background image

1 – 2

UX-44U

FO-55C

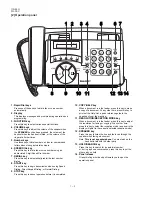
[2] Operation panel

TEL   FAX

RECEPTION

MODE                         RESOLUTION                                                  

FUNCTION

  DOWN      VOLUME          UP

A.M.

SPEED DIAL

REDIAL

SPEAKER

01

02

03

04

05

06

07

08

09

10/POLL

ABC

DEF

JKL

MNO

GHI

TUV

WXYZ

PQRS

START

STOP

COPY/HELP

HOLD/SEARCH

TEL    FAX

GHI

PQRS

JKL

ABC

DEF

MNO

WXYZ

TUV

A

B

C

D

E

STOP

COPY/

HELP

START

FUNCTION

VOLUME

SPEED

DIAL

REDIAL

HOLD/

SEARCH

SPEAKER

RESOLUTION/

RECEPTION MODE

1

2

3

6

5

4

7

8

9

0

2

8

1

4

5

6

2

3

7

11

10

9

12 13 14

1. Rapid Dial keys

     Press one of these keys to dial a fax or voice number
     automatically.

2. Display

     This displays messages and prompts during operation and
     programming.

3. FUNCTION key

     Press this key to select various special functions.

4. VOLUME keys

     Press this keys to adjust the volume of the speaker when
     the SPEAKER key has been pressed, the volume of the
     handset when the handset is lifted, or the volume of the 
     ringer at all other times.

5. Number keys

     Use these keys to dial numbers, and enter numbers and
     letters when storing auto-dial numbers.

6. SPEED DIAL key

     Press this key to dial a fax or voice number using an 
     abbreviated 2-digit Speed Dial number.

7. REDIAL key

     Press this key to automatically redial the last number
     dialed.

8. START key

     Press this key to begin transmission when using Speed
     Dialing, Direct Keypad Dialing, or Normal Dialing.

9. STOP key

     Press this key to cancel operation before it is completed.

10. COPY/HELP key

       When a document is in the feeder, press this key to make
       a copy of a document. At any other time, press this key to
       print out the Help List, a quick reference guide to the
       opeation of your fax machine.

11. RESOLUTION/RECEPTION MODE key

       When a document is in the feeder, press this key to adjust
       the resolution for faxing or copying. At any other time,
       press this key to select the reception mode (an arrow in the
       display will point to the currently selected reception mode).

12. SPEAKER key

       Press this key to listen the line and fax tones through the
       speaker when faxing a document.
       Note: This is not a speakerphone. You must pick up the
                 handset to talk with the other party.

13. HOLD/SEARCH key

       Press this key to search for an auto-dial number,
       or, during a phone conversation, press this key to put the
       other party on hold.

14. Panel release

       Grasp this finger hold and pull toward you to open the
       operation panel.

Summary of Contents for FO-55

Page 1: ...it 5 12 CHAPTER 6 CIRCUIT SCHEMATICS AND PARTS LAYOUT 1 Control PWB circuit 6 1 2 TEL LIU PWB circuit 6 9 3 Power supply PWB circuit 6 13 4 Operation panel PWB circuit 6 17 CHAPTER 7 OPERATION FLOWCHART 1 Refer to the service manual of FO 77U 2 Refer to the service manual of FO 77U CHAPTER 8 OTHERS 1 Refer to the service manual of FO 77U 2 Refer to the service manual of FO 77U PARTS GUIDE CONTENTS...

Page 2: ...n ohjeiden mukaisesti French ATTENTION Il y a danger d explosion s il y a remplacement incorrect de la batterie Remplacer uniquement avec une batterie du même type ou d un type recommandé par le constructeur Mettre au rébut les batteries usagées conformément aux instructions du fabricant Swedish VARNING Explosionsfare vid felaktigt batteribyte Använd samma batterityp eller en ekvivalent typ som re...

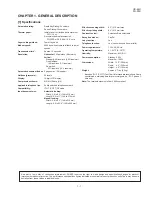
Page 3: ... mm Length 5 5 to 11 140 to 279 mm Manual feeding Width 5 8 to 8 5 148 to 216 mm Length 5 5 to 23 6 140 to 600 mm Effective scanning width 8 3 210 mm max Effective printing width 8 3 210 mm max Contrast control Automatic Dark selectable Reception modes Fax Tel Copy function Yes Telephone function Yes cannot be used if power fails Power requirements 120 V AC 60 Hz Operating temperature 41 95 F 5 35...

Page 4: ...oice number using an abbreviated 2 digit Speed Dial number 7 REDIAL key Press this key to automatically redial the last number dialed 8 START key Press this key to begin transmission when using Speed Dialing Direct Keypad Dialing or Normal Dialing 9 STOP key Press this key to cancel operation before it is completed 10 COPY HELP key When a document is in the feeder press this key to make a copy of ...

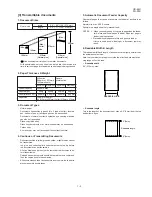
Page 5: ... smaller documents Readable width Min Max Letter size Max 140mm 279mm 600mm 148mm 216mm Normal size 216mm Special size 3 Document Types Normal paper Documents handwritten in pencil No 2 lead or softer fountain pen ball point pen or felt tipped pen can be transmitted Documents of normal contrast duplicated by a copying machine can also be transmitted Diazo copy blue print Diazo copy documents of a ...

Page 6: ...d be between 5 and 35 C The humidity should be between 30 and 85 without conden sation ELECTRICITY AC 120V 60Hz grounded 3 prong AC outlet is required Caution Connection to a power source other than that specified will cause damage to the equipment and is not covered under the warranty If your area experiences a high incidence of lightning or power surges we recommend that you install a surge prot...

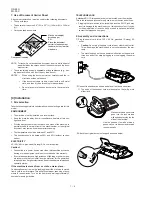
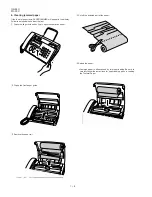
Page 7: ...re on a pulse dial rotary line you must set the fax machine for pulse dialing Press the keys on the operation panel as follows 3 Press the STOP key to return to the date and time display 3 Removing the packing paper 1Grasp the finger hold and pull up to open the operation panel DIAL MODE FUNCTION 4 2 Press 1 to select tone touch tone dialing or 2 to select pulse rotary dialing 1 2 or TONE PULSE ST...

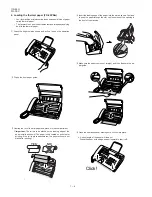
Page 8: ...The roll must be placed so the leading edge of the paper unrolls as shown The paper is only coated on one side for printing If the roll is placed backwards the paper will come out blank after printing 4Insert the leading edge of the paper into the slot as shown Continue to push the paper through the slot until it comes out the opening in the front of the machine 5Make sure the paper comes out stra...

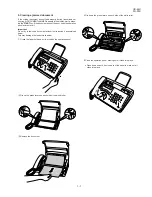
Page 9: ...it Important Do not try to remove a document without first releasing it as explained below This may damage the feeder mechanism 1Grasp the finger hold and pull up to open the operation panel 2Flip up the green levers on each side of the white roller 3Remove the document 4Flip down the green levers on each side of the white roller 5Close the operation panel making sure it clicks into place Press do...

Page 10: ...clear the jam 1Grasp the finger hold and pull up to open the operation panel 2Flip up the front paper guide 4Cut off the wrinkled part of the paper 3Remove the paper roll 5Reload the paper Jammed paper is often caused by improper loading Be sure to carefully follow the instructions for paper loading given in Loading the Thermal Paper ...

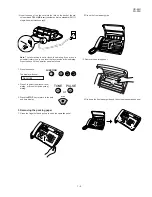
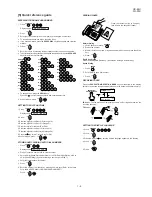
Page 11: ... is empty SPEAKER SPEED DIAL FAX mode The fax machine automatically answers on four rings and receives the incoming document TEL mode SETTING THE DISPLAY LANGUAGE 1 Press 2 Press 3 Press the key or key until the desired language appears in the display 4 Press 5 Press FUNCTION 4 STOP START START START START START SETTING THE DATE AND TIME 1 Press Display shows DATE TIME SET 2 Press 3 Enter two digi...

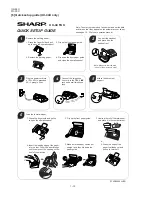
Page 12: ... straight and then flip down the paper guide 2 Flip up the front paper guide 6 Grasp the edge of the paper that feeds out and pull up to tear it off 6 TCADZ2869XHZZ Note Make sure that the area in front of the machine is clear 4 Insert the leading edge of the paper into the slot Push the paper through until it comes out the opening on the front of the machine 1 Grasp the finger hold and pull up to...

Page 13: ...ce it with a new one step 1 Select OPTION SETTING KEY FUNCTION 4 DISPLAY OPTION SETTING PRESS OR step 2 Select DIAL MODE KEY Push until DAIL MODE is indicated because the number of s changes by the model DISPLAY DIAL MODE step 3 Select using 1 or 2 KEY 1 DISPLAY TONE SELECTED KEY 2 DISPLAY PULSE SELECTED step 4 End using the STOP key KEY Cursor When initially registering the mode shows 1 TONE When...

Page 14: ...ta receive Message print START D Shading mode START START Country select 2 2 2 Diagnostic items ITEM DIRECT No key Contents Function 1 SOFT SWITCH MODE Soft switches are displayed and changed List can be output 2 A ROM RAM CHECK ROM is sum checked and RAM is matched Result list is output 3 AGING MODE 10 sheets of check patterns are outputted every 5 minutes per sheet 4 PANEL CKECK MODE Panel keys ...

Page 15: ...ignal sound is also output to the speaker when the line monitor of the soft switch is on 1 No signal CML signal turned on 2 9600bps 3 7200bps 4 4800bps 5 2400bps 6 300bps FLAG 7 2100Hz CED 8 1100Hz CNG 9 Pseudo Ring models with auto TEL FAX changeover function 10 END 3 7 Memory clear This mode is used to clear the backup memory and to reset to the fac tory default settings The content of each sett...

Page 16: ...switch mode is terminated S F T SW A1 0 0 0 0 0 0 0 0 START DATA No 1 2 3 4 5 6 7 8 When the COPY key is pressed the contents of soft switches are printed 3 14 Country select This mode is used to set line connecting parameters which correspond to each destination When the country select mode is selected and then the START key is pressed the destination country name currently set will be displayed ...

Page 17: ...es 0 CED tone signal interval 1000ms 750ms 500ms 75ms 1 No 1 1 1 0 0 0 2 No 2 1 0 1 0 0 3 MR Coding No Yes 0 4 Reserved 0 5 Reserved 0 6 Reserved 0 7 Reserved 0 8 Reserved 0 1 Signal Transmission level Binary input 0 2 0 31 dBm setting by 1dBm step No 16 8 4 2 1 1 3 1 2 3 4 5 0 4 0 1 0 1 0 1 5 0 6 Protocol monitor Error print Printed at com error Not printed 0 7 Protocol monitor Yes No 0 8 Line mo...

Page 18: ...ep No 16 8 4 2 1 1 6 4 5 6 7 8 0 7 0 1 0 1 0 1 8 0 1 Recall times 0 15times setting Binary input 0 2 No 8 4 2 1 0 3 1 2 3 4 1 4 0 0 1 0 0 5 Dial tone detection Before auto dial No Yes 1 6 Reserved 0 7 Busy tone detection After auto dial No Yes 0 8 Busy tone detection pulse number 4 pulses 2 pulses 0 After auto dial Waiting time after dialing 45 seconds 55 seconds 90 seconds 140 seconds 1 No 1 0 0 ...

Page 19: ...equency 0 15 5dBm setting No 16 8 4 2 1 1 3 by 0 5dBm step 1 2 3 4 5 0 4 0 1 0 0 1 0 5 1 6 Reserved 0 7 Reserved 0 8 Reserved 0 Reading Slice Binary Factory Dark Light Daker in setting dark 1 No 1 0 0 1 1 0 2 No 2 0 1 0 1 0 Reading Slice Half tone Factory Dark Light Daker in setting dark 3 No 3 0 0 1 1 0 4 No 4 0 1 0 1 0 5 Line density selection Fine Standard 0 6 Reserved 0 7 MTF correction in hal...

Page 20: ...ved 0 7 Reserved 0 8 Reserved 0 1 DTMF type Caller ID RX level Binary input 1 2 0 44dBm setting by 1dBm step No 32 16 8 4 2 1 0 3 1 2 3 4 5 6 1 4 1 0 1 1 0 0 1 5 0 6 0 7 Reserved 0 8 Reserved 0 1 Reserved 0 2 Reserved 0 3 Reserved 0 4 Reserved 0 5 Reserved 0 6 Reserved 0 7 Reserved 0 8 Reserved 0 1 Reserved 0 2 Reserved 0 3 Reserved 0 4 Reserved 0 5 Reserved 0 6 Reserved 0 7 Reserved 0 8 Reserved ...

Page 21: ...etect STAND BY mode 1 pulse 2 pulses 3 pulses 4 pulses 4 No 4 0 0 1 1 0 5 No 5 0 1 0 1 1 6 Reserved 0 7 Reserved 0 8 Reserved 0 1 Reserved 0 2 Reserved 0 3 Reserved 0 4 Reserved 0 5 Reserved 0 6 Reserved 0 7 Reserved 0 8 Reserved 0 1 Reserved 0 2 Reserved 0 3 Reserved 0 4 Reserved 0 5 Reserved 0 6 Reserved 0 7 Reserved 0 8 Reserved 0 1 Reserved 0 2 Reserved 0 3 Reserved 0 4 Reserved 0 5 Reserved 0...

Page 22: ...ed 0 6 Reserved 0 7 Reserved 0 8 Reserved 0 1 Reserved 0 2 Reserved 0 3 Reserved 0 4 Reserved 0 5 Reserved 0 6 Reserved 0 7 Reserved 0 8 Reserved 0 1 Reserved 0 2 Reserved 0 3 Reserved 0 4 Reserved 0 5 Reserved 0 6 Reserved 0 7 Reserved 0 8 Reserved 0 1 Reserved 0 2 Reserved 0 3 Reserved 0 4 Reserved 0 5 Reserved 0 6 Reserved 0 7 Reserved 0 8 Reserved 0 SW l H1 SW l H2 SW l I1 SW NO DATA NO ITEM S...

Page 23: ...erved 0 8 Reserved 0 1 Sender s phone number setting Cannot change Change allowed 0 2 Summer time setting Daylight saving No Yes 1 OPTION Ringer volume Off Low Middle High OPTION 3 No 3 0 0 1 1 1 4 No 4 0 1 0 1 0 Speaker volume Low Low Middle High OPTION 5 No 5 0 0 1 1 1 6 No 6 0 1 0 1 0 7 Reserved 0 8 Reserved 0 Handset receiver volume Middle Middle Middle High OPTION 1 No 1 0 0 1 1 1 2 No 2 0 1 ...

Page 24: ...ime format 12 hour 24 hour 1 5 Date format Month Day Year Day Month Year 1 6 Reserved 0 7 Reserved 0 8 Reserved 0 1 Entering diag mode by pressing SPEED key Yes No 0 2 Reserved 0 3 Reserved 0 4 Reserved 0 5 Reserved 0 6 Reserved 0 7 Reserved 0 8 Reserved 0 SW NO DATA NO ITEM Switch setting and function 1 0 Remarks Initial setting 2 12 SW l J3 SW l K1 ...

Page 25: ...A2 No 6 H2 mode Used to determine reception of H2 mode 15 sec transmission mode When set to OFF H2 mode reception is inhibited even though the trans mitting machine has H2 mode function SW A2 No 7 Communication error treatment in RTN sending mode Reception Used to determine communication error treatment when RTN is sent by occurrence of a received image error in G3 reception When it is set to 1 co...

Page 26: ...o 1 No 2 EOL End Of Line detect timer Used to make a choice of whether to use the 5 or 13 or 20 or 25 seconds timer for detection of EOL This is effective to override communication failures with some facsimile models that have longer EOL detection SW A7 No 3 No 8 Reserved Set to 0 SW B1 No 1 Hold key Used to set YES NO of holding function by the HOLD key SW B1 No 2 Auto dial fax transmission by RE...

Page 27: ... is not pressed In the copy mode however the fine mode is automatically selected unless the Resolution key is manually set to another mode SW C1 No 6 Reserved Set to 0 SW C1 No 7 MTF correction in half tone mode This allows selection of MTF correction dimness correction in the half tone mode When NO 1 is selected the whole image becomes soft and mild Clearness of characters will be reduced Normall...

Page 28: ...1dBm step This is used for DTMF type Caller ID detection level setting SW D4 No 7 No 8 Reserved Set to 0 SW E1 No 1 No 8 Reserved Set to 0 SW E2 No 1 No 8 Reserved Set to 0 SW E3 No 1 No 8 Reserved Set to 0 SW F1 No 1 No 2 DTMF detection time Used to set detect time of DTMF Dual Tone Multi Frequency used in remote reception 5 The longer the detect time is the less the error detection is caused by ...

Page 29: ...ustment for Summer time Daylight saving time SW J1 No 3 No 4 Ringer Volume Used to adjust ringing volume SW J1 No 5 No 6 Speaker Volume Used to adjust sound volume from a speaker SW J1 No 7 No 8 Reserved Set to 0 SW J2 No 1 No 2 Handset receiver volume Used to adjust sound volume from a handset receiver volume SW J2 No 3 No 8 Reserved Set to 0 SW J3 No 1 No 3 Communication results printout Transac...

Page 30: ...e following format and check the related matters TO ATT Ref No CC ATT Date FM Dept Sign Please complete this report before calling the TAC hotline if problem still occurs Facsimile communication problem Ref No Date From Mr Fax Tel No Our customer Name Tel No Address Fax No Contact person Model name Other party Name Tel No Address Fax No Contact person Model name Problem mode Line Domestic internat...

Page 31: ... just after fallback 13 Error occurred after a response to retransmission end command was received G3 Reception Code Final received signal Error Condition Receiver side 0 Incomplete signal frame Cannot recognize bit stream after flag 1 NSS DCS Cannot recognize CFR or FTT signal Disconnects line during transmission line error 2 NSC DTC Cannot recognize NSS signal FIF code etc 3 EOP Cannot recognize...

Page 32: ...hickness Documents corresponding to a paper weight heavier than 69 2kg 80g m2 and lighter than 135kg 157g m2 are acceptable for manual feed Documents heavier than 135kg in terms of the paper weight must be duplicated on a copier to make it operative in the facsimile 3 4 Loading the documents 1 Make sure that the documents are of suitable size and thickness and free from creases folds curls wet glu...

Page 33: ... 3 Recording Use of a thermal head permits easier maintenance and low operating costs 1 Thermal head The thermal head consists of 1728 dot heat elements arranged in a sin gle row and has the resolution of 8 dots mm The maximum recording speed is 10ms line The thermal head also incorporates a 1728 dot shift register latch and output control driver circuit Low power consumption is achieved by dividi...

Page 34: ...n to each other To assure reliability of the product the disassembly and the assembly procedures should be performed carefully and deliberately Paper support guide handset cover and scanner unit 1 Parts list Fig 1 Fig 1 No Part name Q ty No Part name Q ty 1 Mechanism unit 1 2 Screw 3 12 2 3 Paper support guide 1 4 Paper sensor lever 1 5 Paper sensor lever spring 1 6 Panel stopper 1 3 3 7 Screw 3 8...

Page 35: ...ment guide lower 1 2 Back roller gear 1 3 Back roller bearing left 1 4 CIS release lever left 1 5 Back roller 1 6 CIS release lever right 1 7 Back roller bearing right 1 8 Reduction gear 17 28z 1 9 Reduction gear 17 23z 1 10 Feed roller shaft 1 3 4 CIS unit and scanner frame 2 2 3 4 5 1 7 8 9 6 12 13 13 14 14 13 14 15 15 17 15 11 17 17 18 19 10 20 16 Hook Hook 2 3 4 5 1 7 8 9 6 12 13 11 15 10 14 1...

Page 36: ... Q ty No Part name Q ty 1 Mechanism unit 1 2 Connector 2 3 Operation panel unit 1 4 Connector 2 5 Screw 3 12 1 6 Drive unit 1 7 Screw 3 8 2 8 Hopper guide unit 1 Operation panel unit drive unit hopper guide 3 7 8 11 12 13 14 10 9 15 12 3 1 6 5 Control PWB 2 2 4 Control PWB 2 3 7 8 1 11 12 13 10 15 14 4 5 6 9 R L GAP 0 GAP 0 HOPPER GUIDE L HOPPER GUIDE R 30 Fix position boss Rib Rib Confirm of HOPP...

Page 37: ...ts list Fig 4 No Part name Q ty No Part name Q ty 1 Screw 3 8 2 2 Connector 1 3 Door sensor 1 4 Blind sheet 1 5 Document guide upper unit 1 6 Operation panel unit 1 7 Separate spring 1 8 Separator plate 1 9 Separator rubber 1 2 3 3 4 5 5 6 6 1 2 8 8 9 9 10 10 7 7 7 13 13 14 14 15 15 16 16 12 11 18 18 19 19 11 12 17 17 12 LCD PWB LCD PWB Rib Rib LCD CABLE Note The LCD PWB should be securely locked ...

Page 38: ...frame 1 1 Cam spring 1 2 Cam switch 1 3 Cam gear 1 4 Mode lever 1 5 Planet gear 1 6 Planet gear spring 1 7 Planet lever A 1 8 Planet gear 1 9 Planet gear spring 1 Parts list Fig 5 No Part name Q ty No Part name Q ty Drive unit frame 5 2 3 4 5 1 7 8 9 6 12 13 14 15 11 17 18 19 10 16 17 16 18 10 11 12 Grease Grease Nail be doing lock 4 5 6 7 8 9 10 11 12 4 5 6 7 8 9 OK NG 10 OK NG 1 2 8 3 9 7 19 14 ...

Page 39: ... 44U FO 55C Release lever PO guide and head guide Fig 6 3 8 Parts list Fig 6 No Part name Q ty 1 Mechanism unit 1 2 Screw 3x8 1 3 PO guide 1 4 Release lever 1 5 Head guide 1 6 1 4 1 5 2 3 4 5 RELEASE 3 2 ...

Page 40: ... Fig 7 No Part name Q ty 1 Mechanism unit 1 2 Screw 3 6 1 3 Connector 1 4 Screw 3 8 1 5 Head earth cable 1 6 Head frame unit 1 7 Screw 3 8 2 8 Panel lock lever spring 2 Head frame unit 7 2 3 1 7 7 8 8 6 2 3 4 5 1 7 8 6 Control PWB 4 5 5 ...

Page 41: ...y No Part name Q ty 1 Platen gear 1 2 Platen bearing 2 3 Platen roller 1 4 Connector 1 5 Screw 3 6 1 6 Head holder left 1 7 Screw 3 6 1 8 Head holder right 1 9 Thermal head 1 10 Head spring 2 2 11 Head spring 1 3 12 Head frame 1 12 10 10 11 11 11 9 12 2 2 2 1 1 3 3 4 4 5 7 5 8 6 9 7 6 10 8 ...

Page 42: ...B case bottom 1 Parts list Fig 9 No Part name Q ty No Part name Q ty 1 Mechanism unit 1 2 Screw 3 8 1 3 Connector 1 4 Connector 2 5 PWB case unit 1 6 Screw 3 8 1 7 Control PWB unit 1 8 Screw 3 8 1 9 Speaker holder lever spring 1 10 Speaker ass y 1 PWB case top bottom PWB and speaker 9 Hook 2 3 4 4 5 7 8 9 6 12 13 14 15 11 17 18 19 10 16 20 12 13 14 15 11 11 17 17 18 18 19 19 16 20 Fix position 2 3...

Page 43: ... bottom AC cord earth cable AC cord earth cable ARG cable TEL LIU PWB Power supply PWB AC cord 2 7 4 3 3 1 1 Operation panel PWB Operation panel unit Rib Rib Speaker Rib Rib TEL LIU PWB Power Supply PWB 1 1 The panel cable and door sensor cable pass to the core 2 times The head cable and head earth cable pass to the core 2 times CIS cable CIS cable Front sensor cable Scanner frame Rib Rib Rib Spea...

Page 44: ...TION PANEL CONTROL PWB UNIT 1CHIP FAX ENGINE FC200 HANDSET SPEAKER 5V 24V OPERATION PANEL TEL LIU PWB UNIT DRIVER THERMAL HEAD PM CONTACT IMAGE SENSOR POWER SUPPLY PWB UNIT STABILIZER MODEM FM209 AMPLIFIER AMPLIFIER SURGE PROTECT FILTER CML TRANSFORMER CI VBT RECTIFIER TRANSFORMER RECTIFIER DIODE TRANS SURGE ABSORBER FILTER LINE PAPER SENSOR RESET IC AMPLIFIER BZ CLOCK 32 256MHz LCD D FF 16MHz 3 3...

Page 45: ...2 CNLIUA CNFRS FRONT SENSOR CNSP CNCSW CNMT CAM SW TX RX MOTOR 6 2 2 2 CNPN SPEAKER 16 CNPN CNLCD OPERATION PANEL PWB UNIT LCD UNIT 16 7 THERMAL HEAD CIS CONTACT IMAGE SENSOR UNIT HANDSET FG ARG CNHJ TEL LIU PWB UNIT POWER SUPPLY PWB UNIT CONTROL PWB UNIT FG 14 AC CORD 2 CNTLJ FO 55C ONLY ...

Page 46: ... VO DG 5V øT CISCLK GLED 24V VO DG 5V øT CISCLK GLED 24V DG 5V SEN4 E SEN0 SEN1 SEN2 SEN3 SEN5 SEN6 SEN7 ORGSNS KEN4A KEN3A KEN2A KEN1A DG 5V SEN4 E SEN0 SEN1 SEN2 SEN3 SEN5 SEN6 SEN7 ORGSNS KEN4A KEN3A KEN2A KEN1A CNPN CNPN CNCIS 1 2 3 4 5 6 7 8 9 10 11 12 1 2 3 4 5 6 7 8 9 10 11 12 TEL LIU PWB TELOUT TELIN TELMUTE CI HS RHS RXIN TXOUT CML 5V DG 24V TELOUT TELIN TELMUTE CI HS RHS RXIN TXOUT CML 5...

Page 47: ...photo coupler PC1 from 24V output 5 Circuit description of CIS unit 1 CIS Contact Image Sensor Cis is an image sensor which puts the original paper in close contact with the full size sensor for scanning being a monochromatic type with the pixel number of 1 728 dots and the main scanning density of 8 dots mm It is composed of sensor rod lens LED light source light conductive plate control circuit ...

Page 48: ...UX 44U FO 55C M E M O 5 13 ...

Page 49: ... CNPN 14 CNPN 13 CNPN 4 CNPN 5 CNPN 6 CNPN 7 CNPN 8 CNPN 3 CNPN 9 CNPN10 CNPN 11 KEN1A KEN2A KEN3A KEN4A E SEN0 SEN1 SEN2 SEN3 SEN4 SEN5 SEN6 SEN7 L104 HM601 R133 120 RA8 470 x 4 RA13 470 x 4 A23 A22 A21 A20 A19 A18 A17 A16 A15 A14 A13 A12 A11 A10 A9 A8 A7 A6 A5 A4 A3 A2 A1 A0 RD WR ROMCS CS1 CS0 MCS SYNC REGDMA WAIT RAS CAS0 CAS1 DWR WRPROT VBAT CNTH 13 LATCH CNTH 15 DATA CNTH 14 PCLK CNTH 3 STRB...

Page 50: ...8 4 A8 A7 5 A7 A6 6 A6 A5 7 A5 VDD 28 A4 8 A4 VSS 14 A3 9 A3 A2 10 A2 A1 A0 27 A0 22 CS2 OE A 16 0 1 5I D 7 0 1 6I 1 3H RD 1 3H 5V DG C161 0 1 D7 D6 D5 D4 D3 D2 D1 D0 IC5 27C010 ROM 3 A15 DQ8 A14 DQ7 A13 DQ6 A12 DQ5 4 A11 DQ4 A10 DQ3 A9 DQ2 A8 DQ1 A7 5 A6 6 A5 PGM 7 A4 VCC 8 A3 VPP 9 A2 A1 A0 GND E G IC3 W24258S 70LE SRAM A1 WE D7 D6 D5 D4 D3 D2 D1 D0 VBT DG C113 0 1 WR 1 3H VBT R121 22K ROMCS 2 A...

Page 51: ...C130 0 1 R134 2 2K R129 1K MAG CNDR 1 DRSNS C119 2200P R115 470 5V R165 100K 98 97 96 95 94 93 120 14 CNTH 6 RANK CNLIUA 6 RHS R117 470 RA14 470 x 1 3 3V L103 HM601 C133 1 DG 10 77 85 100 112 73 16 84 87 106 114 125 113 126 48 33 45 5V L100 HM601 C110 0 1 3 3V R14 3 C9 47 25 C132 1 58 70 127 68 C118 0 1 5V L102 HM601 MAG MAG DG MAG MICP P MICM P MICBIAS P SPKRP P SPKRM P LINEIN P LINEOUT P VREF P ...

Page 52: ...1K DG R114 0 N M 1 3A PSNS 1 3 2 4 DG DG DG 1 3 2 4 PESNS PSNS PI2 SG206 PI1 CNCUT 1 CNCUT 3 CUT DG 1 5A C117 DG CUTI DG 5V R160 5 6K BAT1 CR2032 D103 HRW0202 VBT VBT 3 3V 2 3 1 D102 1SS355 REG100 XC62FP3302P C167 0 1 DG DG 5V 24V 24VA C17 22 50 C170 0 1 R159 N M R164 FG N M C18 47 25 C171 0 1 5V DG DG 24V 24V MG MG 5V 5V DG DG 24V CNLIUA 10 CNPN 2 CNLIUA 11 CNPN 1 CNLIUA 12 CNPW 2 CNPW 1 CNPW 7 C...

Page 53: ...0K 1 1F VREF R142 30K DG R143 43K 9 16 15 14 13 12 11 10 1 2 3 4 5 6 7 8 TPA TPB TPA TPB VTHON LEDON 1 1E 1 1E 1 1E 1 1E 1 1E 1 1E 24V FU100 KAB2402 D1 100 1W VMT VMT TPBD TPAD TPBD TPAD VTHON LEDON CNMT 5 CNMT 6 CNMT 1 CNMT 2 CNMT 3 CNMT 4 5 4B 5 4B IC8 ULN2003A 1B 2B 3B 4B 5B 6B 7B E COM 1C 2C 3C 4C 5C 6C 7C VTHON 5 5I 24V D104 1SS355 RY1 DQ1U24VDC 1 2 3 4 24V VTH CNTH 1 VTH CNTH 2 VTH CNTH 16 M...

Page 54: ... 3 1 7 8 5V R154 100K C159 220P R139 220K C11 47 25 SP DG SP CNSP 1 CNSP 2 1 5A SPMUTE C158 1 DG DG 1 1F BZOUT R156 1K C164 4700P R141 20K RXIN CNLIUA 7 C157 0 R152 0 R15 N M 7 6 5 R18 R17 0 N M C14 N M DG R138 0 C147 HM601 C146 1 R16 N M SIGRX 3 3H CML 1 5A Q102 RXIN CNLIUA 7 TELIN CNLIUA 2 C154 0 1 C156 0 1 R153 47K RCVOL 1 1E R151 10K R149 100K Q103 RNC1402 DG 24VA C153 N M 8 4 IC7 DG C22 1 D10...

Page 55: ...UX 44U FO 55C Control PWB parts layout Top side 6 7 ...

Page 56: ...UX 44U FO 55C Control PWB parts layout Bottom side 6 8 ...

Page 57: ... 7K TXOUT CNLIUA 8 R137 C125 R139 C126 R138 N M C124 1 C122 1 R134 20K R140 20K R141 47K C120 820P C121 R143 15K N M 2 3 1 IC102 2904 RXIN CNLIUA 7 R142 3 3K DG 8 4 DG C112 0 1 C114 0 1 8 4 DG IC101 2904 IC102 2904 R111 20K R113 20K R112 0 C7 10 50 DG DG CNHJ 4 CNHJ1 4 CNHJ 1 CNHJ1 1 TX TX C104 2200P CNHJ1 2 CNHJ 2 CNHJ1 3 CNHJ 3 RX RX L8 TR0703 R108 1 5K R109 1K C6 22 50 DG C105 2200P DG C106 0 1...

Page 58: ...LY CNLIUB 5 R119 PC1 Q105 DG Q106 DG Q108 DG R120 R121 PC2 PC4 CI CNLIUA 4 R122 DG DG C110 PC5 TLP521 HS CNLIUA 5 R136 DG DG C119 PC3 N M N M RHS CNLIUA 6 DG CNHS 1 CNHS 2 SW1 HOOK SW CNLIUA 10 5V CNLIUA 11 DG CNLIUA 12 24V R118 1K C13 22 25 C12 22 50 C117 0 1 C118 0 1 5VA DG 24VA R135 100 CNLIUA 9 CML D4 1SS133 DG Q104 RNC1402 N M N M CML ...

Page 59: ...UX 44U FO 55C TEL LIU PWB parts layout Top side 6 11 ...

Page 60: ...UX 44U FO 55C 6 12 TEL LIU PWB parts layout Bottom side ...

Page 61: ...A 5 CN2 6 24V 24V 5V 2 MG 4 MG 3 DG 1 F2 FB3 R15 R14 R23 R21 R20 R22 R17 R19 C15 R18 ZD3 FB2 C12 C13 C16 D8 D9 R5 D7 R7 R2 C10 R3 D6 D5 R13 R9 R10 C11 R8 C9 Q2 R4 FB1 C8 Q1 C17 C5 D1 D2 D4 D3 TH1 F1 1 3 L N CN1 AC IN FG V1 R1 C1 L1 6 4 8 9 T1 8 2 1 10 11 12 PC1 1 IC2 R11 PC1 2 NOTE Since the parts of PWB cannot be supplied change it as a unit 6 13 ...

Page 62: ...UX 44U FO 55C Power supply PWB parts layout RDENT2142XHZZ In October 1999 to the production RDENT2142XHZZ F2 6 14 ...

Page 63: ...TTN105 FB1 ZD4 RD30FB IC1 UPC78M05AHF F3 CCP2E100 4A C16 0 1 R16 22K C12 0 1 R15 330K R14 1K R13 4 7K PC1 PS2501 1 R18 3 3K Q4 2SC2412K ZD5 RD6 2SB VR1 1K R17 8 2K C10 330 16 D8 SR140 F N M D9 C23 R24 ZD26 R4 560 C4 1500P ZD2 RD4 3SB C6 0 D5 1SS355 PC1 PS2501 1 C17 0 1 C24 4700P R7 180 D6 R2 820K R3 180K Q1 FS5KM 14 AN C3 470P ZD1 Q2 2SD2114K Q3 2SC2412K R9 470 R10 0 15 R8 47K C7 3300P CN1 F1 2 5A...

Page 64: ... J9 J10 R2 R3 J6 J4 C24 PC1 ZD4 CN2 C7 VR1 FB1 IC1 C16 6 1 V1 L1 R1 C22 C21 C2 C3 Q1 R10 R8 R9 ZD6 T1 C23 J7 C13 C8 D7 C10 C16 72V 4A F3 ZD5 Q4 R14 R15 C12 R16 R18 R13 C17 R7 D5 C6 R4 D6 R23 R24 J4 ZD2 R6 R5 C5 R3 R2 Q2 C20 J6 FB1 C4 J3 D9 Q3 ZD1 D8 IC1 ZD4 CN2 VR1 PC1 R17 C24 J10 J9 J8 J5 D1 D3 D4 D2 J2 J1 JW1 F1 C1 CN1 C7 Power supply PWB parts layout Bottom side RDENT2143XHZZ In November 1999 t...

Page 65: ...7 1SS270 CNPN 10 HOLD REDIAL SEN6 SPEED SPEAKER D8 CNPN 11 PLAY REC SEN7 REPEAT DELETE CNPN 16 KEN1A CNPN 15 KEN2A CNPN 14 KEN3A CNPN 13 KEN4A N M CNPN 12 ORGSNS ORGSNS DG SW 169 72AU CNLCD 6 E CNPN 4 E CNLCD 2 5V CNPN 2 5V CNLCD 1 DG CNPN 1 DG CNLCD 5 R W CNLCD 3 VO DG C2 C1 R1 1K R2 6 2K 1 2 3 4 5 6 7 8 9 10 11 12 13 14 15 16 CNPN DG SEN4 SEN0 SEN2 SEN5 SEN7 KEN4A KEN2A E SEN1 SEN3 SEN6 ORGSNS K...

Page 66: ...UX 44U FO 55C 6 18 M E M O ...

Page 67: ...r the machine safety maintenance and operation they must be replaced with the parts specific to the product specification 1 Cabinet etc 2 Scanner unit 3 Upper cabinet 4 Document guide upper 5 Drive unit 6 Packing material Accessories 7 Control PWB unit 8 TEL Liu PWB unit 9 Power supply PWB unit Index ...
Page 68: ...2 13 14 15 16 17 18 19 20 21 22 23 24 58 28 28 27 29 30 31 33 34 34 36 37 39 39 40 40 41 45 46 47 49 52 53 53 54 SCANNER UNIT DOCUMENT GUIDE UPPER B1 B3 B3 B3 B3 B3 B3 B3 B3 B3 B3x2 B4 B5 B7x2 B7x2 B4 B4 B3 B4 B3 14 B3 55 R E L E A S E DRIVE UNIT B7 57 ...
Page 69: ...t In October 1999 to the production RDENT2143XHZZ BA N E Power supply PWB unit In November 1999 than production 22 GDAI 2083XHZZ AF N C Paper support guide 23 MLEVP2316XHZZ AC N C Paper sensor lever 24 MSPRD3116XHZZ AB N C Paper sensor lever spring 27 PGIDM2563XHSA AE N C PO guide 44U PGIDM2563XHSB AE N C PO guide 55C 28 LBSHP2112XHZZ AB N C Platen bearing 29 LFRM 2208XHZZ AF N C Head frame 30 LHL...
Page 70: ... release lever 6 MSPRC3117XHZZ AB N C CIS spring 7 NGERH2479XHZZ AB N C Back roller gear 8 NGERH2480XHZZ AB N C Reduction gear 17 28Z 9 NGERH2481XHZZ AB N C Reduction gear 17 23Z 10 NROLR2375XHZZ AL C Feed roller 11 NROLR2428XHZZ AP N C Back roller 12 NSFTZ2273XHZZ AF C Feed roller shaft 13 PGIDM2562XHZZ AD N C Document guide lower 14 PSHEZ3436XHZZ AC C CIS protect sheet 15 QCNW 211AXHZZ AF N C CI...

Page 71: ...TN 2258XHSA AC N C Start key 44U JBTN 2258XHSB AC N C Start key 55C 6 JBTN 2261XHSA AC N C Direct key 44U JBTN 2261XHSB AC N C Direct key 55C 7 DCEKP482BXH01 AQ N E Operation panel PWB unit B2 XUBSD20P06000 AA C Screw 2x6 Unit 901 DCEKP481BXH01 AP N E Operation panel unit 44U DCEKP481BXH03 AP N E Operation panel unit 55C 4 Document guide upper 1 LPLTG2911XHZZ AE C Separator rubber 2 LPLTP2908XHZZ ...

Page 72: ...ZZ AB N C Planet lever A 6 MLEVP2312XHZZ AB N C Planet lever B 8 MLEVP2314XHZZ AB N C Mode lever 9 MSPRC2735XHZZ AC C Planet gear spring 10 MSPRC3110XHZZ AB N C Cam spring 12 NGERH2278XHZZ AC C Planet gear 13 NGERH2379XHZZ AC C Idler gear 25Z 15 NGERH2391XHZZ AC C Reduction gear 17 30Z 17 NGERH2475XHZZ AB N C Reduction gear 17 43Z 20 QCNW 4933XHZZ AC C Cam switch cable 21 QSW F2224SCZZ AE B Cam sw...

Page 73: ...support 5 QCNW 3975XHGY AG C Telephone line cord 44U QCNW 3247SCZZ AH C Telephone line cord 55C 6 SPAKP296BXHZZ AE N D Vinyl cover 7 SPAKA287BXHZZ AE N D Packing add left 8 SPAKA288BXHZZ AE N D Packing add right 9 SPAKA289BXHZZ AC N D Pad 10 SPAKC142BXHZZ AH N D Packing case 44U SPAKC254BXHZZ AH N D Packing case 55C 11 TLABM270AXHZZ AD N D Box label 44U TLABM458AXHZZ AD N D Box label 55C 12 TLABH4...

Page 74: ...C119 38 VCKYTV1EF104Z AA C Capacitor 25WV 0 1µF C120 39 VCKYTV1CF105Z AB C Capacitor 16WV 1µF C121 40 VCKYTV1CF105Z AB C Capacitor 16WV 1µF C122 41 VCKYTV1CF105Z AB C Capacitor 16WV 1µF C123 42 VCKYTV1CF105Z AB C Capacitor 16WV 1µF C124 43 VCCCTV1HH220J AA C Capacitor 50WV 22PF C125 44 VCCCTV1HH220J AA C Capacitor 50WV 22PF C126 45 VCKYTV1CF105Z AB C Capacitor 16WV 1µF C127 46 VCKYTV1HB102K AA C C...

Page 75: ...r SG206S PI2 121 VS2SA1037KS 1 AB B Transistor 2SA1037KS Q100 122 VSRNC1402 1 AC B Transistor RNC1402 Q103 123 VS2SA1037KS 1 AB B Transistor 2SA1037KS Q104 124 VRS TS2AD271J AA C Resistor 1 10W 270Ω 5 R4 125 VRS TS2AD333J AA C Resistor 1 10W 33KΩ 5 R6 126 VRS TS2AD103J AA C Resistor 1 10W 10KΩ 5 R8 127 VRS TS2AD106J AA C Resistor 1 10W 10MΩ 5 R12 128 VRS TS2AD3R0J AA C Resistor 1 10W 3 0Ω 5 R14 12...

Page 76: ...sistor 470Ωx4 RA4 194 RR TZ3018SCZZ AC C Block resistor 470Ωx4 RA5 195 RR TZ3017SCZZ AC C Block resistor 270Ωx4 RA6 196 RR TZ3017SCZZ AC C Block resistor 270Ωx4 RA7 197 RR TZ3018SCZZ AC C Block resistor 470Ωx4 RA8 198 RR TZ3017SCZZ AC C Block resistor 270Ωx4 RA9 199 RR TZ3018SCZZ AC C Block resistor 470Ωx4 RA11 200 RR TZ3018SCZZ AC C Block resistor 470Ωx4 RA12 201 RR TZ3018SCZZ AC C Block resistor...

Page 77: ...RS TS2AD433J AA C Resistor 1 10W 43KΩ 5 R114 56 VRSTS2AD8662F AA C Resistor 1 10W 86 6KΩ 1 R115 57 VRS TS2AD332J AA C Resistor 1 10W 3 3KΩ 5 R116 58 VRS TS2AD102J AA C Resistor 1 10W 1KΩ 5 R118 59 VRS TS2AD151J AA C Resistor 1 10W 150Ω 5 R123 60 VRS TS2AD332J AA C Resistor 1 10W 3 3KΩ 5 R125 61 VRS TS2AD224J AA C Resistor 1 10W 220KΩ 5 R126 62 VRS TS2AD393J AA C Resistor 1 10W 39KΩ 5 R127 63 VRS T...

Page 78: ...GIDM2563XHSA 1 27 AE N C PGIDM2563XHSB 1 27 AE N C PGIDM2566XHZZ 1 52 AC N C PHOP 2104XHSA 1 9 AF N C PHOP 2104XHSB 1 9 AF N C PHOP 2105XHZZ 6 4 AD N C PSHEZ3410XHZZ 1 57 AB C PSHEZ3436XHZZ 2 14 AC C PSHEZ3517XHZZ 4 7 AE N C Q QACCD2027XHZZ 1 20 AR B QCNCM2401SC0B 7 92 AA C QCNCM2442SC0B 7 85 AB C QCNCM2548SC1B 8 30 AH C QCNCM7014SC0B 7 87 AD C QCNCM7014SC0F 7 89 AB C QCNCM7014SC0G 7 84 AB C QCNCM...

Page 79: ...AA C VRS TS2AD000J 7 9 AA C 7 68 AA C 7 71 AA C 7 129 AA C 7 131 AA C 7 144 AA C 7 157 AA C 7 163 AA C 7 164 AA C 7 172 AA C 7 173 AA C 7 176 AA C 8 53 AA C 8 65 AA C 8 67 AA C VRS TS2AD101J 8 70 AA C VRS TS2AD102J 7 156 AA C 7 171 AA C 7 180 AA C 8 50 AA C 8 58 AA C VRS TS2AD103J 7 126 AA C 7 150 AA C 7 159 AA C 7 170 AA C 7 175 AA C 7 188 AA C VRS TS2AD104J 7 174 AA C 7 178 AA C 7 179 AA C 7 186...

Page 80: ... 0192 Japan Printed in U S A 9911 2084NS IS T No part of this publication may be reproduced stored in a retrieval system or transmitted in any form or by any means electronic mechanical photocopying recording or otherwise without prior written permission of the publisher COPYRIGHT 1999 BY SHARP CORPORATION ALL RIGHTS RESERVED ...

Reviews: