background image

E-6

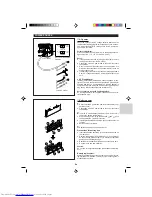
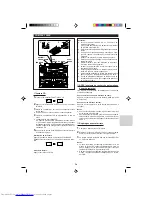
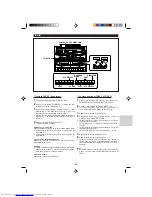
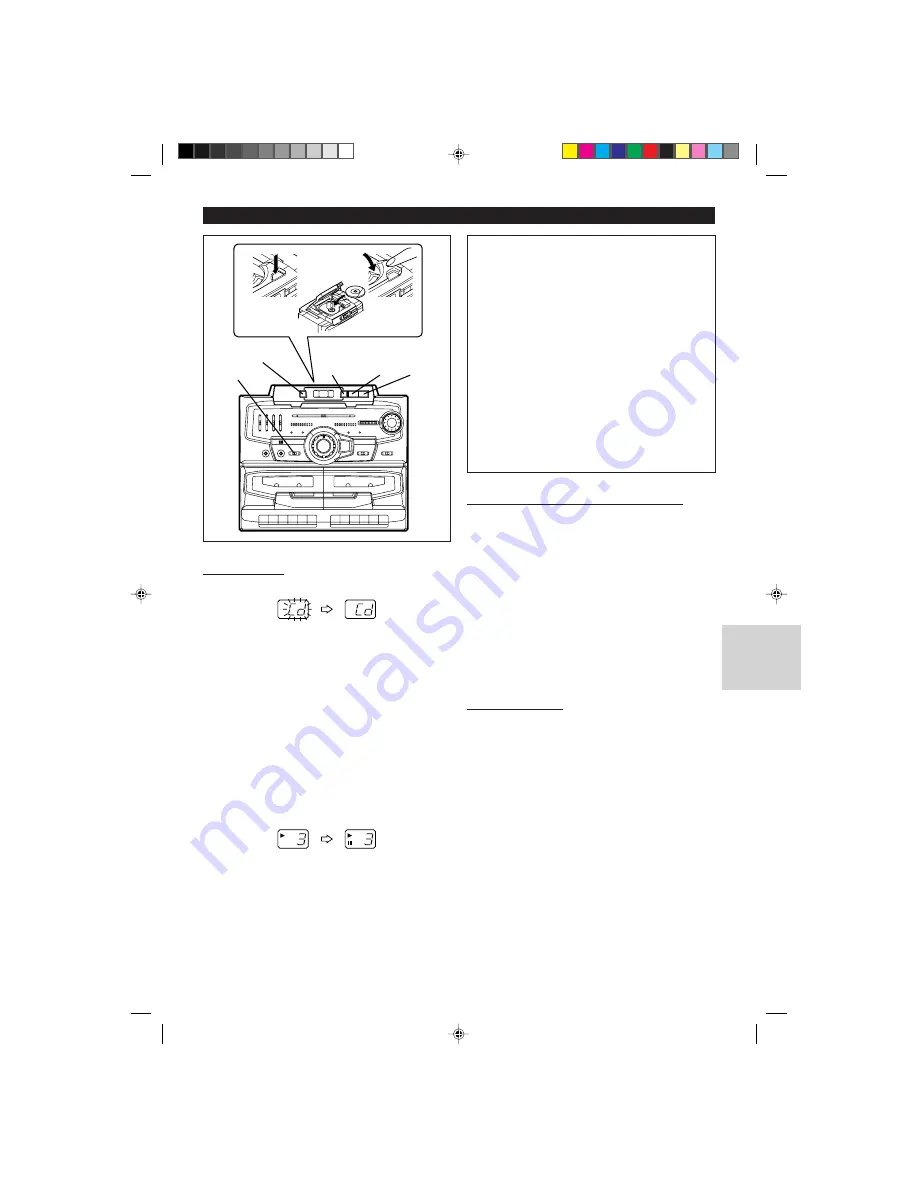
COMPACT DISC OPERATION

CUE /
TRACK UP

PLAY /
PAUSE

STOP

REVIEW /
TRACK DOWN

FUNCTION

Precautions:

When “Cd” or track number is displayed, the power is
connected.
If you do not use the CD player, set the FUNCTION
switch to STAND-BY.

Do not open the CD compartment whilst the disc is ro-
tating.

If the disc is damaged, dirty, or loaded upside down, the
total number of tracks will not appear.
Clean, replace, or reload the disc properly.

Keep foreign objects out of the CD compartment.

Subjecting the unit to shock or vibration may cause
mistracking.

Keep the CD compartment closed except when loading
discs.

Playing certain compact discs at a high volume may
cause mistracking. In this case, listen at a lower vol-
ume.

The temperature range for playing compact discs is rec-
ommended to be 5

°

C (41

°

F) - 35

°

C (95

°

F).

If TV or radio interference occurs during CD operation,
move the unit away from the TV or radio.

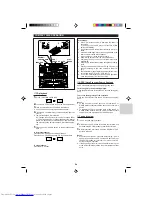
 APSS (Auto Program Search System)

APSS automatically locates the beginning of any track.

To listen again to the track being played:
Press the DOWN button for less than 0.5 seconds during play-
back.

To move to the beginning of the next track:
Press the UP button for less than 0.5 seconds during play-
back.

Notes:

To skip a number of tracks at one time, press the UP or

DOWN button repeatedly until the desired track number is
shown.

To start playback from a desired track, press the UP or

DOWN button whilst in the stop mode to select the track
number, and then press the PLAY/PAUSE button.

 Cue and review

1

Load a disc and begin playback.

2

Hold down the CUE button for audible fast forward, and
hold down the REVIEW button for audible fast reverse.

3

Normal playback will resume when the REVIEW or CUE
button is released.

Notes:

When the end of the disc is reached whilst cueing, “En” will

appear in the display and CD operation is paused. Press
the REVIEW button for fast reverse or press the STOP
button to stop CD operation.

If the beginning of the disc is reached whilst reviewing, the

mode will automatically switch to normal playback at that
point.

2

4

3

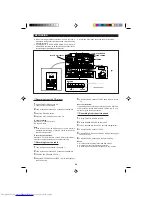
 CD playback

1

 Set the FUNCTION switch to CD.

2

 Press the CD EJECT button to open the CD compartment.

3

 Place a compact disc on the spindle, label side up.

8 cm (3") discs can be played without an adaptor.

4

 Close the CD compartment by firmly pushing the right cor-

ner of it.

The unit reads the CD information.
“Cd” flashes, then the maximum number of tracks, finally
“1” (the minimum number of tracks) appears in the display.
Whilst “Cd” flashes, do not press the PLAY/PAUSE button.
The unit may not be able to read the CD information prop-
erly.

5

  Press the PLAY/PAUSE button to start playback from

track 1.

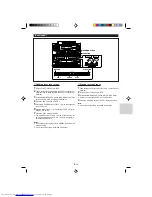
To interrupt playback:
Press the PLAY/PAUSE button during playback.
Press the PLAY/PAUSE button again to resume playback.

To stop playback:
Press the STOP button.

Summary of Contents for GX-CD1200W BK

Page 1: ...ONENT SYSTEM CHAÎNE CD STÉRÉO PORTATIVE SISTEMA ESTEREO COMPONENTE CON REPRODUCTOR DE CD GX CD1200W MANUAL DE MANEJO Thank you for purchasing this SHARP product Nous vous remercions d avoir porté votre choix sur ce produit SHARP Muchas gracias por haber adquirido este producto SHARP SHARP CORPORATION ...

Page 2: ...of proce dures other than those specified herein may result in haz ardous radiation exposure As the laser beam used in this compact disc player is harmful to the eyes do not attempt to disassemble the cabinet Refer servicing to qualified personnel only Laser Diode Properties Material GaAIAs Wavelength 780 nm Emission Duration continuous Laser Output max 0 6 mW CAUTION INVISIBLE LASER RADIATION WHE...

Page 3: ... at a given volume setting depends on a com bination of speaker efficiency location and various other fac tors It is advisable to avoid exposure to high volume levels which occur whilst turning the unit on with the volume control setting up high or whilst continually listening at high volumes Condensation Sudden temperature changes and storage or operation in an extremely humid environment may cau...

Page 4: ...23 Surround Switch 24 Band Selector Switch 25 Dubbing Speed Built in Microphone FM Mode Switch 26 TAPE 2 Cassette Compartment 27 TAPE 1 Record Button 28 TAPE 1 Play Button 29 TAPE 1 Rewind Button 30 TAPE 1 Fast Forward Button 31 TAPE 1 Stop Eject Button 32 TAPE 1 Pause Button 33 TAPE 2 Reverse Mode Switch 34 TAPE 2 Play Button 35 TAPE 2 Fast Wind Buttons 36 TAPE 2 Stop Eject Button 37 TAPE 2 Direc...

Page 5: ...a and New Zealand An AC plug adaptor is not supplied if the lead has an Austra lian Standard plug Battery power 1 Disconnect theAC power lead and remove the battery com partment cover Connection of the AC power lead to the unit disconnects the batteries 2 Insert 10 D size batteries UM SUM 1 R20 HP 2 or simi lar into the battery compartment When inserting or removing the batteries and push them tow...

Page 6: ...he right channel and left channel wiring when connecting the speakers to the unit Do not let bare speaker wires touch each other as this may damage the amplifier and or speakers Do not stand or sit on the speakers If the speakers fall or collapse you may be injured Note The speaker grille is not removable Right speaker Left speaker Red Red Black Volume Rotate the VOLUME control towards MAX to incr...

Page 7: ...ed track number is shown To start playback from a desired track press the UP or DOWN button whilst in the stop mode to select the track number and then press the PLAY PAUSE button Cue and review 1 Load a disc and begin playback 2 Hold down the CUE button for audible fast forward and hold down the REVIEW button for audible fast reverse 3 Normal playback will resume when the REVIEW or CUE button is ...

Page 8: ...Fast forward rewind To advance the tape press the STOP EJECT button then press the F FWD button To rewind press the STOP EJECT button then press the REWIND button Notes When the end of the tape is reached during the recording playback fast forward or rewind mode the full auto stop system is activated and automatically puts the unit into the neutral stop mode If the PAUSE button is pressed whilst t...

Page 9: ... forward rewind operation the tape will stop but the motor will con tinue to rotate Press the STOP EJECT button immediately To stop playback Press the STOP EJECT button Continuous playback TAPE 2 to TAPE 1 1 Press the STOP EJECT button and load cassettes into the TAPE 1 and TAPE 2 cassette compartments 2 Set the REVERSE MODE switch to P The continuous playback function will not operate when the RE...

Page 10: ...D button of TAPE 1 which also engages the PLAY button 5 Press the PAUSE button of TAPE 1 again to begin record ing Beat cancel switch If a whistling noise occurs when recording from an MW SW1 or SW2 station set the BEAT CANCEL switch to A B or C whichever gives the best reception Recording from the microphone 1 Set the FUNCTION switch to TAPE 2 Set the DUBBING SPEED switch to MIC 3 Load a cassette...

Page 11: ...Press the PLAY button of TAPE 2 The PAUSE button of TAPE 1 will be released automati cally and dubbing from TAPE 2 to TAPE 1 will begin Syn chronous dubbing start Notes Do not change the setting of the DUBBING SPEED switch during dubbing Do not connect anything to the MIX MIC socket PLAY PLAY PAUSE DIRECTION RECORD DUBBING SPEED FUNCTION TAPE 1 TAPE 2 Erasing recorded tapes 1 Load the tape to be e...

Page 12: ...e into the TAPE 1 cassette compartment set the FUNCTION switch to TAPE and the DUBBING SPEED switch to NOR MAL Then press the RECORD button Caution When not using the microphone remove the microphone plug from the MIX MIC socket Mixing from a microphone and a CD To listen to or record mixed signals from an external mi crophone and CD 1 To protect the speakers from shock noise and to avoid dis turb...

Page 13: ...her chemicals General Power source AC 110 127 V 220 240 V 50 60 Hz DC 15 V D size UM SUM 1 R20 or HP 2 battery x 10 Power consumption 31 W Output power PMPO 200 W Total AC operation MPO 50 W 25 W 25 W AC operation RMS 25 W 12 5 W 12 5 W DC operation 10 T H D Input terminal Mixing microphone 600 ohms Output terminal Headphones 16 50 ohms recommended 32 ohms Dimensions Width 300 mm 11 13 16 Height 2...

Page 14: ...J STRALEN MED OPTISKA INSTRUMENT ADVERSEL USYNLIG LASERSTRALING VED ABNING SE IKKE IND I STRALEN HELLER IKKE MED OPTISKE INSTRUMENTER VARO AVATTAESSA OLET ALTTIINA NAKYMATON LASERSATEILYLLE ALA TUIJOTA SATEESEEN ALAKA KATSO SITA OPTISEN LAITTEEN LAPI VARNING OSYNLIG LASERSTRALNING NAR DENNA DEL AR OPPNAD STIRRA EJ IN I STRALEN OCH BETRAKTA EJ STRALEN GENOM OPTISKT INSTRUMENT ADVERSEL USYNLIG LASER...

Page 15: ... de rideaux etc Éviter de placer sur l appareil une bougie qui brûle Il faut traiter une pile usée selon la réglementation environnementale Avertissement la tension indiquée sur l appareil Le fonctionnement sur une tension plus élevée est dangereux et risque de provoquer un incendie ou tout autre type d accident SHARP ne sera pas tenu pour responsable des dommages causés par le non respect de la t...

Page 16: ...teur de gamme d ondes 25 Commutateur de vitesse de copie microphone incorporé mode FM 26 TAPE 2 Compartiment de cassette 27 TAPE 1 Touche d enregistrement 28 TAPE 1 Touche de lecture 29 TAPE 1 Touche de rebobinage 30 TAPE 1 Touche d avance rapide 31 TAPE 1 Touche d arrêt éjection 32 TAPE 1 Touche de pause 33 TAPE 2 Commutateur de mode d inversion 34 TAPE 2 Touche de lecture 35 TAPE 2 Touches de bo...

Page 17: ...tion Cet adaptateur n accompagne pas les appareils destinés aux régions où le branchement peut se faire directement voir illustration Piles 1 Retirer le cordon d alimentation et ouvrir le logement Le branchement du cordon d alimentation sur l appareil déconnecte les piles 2 Mettre 10 piles D UM SUM 1 R20 HP 2 ou équivalent dans le logement Pour introduire ou retirer les piles et on les poussera ve...

Page 18: ... graphique Surround Avant le branchement ou le débranchement des enceintes amener le commutateur FUNCTION sur STAND BY Fixation des enceintes à l appareil principal Mettre les rainures ménagées sur les enceintes en face des guides sur l appareil principal et baisser les enceintes pour les bloquer en place Séparation des enceintes et de l appareil principal La pression sur le levier RELEASE permet ...

Page 19: ... touche UP ou DOWN Pour déclencher la lecture à partir d un morceau souhaité sélectionner le morceau en agissant en mode d arrêt sur la touche UP ou DOWN et puis appuyer sur la touche PLAY PAUSE Repérages avant et arrière 1 Charger un disque et lancer la lecture 2 Maintenir la touche CUE enfoncée pour l avance rapide audible et la touche REVIEW pour l inversion audible 3 La lecture normale reprend...

Page 20: ... la lecture Appuyer pendant la lecture sur la touche PAUSE Réappuyer sur la touche PAUSE pour reprendre la lecture Arrêt de la lecture Appuyer sur la touche STOP EJECT Attention Ne pas appuyer en même temps sur les touches PLAY et REWIND La bande s abîmera Pour changer de mode appuyer sur la touche STOP EJECT En cas de lecture simultanée de TAPE 1 et TAPE 2 on n entend que le son de TAPE 2 Le voya...

Page 21: ...lâchées et la lecture de TAPE 1 démarre Note En lecture continue le fait d appuyer sur la touche STOP EJECT de TAPE 2 lance automatiquement la lecture de TAPE 1 Lecture TAPE 2 deux faces 1 Amener le commutateur FUNCTION sur TAPE 2 Appuyer sur la touche STOP EJECT et mettre une cas sette dans le compartiment TAPE 2 3 Amener le commutateur REVERSE MODE sur P pour écouter une fois les deux faces et s...

Page 22: ...ophone incorporé n est pas en stéréo Avant tout enregistrement important faire un essai pour s assurer que l enregistrement se fait correctement Possibilité d agir sur les commandes VOLUME X BASS SURROUND et GRAPHIC EQUALIZER sans affecter le niveau d enregistrement contrôle sonore variable La cassette métal ou CrO2 n est pas utilisable pour l en registrement Enregistrement à partir du lecteur CD ...

Page 23: ...Choisir la face A 1 ou B 2 de TAPE 2 au moyen du commutateur DIRECTION 7 Appuyer sur la touche PLAY de TAPE 2 La touche PAUSE de TAPE 1 sera automatiquement relâchée et la copie de TAPE 2 à TAPE 1 se déclenchera Départ synchrone de copie Notes Ne pas modifier le réglage du commutateur DUBBING SPEED pendant la copie Ne rien brancher à la prise MIX MIC Effacement de cassettes enregistrées 1 Mettre l...

Page 24: ...sant sur la commande VOLUME Mixage d un microphone et d une cassette TAPE Pour écouter ou enregistrer les signaux mélangés provenant d un microphone extérieur et de la platine TAPE 1 Amener la commande VOLUME sur le niveau minimum pour protéger les enceintes contre des bruits de choc et pour éviter des interférences Utiliser un microphone doté d une fiche de 3 5 mm de diamètre et ayant une impédan...

Page 25: ...utres produits chimiques Général Alimentation 110 127 V 220 240 V CA 50 60 Hz 15 V CC Pile D UM SUM 1 R20 ou HP 2 x 10 Consommation 31 W Puissance de sortie PMPO 200 W total fonctionnement sur CA MPO 50 W 25 W 25 W Fonctionnement sur CA RMS 25 W 12 5 W 12 5 W Fonctionnement sur CC 10 de D H T Borne d entrée Microphone de mixage 600 ohms Borne de sortie Casque 16 50 ohms recommandé 32 ohms Dimensio...

Page 26: ...dicial para los ojos Para el servicio de reparación consulte a una persona cualificada CAUTION INVISIBLE LASER RADIATION WHEN OPEN DO NOT STARE INTO BEAM OR VIEW DIRECTLY WITH OPTICAL INSTRUMENTS VARNING OSYNLIG LASERSTRALNING NAR DENNA DEL AR OPPNAD STIRRA EJ IN I STRALEN OCH BETRAKTA EJ STRALEN MED OPTISKA INSTRUMENT ADVERSEL USYNLIG LASERSTRALING VED ABNING SE IKKE IND I STRALEN HELLER IKKE MED...

Page 27: ...gar cercano es aconsejable desenchufar el cable de alimentación de CA del tomacorriente de CA por razones de seguridad No se deberá impedir la ventilación cubriendo las aberturas de ventilación con objetos tales como periódicos manteles cortinas etc No deberán ponerse llamas de ningún tipo como por ejemplo de velas sobre el aparato Deberá prestarse atención a los aspectos del medio ambiente al des...

Page 28: ...nterruptor de sonido perimétrico 24 Selector de bandas 25 Selector de velocidad de doblaje micrófono incorporado modo de FM 26 TAPE 2 Compartimiento del cassette 27 TAPE 1 Botón de grabación 28 TAPE 1 Botón de reproducción 29 TAPE 1 Botón de rebobinado 30 TAPE 1 Botón de avance rápido 31 TAPE 1 Botón de parada expulsión 32 TAPE 1 Botón de pausa 33 TAPE 2 Interruptor del modo de inversión 34 TAPE 2...

Page 29: ...dor para la clavija de CA suministrado con el aparato tal como se ilustra El adaptador para la clavija de CA no se incluye en las zonas en las que se pueden conectar directamente el tomacorriente de CA de la pared y la clavija de alimentación de CA ver el dibujo Funcionamiento con pilas 1 Desconecte el cable de alimentación de CA y quite la tapa del compartimiento de las pilas Las pilas se descone...

Page 30: ...fico Sonido perimétrico Ajuste el interruptor FUNCTION en STAND BY antes de efectuar la conexión o desconexión de los altavoces Montaje de los altavoces al aparato principal Fije las ranuras del altavoz en las guías del aparato principal y luego deslice el altavoz hacia abajo por completo hasta que se fije en su sitio Separación de los altavoces y del aparato principal Pulse la palanca RELEASE tal...

Page 31: ...Para iniciar la reproducción de la pista deseada pulse el botón UP o DOWN estando en el modo de parada para seleccionar el número de pista y pulse luego el botón PLAY PAUSE Localización progresiva y localización regresiva 1 Meta un disco y empiece la reproducción 2 Mantenga pulsado el botón CUE para efectuar el avance rápido audible y mantenga pulsado el botón REVIEW para efectuar una inversión rá...

Page 32: ... el botón PAUSE durante la reproducción Pulse de nuevo el botón PAUSE para reanudar la reproducción Para detener la reproducción Pulse el botón STOP EJECT Precauciones No pulse los botones PLAY y REWIND al mismo tiempo o se dañará la cinta Antes de cambiar de un funcionamiento a otro pulse el botón STOP EJECT Si la TAPE 1 y la TAPE 2 se reproducen al mismo tiempo sólo se oirá el sonido de la TAPE ...

Page 33: ...la TAPE 1 y la TAPE 1 empieza a reproducir Nota Cuando el aparato está en el modo de reproducción con tinua y se pulsa el botón STOP EJECT de la TAPE 2 comienza automáticamente la TAPE 1 Reproducción de la TAPE 2 ambas caras 1 Coloque el interruptor FUNCTION en TAPE 2 Pulse el botón STOP EJECT y meta un cassette en el compartimiento de la TAPE 2 3 Coloque el interruptor REVERSE MODE en P para escu...

Page 34: ...rabación Grabación desde la radio 1 Sintonice la emisora deseada Vea la página 7 2 Meta un cassette en el compartimiento de la TAPE 1 3 Pulse el botón PAUSE de TAPE 1 4 Pulse el botón RECORD de la TAPE 1 que acciona también el botón PLAY Cuando vaya a hacer grabaciones importantes es aconsejable que haga una prueba preliminar para garantizar que la grabación deseada se efectúa adecuadamente 5 Puls...

Page 35: ...el botón PLAY 6 Escoja la cara A 1 o la cara B 2 de la TAPE 2 usando el interruptor DIRECTION 7 Pulse el botón PLAY de la TAPE 2 El botón PAUSE de la TAPE 1 se soltará automáticamente y empezará el doblaje de la TAPE 2 a la TAPE 1 Comienza el doblaje sincronizado Notas No cambie la posición del interruptor DUBBING SPEED durante el doblaje No conecte nada al enchufe MIX MIC Borrado de las cintas gr...

Page 36: ...tomáticamente los altavoces Ajuste el volumen empleando el control VOLUME Mezcla de un micrófono y de la Tape Para escuchar o grabar señales mezcladas de un micrófono externo y de la TAPE 1 Para proteger los altavoces contra ruido de golpes y evitar ruidos perturbadores ajuste el control VOLUME en mínimo Asegúrese de que el micrófono tenga una clavija de 3 5 mm de diámetro y que tenga una impedanc...

Page 37: ...lgunas desviaciones de estos valores en los aparatos individuales Generalidades Fuente de 110 127 V 220 240 V de CA 50 60 alimentación Hz 15 V de CC Pila del tamaño D UM SUM 1 R20 o HP 2 x 10 Consumo de potencia 31 W Potencia de salida PMPO 200 W Total Funcionamiento de CA MPO 50 W 25 W 25 W Funcionamiento de CA RMS 25 W 12 5 W 12 5 W Funcionamiento con CC 10 de distorsión armónica total Terminal ...

Page 38: ...MEMO MÉMORANDUM MEMORÁNDUM ...

Page 39: ...MEMO MÉMORANDUM MEMORÁNDUM ...

Reviews: