Messages
57
Inserting Attached Data
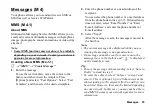
You can send pictures, sounds and video clips attached
to MMS messages. When attaching video clips, “Slide
Show” must be set to “Off”.
A
→
“MMS”
→
“Create Message”
1.
Press [Options] and select from “Picture”, “Sound”
or “Video Clip”.
2.
Select from “Saved Pictures”, “Saved Sounds” or
“Saved Videos”.
3.
Select the desired file name.
The selected picture/sound/video clip is attached.
When attaching is complete, press [Back] to return
to the message creation screen.
• To remove the attached files, press [Options] and
select “Remove” in the menu of attaching pictures,
sounds or video clips.
Note
•
Pictures/Sounds/Video clips protected with a
copyright cannot be sent attached to a message.
•
Instead of performing step 2, you can send data
recorded with “Digital Camera”, “Voice Recorder”
or “Video Camera” options.
Reading MMS
Messages you receive are stored in the Inbox.
Incoming Messages
The MMS indicator (
) will appear when you are
receiving an incoming message.
A
→
“MMS”
→
“Inbox”
1.
Select the message you wish to view.
The message is displayed.
2.
Scroll the screen to read the message.
3.
Press
e
when finished.
Tip
•
The volume varies depending on the Multimedia
Volume settings (p. 95). The sound is deactivated
when “Multimedia Volume” is set to “Silent”.
Storing the Phone Number or E-mail Address
of a Sender in the Phonebook
A
→
“MMS”
→
“Inbox”
1.
Highlight the message from which you want to store
the phone number or e-mail address.
2.
Press [Options] and select “Save to Phonebook”.
For details on entering a name, see “Add New” on
page 38.

