background image

DE -

5

-

SICHERHEITSHINWEISE 

LESEN SIE SICH DIESE ANLEITUN-

GEN VOLLSTÄNDIG UND SORGFÄL-

TIG VOR DER VERWENDUNG IHRES 

GERÄTS DURCH UND BEWAHREN 

SIE SIE FÜR SPÄTER AN EINEM 

LEICHT ERREICHBAREN ORT AUF.

DIESES HANDBUCH WURDE FÜR 

MEHR ALS EIN MODELL GLEICHZEI-

TIG ERSTELLT. IHR GERÄT MUSS 

NICHT ALLE DER EIGENSCHAFTEN 

HABEN, DIE IN DIESEM HANDBUCH 

BESCHRIEBEN SIND. ACHTEN SIE 

BEIM LESEN DIESES BETRIEBS-

HANDBUCHS DIE AUSDRÜCKE MIT 

ZAHLEN.

Allgemeine Sicherheitshinweise

• 

Das Gerät darf von 

Kindern ab 8 Jahren 

und Menschen mit 

verringerten körper-

lichen, sensorischen 

oder mentalen Fähig-

keiten oder Fehlen 

von Erfahrung und 

Wissen bedient wer-

den, wenn Sie eine 

Einweisung oder An-

weisungen zur si-

cheren Handhabung 

des Geräts erhalten 

haben und die damit 

verbundenen Gefah-

ren kennen. Kinder 

dürfen nicht mit dem 

Gerät spielen. Die 

Reinigung und An-

wenderwartung soll-

te von Kindern nicht 

ohne Aufsicht ausge-

führt werden.  

• 

ACHTUNG! Während 

des Betriebs wird das 

Gerät und seine be-

rührbaren Teile heiß. 

Passen Sie auf, dass 

nicht die Heizelemen-

te berühren. Kinder 

unter acht Jahren 

sollten ferngehalten 

werden, es sei denn, 

sie sind ständig unter 

Aufsicht. 

• 

ACHTUNG! Brandge-

fahr: Legen Sie keine 

Gegenstände auf den 

Kochflächen ab. 

• 

ACHTUNG! Wenn die 

Oberfläche gerissen 

ist, schalten Sie das 

Gerät aus, um einen 

Stromschlag zu ver-

meiden. 

Summary of Contents for K-50M15IL2

Page 1: ...Home Appliances Cooking For Life User Manual EN Guide D utilisation FR Istruzioni per l uso IT Oven K 50M15IL2 EN Bedienungsanleitung DE ...

Page 2: ...carefully read this guide which includes basic information on safe installation maintenance and use Please contact your nearest authorized service centre for the installation of your product CE Declaration of conformity This appliance has been designed for home cooking only Any other use such as heating a room is improper and dangerous This appliance has been designed constructed and marketed in c...

Page 3: ...EN 3 Contents Presentation and size of product Warnings Preparation for installation and use Using the oven Cleaning and maintenance of your product Service and Transport ...

Page 4: ...EN 4 Control panel Tray Lower heating element behind the plate Handle Oven door Upper heating element behind the plate Wire grille Racks Oven light Air outlet shutters PRESENTATION AND SIZE OF PRODUCT ...

Page 5: ... experience and knowledge if they have been given su pervision or instruc tion concerning use of the appliance in a safe way and under stand the hazards in volved Children must not play with the ap pliance Cleaning and user maintenance shall not be carried out by children with out supervision WARNING The ap pliance and its acces sible parts become hot during use Care should be taken to avoid touch...

Page 6: ...ur appliance is produced in ac cordance with all applicable local and international standards and regulations Maintenance and repair work must be performed only by authorized service technicians Installation and repair work that is carried out by unauthorized technicians may endanger you It is dangerous to alter or modify the specifications of the appliance in any way Prior to installation ensure ...

Page 7: ...mful to children they should be gathered up and dis posed of immediately Protect your appliance against at mospheric effects Do not expose it to sun rain snow etc The materials surrounding the ap pliance cabinet must be able to withstand a temperature of min 100 C During usage When you first run your oven a certain smell will emanate from the insulation materials and the heater elements For this r...

Page 8: ...RIGINAL SPARE PARTS AND TO CALL ONLY OUR AUTHORIZED SERVICE AGENTS IN CASE OF NEED PREPARATION FOR INSTALLA TION AND USE Manufactured with the best quality parts and materials this modern functional and practical oven will meet your needs in all respects Make sure to read the manual to obtain successful results and to avoid any possible problems The information given below contains rules that are ...

Page 9: ... 2 screws in the holes located on the oven frame When the product frame touches the wooden surface of cabinet tighten the screws Worktop min 25 mm min 50 mm Built in hob Built in oven If the oven is installed under a hob the distance between the worktop and the top panel of the oven must be minimum 50 mm and the distance between the worktop and the top of control panel must be minimum 25 mm WIRING...

Page 10: ...H05VV F type supply cable must be used Faulty wiring may damage the appli ance This type of damage will not be covered under the warranty The appliance is designed to connect to 220 240V if your electricity is dif ferent than the value given above call your authorised service supplier immediately The manufacturer declares that it bears no responsibility whatsoev er for any kind of damage and loss ...

Page 11: ...re ex plained in the next section Oven Function Control Knob To select the desired cooking function turn the knob to the related symbol The details regarding oven functions are ex plained in the next section USING THE OVEN Control panel Oven function control knob Oven operation light Oven operation light Oven function control knob Mechanic timer ...

Page 12: ...for about 10 minutes Warning When grilling the oven door must be closed and the oven temperature should be adjusted to 190 0 C Oven Functions The functions of your oven may be dif ferent due to of your product model Oven Lamp Only the oven light will turn on and it remains on throughout all cooking func tions Static Cooking Function The oven s thermostat and warning lights will turn on the lower a...

Page 13: ...an continuously run your oven When the timer button is in the 0 position the oven will not operate Operating by adjusting the time Set the desired cooking time by turning the timer button to a certain time range between 0 100 minutes At the end of this time period the oven will stop working and the timer will give an audible warning once ...

Page 14: ... period min Thermostat Pos o C Rack pos Cooking period min Layered pastry 170 190 1 2 35 45 Cake 170 190 1 2 30 40 Cookies 170 190 1 2 30 40 Grilled meatballs 190 4 10 15 Watery food 175 200 2 40 50 Chicken 200 1 2 45 60 190 Chopped 190 3 4 15 25 Beefsteak 190 4 15 25 ...

Page 15: ...from the oven to avoid breaking the tray or dish Do not put on cold and wet surfaces Place the tray on a dry kitchen cloth and allow to cool slowly When using the grille in your oven we recommend where ap propriate that you use the grille that came with the product When using the wire grille put a tray on one of the lower shelves to collect oil Water may be added to the tray to assist cleaning As ...

Page 16: ...g pow ders rough wire wool or hard tools be cause they might damage the surfaces Your stove s enamel could be damaged if excess liquids that overflow burn Im mediately clean up any liquid that has overflowed Do not use steam cleaners to clean the oven Cleaning the interior of the oven Make sure to unplug the oven before cleaning it You will obtain best results if you clean the oven interior while ...

Page 17: ...th a timer time may not be regulated If the oven does not heat The heat may be not adjusted with ov en s heater control switch If the interior lighting lamp does not light The electrical supply must be checked It must be checked whether the lamps are defective If they are defective you can change them as per the guide Cooking if lower upper part does not cook evenly Check the shelf locations cooki...

Page 18: ... of oven against possible blows The symbol on the product or on its packaging indicates that this product may not be treated as household waste Instead it shall be handed over the ap plicable collection point for recycling of electrical and electronic equipment By ensuring this product is disposed of correctly you will help prevent potential negative consequences for the environ ment and human hea...

Page 19: ...iques de sécurité concernant l installation l entretien et l utilisation Veuillez contacter votre centre de service après vente au torisé le plus proche pour l installation de votre appareil Déclaration CE de conformité Cet appareil a été conçu uniquement pour une utilisation de cuisson domestique Toute autre utilisation comme le refroidissement des pièces est incorrecte et dan gereuse Cet apparei...

Page 20: ...FR 3 Contenu Présentation et taille du produit Avertissements Préparation de l installation et de l utilisation Utilisation du four Nettoyage et entretien de votre produit Service et transport ...

Page 21: ...e de cuisson Élément chauffant inférieur derrière la plaque Poignée Porte du four Élément chauffant supérieur derrière la plaque Grille Guides Lampe de four Plaques de blocage de l extraction d air PRÉSENTATION ET TAILLE DU PRODUIT ...

Page 22: ...tes ou manquant d expérience et de connaissances s ils sont supervisés ou s ils ont reçu des instructions concernant l utilisation de cet appareil en toute sûreté et comprennent les risques courus Les enfants ne doivent pas jouer avec l appareil Le nettoyage et l entretien ne doivent pas être ef fectués par des enfants non supervisés AVERTISSEMENT L appareil est ses pièces accessibles chauffent du...

Page 23: ... l utilisation du four cuisson normale ou gril Les jeunes enfants doivent être tenus à distance Votre appareil est fabriqué confor mément aux standards et lois lo cales et internationales en vigueur Les travaux d entretien et de répa ration ne doivent être effectués que par des techniciens de ser vice autorisés Les travaux d ins tallation et de réparation effectués par des techniciens non autorisé...

Page 24: ... ment Les matériaux utilisés dans l emballage nylon agrafes sty rofoam etc pouvant avoir des effets nocifs sur les enfants ils doivent être collectés et éliminés immédiatement Protégez votre appareil des effets atmosphériques Ne l exposez pas au soleil à la pluie à la neige etc Les matériaux entourant l appareil doivent être capables de supporter une température d au moins 100 C Durant l utilisati...

Page 25: ...FICACI TÉ ET LA SÉCURITÉ DE VOTRE APPAREIL NOUS VOUS RECOM MANDONS DE TOUJOURS UTILI SER DES PIÈCES DÉTACHÉES ORIGINALES ET DE N APPELER QUE NOSAGENTS DE SERVICES AUTORISÉS EN CAS DE BESOIN PRÉPARATION DE L INSTALLA TION ET DE L UTILISATION Fabriqué avec des pièces et matériaux de meilleure qualité ce four moderne et pratique répond à tous vos besoins As surez vous de lire ce manuel pour obtenir d...

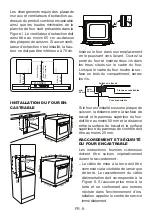
Page 26: ...t vers l avant Ouvrez la porte du four et insérez deux vis dans les trous situés sur le cadre du four Lorsque le cadre du four touche la sur face en bois du compartiment serrez les vis Surface de travail min 25 mm min 50 mm Plaques encastrables Four encastrable Si le four est installé sous une plaque de cuisson la distance entre la surface de travail et le panneau supérieur du four doit être au mo...

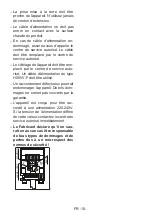
Page 27: ... être rem placé par le centre de service auto risé Un câble d alimentation de type H05VV F doit être utilisé Un raccordement défectueux pourrait endommager l appareil De tels dom mages ne seront pas couverts par la garantie L appareil est conçu pour être rac cordé à une alimentation 220 240V Si la tension de l alimentation diffère de cette valeur contactez le centre de service autorisé immédiateme...

Page 28: ...ction suivante Bouton de contrôle du four Pour sélectionner la fonction de cuisson désirée tournez le bouton vers le sym bole correspondant Les fonctions du four sont expliquées en détails dans la section suivante UTILISATION DU FOUR Panneau de contrôle Bouton de contrôle du four Lampe de fonctionnement du four Lampe de fonctionnement du four Bouton de contrôle du four Minuterie mécanique ...

Page 29: ...t placez les aliments au centre de la grille Placez toujours un plateau en dessous pour collecter les gouttes d huile ou de graisse Il est recommandédepréchaufferlefourpendant environ10minutes Avertissement Durant la fonction gril la porte du four doit être fermée et la température du four doit être réglée sur 1900 C Fonctions du four Les fonctions de votre four peuvent dif férer selon le modèle d...

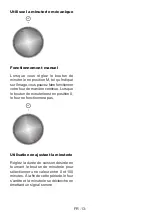
Page 30: ...ner votre four de manière continue Lorsque le bouton de minuterie est en position 0 le four ne fonctionnera pas Utilisation en ajustant la minuterie Réglez la durée de cuisson désirée en tournant le bouton de minuterie pour sélectionner une valeur entre 0 et 100 minutes À la fin de cette période le four s arrête et la minuterie se déclenche en émettant un signal sonore ...

Page 31: ...Thermostat Pos o C Position de grille Période de cuisson min Pâtisserie en couches 170 190 1 2 35 45 Gâteau 170 190 1 2 30 40 Cookie 170 190 1 2 30 40 Boulettes de viande grillées 190 4 10 15 Aliments aqueux 175 200 2 40 50 Poulet 200 1 2 45 60 190 Côtelettes 190 3 4 15 25 Steak de bœuf 190 4 15 25 ...

Page 32: ...ment du four vers un environnement froid pour éviter de les endommager Ne les placez pas sur des surfaces froides et humides Pla cez les sur un chiffon sec et laissez les refroidir lentement Lorsque vous utili sez le four en fonction gril nous recom mandons lorsque approprié d utiliser la grille fournie avec le produit Lorsque vous utilisez la grille placez une plaque sur l une des positions infér...

Page 33: ...nant des particules pou vant rayer les parties émaillées et peintes de votre four Utilisez des nettoyants crémeux ou liquides ne contenant pas de particules Celles ci pouvant endommager les surfaces n utilisez pas de crèmes corrosives de poudres de nettoyage abrasives de laine métallique ou d outils durs Si un excès de liquide s étant écoulé dans votre four commencent à brûler il peut endommager l...

Page 34: ...e fonctionne pas Le four peut être débranché il y a eu une panne de courant Nos modèles sont équipés d une minuterie le temps peut ne pas être correctement réglé Si le four ne chauffe pas La chaleur peut être ajustée avec l in terrupteur de contrôle du chauffage du four Si la lampe d intérieur ne s allume pas L alimentation électrique doit être véri fiée Vérifiez si la lampe est défec tueuse Le ca...

Page 35: ...allage ori ginal Mesurez les surfaces externes sur faces vitrées et peintes du four contre les chocs possibles Ce symbole sur le produit ou sur l em ballage indique que ce produit ne doit pas être traité comme des déchets mé nagers Il doit plutôt être remis au point de ramassage concerné se chargeant du recyclage du matériel électrique et électronique En vous conformant à une procédure d enlèvemen...

Page 36: ...ältig durch die wichtige Informationen für eine sichere Aufstellung Pflege und Verwen dung enthält Bitte setzen Sie sich mit Ihrem nächsten autorisierten Servicezent rum wegen der Aufstellung und dem Anschluss Ihres Geräts in Verbindung EG Konformitätserklärung Dieses Haushaltsgerät ist für das Kochen im privaten Haushalt konstruiert Eine andere Verwendung wie Heizen eines Raums ist nicht zweckger...

Page 37: ...DE 3 Inhalt Vorstellung und Abmessungen des Produkts Warnhinweise Vorbereitung des Einbaus und der Verwendung Den Herd verwenden Reinigung und Wartung Ihres Produkts Reparatur und Transport ...

Page 38: ...DE 4 Steuertafel Blech Unteres Heizelement hinter der Platte Griff Ofentür Oberes Heizelement hinter der Platte Drahtgrill Schienen Ofenlampe Luftauslassklappen VORSTELLUNG UND ABMESSUNGEN DES PRODUKTS ...

Page 39: ...oder mentalen Fähig keiten oder Fehlen von Erfahrung und Wissen bedient wer den wenn Sie eine Einweisung oder An weisungen zur si cheren Handhabung des Geräts erhalten haben und die damit verbundenen Gefah ren kennen Kinder dürfen nicht mit dem Gerät spielen Die Reinigung und An wenderwartung soll te von Kindern nicht ohne Aufsicht ausge führt werden ACHTUNG Während des Betriebs wird das Gerät und...

Page 40: ...G Achten Sie darauf dass das Gerät bevor Sie die Lampe austauschen ausgeschaltet ist um einen Stromschlag zu vermeiden VORSICHT Berühr bare Teile können beim Braten oder Grillen sehr heiß sein Kleine Kinder müssen immer ferngehalten werden Ihr Gerät wurde nach allen gelten den nationalen und internationa len Normen und Vorschriften her gestellt worden Wartungs und Reparaturarbei ten dürfen nur von...

Page 41: ... von einem auto risierten Techniker angeschlossen und in Betrieb genommen werden Der Hersteller ist nicht für Schä den haftbar die durch eine falsche Aufstellung oder einen falschen Anschluss durch nicht autorisierte Personen entstehen Wenn Sie das Gerät auspacken achten Sie bitte auf mögliche Transportschäden Wenn ein Schaden vorliegt dürfen Sie das Gerät nicht verwenden und Sie müssen sich mit d...

Page 42: ...laufen Stellen Sie nichts auf die geöffne te Tür oder Schublade des Herds Sie können Ihr Gerät aus dem Gleichgewicht bringen oder den Deckel abbrechen Stellen Sie keine schweren Ge genstände oder entflammbare oder entzündliche Waren Ny lon Plastiktüten Papier Stoff in die Schublade Dies gilt auch für Kochgeschirr mit Kunststoffzube hör z B Griffe Hängen Sie keine Handtücher Küchentücher oder Kleid...

Page 43: ...rhän ge Öl Stoffe usw die leicht Feuer fangen können in unmittelbarer Nähe des Herds befinden Die den Herd umgebenden Möbel müssen aus einem Material sein dass einer Hitzeentwicklung von mehr als 50 C über der Raumtempe ratur standhält An Wandschränken und Abluftventila toren über dem eingebauten Kombi nationsprodukt erforderliche Änderun gen sowie die Maximalhöhen über der Herdplatte sind in Abbi...

Page 44: ...e geerdete Steckdose gibt rufen Sie sofort den autorisierten Kundendienst an Die geerdete Steckdose muss sich in unmittelbarer Nähe des Herds befin den Verwenden Sie niemals ein Ver längerungskabel Das Stromversorgungskabel darf nicht die heißen Oberfläche des Pro dukts berühren Im Fall eines beschädigten Stromver sorungskabels müssen Sie den auto risierten Kundendienst anrufen Das Kabel muss vom ...

Page 45: ...en Sie im nächsten Abschnitt Herdfunktionskontrollknopf Zur Auswahl der gewünschten Koch funktion drehen Sie den Knopf auf das entsprechende Symbol Die Einzelhei ten zu den Herdfunktionen finden Sie im nächsten Abschnitt VERWENDUNG DES HERDS Steuertafel Herdfunktionskontrollknopf Ofenfunktionslampe Ofenfunktionslampe Herdfunktionskontrollknopf Mechanische Zeitschaltuhr ...

Page 46: ... Mitte des Gitters Stellen Sie immer ein Blech darunter um tropfendes Öl oder Fett aufzufangen Es wird empfohlen den Ofen für 10 Minuten vorzuheizen Warnung Beim Grillen muss die Ofentür geschlossen und die Ofentemperatur auf 0 C eingestellt sein Herdfunktionen Die Funktionen Ihres Herdes können je nach Modell Ihres Produkts unter schiedlich sein Ofenlampe Nur die Ofenlampe wird eingeschaltet und ...

Page 47: ... setzen können Sie Ihren Ofen fortlaufend verwenden Wenn der Zeitschaltuhrknopf auf 0 steht funktioniert der Herd nicht Einstellung einer Zeit Stellen Sie die gewünschte Kochzeit durch Drehen am Zeitschaltuhrknopf in einem Zeitbereich von 0 100 Minuten ein Zum Ende dieses Zeitraums schaltet sich der Ofen ab und die Zeitschaltuhr gibt einen Warnton ab ...

Page 48: ...Zeit Min Thermostat Pos o C Ein schub pos Koch Zeit Min Blätterteig gebäck 170 190 1 2 35 45 Kuchen 170 190 1 2 30 40 Plätzchen 170 190 1 2 30 40 Grillfleisch 190 4 10 15 Wässrige Speisen 175 200 2 40 50 Hühnchen 200 1 2 45 60 190 Braten 190 3 4 15 25 Steak Lende 190 4 15 25 ...

Page 49: ...Zerbrechen des Tab letts oder des Geschirrs zu vermeiden Stellen Sie sie nicht auf kalte oder nas se Oberflächen Stellen Sie sie auf ein trockenes Küchentuch und lassen sie langsam auskühlen Wenn Sie den Grill Ihres Ofens verwenden empfehlen wir wenn geeignet das mitgelieferte Git ter zu verwenden Wenn Sie ein Draht gitter verwenden dann stellen Sie ein Blech auf eines der unteren Regale damit her...

Page 50: ...le Ihres Herds verkratzen könnten Verwenden Sie Scheuermilch oder Flüssigreiniger die keine Partikel enthalten Verwenden Sie keine scharfen Cremes Scheuerpulver Drahtwolle oder harte Werkzeuge das diese die Oberflächen beschädigen können Für den Fall dass überge laufene Flüssigkeit sich in Ihren Herd eingebrannt hat kann dies das Emaille beschädigen Waschen Sie übergelau fene Flüssigkeit sofort ab...

Page 51: ... TRAGEN EINER REPARATUR Wenn der Herd nicht funktioniert Der Herd könnte ausgesteckt sein oder es war ein Stromausfall Bei Modellen mit einer Zeitschaltuhr könnte die Zeit nicht eingestellt sein Wenn der Herd nicht heizt Die Hitze wurde vielleicht nicht mit dem Hitzekontrollknopf eingestellt Die Anzeigelampen leuchten nicht Die Stromzufuhr muss überprüft wer den Es muss auch geprüft werden ob die ...

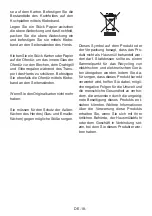
Page 52: ... für den Schutz der Außen flächen des Herdes Glas und Emaille flächen gegen mögliche Stöße sorgen Dieses Symbol auf dem Produkt oder der Verpackung besagt dass das Pro dukt nicht als Hausmüll behandelt wer den darf Stattdessen sollte es einem Sammelpunkt für das Recycling von elektrischen und elektronischen Gerä ten übergeben werden Indem Sie da für sorgen dass dieses Produkt korrekt verwertet wir...

Page 53: ...i base per una installazione manutenzione e uso sicuri Con tatta il centro di assistenza clienti autorizzato più vicino per l installazione del tuo prodotto Dichiarazione di conformità CE Questa apparecchiatura è stata progettata esclusivamente per essere usata nelle cucine domestiche Ogni altro uso come per il riscaldamento delle stanze è im proprio e pericolosi Questa apparecchiatura è stata pro...

Page 54: ...IT 3 Contenuti Presentazione e dimensioni del prodotto Avvertenze Preparazione per l installazione e l uso Uso del forno Pulizia e manutenzione del prodotto Assistenza e trasporto ...

Page 55: ...oio Elemento riscaldante inferiore dietro la piastra Maniglia Porta forno Elemento riscaldante superiore dietro la piastra Griglia Sostegni Illuminazione forno Portelli per lo scarico dell aria PRESENTAZIONE E DIMENSIONI DEL PRODOTTO ...

Page 56: ...li o mentali ridotte o mancanza di espe rienza e conoscenze nel caso in cui siano state assegnate a supervisori o abbiano ottenuto istruzioni in merito all uso sicuro dell apparecchiatura e comprendano i pe ricoli coinvolti L appa recchiatura non è un giocattolo La pulizia e la manutenzione non devono essere esegui ti a bambini in assenza di supervisione AVVERTENZE L ap parecchiatura e le sue part...

Page 57: ...r evitare eventuali scosse elettriche ATTENZIONE le parti accessibili potrebbero essere incandescenti durante la cottura o l u so della griglia Tenere lontani i bambini La tua apparecchiatura è prodotta se condo tutti gli standard e i regolamen ti internazionali e locali applicabili Lamanutenzioneelariparazionede vono essere eseguite esclusivamen te da tecnici di servizio autorizzati La manutenzio...

Page 58: ... usare l apparecchiatura e contattare im mediatamente un agente di assi stenza qualificato I materiali usati per l imballaggio nylon graffetta trici schiuma espansa ecc po trebbero avere effetti negativi sui bambini e dovrebbero essere rac colti e rimossi immediatamente Proteggere l apparecchiatura dagli effetti atmosferici Non esporla agli effetti di sole pioggia neve ecc I materiali che circonda...

Page 59: ...annello di controllo PER MANTENERE L EFFICIEN ZA E LA SICUREZZA DELLA PROPRIA APPARECCHIATURA RACCOMANDIAMO DI USA RE SEMPRE PARTI ORIGINALI O CHIAMARE I NOSTRI AGENTI DI ASSISTENZA AUTORIZZATI IN CASO DI NECESSITÀ PREPARAZIONE PER L INSTAL LAZIONE E L USO Prodotto con le parti e i materiali della migliore qualità questo forno moder no funzionale e pratico soddisferà tutti i tuoi bisogni Assicurar...

Page 60: ... forno e inserire due viti nei fori ubicati sopra il telaio del forno Quando il telaio del prodotto tocca la superficie in legno del cabinato serrare le viti piani min 25 mm min 50 mm Piano di cottura incorporato Forno incorporato Se il forno è installato sotto un piano di cottura la distanza tra il piano e il pan nello superiore del forno deve essere almeno di 50 mm e la distanza tra il pia no e ...

Page 61: ...atura deve essere eseguito dal servizio di assi stenza autorizzato Usare un cavo di alimentazione modello H05VV F Un cablaggio non correttamente ese guito potrebbe danneggiare l appa recchiatura Tali danni non saranno coperti dalla garanzia L apparecchiatura è progettata per connettersi a 220 240V Se l elettricità è diversa dal valore indicato contatta re immediatamente il servizio di assi stenza ...

Page 62: ...one suc cessiva Manopole di controllo funziona mento forno Per selezionare la funzione di cottura desiderata ruotare la manopola al sim bolo relativo i dettagli delle funzioni del forno sono indicate nella sezione suc cessiva USO DEL FORNO Pannello di controllo Manopole di controllo funzionamento forno Illuminazione forno Illuminazione forno Manopole di controllo funzionamento forno Timer meccanic...

Page 63: ...la griglia Collocare sempre un vassoio sotto per raccogliere le gocce di olio o grasso Si raccomanda di preriscaldare il forno per circa 10 minuti Avviso Quando si usa la griglia lo sportello del forno deve restare chiuso e la temperatura delforno deve essere regolata su 1900 C Funzioni forno Le funzioni del forno potrebbero esse re diverse a seconda del modello Illuminazione forno Si illumina sol...

Page 64: ...è possibile azionare in modo continuo il forno Quando il pulsante del timer è in posizione 0 il forno non funziona Operare regolando il tempo Impostare il tempo di cottura desiderato ruotando il pulsante del timer in un intervallo compreso tra 0 100 minuti Al termine di questo periodo il forno smette di funzionare e il timer emette un avviso sonoro ...

Page 65: ... cottura min Termostato Pos o C Pos sostegni Periodo di cottura min Dolce a strati 170 190 1 2 35 45 Torta 170 190 1 2 30 40 Biscotti 170 190 1 2 30 40 Polpette alla griglia 190 4 10 15 Alimenti umidi 175 200 2 40 50 Pollo 200 1 2 45 60 190 Braciole 190 3 4 15 25 Bistecca 190 4 15 25 ...

Page 66: ...on collocare vassoi e piatti in vetro caldi in ambienti freddi subito dopo averli tolti dal forno per evitare di romperli Non col locare su superfici fredde e umide Col locare su un panno da cucina asciutto e attendere che si asciughi Quando si usa la griglia del forno raccomandiamo quando appropriato di usare la griglia fornita con il prodotto Quando si usa la griglia collocare un vassoio su una ...

Page 67: ...o liquidi che non contengono particel le Non usare creme caustiche polveri abrasive lana di ferro o strumenti rigi di perché potrebbero danneggiare le superfici Nel caso in cui del liquido in eccesso venga sversato sul forno e si incendi potrebbe danneggiare lo smal to Pulire immediatamente i liquidi ver sati Non usare pulitori a vapore per la pulizia del forno Pulizia l interno del forno Assicura...

Page 68: ... l orario potrebbe non es sere regolato Se il forno non riscalda Il calore potrebbe non essere regolato con l interruttore di controllo del riscal datore Se la lampadina interna non si accende controllare l elettricità Bisogna control lare se le lampadine sono difettose Se sono difettose sostituirle seguendo la guida Cucina se la parte inferiore superiore non cuoce in modo uniforme Controllare la ...

Page 69: ...i possiede il contenitore originale Prendere le misure delle superfici ester ne vetro e superfici verniciate del forno Il simbolo sul prodotto o sulla confezio ne indica che questo prodotto potrebbe non essere trattato come rifiuti dome stici Al contrario saranno trasmessi al punto di raccolta adeguato per il riciclo delle componenti elettriche ed elettroni che Assicurando il corretto smaltimen to...

Page 70: ...Service Support Visit our website www sharphomeappliances com Or contact us 52177672 11 15 ...

Reviews: