background image

– 9 –

MD-MT180

DISASSEMBLY

Cares before disassembling
When assembling the machine after disassembling or
repair, observe the following requirements so as to ensure
safety and performance.
1. Remove the batteries from the machine, and take out the

mini-disc.

2. When assembling after repair, be sure to position the

wires in the same location.
Use the specified screws to fix the cabinet and the
mechanism unit. The use of the screws with length other
than specified may cause contact with the mechanism
unit resulting in malfunction.

3. When repairing, pay close attention so not to damage the

IC from static electricity.

Caution:
Carefully handle the main PWB and flexible PWB. After removing the
flexible PWB (*) for the optical pickup from the connector, do not touch
directly the front end of flexible PWB with your hand so as to prevent
damage of optical pickup by static electricity.

(B1) x2
ø1.4 x2.5mm

(C1) x1
ø1.4 x2.5mm

(C1) x1
ø1.4 x2.5mm

(C1) x1
ø1.4 x2mm

(B2) x2

(C2) x1

*(C2) x1

Top Cabinet

EJECT SWITCH

Main PWB

Hook
(C3) x3

Pull

Pull

Pull

Pull

Be careful not to break the EJECT 
SWITCH when remove and attach 
the bottom cabinet.

(D1) x1
ø1.4 x1.5mm

(D1) x1
ø1.4 x1.5mm

Bracket

Mechanism Unit

1

Bottom Cabinet

1. Screw ..................... (A1) x5

9-1

2. Open the Battery Door.
3. Hook ....................... (A2) x1

2

Top Cabinet

1. Open the Top cabinet.

9-1

2. Screw ..................... (B1) x2

9-2

3. Flexible PWB .......... (B2) x2

3

Main PWB

1. Screw .................... (C1) x3

9-2

2. Flexible PWB ......... (C2) x2
3. Hook ...................... (C3) x3

4

Mechanism Unit

1. Screw .................... (D1) x2

9-3

REMOVAL

PROCEDURE

STEP

FIGURE

Figure 9-1

Figure 9-2

Figure 9-3

(A1) x2
ø1.4 x4mm

(A1) x1
ø1.4 x4mm

(A1) x1
ø1.4 x2.5mm

(A1) x1
ø1.4 x2.5mm

Battery Door

Battery Terminal

Bottom Cabinet

Top Cabinet

Open Lever

1

2

Hook
(A2) x1

Pull

Summary of Contents for MD-MT180

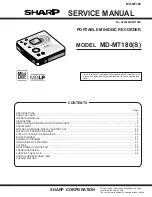
Page 1: ...inal condition and only parts identical to those specified be used Page SPECIFICATIONS 2 NAMES OF PARTS 3 OPERATION MANUAL 4 DISASSEMBLY 9 REMOVING AND REINSTALLING THE MAIN PARTS 10 ADJUSTMENT 12 MD ERROR MESSAGE DISPLAY CONTENT LIST 25 NOTES ON SCHEMATIC DIAGRAM 26 TYPES OF TRANSISTOR AND DIODE 26 BLOCK DIAGRAM 27 SCHEMATIC DIAGRAM 28 WIRING SIDE OF P W BOARD 32 VOLTAGE 43 WAVEFORMS OF MD CIRCUI...

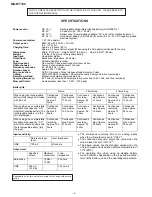
Page 2: ...life Input sensitivity Output level The continuous recording time is for analog inputs when the volume level is set to VOL 0 The continuous play time shows the value when the volume level is set to VOL 15 The above values are the standard values when the unit is charged and used at an ambient temperature of 77 F 25 C The operating time when using an alkaline battery may be different depending on t...

Page 3: ...Stop Power Off Hold Button 12 Rechargeable Battery Cover 13 Play Pause Button 14 Level Meter 15 Stereo Recording Indicator 16 Long play Recording Mode Indicator 17 Repeat Indicator 18 Monaural Mode Indicator 19 Record Indicator 20 Disc Mode Indicator 21 Synchro Recording Indicator 22 Total Track Number Indicator 23 Disc Name Indicator 24 TOC Indicator 25 Battery Indicator 26 Random Indicator 27 Tr...

Page 4: ...l and battery will be gin charging Scrolling Using with the Alkaline Battery Use one commercially available alkaline battery LR6 AA size When using the alkaline battery be sure to insert the rechargeable battery also Caution While you are using the rechargeable battery and the alkaline battery at the same time do not remove either of them If you do when the unit is in the play mode playback will s...

Page 5: ...or where you purchased the unit HOLD The unit is in the hold mode LOCKED You removed a MiniDisc when record ing or editing Turn off the power before removing the MiniDisc NO DISC A disc has not been loaded Number or symbol appears in position ERROR MES SAGES MEANING NO SIGNAL Poor connection of the digital cable No output signal comes out from the connected unit to playback Use the AC power for th...

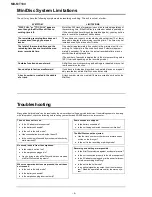
Page 6: ...ly recorded or edited MiniDisc sound may skip A track number is created in the middle of a track A track number may be created if there are scratches or dust on the MiniDisc Troubleshooting Many potential problems can be resolved by the owner without calling a service technician If something seems to be wrong with this product check the following before calling your authorized SHARP dealer or serv...

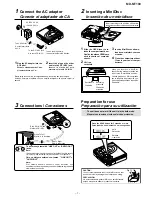
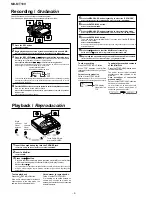
Page 7: ...n con tra borrado esté puesta en la posición Grabable Recordable Grabable Recording prevented Grabación prevenida 3 1 2 4 4 3 Insert according to the direction of the arrow Insértelo de acuerdo con la dirección de la flecha LINE OUT LEFT RIGHT LINE IN White To Left Blanco A la izquierda Red To Right Rojo A la derecha 3 Connections Conexiones To a stereo system with LINE OUT or AUDIO OUT jacks Note...

Page 8: ...blecerá automáticamente después de 7 segundos aunque no se pulse el botón ENTER SYNC 9 Press the 06 06 06 06 06 button to start the MiniDisc unit recording Pulse el botón 06 06 06 06 06 para iniciar la grabación del aparato de MD 10Begin playback on the stereo system and the output will be recorded Inicie la reproducción en el sistema estéreo y se grabará la salida To stop recording Press the OFF ...

Page 9: ...p from the connector do not touch directly the front end of flexible PWB with your hand so as to prevent damage of optical pickup by static electricity B1 x2 ø1 4 x2 5mm C1 x1 ø1 4 x2 5mm C1 x1 ø1 4 x2 5mm C1 x1 ø1 4 x2mm B2 x2 C2 x1 C2 x1 Top Cabinet EJECT SWITCH Main PWB Hook C3 x3 Pull Pull Pull Pull Be careful not to break the EJECT SWITCH when remove and attach the bottom cabinet D1 x1 ø1 4 x...
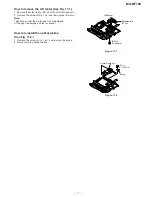
Page 10: ...Remove the screws C4 x 2 pcs and remove the sled motor and the left bracket 4 Remove the screw C5 x 1 pc and remove the right bracket Note Take care so that the motor gear is not damaged If the gear is damaged noise is caused How to remove the spindle motor See Fig 10 2 1 Remove the solder joints B1 x 4 of flexible PWB 2 Remove the screws B2 x 3 pcs and remove the spindle motor MD Mechanism Spindl...

Page 11: ...emove the Lift motor See Fig 11 1 1 Remove the solder joints D1 x 2 of the lift motor lead wire 2 Remove the screw D2 x 1 pc and remove the lift motor Note Take care so that the motor gear is not damaged If the gear is damaged noise is caused D2 x1 ø1 4 x5mm Lift Motor SolderJoints D1 x2 Spring Optical Pickup Unit E1 x1 ø1 7 x3 5mm Figure 11 1 Figure 11 2 ...

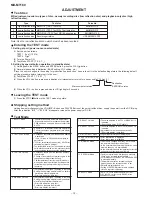
Page 12: ...ied address is performed Change of record laser output servo gain is also changed according to laser output The temperature correction is performed only when servo start is performed but the posture correction is not performed during continuous recording 5 MANUAL 1 Mode Temperature is displayed Updating in real time Seeing the displayed adjustment value perform preliminary manual adjustment Error ...

Page 13: ...nt item out of range focus ON failure and adjustment error When the PLAY button is pressed while ADJ OK is displayed AUTO2 is executed 2 AUTO2 Mode When the STOP button is pressed while the AUTO2 menu appears or during automatic adjustment the mode changes to the TEST mode stop state At this time the adjustment value is not output Adjustment NG Adjustment item out of range and adjust ment error Wh...

Page 14: ...hile the error data indication menu appears the error data is initialized C L E A R _ Error Code Explanation of error history code 13h Excessive number of retry to draw servo during its adjustment 16h COUT detection time over during servo adjustment 17h The level of input signal from the RF amplifier is out of the allowable range 1Fh Cannot clear the factor of ENDEC DINT 21h Cannot focus on the di...

Page 15: ... button ENTER button and Play button to start the test mode 3 Start the EEPROM mode Temp menu Button operation in order of BASS FAST REVERSE x 3 times PLAY PLAY in the test mode STOP state TM is displayed Temperature code Temperature reference 4 Once press FAST FORWARD and determine the displayed microcomputer TEMP input AD value TPin is displayed TEMP input AD value 5 At the ambient temperature d...

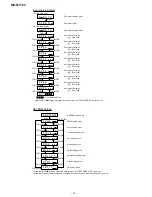
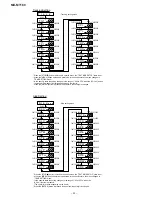
Page 16: ...0 H T O G _ F 2 H T 1 P _ 2 0 H Spindle setting Focus setting F G 1 _ 4 0 H F Z H _ E D H F L n _ 0 9 H F L p _ 0 6 H F T s _ 1 8 H F S B _ 4 0 H F T B _ 2 8 H T O 1 _ 5 0 H T O R _ 5 8 H Item display Set values S P G _ 3 0 H S P i _ 9 A H S P m _ 6 2 H S P o _ 4 F H S D 1 _ 7 F H S D 2 _ 7 F H S P K _ E B H S P W _ 0 F H S P B _ 6 6 H S R i _ C 0 H S R m _ 9 A H S R o _ 7 B H S B R _ 6 0 H O S L ...

Page 17: ...l adjustment menu M A N U 1 ATT manual adjustment menu M A N U 2 Error history display menu E D A T A Test mode normal playback menu N O R M A L E E P R O M A U T O 2 Preautomatic Adjustment menu Preadjustment error adjustment value output During preadjustment adjustment Adjustment error Normal end Preadjustment normal end adjustment value output During ATT automatic adjustment PLAY PLAY A U T O 1...

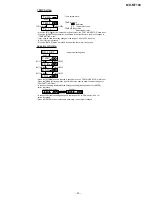
Page 18: ...dress set state the start address changes as follows when the MENU button is pressed 0 0 3 2 H initial value 0 3 C 0 H 0 7 0 0 H 0 8 A 0 H A d 0 0 3 2 A d 0 3 C 0 A d 0 7 0 0 MENU MENU MENU MENU A d 0 8 A 0 In the start address setting state the start address change digit changes when the ENTER button is pressed 1st digit initial value 2nd digit 3rd digit A d 0 0 3 2 A d 0 0 3 2 ENTER ENTER ENTER ...

Page 19: ...ntinuous record playback from any address A d 0 0 3 2 0 0 3 2 H initial value 0 3 C 0 H 0 7 0 0 H 0 8 A 0 H A d 0 3 c 0 A d 0 7 0 0 MENU MENU MENU MENU A d 0 8 A 0 In the start address setting state the start address change digit changes when the ENTER button is pressed A d 0 0 3 2 1st digit initial value 2nd digit 3rd digit A d 0 0 3 2 A d 0 0 3 2 ENTER ENTER ENTER A d 0 9 5 0 TEST mode normal pl...

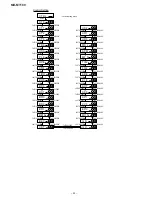
Page 20: ...et Error history display menu Error history 0 display Error code Error history 1 display Error code Error history 2 display Error code Error history 3 display Error code Error history 4 display Error code Error history 5 display Error code Error history 6 display Error code Error history 7 display Error code Error history 8 display Error code Error history 9 display Error code PLAY E D A T A Error...

Page 21: ...FAST REVERSE Spin setting menu PLAY S p i n Spin Setting S P G S P i FAST FORWARD FAST REVERSE S P m FAST FORWARD FAST REVERSE S P o FAST FORWARD FAST REVERSE S D 1 FAST FORWARD FAST REVERSE S D 2 FAST FORWARD FAST REVERSE S P K FAST FORWARD FAST REVERSE S P W FAST FORWARD FAST REVERSE S P B FAST FORWARD FAST REVERSE S R i FAST FORWARD FAST REVERSE When the STOP button is pressed in specific menu ...

Page 22: ...VERSE B P W FAST FORWARD FAST REVERSE B P 1 FAST FORWARD FAST REVERSE B R E FAST FORWARD FAST REVERSE B R W FAST FORWARD FAST REVERSE S R S FAST FORWARD FAST REVERSE Tracking setting menu PLAY T r a c k Tracking Setting T G 1 T B o FAST FORWARD FAST REVERSE T B t FAST FORWARD FAST REVERSE T K o FAST FORWARD FAST REVERSE T K t FAST FORWARD FAST REVERSE T D o FAST FORWARD FAST REVERSE T D t FAST FOR...

Page 23: ...ch state the set digit is changed Adjustment setting menu PLAY A D J S E T Adjustment Setting C O K F A B FAST FORWARD FAST REVERSE H S G FAST FORWARD FAST REVERSE L S G FAST FORWARD FAST REVERSE When the STOP button is pressed in specific menu the TEST MODE STOP state is set When the MENU button operation is performed in the specific state the menu changes to TEMP SETTING menu In the specific set...

Page 24: ... B D 0 B D 1 FAST FORWARD FAST REVERSE B M K FAST FORWARD FAST REVERSE B E C FAST FORWARD FAST REVERSE C S T FAST FORWARD FAST REVERSE U S 2 U S 1 FAST FORWARD FAST REVERSE U S 0 FAST FORWARD FAST REVERSE M S L FAST FORWARD FAST REVERSE S P M FAST FORWARD FAST REVERSE M F P FAST FORWARD FAST REVERSE T G 2 FAST FORWARD FAST REVERSE F G 2 FAST FORWARD FAST REVERSE A D E FAST FORWARD FAST REVERSE C 1...

Page 25: ...write test Er MD80 EEPROM readout Check sum error TOC FORM Abnormal data DISC detection L UTOC SELECTOR is Loop indicates the detailed factor a_ Address abnormal t_ FTNO LTNO NAME FULL The number of characters for names exceeds the specification limit OPEN The disc compartment is open Open lid is detected while the system is running Display content Error content Error code Remarks f Focus error r ...

Page 26: ...lectro lytic capacitor the expression capacitance withstand volt age is used CH TH RH UJ Temperature compensation ML Mylar type The indicated voltage in each section is the one measured by Digital Multimeter between such a section and the chas sis with no signal given Parts marked with are important for maintaining the safety of the set Be sure to replace these parts with specified ones for mainta...

Page 27: ... IN J701 AUDIO AMP IR3R54N IC701 AUDIO AMP IR3R59N IC703 HEADPHONES KEY SWITCH PWB SW401 EJECT SW403 LID OPEN J703A AD DA CONVERTER AK4551VT IC501 PWM MOTOR DRIVER LV8201W IC601 EEPROM 58X2402T IC402 SYSTEM MICROCOMPUTER IX0529AW IC401 2 3V REGULATOR 6204B23M IC771 4 5V REGULATOR 6204B45M IC873 1 1A F841 IC801 MM3032A 3 0V REGULATOR IC802 XP04501 IC803 S80819LN RESET Q801 Q803 Q891 Q250 Q251 Q257 ...

Page 28: ...N3 S3 S2 S1 CP2 CP1 CPC1 SWO CPC2 VG WCIN OUT2R OUT1F PE4 PCNT1 PLVON CHGON CHGCNT CHIMON PLVBAT STOP REC PF4 NMI LCDRST HKEY1 HKEY2 TEMP LDVAR Vref AVSS EPCS EEPK XRST SYD0 SYD1 SYD2 SYD3 SYD4 SYD5 SYD6 SYD7 SYWR SYRD SYRS LDON VSS DCEXT XTAL VCC RESET SPIN CIN SENSE FOK AVCC RKEY DCNT1 EJSW DISCPR DSPSTB DSPDAT DSPSCK EMPH0 PLAY TEST0 TEST1 MCPGI INPGI INPGCK CKSTP MCMON RMDAT DISCP SGAIN RACLK ...

Page 29: ...02 892 POWER TRANSISTOR TP803 EXCEPT FOR MAIN PWB VERSION 1K 100K 0 1 10K 10K 10µH IX2824AF 5 6K 8 2K 18K 5 6K 8 2K 18K 18K 18K 33K 0 01 0 1 6 8K 6 8K 6 8K 0 1 10 6 3 22 10 6 3 100 0 01 150K 1 150K 100K 2 2 1 IR3R59N 2 2K 0 1 100 33 6 3 47 6 3 0 22 6204B23M 1 0 0022 220K 100K RB731U 560K 22K 1SS389 100µH 10 6 3 6204B45M 1 1 180K 0 33 180K 270K 330K 68P CH 390K 3 3M 10K 18P CH MCH3409 47K 10K M1FH3...

Page 30: ...GCK CKSTP MCMON RMDAT DISCP SGAIN RACLK RADAT PBLAT RCLAT PBOPON EEPD VSS VSS RCPCNT VSS BUZOUT MD0 MD1 WDT0VF MD2 µSTBY VCC EXTAL VSS VSS VCC JPNP RPLAY ARQK DINT ARQD SPWDS SCK0 OPICGA EPRT PCNT2 RFPCNT TP412 TP771 TP772 9 10 11 12 13 14 15 16 17 18 19 20 21 22 23 24 8 7 6 5 4 3 2 1 9 10 11 12 13 14 15 16 17 18 19 20 21 22 23 24 8 7 6 5 4 3 2 1 AUDATA AUSCLK PBAULT PBMUTE BEEP AURESET INPGIN INP...

Page 31: ...MON RMDAT DISCP SGAIN RACLK RADAT PBLAT RCLAT PBOPON EEPD VSS VSS RCPCNT VSS BUZOUT MD0 MD1 WDT0VF MD2 µSTBY VCC EXTAL VSS VSS VCC JPNP RPLAY ARQK DINT ARQD SPWDS SCK0 OPICGA EPRT PCNT2 RFPCNT TP412 TP771 TP772 9 10 11 12 13 14 15 16 17 18 19 20 21 22 23 24 8 7 6 5 4 3 2 1 9 10 11 12 13 14 15 16 17 18 19 20 21 22 23 24 8 7 6 5 4 3 2 1 AUDATA AUSCLK PBAULT PBMUTE BEEP AURESET INPGIN INPGCK RCAULT L...

Page 32: ...V OPTICAL LINE IN HEADPHONES 1 1 1 3 4 5 3 4 5 4 5 8 TP453 TP455 TP461 TP454 TP657 TP656 TP704 TP705 TP712 TP707 TP487 TP457 TP714 TP708 TP702 TP703 TP701 TP451 TP711 TP721 TP723 TP727 TP5 TP484 TP483 TP771 TP772 TP6 TP7 TP500 TP713 TP729 TP462 TP665 TP726 TP724 TP722 TP725 TP456 TP400 TP441 TP412 TP202 TP406 TP415 TP485 TP101 TP417 TP416 TP107 TP118 TP102 TP131 TP108 TP133 TP132 TP114 TP116 TP115...

Page 33: ...808 D802 R714 L704 C714 R718 C715 R715 R716 L703 C712 C762 C503 C509 IC501 C511 C502 C501 R501 R502 C754 C753 IC703 C761 R464 C454 R766 C766 C765 R765 R404 R403 R768 R767 D496 C510 R758 R757 C760 C492 L454 C771 C869 R762 C758 D495 R761 R754 L452 L453 IC701 R701 R702 C702 R703 C701 C703 Q711 IC401 R728A R266 1 1 1 4 2 3 4 3 2 12 5 10 15 20 24 1 1 1 1 3 4 6 1 3 4 6 1 3 4 6 1 3 1 1 1 1 1 3 4 6 2 3 4 ...

Page 34: ...V OPTICAL LINE IN HEADPHONES 1 1 1 3 4 5 3 4 5 4 5 8 TP453 TP455 TP461 TP454 TP657 TP656 TP704 TP705 TP712 TP707 TP487 TP457 TP714 TP708 TP702 TP703 TP701 TP451 TP711 TP721 TP723 TP727 TP5 TP484 TP483 TP771 TP772 TP6 TP7 TP500 TP713 TP729 TP462 TP665 TP726 TP724 TP722 TP725 TP456 TP400 TP441 TP412 TP202 TP406 TP415 TP485 TP101 TP417 TP416 TP107 TP118 TP102 TP131 TP108 TP133 TP132 TP114 TP116 TP115...

Page 35: ...808 D802 R714 L704 C714 R718 C715 R715 R716 L703 C712 C762 C503 C509 IC501 C511 C502 C501 R501 R502 C754 C753 IC703 C761 R464 C454 R766 C766 C765 R765 R404 R403 R768 R767 D496 C510 R758 R757 C760 C492 L454 C771 C869 R762 C758 D495 R761 R754 L452 L453 IC701 R701 R702 C702 R703 C701 C703 Q711 IC401 R728A R266 1 1 1 4 2 3 4 3 2 12 5 10 15 20 24 1 1 1 1 3 4 6 1 3 4 6 1 3 4 6 1 3 1 1 1 1 1 3 4 6 2 3 4 ...

Page 36: ...70 75 76 80 85 90 1 7 5 10 12 13 15 20 5 TP201A CK102 1 50 51 12 13 24 25 35 36 37 48 40 45 15 20 5 10 5 8 1 4 8 5 CK108 CK139 CK100 CK202 CK203 13 13 14 15 CK418 CK205 30 CK403 CP7 6 MAIN PWB A TOP VIEW X0021AWZZ B P33 LID OPEN EJECT SW401 SW403 CK809 X0021AWZZ C P35 IC255 C113 IC101 100 IC251 XL401 IC501 IC703 IC703 IC401 MAIN PWB VE SUB PWB B is added to Figure 36 WIRING SIDE OF P W BOARD 5 11 ...

Page 37: ...02 TP131 TP108 TP133 TP132 TP114 TP116 TP115 TP144 TP117 TP106 TP130 TP201 TP110 TP103 TP111 TP481 TP452 TP407 TP209 TP210 TP208 TP411 TP204 5 10 15 60 65 70 75 76 1 1 5 4 3 3 2 80 85 90 95 100 1 TP410 TP105 TP171 TP207 TP206 TP409 TP408 TP401 20 25 26 30 35 40 45 50 51 55 TP658 TP121 TP402 TP655 TP651 TP205 TP803 TP351 TP660 TP652 TP653 TP841 TP122 TP842 TP120 TP212 1 5 10 12 13 15 20 24 TP458 TP...

Page 38: ...6 TP661 TP659 TP706 TP801 TP802 DC IN 5V OPTICAL LINE IN HEADPHONES 1 1 1 3 4 5 3 4 5 4 5 8 TP453 TP455 TP461 TP454 TP657 TP656 TP704 TP705 TP712 TP707 TP487 TP457 TP714 TP708 TP702 TP703 TP701 TP451 TP711 TP721 TP723 TP727 TP5 TP484 TP483 TP771 TP772 TP6 TP7 TP500 TP713 TP729 TP462 TP665 TP726 TP724 TP722 TP725 TP456 TP400 TP441 TP412 TP202 TP406 TP415 TP485 TP101 TP417 TP416 TP107 TP118 TP102 TP...

Page 39: ...R811 R809 Q891 R802 R803 R810 R808 D802 R714 L704 C714 R718 C715 R715 R716 L703 C712 C762 C503 C509 IC501 C511 C502 C501 R501 R502 C754 C753 IC703 C761 R464 C454 R766 C766 C765 R765 R404 R403 R768 R767 D496 C510 R758 R757 C760 C492 L454 C771 C869 R762 C758 D495 R761 R754 L452 L453 IC701 R701 R702 C702 R703 C701 C703 Q711 IC401 C867 C866 R728A R266 1 1 1 4 2 3 4 3 2 12 5 10 15 20 24 1 1 1 1 3 4 6 1...

Page 40: ...P661 TP659 TP706 TP801 TP802 DC IN 5V OPTICAL LINE IN HEADPHONES 1 1 1 3 4 5 3 4 5 4 5 8 TP453 TP455 TP461 TP454 TP657 TP656 TP704 TP705 TP712 TP707 TP487 TP457 TP714 TP708 TP702 TP703 TP701 TP451 TP711 TP721 TP723 TP727 TP5 TP484 TP483 TP771 TP772 TP6 TP7 TP500 TP713 TP729 TP462 TP665 TP726 TP724 TP722 TP725 TP456 TP400 TP441 TP412 TP202 TP406 TP415 TP485 TP101 TP417 TP416 TP107 TP118 TP102 TP131...

Page 41: ...811 R809 Q891 R802 R803 R810 R808 D802 R714 L704 C714 R718 C715 R715 R716 L703 C712 C762 C503 C509 IC501 C511 C502 C501 R501 R502 C754 C753 IC703 C761 R464 C454 R766 C766 C765 R765 R404 R403 R768 R767 D496 C510 R758 R757 C760 C492 L454 C771 C869 R762 C758 D495 R761 R754 L452 L453 IC701 R701 R702 C702 R703 C701 C703 Q711 IC401 C867 C866 R728A R266 1 1 1 4 2 3 4 3 2 12 5 10 15 20 24 1 1 1 1 3 4 6 1 ...

Page 42: ...ECHANISM FLEXIBLE PWB 19 P33 P35 P39 P41 8 C D P33 P35 P39 P41 9 C D TO MAIN PWB P33 P35 P39 P41 8 9 E F TO MAIN PWB P33 P35 P39 P41 9 10 C D TO MAIN PWB LCD UNIT 229 KEY SWITCH FLEXIBLE PWB 228 TO MAIN PWB CN601 CN101 CN482 CN451 M901 M902 M903 Figure 42 WIRING SIDE OF P W BOARD 11 11 ...

Page 43: ... 3 1 2 4 5 3 1 2 4 5 6 7 8 9 10 11 12 13 14 3 1 2 4 3 37 38 40 41 42 43 44 45 46 47 48 39 1 2 4 5 6 7 8 9 10 11 12 13 14 15 16 17 18 19 20 21 22 23 24 25 26 27 28 29 30 31 32 33 34 35 36 52 53 55 56 57 58 59 60 61 62 63 64 54 49 50 51 3 1 2 4 5 6 7 8 9 10 11 12 13 14 15 16 17 18 19 20 21 22 23 24 3 0 79V 2 61V 1 31V 0V 2 61V 1 31V 1 31V 1 31V 1 31V 1 31V 1 31V 1 31V 1 31V 1 63V 0V 0V 1 31V 0V 0V 0...

Page 44: ...thiing OFF BW FULL CH1 0 000V CH2 0 00V Main 1K Zoom 1K CH3 0 00V CH4 0 00V Trigger Mode AUTO Type EDGE CH1 Detay 0 0ns Hold OFF MINIMUM T TP201 EFMMON Stopped CH1 2V DC 10 1 500ms div 500ms div 1 MORM 200MS s 9 1994 12 15 08 57 26 Filter Offset Record Length Smoothiing OFF BW FULL CH1 0 00V CH2 0 00V Main 10K Zoom 10K CH3 0 000V CH4 0 0V Trigger Mode NORMAL Type EDGE CH1 Detay 0 0ns Hold OFF MINI...

Page 45: ...ned below Turn the power off Gently clean the lens with a lens cleaning tissue and a small amount of lens cleaner on the market Do not touch the lens with the bare hand Is the power supply turned on when the main unit button is pressed No Perform the check stated in item Power is not turned on when the PLAY button is pressed Perform the check stated in item Abnormal display No Yes Does the display...

Page 46: ...eriphery of headphone Although the playback time display is acting no sound is given during playback in the normal mode The spindle motor fails to run Does the head move No Does the waveform appear on the IC201 pins 24 and 25 after TEST mode AUTO2 completion and in this state Check the IC201 periphery Yes Does waveform appear on the IC601 pin 36 Does waveform appear on IC601 pins 56 57 and 58 Repl...

Page 47: ...recording VOLUME button operation Check whether the soldering of IC701 is poor No Check whether the audio signal line between IC701 and J701 is defective Is audio waveform observed on the pins 10 and 12 of IC701 Yes Check whether input waveform is observed on the pins 5 and 6 of IC701 Yes Check voltage of pins 57 and 58 of IC201 pins 3 4 7 and 9 of IC651 pins 4 and 5 of CN601 Check whether disc is...

Page 48: ...gital plug insertion detection 35 PC3 INPGCK Input Line digital plug type detection 36 PC4 RCPCNT Input Output Record circuit power control output 37 PC5 TEST1 Input Test mode setting input 1 38 PC6 TEST0 Input Test mode setting input 0 39 PC7 JPNP Input Kana conversion Kana input existence nonexistence discrimination 40 VCC VCC Positive power supply 41 PB0 OPICGA Output P U detection sensitivity ...

Page 49: ... voltage detection 81 AN2 TEMP Input Ambient temperature detection input 82 AN3 RKEY Input Remote control key operation detection input 83 AN4 HKEY1 Input Unit key operation detection input 1 84 AN5 HKEY2 Input Unit key operation detection input 2 85 P46 AN6 DA0 CHGCNT Output Charging current control output 86 DA1 LDVAR Output P U laser power setting output 87 AVSS AVSS A D and D A converter groun...

Page 50: ...of EMPH port settings H H Brake H L Drive UP L H Drive DOWN L L Output OFF LDCNT1 LDCNT0 Details 3 List of LDCNT port settings TEST0 76 77 78 79 80 81 82 83 84 85 86 87 88 89 90 91 92 93 94 95 96 97 98 99 100 1 2 3 4 5 6 7 8 9 10111213141516171819202122232425 75747372717069686766656463626160595857565554535251 50 49 48 47 46 45 44 43 42 41 40 39 38 37 36 35 34 33 32 31 30 29 28 27 26 TOTMON TEMON H...

Page 51: ...al controls the VCO oscillation frequency 22 RMAX VCO maximum frequency setting terminal The resistor is connected to the GND terminal The frequency rises by lowering the resistance With the VCOIN terminal set to VCC 1V the VCO oscillation frequency is set to more than 48 times of the switching frequency at the highest revolution speed of the motor 23 RMIN VCO minimum frequency setting terminal Th...

Page 52: ...acitor is connected between this terminal and CPC1 terminal pin 51 51 CPC1 Charge pump booster terminal The capacitor is connected between this terminal and CP1 terminal pin 50 52 CPC2 Charge pump booster terminal The capacitor is connected between this terminal and CP2 terminal pin 49 Open this when used with doubled voltage 53 VG Charge pump booster output terminal The capacitor is connected to ...

Page 53: ...ted 7 A10 Address input 8 11 A0 A3 Address input 12 Vcc Power supply 2 6V 13 GND Ground 0V 14 19 A4 A9 Address input 20 OE Output enable 21 CAS Column address strobe 22 I O3 Data input data output 23 I O4 Data input data output 24 GND Ground 0V IC202 RH iX2824AFZZ 16M Bit D RAM IX2824AF In this unit the terminal with asterisk mark is open terminal which is not connected to the outside ...

Page 54: ... 54 MD MT180 M E M O ...

Page 55: ...ylindrical type without lead wire VC MN Cylindrical type without lead wire VC TV Square type without lead wire VC TQ Square type without lead wire VC CY Square type without lead wire VC CZ Square type without lead wire VC J The 13th character represents capacity difference J 5 K 10 M 20 N 30 C 0 25 pF D 0 5 pF Z 80 20 If there are no indications for the electrolytic capacitors error is 20 Resistor...

Page 56: ... VHDM1FH3 1 J AD Schottky M1FH3 D841 VHDF10J2E 1 J AC Silicon F10J2E D842 843 VHDHRB0103B 1 J AC Silicon HRB0103B D851 VHDM1FH3 1 J AD Schottky M1FH3 D861 862 VHDF10J2E 1 J AC Silicon F10J2E COILS L100 VPBNN100K0000 J AC 10 µH L101 RCILC0353AFZZ J AB Tip Solid Induction 100mA L171 RCILC0356AFZZ J AC 10 µH L202 VPBNN100K0000 J AC 10 µH L204 RCILC0353AFZZ J AB Tip Solid Induction 100mA L452 RCILC035...

Page 57: ...CY1JB273F J AA 27 kohms 1 16W R261 VRS CY1JB102J J AA 1 kohm 1 16W R262 VRS CY1JB124F J AA 120 kohms 1 16W R266 VRS CY1JB473F J AA 47 kohms 1 16W R267 VRS CY1JB103F J AA 10 kohm 1 16W R269 VRS CY1JB393F J AF 39 kohms 1 16W R270 271 VRS CY1JB683F J AA 68 kohms 1 16W R272 VRS CY1JB101J J AA 100 ohm 1 16W R277 VRS CY1JB393J J AA 39 kohms 1 16W R279 VRS CY1JB101J J AA 100 ohm 1 16W R281 VRS CY1JB223J ...

Page 58: ...5mm 504 LX JZ0034AWZZ J AA Screw ø1 4 5mm 505 LX JZ0167AFZZ J AB Screw ø1 4 3 0mm 506 LX WZ9290AFZZ J AA Washer ø0 8 ø2 4 0 2mm M901 RMOTV0044AWZZ J AW Motor Ass y Spindle M902 RMOTS0002AWZZ J AT Motor Ass y Sled M903 RMOTV0033AWZZ J AW Motor Ass y Lift CABINET PARTS 201 GCABA1258AWSA J AN Top Cabinet 202 GCABB1272AWSA J AL Bottom Cabinet 203 GCOVA1414AWSB J AD Cover Terminal 204 GDORB0005AWSB J A...

Page 59: ...MD MT180 A B C D E F G H 1 2 3 4 5 6 Figure 4 MD MECHANISM EXPLODED VIEW 4 1 16 4 3 2 17 M901 M902 M903 12 19 20 502x2 505x3 503 504 503 501x2 501 13 18 15 8 6 5 9 10 11 7 14 506 ...

Page 60: ... 5 MD MECHANISM PWB A 205 206 229 231 228 208 207 201 202 203 204 211 227 209 212 210 215 222 214 226x2 217 218 219 220 221 230 223 224 225 606x2 606 603 603 608 608 609 604 605 604 603x2 607 601 601 216 213 Figure 5 CABINET EXPLODED VIEW ...

Page 61: ...A Type Rechargeable Battery Battery Carring Case Battery Case Operation Manual Quick Guide Packing Case SPAKC1341AWZZ Pad Operation Manual SPAKZ0490AWZZ Pad Unit SPAKA0336AWZZ Bag Polyethylene SSAKH0033AWZZ Label Bar Code TLABR1254AWZZ Label SER No Packing Case TLABN0190AWZZ Label SER No Set TLABN0092AWZZ ...

Page 62: ...MD MT180 MEMO ...

Page 63: ...MD MT180 MEMO ...

Page 64: ...hima Hiroshima 739 0192 Japan SC COPYRIGHT 2002 BY SHARP CORPORATION ALL RIGHTS RESERVED No part of this publication may be reproduced stored in a retrieval system or transmitted in any from or by any means electronic mechanical photocopying recording or otherwise without prior written permission of the publisher ...

Reviews: