background image

16

Preparation

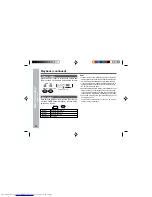
– Hold Function –

Hold Function

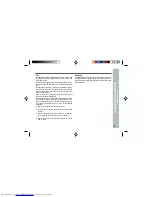
The present operation condition can be kept even if other buttons are accidentally pressed in a place such
as a crowded train.

To cancel the hold mode
Move the HOLD switch away from the safety posi-
tion (the opposite direction of the arrow).

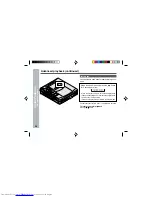
If the hold function is active while the power is
turned off, the power cannot be turned on by mis-
take and the battery will not be drained.

If the battery is inserted or the AC adaptor is connected,
you can set this function even when the power is turned
off.

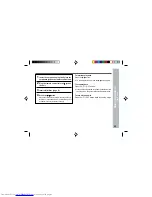
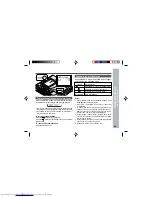
To cancel the hold mode

Press and hold down the • 

■ 

/ –HOLD button for 2 sec-

onds or more while the unit is in the hold mode.

“HOLD OFF” will be shown.

Hold

Release

Press the • 

■ 

/ –HOLD button for 2 seconds

or more.

Move the HOLD switch to the safety position
(direction indicated by the arrow).

Orange mark

Remote control unit

Main unit

Hold

Summary of Contents for MD-MT877

Page 1: ...ORTABLE MINIDISC RECORDER Thank you for purchasing this SHARP product For the best performance read this manual carefully It will guide you in operating your SHARP product MODEL MD MT877 OPERATION MANUAL ...

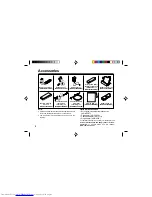
Page 2: ... UBATM0006AWSA RUNTZ0032AWM1 Connection Cable Connection Cable Battery Carrying for analog for digital Carrying Bag x 1 Battery Case x 1 Case x 1 recording x 1 recording x 1 UBAGC0006AWSA GCASZ0002AWSA UBAGC0005AWZZ QCNWG0029AWZZ QCNWG0422AFZZ 2 Optional accessories Rechargeable Nickel Metal Hydride Battery AD N55BT Car adaptor AD CA55X Cassette adaptor AD CT14 Plug adaptor AD M66PA For optional a...

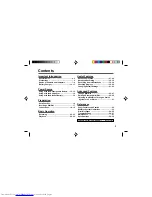
Page 3: ...ation Recording 20 23 Playback 24 26 3 Useful Features Advanced Playback 27 29 Advanced Recording 30 35 Recording from a Microphone 36 38 Checking Displays 39 40 Changing Default Settings 41 42 Advanced Features Titling a MiniDisc 43 47 Editing a Recorded MiniDisc 48 50 Listening to a MiniDisc Through a Stereo System or a Car Stereo 51 References Other Features and Caution 52 MiniDisc System Limit...

Page 4: ...AINS NICKEL METAL HYDRIDE BATTERY MUST BE DISPOSED OF PROPERLY CONTACT LOCAL AGENCIES FOR INFORMATION ON RECY CLING AND DISPOSAL PLANS IN YOUR AREA US and foreign patents licensed from Dolby Laborato ries The letters in brackets contained in the model number indicate the color of the product only Operation and specifications are unaffected FOR YOUR RECORDS For your assistance in reporting this uni...

Page 5: ...there is no guarantee that interference will not occur in a particular installation If this equipment does cause harmful interference to radio or television reception which can be determined by turn ing the equipment off and on the user is encouraged to try to correct the interference by one or more of the following measures Reorient or relocate the receiving antenna Increase the separation betwee...

Page 6: ...upply other than the 5V DC supplied with this unit as it may damage it SHARP is not responsible for damage due to improper use Refer all servicing to a SHARP authorized service center Storing the unit Avoid using or leaving the unit in the following places Places exposed to direct sunlight for many hours especially in cars with the doors and windows closed or near heaters The cabinet may deform ch...

Page 7: ... Forward Fast Reverse Recording Level Name Select Button 20 26 27 30 41 45 4 Stop Power Off Hold Button 16 22 25 41 5 Open Lever 17 6 Display Character Select Button 39 40 43 7 Edit Auto Mark Time Mark Button 34 38 43 50 8 Play Pause Button 20 24 9 Enter Fast Play Synchro Button 29 43 50 10 Bass Delete Button 26 44 11 Rechargeable Battery Cover 12 12 Handstrap Holder 13 Optical Line Input Jack 18 ...

Page 8: ...display panel 3 color LED Various modes are indicated with three colors of lights Charging Lighting starting with yellow green light Refresh Extinguishing starting with orange light after all the lights are lit Playback Flashing the color of the activated play back mode Recording Flashing the color of the activated re cording mode Fast Forward Flashing starting with yellow green light Fast Reverse...

Page 9: ...r Indicator 09 Long play Recording Mode Indicator 10 Repeat Indicator Names of Controls and Indicators continued Important Introduction Names of Controls and Indicators Remote control display panel 1 8 6 7 9 2 3 4 5 Remote control unit 1 Earphones Jack 24 2 Fast Forward Fast Reverse Button 3 Display Button 4 Play Mode Button 29 5 Sound Track Mark Button 26 34 6 Stop Power Off Button 22 25 7 Play P...

Page 10: ... Hook For Fixing The Main Unit 4 Charge Operation Switch 11 5 Stand 6 AC Adaptor Connecting Jack 18 19 Names Setting CHARGE OPERATION 1 2 3 4 Before setting the portable MD to the battery charger make sure the battery charger is in the charge mode CHARGE If you insert the portable MD by force while in the operation mode OPERATION the hook for fixing the portable MD may break Operating while in the...

Page 11: ... Using with the Re chargeable Battery page 12 For operations Move it to the operation mode when playing back or recording see Using with the AC Adaptor page 14 Move the Charge Operation switch to the charge mode Charge mode RELEASE Setting the battery charger and hanging the remote control When the remote control is not used hang it on the holder for your convenience For use with the AC adaptor Wh...

Page 12: ...t fully After the rechargeable battery is charged or used it will get slightly warm This is normal When the portable MD is turned on or operating the battery will not be charged To the DC IN 5V jack AC 120V 60Hz Charge mode Do not force the battery cover open too far 1 Insert the rechargeable battery 2 Move the Charge Operation switch to the charge mode 3 Place the portable MD into the battery cha...

Page 13: ...ry charger Display Conditions Scrolling Charging Turns off The charging is complete When the portable MD is not in serted correctly to the battery charger or Rechargeable terminal is dirty it may not be possible to charge the bat tery Wipe the terminal by cotton swab Refreshing The unit checks and if necessary discharge the rechargeable battery to recharge it automatically At this time battery ind...

Page 14: ...s possible See How to use the Charge Operation switch page 11 When the unit is not in use for extended periods re move the AC adaptor from the AC outlet Insert the plugs firmly Note When power failure occurs while playing back using the AC adaptor disconnect the adaptor from the AC outlet Otherwise playback may start automatically when the power returns To the DC IN 5V jack AC 120V 60Hz Operation ...

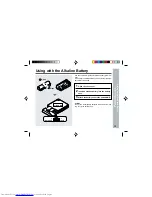
Page 15: ...e recharge able battery is inserted Caution Do not use rechargeable batteries nickel cadmium bat tery etc in the battery case Power Source Using with the Alkaline Battery Using with the Alkaline Battery 1 Open the case cover 2 Insert an alkaline battery into the battery case 3 Attach the battery case to the portable MD 1 2 Press Open Back of the portable MD RELEASE LOCK ...

Page 16: ...s turned off the power cannot be turned on by mis take and the battery will not be drained If the battery is inserted or the AC adaptor is connected you can set this function even when the power is turned off To cancel the hold mode Press and hold down the HOLD button for 2 sec onds or more while the unit is in the hold mode HOLD OFF will be shown Hold Release Press the HOLD button for 2 seconds o...
Page 17: ...ny resistance is felt do not force the MiniDisc into the unit as it may cause damage to the unit If resistance is felt remove the MiniDisc and reload it The lid cannot be opened if TOC is displayed refer to the instruction on page 22 3 4 1 2 Preparation Inserting a MiniDisc Recordable Recording prevented When you record on a MiniDisc check that the erase prevention tab is set to the recordable pos...

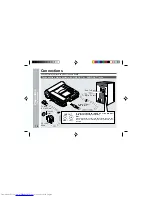
Page 18: ... with LINE OUT or AUDIO OUT jacks See left Analog connection Note If the audio system has only one pair of jacks they are usu ally for input only and recording via this connection is not possible AC 120V 60Hz To connect to a stereo system with LINE OUT or AUDIO OUT jacks You can record your favorite CDs or tapes to an MD Preparation Connections ...

Page 19: ...TICAL OUT jack To a stereo system with a DIGITAL OUT jack See left Digital connection Compared to analog connection recording it allows a high quality recording Note Some audio systems do not have a DIGITAL OUT jack Check before connecting To the OPTICAL LINE IN jack AC 120V 60Hz To an AC outlet To the DC IN 5V jack ...

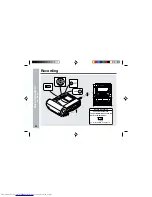
Page 20: ...20 Recording Basic Operation Recording As for the details see page 16 Before Recording Cancel the hold mode The portable MD does not work while in the hold mode ...

Page 21: ...ecording level so that the maximum sound volume from the source makes the reading swing somewhere between 4 dB and 0 dB 0dB 4dB Digital recording You can adjust the level in 1 dB increments within the range of 12 12dB Once you adjust the digital recording level the set ting remains even after the recording stops For cancellation instructions see page 41 4 Press the PAUSE button on the stereo sys t...

Page 22: ... Caution While TOC or TOC EDIT is displayed follow the in structions below Do not jerk or bump the unit Do not unplug the AC adaptor Do not remove the rechargeable battery or an alkaline battery Do not subject the unit to shock Otherwise tracks may not be recorded properly To interrupt recording Press the 06 button To resume recording press the 06 button again The track number will be increased by...

Page 23: ... of the MiniDisc in the direction indicated by the arrow The MiniDisc will then be protected against accidental era sure To add a recording to such a MiniDisc slide the ac cidental erase prevention tab back to its original po sition Recording prevented Recordable About sampling rate converter This portable MD incorporates a sampling rate converter meaning it can record from digital radios or DAT t...

Page 24: ... Playback Playback To the jack Main unit Remote control unit Release As for the details see page 16 Before Playing back Cancel the hold mode The portable MD does not work while in the hold mode Left channel Right channel ...

Page 25: ... automatically with a playback only MiniDisc or a MiniDisc which is protected against accidental erasure Auto play function To interrupt playback Press the 06 button To resume playback press the 06 button again To stop playback Press the OFF button If the unit is not operated for at least 2 minutes while in the stop mode the power will shut off automatically To turn off the power Press the OFF but...

Page 26: ...have very little noise If the volume is adjusted according to your usual expec tations of noise high volume may damage your hearing The sound escaping from your earphones may annoy people around you In particularly crowded places such as on trains or buses reduce the volume Volume control Press the VOL button to increase the volume and the press the VOL button to decrease the volume Bass control E...

Page 27: ...nd hold down the 4 button during play back For audible fast reverse Press and hold down the 5 button during play back Normal playback will resume when the 5 or 4 button is released When the end of the last track is reached during fast forward the unit will enter the pause mode When the beginning of the first track is reached during fast reverse the unit will enter the playback mode To locate the b...

Page 28: ...paused press the 06 button for 2 seconds or more When the playback mode is set as random playback random repeat playback or one track repeat playback the intro scan is not possible In this case the playback is started in the normal mode The duration that INTRO PLAY is displayed is not fixed To return to normal playback Press the 06 06 06 06 06 button ...

Page 29: ...dom play the unit cannot find the beginning of any track which has been played Repeat play lasts until you stop the unit To play at double speed Mono recording only Press the ENTER button while a MiniDisc recorded in the monaural long play mode is being played If a track recorded in the stereo mode is reached during fast playback the fast playback mode will be canceled Depending on the contents re...

Page 30: ...pause function does not work for approximately 10 seconds after a recording starts When the unit receives sound again recording automati cally starts A new track number is created when the recording resumes Useful Features Advanced Recording 3 Press the 5 5 5 5 5 or 4 4 4 4 4 button to adjust the recording level 4 Press the PAUSE button on the stereo sys tem to enter the playback pause mode Select...

Page 31: ...e REC button To cancel the operation press the OFF button 3 Press the ENTER button All of the tracks and track names will be erased following the point where the playback is paused 4 Press the MODE button repeatedly to se lect the recording mode page 32 5 Press the 06 06 06 06 06 button Recording will start To start recording from the middle of a track You can erase a portion of a track and make a...

Page 32: ...rt recording Long play recording Stereo recoding Monaural recording 2 times and 4 times long recording Double or quadruple time of stereo recording is possible Monaural recording In monaural you can record twice as long as the stereo recording SP STEREO A track recorded in monaural can be played back in double speed see page 29 2 times long recording 4 times long recording The recording mode remai...

Page 33: ...al recording Recordable time varies depending on the recording mode If the tracks are recorded on an 80 minute MiniDisc you can record them in the following 4 modes Caution for 4 times long recording LP4 Special compressing method allows the 4 times long re cording to realize long time stereo recording Therefore some noise is recorded occasionally If sound quality is the main requirement stereo re...

Page 34: ... operation will be disabled In that case wait until the next operation can be resumed In stereo recording Within 40 seconds In 2 times long recording Within 80 seconds In 4 times long recording Within 160 seconds In monaural recording Within 80 seconds Advanced Recording continued Useful Features Advanced Recording Recording tracks as a single track You can record several pieces of music as a sing...

Page 35: ... function Track numbers may not be created in proper places depending on the source to be recorded from such as signals with noise The track numbers on the playback side may not match the track numbers recorded on the MiniDisc When recording if a programmed playback is performed by the source or playback is performed by selecting tracks manually the MiniDisc track numbers may not be the same as on...

Page 36: ...ress the OFF button To write recorded contents on the MiniDisc Press the OFF button while in the stop mode Recording from a Microphone To the MIC IN jack Stereo microphone commercially available 0dB 4dB Level meter Adjust the recording level so that the maximum sound volume from the source makes the reading swing somewhere between 4 dB and 0 dB 5 Press the MODE button repeatedly to se lect the rec...

Page 37: ...nged while recording 1 Press the REC button 2 Press the 5 5 5 5 5 or 4 4 4 4 4 button to adjust the recording level 3 Press the MODE button repeatedly to se lect the recording mode page 32 4 Press the ENTER button to select the re cording sensitivity MIC SYNC H Recording starts when the unit detects 24 dB or more The unit can start recording from quiet sounds MIC SYNC L Recording starts when the u...

Page 38: ...o 5 minutes During a mic manual recording Timed auto marks will be created every 5 minutes A new track number is created every 10 minutes A new track number is created every 3 minutes Creating track numbers manually Press the REC button while recording During a mic synchro recording If a silence lasts for 3 seconds or more a timed auto mark will be created 5 minutes after the previous mark is crea...

Page 39: ...maining recording time will not be displayed with a playback only MiniDisc Elapsed playback time and remaining playback time may be different from the actual time To check the elapsed time and remaining time of the track During playback press the DISP button Each time the button is pressed the display will change as follows Elapsed playback time Remaining playback time Track name Remaining time of...

Page 40: ...ine battery with a new one When the battery has run completely out BATT EMPTY LoBATT will appear Then the power will be discon nected automatically Notes If you use the battery which you stopped charging half way may appear It does not mean that the bat tery is completely charged The battery indicator will not correctly display the remain ing capacity for approximately 20 seconds after the power h...

Page 41: ...itch items 4 Press the OFF button While in the stop mode indicates default setting MENU BEEP ON Confirmation sound A PLAY ON Auto play AUTO Psave Auto power save D L MODE 1 Digital recording level LIGHT NORM 3 color LED illu mination Backlight on the remote control Display on the remote control SETTING ITEM BEEP ON Beep BEEP OFF Silent A PLAY ON Setting A PLAY OFF Canceled AUTO Psave Setting Psave...

Page 42: ...n is canceled the storage time cannot be adjusted It cannot be adjusted even if it is operated on the battery charger The storage time varies depending on the play back mode Operation indicator backlight on the remote control and display on the remote control The illuminating pattern of the 3 color LED and the remote control can be changed LIGHT NORM 3 color LED Indication lamp is flashing Backlig...

Page 43: ... Creating disc and track names Load a MiniDisc to be named A playback only or record ing prevented MiniDisc cannot be edited 1 While in the pause mode with DISC dis played press the EDIT button repeatedly to select DISC NAME While in the pause mode press the EDIT button repeatedly to select TRACK NAME Disc name Track name Capital letters Lower case letters Numbers and symbols Continued to the next...

Page 44: ... MiniDisc continued Note One disc name and up to 255 track names can be created per disc A maximum of 100 characters for the disc and each track name and a total of 1 700 characters can be entered However if any tracks are recorded in the 2 times or 4 times long recording mode the number of characters to be entered is decreased since the information of the recording mode is stored by the track 7 W...

Page 45: ...character where you want to add a new character 3 Select the character to add Perform steps 3 4 on page 43 4 Press the ENTER button Titling a MiniDisc continued 5 Press the EDIT button 6 TOC will be displayed To write the up dated contents to the MiniDisc press the OFF button You cannot remove the MiniDisc while TOC is dis played TOC will not disappear until the recorded contents have been updated...

Page 46: ... character information disc and track names of the Master MiniDisc to another MiniDisc for stamping Titling a MiniDisc continued 1 What is a master MiniDisc A recordable MiniDisc that contains tracks and char acter information You cannot transfer the information from a play back only MiniDisc 2 What is a MiniDisc for stamping A MiniDisc that contains the same tracks in the same order as the master...

Page 47: ...is happens adjust the total number of tracks on the newly recorded MiniDisc using the edit operation 4 Press the ENTER button 5 When the unit displays CHANGE MD remove the master MiniDisc Remove it without turning off the power Or the op eration will be canceled 6 Load a MiniDisc for stamping Operation of the MiniDisc for stamping 7 Press the ENTER button The unit will finish recording the charact...

Page 48: ...be erased 5 To erase other tracks repeat steps 1 4 1 While in the stop mode press the EDIT but ton repeatedly to select ALL ERASE 2 Press the ENTER button To cancel the operation press the OFF button 3 Press the ENTER button again All of the tracks will be erased Caution Once a track has been erased it cannot be recovered Check the track number before erasing it To erase tracks one at a time To er...

Page 49: ...two tracks and the unit will pause at the beginning of the second of the two new tracks Editing a recorded MiniDisc continued Advanced Features Editing a Recorded MiniDisc To combine tracks 1Start playing the last of the two tracks to be combined and press the 06 06 06 06 06 button 2Press the EDIT button repeatedly to select COMBINE 3Press the ENTER button To cancel the operation press the OFF but...

Page 50: ...ssigned tracks has not reached 254 it might not be possible to make any further divisions of tracks To combine two non adjacent tracks First put the two tracks next to each other in the order you want using the MOVE function Then combine them using the COMBINE function When one or both tracks to be combined have a name The first track name will be used However when the first track does not have a ...

Page 51: ... of both this portable MD and a car stereo Do not operate this portable MD while you drive a car It may distract your attention and cause a traffic accident Do not use any car adaptor except for the separately available AD CA55X Remove the battery when you power the unit from the car battery Do not leave the unit in the place of high temperature such as in a car If the unit gets hot the LCD displa...

Page 52: ...e of the special quality of this battery The rechargeable battery can be charged approximately 300 times When the operating time is reduced to about half the normal amount of time even after a full charge is per formed replace the battery with a new one AD N55BT When the battery is charged for the first time or is charged after not being used for a long period the operating time may be shorter tha...

Page 53: ...rding time If the MiniDisc is recorded or edited repeatedly or if it has scratches record ing skips scratched parts you may not be able to record the maximum tracks above The unit does not count non recorded portions that last 12 or fewer seconds to display the remaining recording time The time may not increase even if you erase short tracks One cluster approximately 2 seconds is the minimum unit ...

Page 54: ...he disc is scratched The disc is out of recording space The microprocessor has reported a system fault and the unit is out of order The unit is in the hold mode You removed a MiniDisc while recording or editing REMEDY Charge the rechargeable battery or replace the alka line battery or use the AC adaptor for power Replace the disc with a recorded disc Record using the analog cable Change the stop p...

Page 55: ...rmation track names disc names etc The track has been protected from being erased A disc which contains data other than music was played There is an error in the signal recorded on the disc Stamping is not possible REMEDY Load a disc Connect the digital cable securely If the portable CD player has a function to prevent sound skips deactivate it Playback with the connected unit Replace it with a re...

Page 56: ...c contain ing music Is the unit in the hold mode Is the battery exhausted Is the remote control unit plug or the earphones plug inserted firmly Is the battery exhausted Is the unit being subjected to exces sive vibration Has the track number or character information been updated on the disc yet Is the unit in the recording or edit ing mode Is the MiniDisc protected against accidental erasure Is th...

Page 57: ...e inside of the unit It may cause malfunctions Cleaning When the unit becomes dirty Clean it with a soft cloth When the unit is excessively dirty use a soft cloth damp ened in water external surfaces only Clean the plugs and the connecting jack If the plugs or jacks are dirty noise may be heard Cleaning will prevent noise Maintenance Moisture condensation When the unit has condensation inside the ...

Page 58: ...PA Power consumption 7 W AC adaptor Output power RMS 10 mW 5 mW 5 mW 0 2 T H D Charging time Approx 3 5 hours Input sensitivity MIC H reference input level 0 25 mV input impedance 10 k ohms MIC L reference input level 2 5 mV input impedance 10 k ohms LINE reference input level 100 mV input impedance 20 k ohms Output level Earphones maximum output level 5 mW 5 mW load impedance 32 ohms LINE specifi...

Page 59: ...ing play Approx Approx Approx Approx Approx Approx 6 5 hours 12 hours 9 hours 13 5 hours 11 5 hours 15 hours Continuous Continuous Continuous Continuous Continuous Continuous recording play recording play recording play Approx Approx Approx Approx Approx Approx 6 hours 16 hours 10 hours 19 5 hours 13 hours 22 hours Continuous Continuous Continuous Continuous Continuous Continuous recording play re...

Page 60: ...ibed herein on behalf of Sharp The warranties described herein shall be the sole and exclusive warranties granted by Sharp and shall be the sole and exclusive remedy available to the purchaser Correction of defects in the manner and for the period of time described herein shall constitute complete fulfillment of all liabilities and responsibilities of Sharp to the purchaser with respect to the Pro...

Reviews: