36
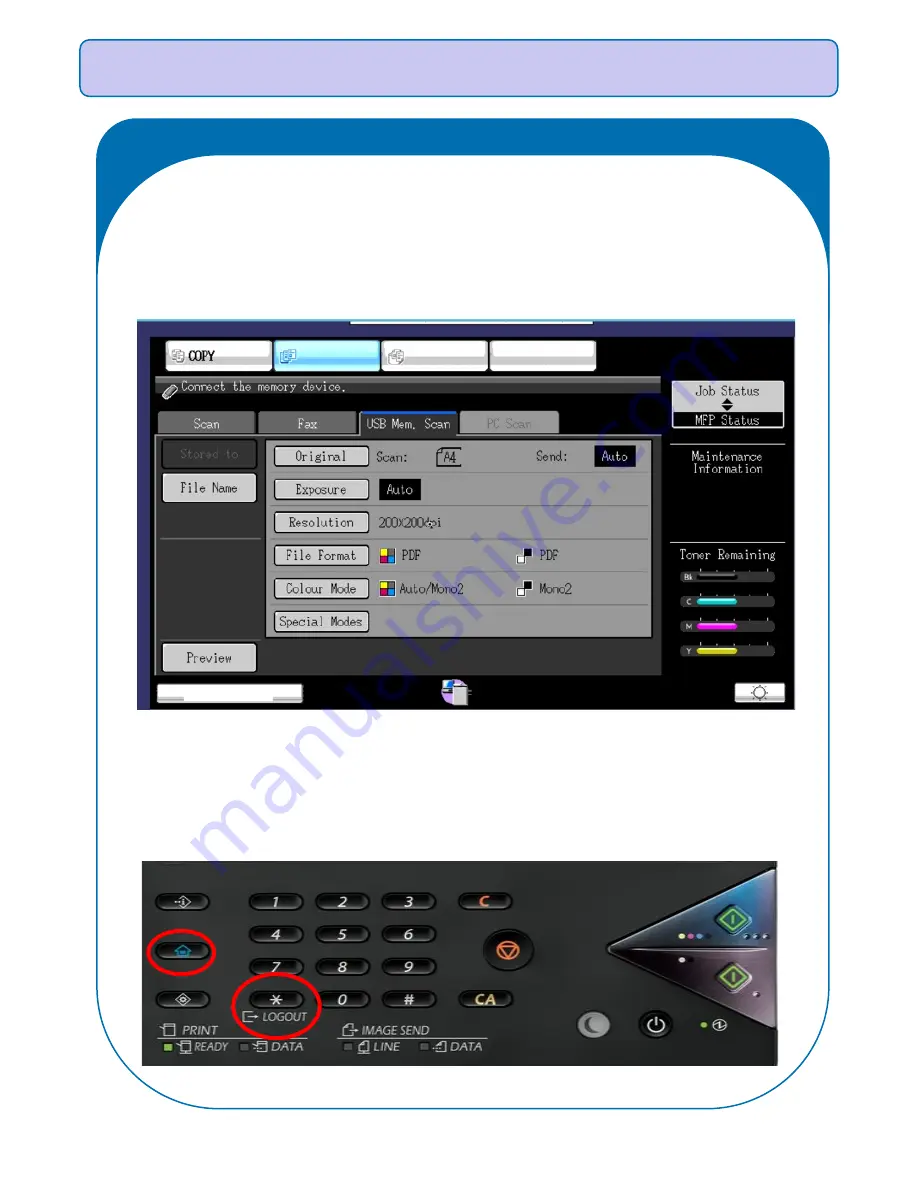
Scan to USB
Scan to USB
If you select Scan to USB you will be prompted to connect your memory
device. The USB port is to the side of the tilting screen.
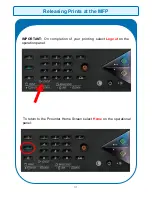
IMPORTANT:
On completion of your scanning select
Logout
at the
top of the touch screen.
To return to the Pcounter Home Screen you simply press the
Home
button
on the right of the touch screen.
Summary of Contents for MX-5141
Page 2: ...Sharp Business Systems UK Plc Ver 1 00 ...
Page 3: ...1 How to Print with The New Sharp Print Queues Printer Guide and Reference Information ...
Page 9: ...Authentication at the MFD 7 How to Authenticate at the MFPs MX 5141 ...
Page 12: ...10 Photocopying How to Access Photocopying MX 5141 ...
Page 15: ...13 How to Release Prints at the MFD MX 5141 Releasing Prints at the MFD ...
Page 19: ...Scan to Email 17 How to Scan at the MFD MX 5141 ...
Page 27: ...Photocopying 25 How to Access Photocopying MX C301W ...
Page 30: ...28 How to Release Prints at the MFP MX C301W Releasing Prints at the MFP ...

