91
4
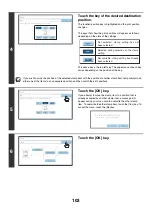
Check the displayed date. If you need to
change the date, touch the [Date
Change] key.
Set the date that you wish to use and touch the [OK] key.
• If you select a date that does not exist (such as Feb. 30), the [OK] key will be grayed out to prevent entry.
• Changing the date here will not change the date that is set in the machine using "Clock" in the system settings.
5
Select the pages that the date will be
printed on and touch the [OK] key.
Select printing on the first page only, or printing on all pages.
After touching the [OK] key, continue from step 5 of "
" (page 87) to complete the
copy procedure.
To cancel the date print setting...
Touch the [Cancel] key in the screen of step 2.
Cancel
Color
B
k(
B
lack)
O
K
Date
C
h
ange
MM
DD
,
YYYY
DD
/
MM
/
YYYY
APR
/
01
/
2006
All
Pages
First
Page
Sta
m
p
Date
MM
/
DD
/
YYYY
YYYY
/
MM
/
DD
Sta
m
p
Date
C
h
ange
O
K
04
01
2006
Year
Mont
h
Day
Cancel
Color
B
k(
B
lack)
O
K
Date
C
h
ange
MM
DD
,
YYYY
DD
/
MM
/
YYYY
APR
/
01
/
2006
All
Pages
First
Page
Sta
m
p
Date
MM
/
DD
/
YYYY
YYYY
/
MM
/
DD
Summary of Contents for MX-6201N Series
Page 1: ...User s Guide MX 6201N MX 7001N MODEL ...
Page 82: ...Copier Guide MX 6201N MX 7001N MODEL ...
Page 230: ...Facsimile Guide MX FXX1 MODEL ...
Page 361: ...Scanner Guide MX 6201N MX 7001N MODEL ...
Page 483: ...Printer Guide MX 6201N MX 7001N MODEL ...
Page 555: ...Document Filing Guide MX 6201N MX 7001N MODEL ...
Page 604: ...System Settings Guide MX 6201N MX 7001N MODEL ...


