background image

Creating a new User Dictionary 

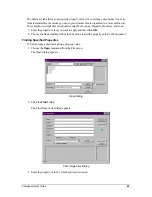
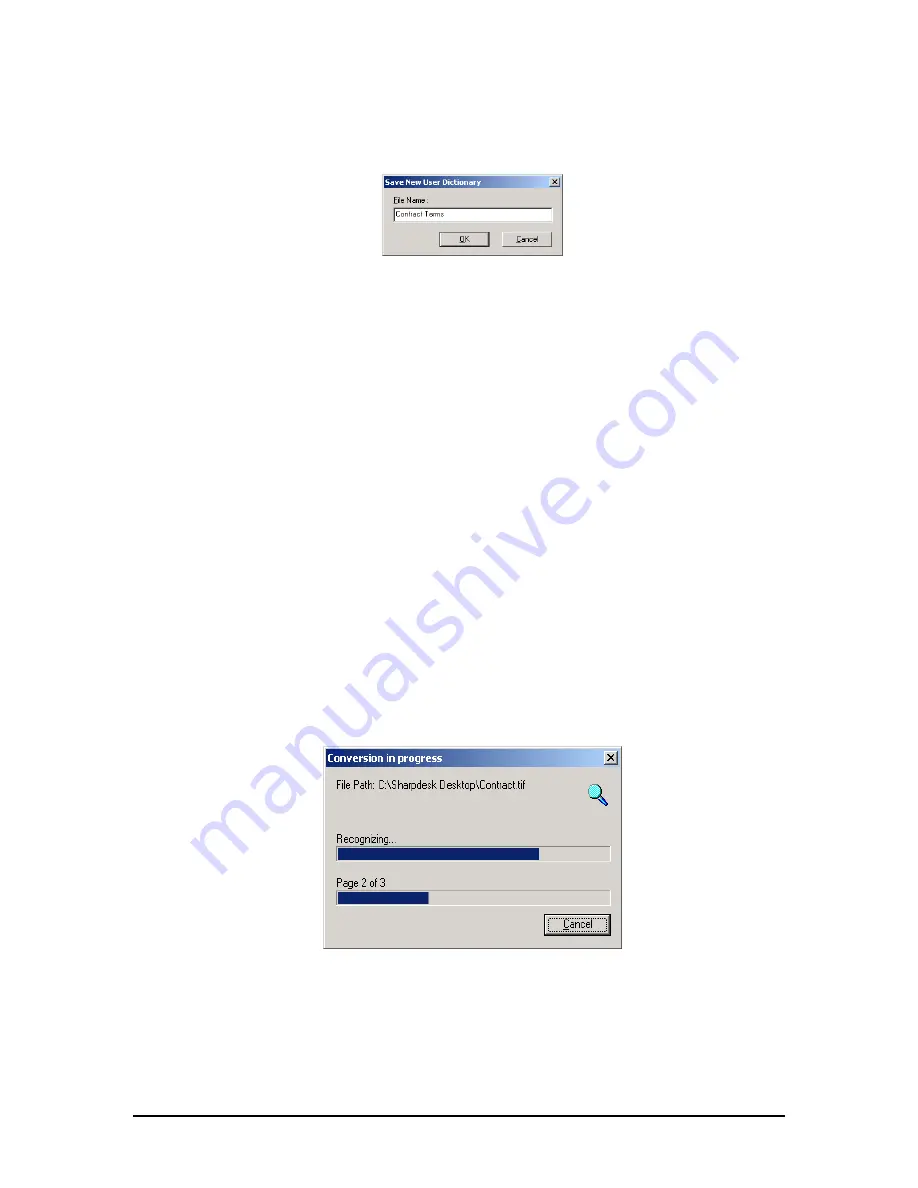
To create a new User Dictionary, click on the New button in the User Dictionary Files dialog.  
This will display the following dialog: 


Give the new user dictionary a name and click on the OK button.  This will create the user 
dictionary file (“Contract Terms”) and display the dialog for adding, importing, or deleting 
words.  See the “Modifying a user dictionary” section of this manual for more details. 

Setting the Reject Character 

If the OCR engine does not recognize a particular character, it will use the Reject Character to 
hold its place in the generated output.  The “*” character is the default; to change this 
unrecognized character flag, select another character from the drop-down menu. 

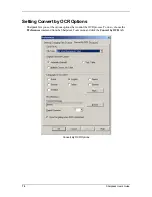
Controlling the OCR Options Dialog 

The Convert by OCR options dialog appears by default every time an OCR operation is started 
from Sharpdesk. If you want the current option settings to be used without seeing the dialog, 
uncheck the “Show dialog when OCR is performed” box and the OCR process will proceed 
without further interaction.  If you change your mind later, you can recheck the box through the 
Tools/Preferences/Convert by OCR menu item. 

Convert an Image using Drag-and-Drop  

To convert an image to text using drag and drop: 

1.  In Sharpdesk, select the image you want to convert in the Sharpdesk work area. 
2.  Make sure the Output Zone bar appears by selecting the 

Output Zone

 command from the 

View menu. 

3.  Drag and drop the image onto the 

Convert by OCR

 option on the Output Zone bar. A dialog 

appears showing you the progress of the conversion. 


Conversion in Progress Dialog 

[If the “Show this dialog every time OCR is processed” is checked (see Properties discussion 
below), the Convert by OCR Preference tab will be displayed first.] This dialog shows you the 
name of the file being converted and the progress of the entire job.  Once the conversion 

Sharpdesk User’s Guide 

79


Summary of Contents for MXUSX5 - Desk - PC

Page 1: ...SharpdeskTM R3 1 User s Guide Version 3 1 08 Sharpdesk User s Guide i ...

Page 2: ...knowledgements Sharp is a registered trademark of Sharp Corporation Sharpdesk is a trademark of Sharp Corporation Microsoft and Windows are registered trademarks of Microsoft Corporation Internet Explorer Microsoft Word and Microsoft Excel are registered trademarks of Microsoft Corporation All other trademarks identified herein are the property of their respective owners ii Sharpdesk User s Guide ...

Page 3: ...le Location 5 Sharpdesk CD Installation 6 Uninstalling Sharpdesk 7 Chapter 3 Sharpdesk Overview 8 Introduction 8 Starting Sharpdesk 9 Menu Bar 9 Folder Window 9 Toolbar 9 Work Area 10 Output Zone 10 Status Bar 10 Scroll Bars 10 Navigating in Sharpdesk 11 Working with the Folder Window 11 Right Click Options 11 The Sharpdesk Menu 13 The Sharpdesk Toolbar 15 The Sharpdesk Output Zone 16 Exiting Shar...

Page 4: ...2 Changing Color Settings 22 Viewing a Document s Property Details 22 Organizing Files 23 Selecting Files 23 Opening Files 23 Deleting Files 24 Restoring a File 24 Moving Documents and Folders 24 Creating Folder Shortcuts 24 Reordering Folders 24 Copying a File 25 Renaming a File 25 Attaching a Document to Electronic Mail Email 25 Scanning with Sharpdesk 25 Scanning Documents 25 To scan an image f...

Page 5: ...avorite Searches 36 Advanced Searching Techniques 37 File Attributes Tab 37 Document Properties Tab 38 Favorites Button 38 Customizing Search Preferences 39 Setting up an Index 40 Creating a New Index Database 40 Editing an Index Database 43 Deleting an Index Database 44 Setting up an Index Schedule 44 Manually Indexing the Database 46 Monitoring the Indexing Process 46 Show Progress 47 Show Last ...

Page 6: ... Pages into Composer 54 Adding Pages from Sharpdesk or Windows Explorer 54 Creating Composer Documents 54 Arranging Pages 54 Deleting Pages 55 Headers and Footers 55 Applying Header Footer to Selected Pages 55 Setting the Size of the Header Footer band 56 Setting the Text for the Header Footer 56 Attaching a Document to Email 56 Saving Documents 56 Opening a Composer Document 57 Closing Composer 5...

Page 7: ...e Processing 63 Using the Imaging Application 64 Starting Sharpdesk Imaging 64 Finding an Image Document 64 Setting Properties 64 Finding Specified Properties 65 Displaying an Image Document 66 Opening the Document 66 Changing the Display 66 Displaying and Changing Thumbnails 67 Creating a Contact Sheet 68 Annotating a Document 68 Applying a Rubber Stamp 68 Adding a Highlight 70 Changing Highlight...

Page 8: ... Document Layout 76 Setting Languages in Document 76 Selecting a User Dictionary 77 Selecting an existing dictionary 77 Modifying a user dictionary 77 Creating a new User Dictionary 79 Setting the Reject Character 79 Controlling the OCR Options Dialog 79 Convert an Image using Drag and Drop 79 Chapter 9 Glossary 81 viii Sharpdesk User s Guide ...

Page 9: ...esk to organize it view it and then print it or e mail it Sharpdesk integrates the tools you need This User s Guide describes the standard features of Sharpdesk Sharpdesk also works with other Sharp products that might add new capabilities to Sharpdesk that are not included in this Guide The details of these new capabilities are described in the literature that comes with the Sharp product that li...

Page 10: ...duction ready document For example combine a Word file with an Excel file and then add in a Lotus file In general any application that can send documents to a printer can contribute pages to a Composer document Reorder pages as you want them to appear and then print the entire document into stapled sets making a single trip to the printer to collect your new documents View Your Images Using Sharpd...

Page 11: ...ow to organize them including how to open save copy and move documents It reviews Sharpdesk scanning options and controls including how to select a scanner scan an image into Sharpdesk and set scanning options Chapter 5 Searching with Sharpdesk This chapter shows you how to search for images and documents using Sharpdesk s advanced searching capabilities from using a single word or phrase to using...

Page 12: ...dware such as a scanner printer fax machine digital camera or copier OCR Optical Character Recognition OCR A technology that lets you convert an image into a form that is compatible with common word processors Sharpdesk Online Help The online help provides step by step instructions for performing Sharpdesk tasks You can access the online help by using the Help menu in each application 4 Sharpdesk ...

Page 13: ... and or folder during installation The installation process also changes some of your system files to allow all the Sharpdesk components to work properly User File Location You can also specify the location of where to store the documents and images you work on in Sharpdesk Unless otherwise specified the installation program creates a new Sharpdesk Desktop folder and subfolders on the default boot...

Page 14: ... have disabled the Windows Auto Run feature run the Setup exe program located in the Sharpdesk directory on the CD NOTE If the CD supports multiple languages you need to choose a language first Sharpdesk Installation Welcome Screen 4 Follow the on screen instructions to complete the installation 5 Once the installation completes you might be prompted to restart your computer If so instructed you m...

Page 15: ... and click on Sharpdesk 4 Click Add Remove 5 When the confirmation message displays click OK to complete the Sharpdesk uninstallation Note that the uninstall process will not delete document files or folders created or modified after Sharpdesk was installed Data files installed with Sharpdesk Search Samples for instance will be removed during uninstall if they have not been modified 6 When complet...

Page 16: ...nts and images With Sharpdesk you can Scan and view documents Convert images into text documents Organize documents and images among Windows folders Distribute documents by e mail Sharpdesk makes working with the devices connected to your computer scanner printer or digital camera more efficient easy and productive than ever before Sharpdesk User s Guide 8 ...

Page 17: ...prised of the following elements Menu Bar The menu bar contains all the commands that are available in Sharpdesk from opening and displaying documents to accessing product support on the Internet Folder Window The Folder Window lets you access your files and system resources It can be used much like Windows Explorer to locate and display information from Sharpdesk or your Folder Drive Toolbar The ...

Page 18: ... pass files to other applications of your choice with a simple drag and drop operation Status Bar The status bar displays information about a selected file in addition to command and toolbar definitions The definitions appear when you move the mouse pointer over a command or toolbar option This is standard Windows status bar behavior Scroll Bars If the contents of the Folder Window or the Work Are...

Page 19: ...older to display the files contained in that folder in the work area Use the Folder Window as you would Windows Explorer to locate select and manage your documents Sharpdesk Desktop contains files and documents that you use often or are important to you Sharpdesk Folder Window Note Deleting or renaming system files or folders may cause Windows or other applications to become unstable Do not delete...

Page 20: ...elect All select all documents in the current folder Arrange arrange thumbnails by Name Date Size Type or force all new folders to the end of the folder Auto Arrange Off Preferences set preferences for displaying thumbnails names for new scanned files text conversion and image export resolution options Right click on a document in the Work Area to display a popup menu with Explorer like menu optio...

Page 21: ...m Scanner or Camera Displays the Device dialog allowing you to select a scanner or camera A Scanning dialog which will be different for each device then displays allowing you to set scanning options for the selected WIA device and then scan an image into Sharpdesk This function is available on Windows XP only Send As Attach the selected file to a mail message using the default email client on your...

Page 22: ...ging component of Sharpdesk Composer Launch Composer component of Sharpdesk INTERNET MENU DESCRIPTION Sharp Product Information Display the Internet page connected to Sharp Product Information OUTPUT ZONE MENU DESCRIPTION Print Prints a single copy of the image to your default printer To print to another printer click on the Down Arrow and select the desired printer FAX Sends the image document to...

Page 23: ...nto two files Rotate Rotate the selected file 90 degrees to the left or right Arrange Arrange a selected folder display in the work area by Name Size Type or Date The current selection will be used to sort the thumbnails of every folder selected If the folder receives many new files you may want to turn Auto Arrange off This will cause each new file to appear at the end of the folder Explorer Star...

Page 24: ...il client installed LABEL DESCRIPTION Print Prints a single copy of the image to your default printer To print to another printer click on the Down Arrow and select the desired printer Fax Sends the image document to the host resident fax utility allowing it to be transmitted over a telephone line eMail Launches your e mail application inserting the selected image document as an attachment Convert...

Page 25: ...pdesk provides Viewing Images and Documents When you open a folder in Sharpdesk you view the documents contained in the folder as a thumbnail of the document If the number of documents within a folder exceeds the available work area horizontal and or vertical scroll bars appear You can use them to scroll through the work area to view all the documents Sharpdesk User s Guide 17 ...

Page 26: ...rough the entire document to determine the total number of pages Until the total page count of the file is known only the current page number will be displayed You can page back to the front of the document using the left arrow or the Previous Page option on the View menu Note that page numbers displayed on the thumbnails are only an approximation of the number of pages known to the application th...

Page 27: ... SDF documents into separate documents by clicking on the multi page document stepping through the thumbnail pages to the spot where you want to split and then select the Split command from the Edit menu or from the Split button on the toolbar The split will cause the selected thumbnail page to appear as the first page of the split document Rotate You can rotate a TIF image file 90 degrees to the ...

Page 28: ...e list box To add an application click the Add button and enter the path to the program you want placed on the Output Zone or use the Browse button to locate and select the program After selecting the application click OK To remove an application from the Output Zone select its name from the Output Zone list box and click on the Remove button Set up Sharpdesk Entry Folder If you always want to ent...

Page 29: ...e the automatic association with Sharpdesk Imaging that was set up when Sharpdesk was installed When Sharpdesk starts it checks to see if TIF files at least are still associated with Sharpdesk Imaging If they are not a message to that effect will be displayed If you want Sharpdesk Imaging to view your TIF files click Yes Sharpdesk Imaging will be set up to open your TIF files when they are double ...

Page 30: ... or may exceed size restrictions placed on email attachments by some Internet Service Providers In such cases you may modify the default image Export resolution settings To do so choose the Preferences command from the Sharpdesk Tools menu and click the Export tab Export Resolution Settings Changing the Default Export Resolution To change the default Export resolution press and hold the left mouse...

Page 31: ...uding cut copy and paste apply to the entire file Selecting Files To work with a file you must first select it in the Sharpdesk work area To select a file With the file displayed in the work area click on it To select multiple files hold down the Ctrl key and click on the files you want to select or hold down the Shift key to select a continuous range of files Once selected you can then choose the...

Page 32: ...y clicking on it 2 Drag and drop the folder document to the new location You can also drag and drop files and folders from Windows Explorer into Sharpdesk using the same procedure Creating Folder Shortcuts You can create a new folder shortcut in the Folder Window as follows 1 Choose the Sharpdesk Folders command from the File menu and the Sharpdesk Folders dialog displays 2 Click on the Add Folder...

Page 33: ... menu Scanning with Sharpdesk Sharpdesk lets you scan documents directly into Sharpdesk Once loaded into Sharpdesk you can use Imaging to look at them Scanned images can also be converted to text allowing you to edit them with common word processors All scanned images are stored in a TIFF format by default This chapter provides instructions on setting and changing scan options Scanning Documents U...

Page 34: ...ge into Sharpdesk Note that you must close the TWAIN Scan dialog before the image will be saved in the desired folder Setting Scanning Options In most cases depending on your scanner you should be able to specify the following scanning options 1 Preview the document prior to scanning 2 Select an area of the document from which to scan typically by dragging the mouse over the area creating an outli...

Page 35: ...Image View in Imaging For more information about viewing an image refer to Chapter 7 Sharpdesk Imaging Sharpdesk User s Guide 27 ...

Page 36: ...use a File Prefix as the new scan name click the Custom Prefix option and then enter the prefix you want to use 5 To control the amount of compression used when scanning JPEG images move the slider bar in the desired direction Generally the higher the compression the lower the quality of the resulting image If the compression is set to 0 the image will be scanned as an uncompressed TIF image This ...

Page 37: ... for particular files using a wide range of criteria including A document name and or path File type Modified date File size You can also run a search using a file s property specifications including Title Author Subject Keyword The Sharpdesk search engine also supports the logical operators and or not or near as keywords allowing you great control over the search criteria you want to make Sharpde...

Page 38: ...all index will be created using sample files provided with Sharpdesk Once you are familiar with the basic search process you can create additional indexes that match your own preferences Creating new indexes is covered later in this Chapter Index Databases All Index Databases are common to all users of the local PC Regardless of the user s authority i e whether the logged in user belongs to Admini...

Page 39: ...ugh thus to too under up very was way we well were what when where which while who will with would you your Restrictions 1 If the user logs off while indexing is in progress indexing will be automatically stopped However in this case the index is not in a complete state Searching the contents of the corresponding Index Database s may or may not find expected file information depending on how far i...

Page 40: ...displays 2 Enter the word or phrase you want in the Search For box Note you can use logical operators and or not and near between keywords to limit your search For example you may specify book and engineering not computer to make a search for files containing both book and engineering but excluding computer 3 Click Find Sharpdesk searches your index database s and displays a list of all the files ...

Page 41: ...parentheses to indicate precisely what you want to search for For example apple and pear or orange could mean apple and pear or orange or it could mean apple and pear or orange Phrases To find an exact string of words create a phrase by enclosing the string by a pair of double quotes When searching for phrases it must be the only item in the Search for box If a phrase contains ignored words Sharpd...

Page 42: ...thin 5 words or Operator The or operator between two terms requires that at least one of the terms be found in any document retrieved For example apple or pear would retrieve any document that contained apple pear or both not Operator The not operator in front of any search term reverses its meaning This allows you to exclude documents from a search Example apple and not pear would retrieve docume...

Page 43: ...To display additional file detail click the Detail link next to the Sorted by drop down The search results page redisplays showing you the following additional information Thumbnail of the file File Type Abstract taken from the file File Size Modified last modified time If there are multiple matches that cannot be displayed on a single page click Next link to view the next page To return to the pr...

Page 44: ... you want to place the file 4 Click the Paste icon on the toolbar select it from the Edit menu or right click on the folder and select Paste from the drop down You can also move a file to one of the Output Zone options to print it email it convert an image to text add it to Sharpdesk Composer or open it in an application Drag and drop the file to the desired Output Zone option Running Another Sear...

Page 45: ...e Advanced Search tabs display File Attributes Tab The File Attributes tab allows you to search for files by Name only a single name may be specified Multiple words in the Name will be will be considered a single long Name with blanks in it Path only the specified directory and its subdirectories will be searched Type for example bmp tif fax doc etc Modified dates between dates or during a period ...

Page 46: ... box the File Attributes Tab and the Document Properties Tab Only files that satisfy all of the specified criteria will be found Note that the contents of the File Attributes and Document Properties tabs are cleared when the Basic button is selected removing the advanced settings display from the work area Favorites Button If you use the same search query repeatedly you can use the Favorites butto...

Page 47: ...uments with words derived from the words you entered in addition to the exact matches For example if you are looking for contract and Variation of word endings has been selected search will return documents containing contractor contracts and contracting in addition to documents containing contract If Exact word has been selected only documents containing contract will be returned Note In general ...

Page 48: ...w If you do not want a field displayed uncheck its check box Note that Document Name must always remain checked 10 After making your selections click Save Setting up an Index When initially installing Sharpdesk allows creation of indexes containing specified folders sub folders and file types making file retrieval fast and efficient You can edit this index or create up to 19 additional indexes pro...

Page 49: ...The Index Name and Location window displays 4 Enter an Index Name using up to 39 characters To select an index location click Browse navigate to the desired location and click OK After entering the information click Next The Folders to Index prompt displays Sharpdesk User s Guide 41 ...

Page 50: ...t displays 6 By default the following file extensions are selected dat doc sdf tif txt wpd wps xls htm pdf rtf ppt These are the default file types that will be indexed making them available to search Uncheck those extensions you do not want to include To undo all entries click None To select all the extensions click All After making your selections click Next The Create Index now or later window ...

Page 51: ...cting the indexes you want to refresh and clicking the Index Selected button To refresh all of the indexes click on the Index All button Note Refreshing an index usually takes much less time than creating the index in the first place Only those files that are new or changed need to be searched for words Editing an Index Database If you want to edit an index database to add or remove folders or cha...

Page 52: ...gardless of users login authorities For example if the system administrator installs Sharpdesk and sets up the Index Schedule via the Search Setup Wizard indexing will occur at the specified time as long as the system administrator is logged on However other users do not acquire the system administrator s schedule they need to set up their own Index Schedule to perform scheduled indexing while the...

Page 53: ...Choose the date to start from the Start Date drop down calendar or type in manually Specify the index time using the Start Time up down arrows or type in manually Specify the number of days between indexing using the Perform Indexing up down arrows or type in manually 4 If you selected a Weekly index Choose the date to start from the Start Date drop down calendar or type in manually Specify the in...

Page 54: ...y index your database s 1 Choose Index Databases from the Search option in the Tools menu This can also be selected from the Search drop down on the toolbar the Search Home page or the Indexing Schedule page The Index Databases page displays 2 Select the database you want to index If you want to index all databases you do not need to select one 3 Click Index Selected or Index All Indexing will sta...

Page 55: ...s of which user performed indexing the last time Note that if the dialog is open prior to completion of a current indexing operation information in the dialog will not be automatically updated To update information in the dialog close the dialog and then re open it after indexing is complete Perform Indexing Select the Perform Indexing item to begin the index process on all currently defined index...

Page 56: ...cument Composer eliminates the need to cut and copy documents from multiple applications If you can print from an application you can usually add the document to the Composer and create any document collection that might be required Documents are added to Composer by dragging and dropping them into Composer s work area or the Composer button on the Output Zone Documents can also be added to Compos...

Page 57: ...robat after printing to Composer All pages are printed to Composer using the default paper orientation set in Acrobat 2 Pages printed into Composer may be blank in some cases 3 EPS output from Page Maker is not supported by Composer 4 Only the sheet that was active when the file was closed is sent to Composer 5 Color documents will be rendered as black and white To retain color content print direc...

Page 58: ...ow for a description of the options available Toolbar When Composer starts the toolbar changes to provide you with quick access to commands needed to save and close send a page or document as an e mail attachment print a document cut copy or paste items and to delete pages Work Area The work area lets you create and arrange the pages of the final document The work area displays pages as a thumbnai...

Page 59: ...Print Preview image may not be an exact replication of how the document will print Page Setup Specify the document s margins setup headers and footers and printer properties Print Setup Select a default printer and set basic print options tray selection copies etc Send Mail Send the current document as an e mail attachment in PDF Adobe Acrobat format Properties Display the attributes of the curren...

Page 60: ...and version information Toolbar Options The Composer Toolbar lets you select commands quickly including COMMAND DESCRIPTION Add Doc Adds pages to the current file Save Save the current modified file Print Print the selected pages or the whole document Cut Cut a page from the Work Area to the clipboard Copy Copy a page from the Work Area and place it in the clipboard Paste Paste the contents of the...

Page 61: ...p uses the default paper size and orientation Loading Pages into Composer You can load pages into Composer directly from Sharpdesk Explorer or from a third party application To place pages into Composer from third party applications for example Word 1 Select the Print command from the application in which you are working A screen similar to the following one appears Print Screen Select Sharpdesk C...

Page 62: ...break the input into multiple segments of 50 pages to avoid exhausting system resources Each segment will be shown in the Reference window of Composer Creating Composer Documents Working with the Composer is easy and intuitive Once your source documents have been loaded into the work area you can use the mouse or commands from the Menu bar and Toolbar to delete or re order pages to create your new...

Page 63: ... the toolbar select the Delete command from the File menu or press the Delete key on your keyboard A confirmation message appears 3 Click OK to delete the page s Headers and Footers You can define your Headers and Footers as follows Choose the Page Setup command from the File menu The Page Setup dialog displays Applying Header Footer to Selected Pages You can specify which pages the Header and Foo...

Page 64: ...der Footer 3 Use the Up Down arrows to specify the Indent from left right edge This setting defines where the first last printed character will be positioned from the left right edge of the paper Setting the Text for the Header Footer Each Header Footer has three sections Left Center Right The Left Section is left justified beginning at the Indent from left edge setting the Center Section is cente...

Page 65: ...with a SDF extension Opening a Composer Document You can open a Composer document as follows 1 Choose the Open command from the File menu The Open dialog box appears 2 Navigate to the file you want to open and click Open Closing Composer To close the Composer choose the Exit command from the File menu Sharpdesk User s Guide 57 ...

Page 66: ...eate modify and process electronic images Typical Imaging operations include Scanning text photographs or drawings and saving the results in an image file Displaying images using techniques such as thumbnail representations magnification rotation and size to fit Sending image documents by e mail or fax Adding annotations to images Performing electronic cleanup of images to make them easier to view...

Page 67: ...WD The extension indicates the format used to store the image Some formats such as BMP and JPEG contain just one image per file Single Image File Other formats such as TIFF and AWD are similar to a book They contain one or more pages with each page holding a single image Multiple Image File Because image files are standard Windows files you can use Windows commands to perform operations such as Or...

Page 68: ...riment with the different options and property settings you can create results that suit your preferences Sharpdesk Imaging consists of the Imaging application and ActiveX controls The Imaging application is described in the following sections Imaging Application This section briefly describes what you can do with the Imaging application For more detailed information including how to perform speci...

Page 69: ...image in the window display thumbnail views of the images contained in a multi page image document or display an image page and thumbnails together Imaging Window Dialog Convert Image Files Using Sharpdesk Imaging you can save a displayed image in one of the following formats TIFF BMP JPEG AWD Windows 98 only Sharpdesk User s Guide 61 ...

Page 70: ...ing forms memos pictures or other paper documents to an image file Sharpdesk Imaging supports TWAIN compatible devices such as scanners and digital cameras NOTE For best results save scanned documents in TIFF format Annotate Images You can add a variety of markups to an image by using Annotation features and then save the annotations with the image Examples of annotations include Freehand or strai...

Page 71: ...ges of each negative on a roll of film Before you create the contact sheet you can globally set the thumbnail size larger to display more detail or smaller to fit more thumbnails onto the contact sheet To create a contact sheet choose the Create Contact Sheet command from the Tools menu Contact Sheet Dialog Image Processing During scanning and faxing documents can pick up small speckles of dust th...

Page 72: ...hoose Sharp Imaging NOTE If you use the sample image files installed with Sharpdesk to practice working with Imaging options you can access the original versions of these files on your installation CD Finding an Image Document You can assign properties to your images Author Keywords Comments Title and Subject to make locating them later easier Setting Properties To assign a property to an image do...

Page 73: ...nter the property values you want to apply and then click OK 8 Choose the Save command from the File menu to add the property value to the document Finding Specified Properties To find an image document using a property value 1 Choose the Open command from the File menu The Open dialog appears Open Dialog 2 Click the Find button The Find Image Files dialog appears Find Image Files Dialog 3 Enter t...

Page 74: ...open and click Open Changing the Display 1 You can change the size of the display window in the vertical and horizontal directions to suit your preference 2 Using the Zoom menu you can choose different options to resize the document to fit in the display window When you change the size of the document its height to width ratio is maintained Click Fit to Height to view the full height of the docume...

Page 75: ...ick Magnifier to enlarge a portion of the document page Note Magnifier controls can only be accessed with the mouse Keyboard control is not supported Displaying and Changing Thumbnails To display or change thumbnails 1 Choose the Thumbnails command from the View menu Thumbnails of the image documents are displayed 2 Choose the Thumbnail Size command from the Options submenu in the Tools menu The T...

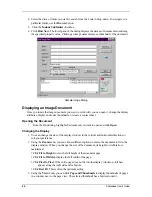
Page 76: ...n to create the file and then click Save 5 Choose the Open command from the File menu 6 Locate the contact sheet you created and click Open 7 Click on a page to view the original page 8 Click the Back button to return to the contact sheet To have your contact sheet automatically open after you create it 9 Choose the Options command from the Tools menu and then click Contact Sheet The Contact Sheet...

Page 77: ...rom the Annotation menu The Rubber Stamp Properties dialog appears You can also click on the Rubber Stamp icon in the Annotation toolbar to display this dialog Rubber Stamp Properties Dialog 5 Click the stamp you want to use in the Stamps list and then click Edit The Edit Text Rubber Stamp Properties dialog appears Edit Text Rubber Stamp Dialog Click Font Sharpdesk User s Guide 69 ...

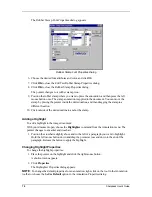
Page 78: ...mp Adding a Highlight To add a highlight to the image document With your document open choose the Highlighter command from the Annotation menu The pointer changes to a marker and crosshair 1 Position the crosshairs slightly above and to the left of a paragraph you want to highlight Hold the left mouse button down and drag the pointer across and down to the end of the paragraph Release the button t...

Page 79: ...ng process Straightening a Page To straighten a displayed document 1 Choose the Straighten Page command from the Tools menu The Straighten Page dialog appears 2 Move the dialog to the side or bottom of the page so you can draw a reference line in the top portion of the page The cursor will change to a crosshair 3 Draw a reference line that is slanted in exactly the same way as the text Position th...

Page 80: ...Straighten Page Dialog 4 Click OK in the Straighten Page dialog The page rotates until the reference line you drew is parallel with the top and bottom edges of the window 72 Sharpdesk User s Guide ...

Page 81: ... image into one of many standard output formats Keep in mind that text conversion accuracy depends on the quality of the original image A poor quality fax or copy might not convert correctly as the engine will have difficulty reading the text characters Sharpdesk OCR can convert images with resolutions between 75 and 600 dpi dots per inch Best results are obtained using images with 300 dpi resolut...

Page 82: ...ions Sharpdesk lets you set the various options that control the OCR process To do so choose the Preferences command from the Sharpdesk Tools menu and click the Convert by OCR tab Convert By OCR Options 74 Sharpdesk User s Guide ...

Page 83: ...s for the OCR process Save File As format Adobe PDF pdf Adobe PDF with image on text pdf Excel 97 2000 xls RTF Word 2000 rtf Text Comma Delimited txt Text Standard txt MS Word Document doc WordPerfect 8 0 wpd WordPerfect 9 10 wpd Word format doc is the default Sharpdesk User s Guide 75 ...

Page 84: ...tain text in columns and you want them kept in separate columns similar to the original layout Text Table Choose this setting if your page contains only one column of text and or tables Setting Languages in Document The Languages in Document setting tells the OCR engine what word or character sets to expect in the image s it is about to process The languages Sharpdesk is localized in are shown in ...

Page 85: ...tionary will have current following its name To choose a different dictionary click on its name and then click on the Set as Current button This will move the current flag to the name you have selected Only one User Dictionary may be used at a time Modifying a user dictionary First select the name of the dictionary you want to modify Then click on the Edit button This will display the Edit User Di...

Page 86: ...ams and import them into the user dictionary The words to be imported must be in a simple text file one word per line with no punctuation before or after the word To import these words click on the Import button to display the Import dialog Navigate to the file containing the words and click on the Open button The words in the file will be loaded into the user dictionary for OCR Exporting words fr...

Page 87: ...from Sharpdesk If you want the current option settings to be used without seeing the dialog uncheck the Show dialog when OCR is performed box and the OCR process will proceed without further interaction If you change your mind later you can recheck the box through the Tools Preferences Convert by OCR menu item Convert an Image using Drag and Drop To convert an image to text using drag and drop 1 I...

Page 88: ...completes the dialog automatically closes and the finished text document appears in the appropriate application If you click Cancel the ongoing conversion process is canceled 80 Sharpdesk User s Guide ...

Page 89: ...1 parity bit B Browser The application program such as Microsoft s Internet Explorer that lets you display HTML documents D Default Setting A system setting incorporated at the factory and permanently registered to the application Also a value or a setting that the software assumes until or unless you specify another value Devices A device is a piece of hardware such as a scanner printer fax machi...

Page 90: ...format O OCR Optical Character Recognition A technology that lets you turn a paper document into an editable electronic document Output Zone A Sharpdesk added toolbar allowing quick access to print fax scan e mail and OCR an image P Paper Feed Movement of a sheet of paper into the printer s paper path PC Fax An electronic way to send and receive faxes from your computer A PC fax is sent from or re...

Page 91: ...meras and other imaging equipment without requiring you to switch out of the application It provides compatibility between image input devices and applications by acting as the liaison between hardware devices and software applications TWAIN the industry standard was developed by the TWAIN working group which consists of representatives from many leaders in the scanner hardware and software indust...

Reviews: