


4
E
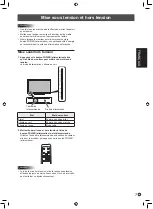
MOUNTING PRECAUTIONS
• This product is for use indoors.
• A mounting bracket compliant with VESA specifications is
required.
• Since the monitor is heavy, consult your dealer before
installing, removing or moving the monitor.
• Mounting the monitor on the wall requires special expertise
and the work must be performed by an authorized SHARP
dealer. You should never attempt to perform any of this
work yourself. Our company will bear no responsibility
for accidents or injuries caused by improper mounting or
mishandling.
• Use the monitor with the surface perpendicular to a level
surface.
• When moving the monitor, be sure to hold at the sides and
bottom. Do not grasp the screen or tray. This may cause
product damage, failure, or injury.
• This monitor should be used at an ambient temperature
between 41°F (5°C) and 95°F (35°C). Provide enough
space around the monitor to prevent heat from
accumulating inside.
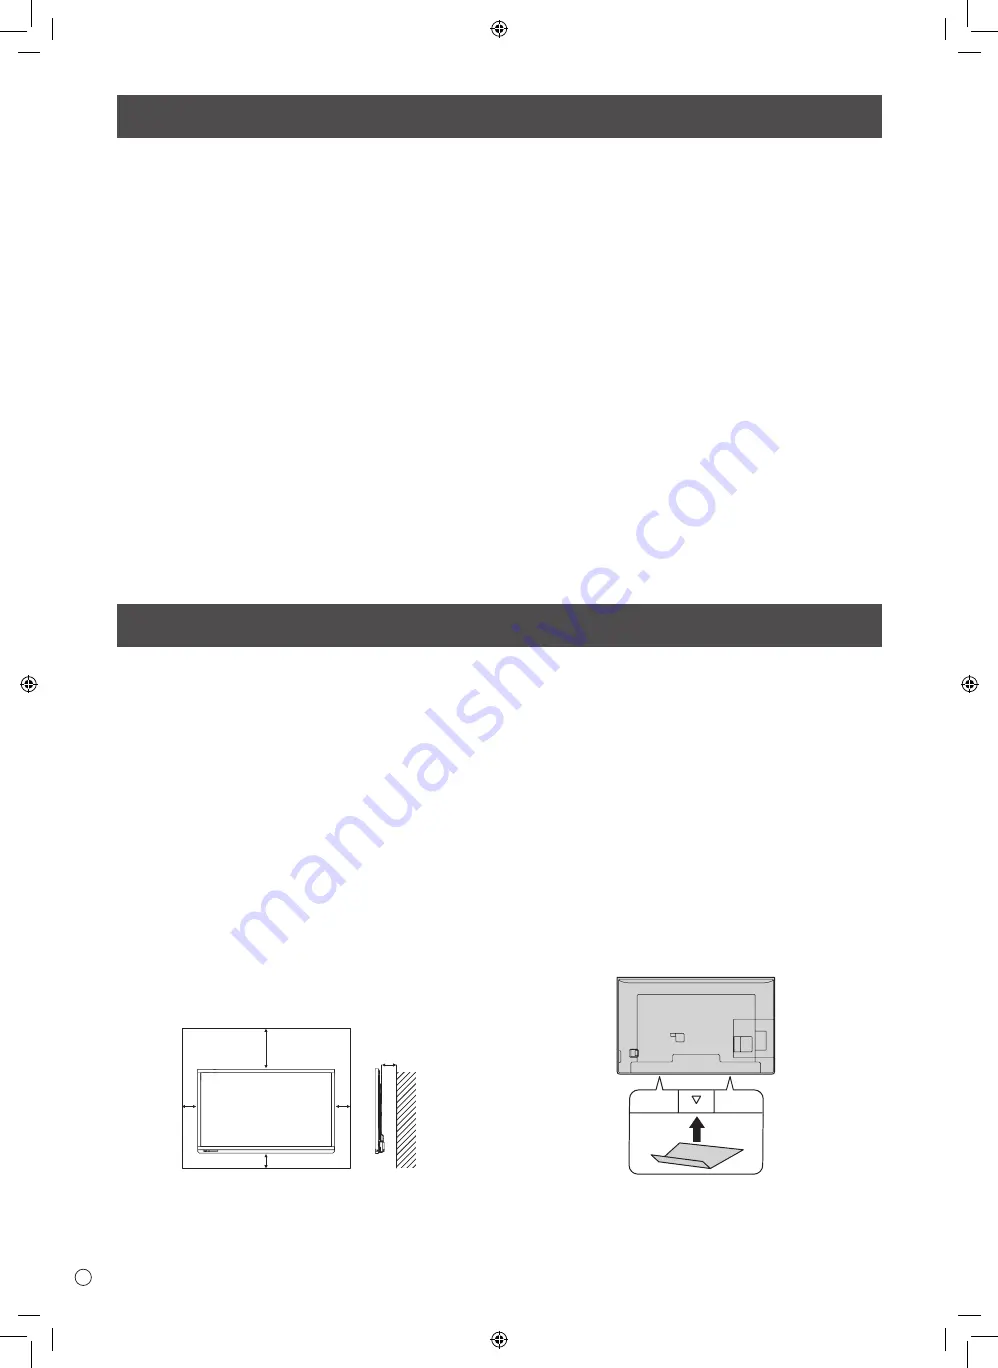
7-7/8 [20]
Unit: inch [cm]
2 [5]
2
[5]
2
[5]
2-3/16 [5.5]
• If it is difficult to provide sufficient space for any reason
such as the installation of the monitor inside a housing, or
if the ambient temperature may be outside of the range
of 41°F (5°C) to 95°F (35°C), install a fan or take other
measures to keep the ambient temperature within the
required range.
• Do not block any ventilation openings. If the temperature
inside the monitor rises, this could lead to a malfunction.
• Do not place the monitor on a device which generates heat.
• Do not use the product in locations where the unit is
exposed to direct sunlight or other strong light. Since this
product operates with infrared rays, such light may cause a
malfunction.
• When using multiple monitors closely, be sure the infrared
transmitter/receiver does not affect the other ones.
• After installing the monitor, affix the stand hole protection
covers.
SAFETY INSTRUCTION
- Do not use the monitor where there is a lot of dust, where
humidity is high, or where the monitor may come into contact
with oil or steam. Do not use in an environment where
there are corrosive gases (sulfur dioxide, hydrogen sulfide,
nitrogen dioxide, chlorine, ammonia, ozone, etc.). As this
could lead to fire.
- Ensure that the monitor does not come into contact with
water or other fluids. Ensure that no objects such as paper
clips or pins enter the monitor as this could lead to fire or
electric shock.
- Do not place the monitor on top of unstable objects or in
unsafe places. Do not allow the monitor to receive strong
shocks or to strongly vibrate. Causing the monitor to fall or
topple over may damage it.
- Do not use the monitor near heating equipment or in places
where there is likelihood of high temperature, as this may
lead to generation of excessive heat and outbreak of fire.
- Do not use the monitor in places where it may be exposed to
direct sunlight. Risk of cabinet deformation and failure if the
monitor is used in direct sunlight.
- The AC outlet shall be installed near the equipment and shall
be easily accessible.
- Do not operate the screen with a hard or pointed object such
as a fingernail or pencil.
The Power Cord
-
Use only the power cord supplied with the monitor.
-
Do not damage the power cord nor place heavy objects on
it, stretch it or over bend it. Also, do not add extension cords.
Damage to the cord may result in fire or electric shock.
-
Do not use the power cord with a power tap.
Adding an extension cord may lead to fire as a result of
overheating.
-
Do not remove or insert the power plug with wet hands.
Doing so could result in electric shock.
-
Unplug the power cord if it is not used for a long time.
-
Do not attempt to repair the power cord if it is broken
or malfunctioning. Refer the servicing to the service
representative.


