8
E
Supplied Components
If any component should be missing, please contact your dealer.
Liquid Crystal Display Monitor: 1
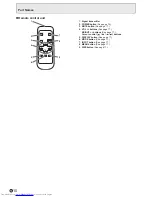
Remote control unit: 1
Cable clamp: 2
Power cord: 1
R-6 battery (“AA” size): 2
CD-ROM (Utility Disk for Windows): 1
Setup Manual: 1
Cover: 2
Cover screws (M4 with washers): 4
Vertical sticker (Operation panel): 1
Vertical sticker (Logo): 1
Terminal label: 1
Used when installing the expansion board PN-ZB01 (optional).
Cover Sharp logo: 1
Place this sticker onto the SHARP logo to cover the logo.
* Sharp Corporation holds authorship rights to the Utility Disk program. Do not reproduce it without permission.
* For environmental protection!
Do not dispose of batteries in household waste. Follow the disposal instructions for your area.
Contents
IMPORTANT INFORMATION ............................................3
DEAR SHARP CUSTOMER ..............................................4
SAFETY PRECAUTIONS ..................................................4
TIPS AND SAFETY INSTRUCTIONS ...............................6
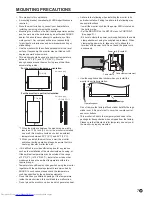
MOUNTING PRECAUTIONS ............................................7
Supplied Components .....................................................8
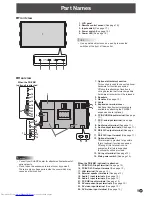
Part Names .......................................................................9
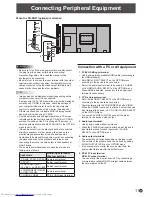
Connecting Peripheral Equipment ...............................11
Connection with a PC or AV equipment
.....................
11
Connection when the PN-ZB01 (optional)
is attached .................................................................
1
2
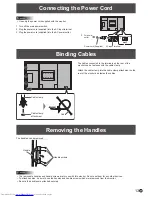
Connecting the Power Cord .........................................13
Binding Cables ...............................................................13
Removing the Handles ..................................................13
Preparing the Remote Control Unit ..............................14
Installing the batteries ................................................
1
4
Remote control operation range .................................
1
4
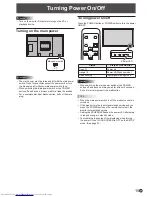
Turning Power On/Off ....................................................15
Turning on the main power
.........................................
15
Turning power on/off
..................................................
15
Disabling power on/off operations
..............................
1
6
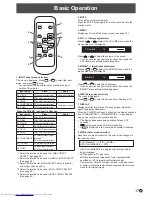
Basic Operation .............................................................17
Menu Items .....................................................................19
Displaying the menu screen
.......................................
1
9
Menu item details .......................................................2
0
Adjustments for PC screen display
............................27
Initialization (Reset)/Functional Restriction Setting
(FUNCTION) ....................................................................28
Controlling the Monitor with a PC (RS-232C) ..............29
PC connection ............................................................29
Communication conditions .........................................29
Communication procedure .........................................29
Setting of the GAMMA user data ................................32
RS-232C command table ...........................................33
Controlling the Monitor with a PC (LAN) .....................41
Settings to connect to a LAN ......................................4
1
Controlling with a PC
..................................................43
Troubleshooting .............................................................49
Specifications
...............................................................51
Mounting Precautions
(For SHARP dealers and service engineers) ...............55
Summary of Contents for PN-E802 Professional
Page 1: ...PN E802 LCD MONITOR OPERATION MANUAL ...
Page 56: ...PN E802 Mu EN12D 1 ...


