30
E
n
SCHEDULE
You can set the time to switch the motion on and off.
A file in a USB flash drive can also be played at a specified
time. Set “INPUT” in SCHEDULE to “USB”, and create a play
list.
Set this function with SCHEDULE in the SETUP menu. (See
page 27.)
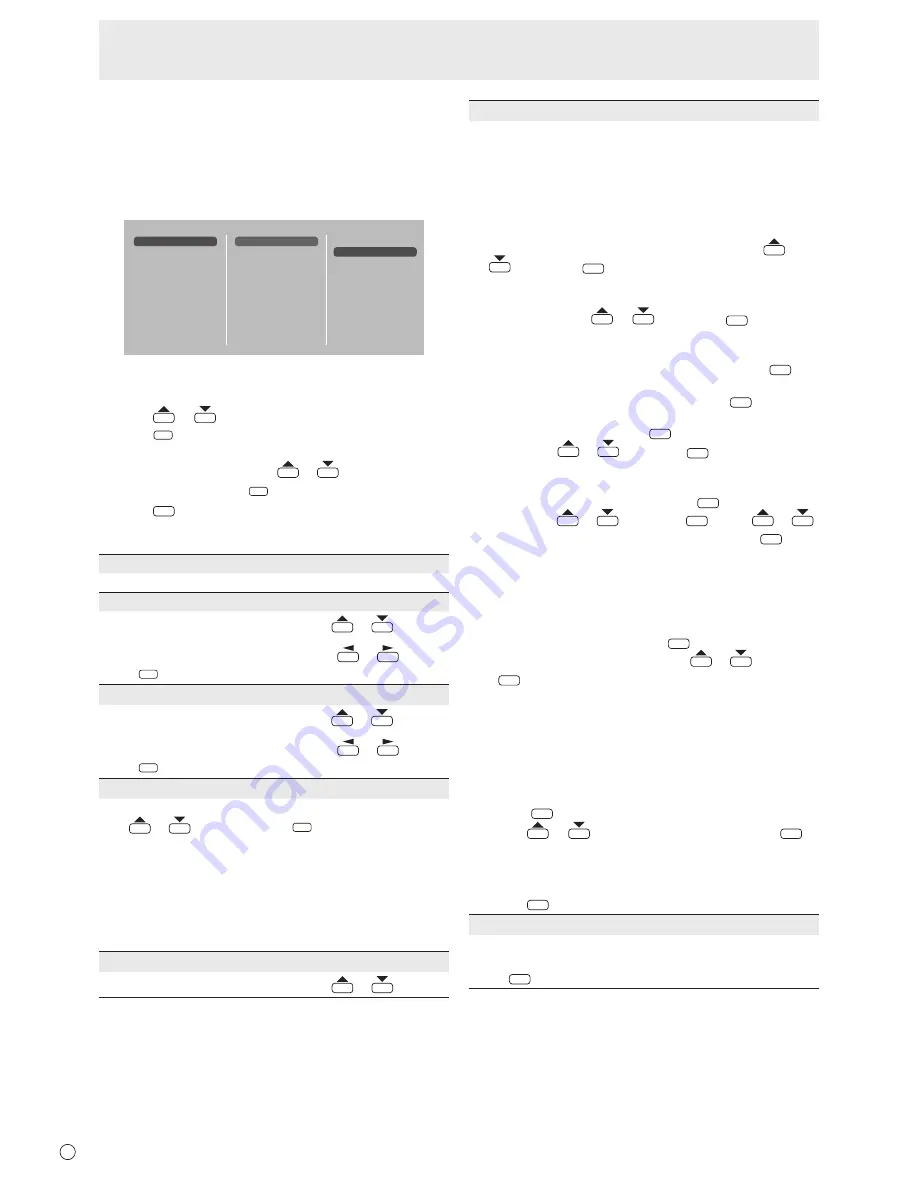
SCHEDULE 1
SCHEDULE 2
SCHEDULE 3
ON/OFF
ON TIME
OFF TIME
REPEAT MODES
INPUT
PLAYLIST SETTING
PLAY
OFF
ON
1. Insert the USB flash drive into a USB port on the
monitor. (See page 12.)
2. Press
or
to select the SCHEDULE number, and
press
ENTER
.
3. Set the SCHEDULE.
(See below)
Move through the items with
or
, and display the
settings of an item with
ENTER
.
4. Press
MENU
.
SCHEDULE becomes effective.
(1) ON/OFF
Enable/disable the SCHEDULE.
(2) ON TIME
Specify the time the power turns on with
or
.
Set the time on a 24-hour basis.
When you have finished, select [OK] with
or
and
press
ENTER
.
(3) OFF TIME
Specify the time the power turns off with
or
.
Set the time on a 24-hour basis.
When you have finished, select [OK] with
or
and
press
ENTER
.
(4) REPEAT MODES
Select the day of the week the schedule will be executed
with
or
, and specify with
ENTER
.
• ONLY ONCE
The SCHEDULE will be executed once only regardless of
the day of the week.
• EVERY SUN - EVERY SAT
Executes the SCHEDULE on the specified day every
week.
Multiple days of the week can be specified.
(5) INPUT
Specify the input mode at power on with
or
.
(6) PLAYLIST SETTING
This only appears when INPUT is set to [USB].
Use to create a playlist for automatic display/playback of files
in a USB flash drive.
• Image files and video files can be combined in the same
playlist.
• Audio files cannot be used.
1. Select the type of file to be set in the list with
or
, and press
ENTER
.
• A list of folders or files of the selected type (Photo/Video)
appears.
2. Select a file with
or
, and press
ENTER
to set the
file.
• When a file is selected and set, it appears in the left area.
• When you select a file in the left area and press
ENTER
, it
disappears from the left area.
• To move up a folder, select [..] and press
ENTER
.
• To change the file type, press [..] to return to the
selection screen, or press
DISPLAY
(Red), select [Media
Type] with
or
, and press
ENTER
. When [Photo]
is selected, image files appear, and when [Video] is
selected, only video files appear.
• To sort the files in the folder, press
DISPLAY
(Red), select
[Sort] with
or
, and press
ENTER
. Press
or
to select an item from the following, and press
ENTER
.
Type ..... Sorts the files according to the type of video
files. This item does not appear for image files.
Date ..... Sorts the files according to the modified date
and time.
Name ... Sorts the files according to their names.
• To change the file view, press
DISPLAY
(Red), select [Normal
Parser] or [Recursive Parser] with
or
, and press
ENTER
. When an option is selected, the file view changes
as follows:
Normal Parser
Folders and files are displayed in the hierarchy of the
USB flash drive.
Recursive Parser
All image files or all video files are shown together,
regardless of the hierarchy of the USB flash drive.
3. Press
DISPLAY
(Red).
4. Press
or
to select [Save list], and press
ENTER
.
• The list displayed in the left area is saved as playlist. If
you make changes to a playlist, use [Save list] to save
the changed list.
5. Press
SIZE
(Yellow).
(7) PLAY
It appears only after the playlist is saved.
It starts the playlist.
Press
INPUT
to pause the playlist.
Menu Items


