background image

17

QT-MP3W

References

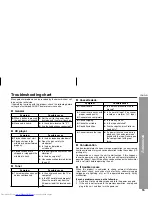
Troubleshooting chart (continued) 

Before transporting the unit

Remove CD from the unit. Make sure there is no CD in the disc
spindle. Then, set the unit to the power stand-by mode. Carrying the
unit with disc left inside can damage the unit.
 

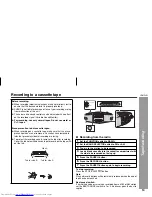
Care of compact discs

Compact discs are fairly resistant to damage, however mistracking
can occur due to an accumulation of dirt on the disc surface. Follow
the guidelines below for maximum enjoyment from your CD
collection and player.

Do not write on either side of the disc, particularly the non-label
side from which signals are read. Do not mark this surface.
Keep your discs away from direct sunlight, heat, and excessive
moisture.
Always hold the CDs by the edges. Fingerprints, dirt, or water on
the CDs can cause noise or mistracking. If a CD is dirty or does
not play properly, clean it with a soft, dry cloth, wiping straight out
from the centre, along the radius.


Maintenance

Cleaning the cabinet

Periodically wipe the cabinet with a soft cloth and a diluted soap
solution, then with a dry cloth.

Caution:

Do not use chemicals for cleaning (petrol, paint thinner, etc.). It
may damage the cabinet finish.
Do not apply oil to the inside of the unit. It may cause
malfunctions.

Cleaning the lens and tape-handling parts

Do not touch the laser pickup lens. If finger prints or dust accumu-
late on the pickup, clean it gently with a dry cotton swab.
Dirty head, capstan or pinch roller can cause poor sound and tape
jams. Clean these parts with a cotton swab moistened with com-
mercial head/pinch roller cleaner or isopropyl alcohol.
When cleaning the head, pinch roller, etc., unplug the unit which
contains high voltages.
After long use, the deck's head and capstan may become magne-
tised, causing poor sound. Demagnetise these parts once every
30 hours of playing/recording time by using a commercial tape
head demagnetiser. Read the demagnetiser's instructions care-
fully before use.

NO

YES
Correct

   Laser pickup lens

   Pinch roller

   Capstan

   Recording/Playback head

   Erase head

A

B

C

E

D

Summary of Contents for QT-MP3W

Page 1: ...rchasing this SHARP product To obtain the best performance from this product please read this manual carefully It will guide you in operating your SHARP product PORTABLE CD STEREO SYSTEM MODEL QT MP3W OPERATION MANUAL ...

Page 2: ...provement without prior notice 11 14 06 1 27 PM ...

Page 3: ...QT MP3 provement without prior notice 11 14 06 1 27 PM ...

Page 4: ...provement without prior notice 11 14 06 1 27 PM ...

Page 5: ...provement without prior notice 11 14 06 1 27 PM ...

Page 6: ...provement without prior notice 11 14 06 1 27 PM ...

Page 7: ...provement without prior notice 11 14 06 1 27 PM ...

Page 8: ...provement without prior notice 11 14 06 1 27 PM ...

Page 9: ...provement without prior notice 11 14 06 1 27 PM ...

Page 10: ...Output max 0 6 mW When the FUNCTION switch is set at TAPE STAND BY position mains voltage is still present inside the unit This unit contains no user serviceable parts Never remove covers unless qualified to do so This unit contains dangerous voltages always remove mains plug from the socket before any service operation and when not in use for a long period To prevent fire or shock hazard do not e...

Page 11: ...is required For details please visit http mp3licensing com MPEG Layer 3 audio coding technology licensed from Fraunhofer IIS and Thomson Accessory Please confirm that the following accessory is included Note Only the above accessory is included Contents Page General Information Precautions 3 Controls and indicators 4 5 Preparation for Use Operation with AC power 6 Operation with batteries 6 Basic ...

Page 12: ...t with a voltage other than that which is specified Volume control The sound level at a given volume setting depends on speaker effi ciency location and various other factors It is advisable to avoid ex posure to high volume levels Do not turn the volume on to full at switch on and listen to music at moderate levels Use the unit on a firm level surface free from vibration Keep the unit away from d...

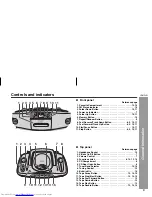
Page 13: ...X Bass On Off Button 7 3 Volume Control 7 4 Function switch 8 12 13 14 5 CD Compartment 8 6 CD Door Open Button 8 7 Tuner Band Selector 12 14 8 Tuning Control 12 9 Build in Mic 14 10 Tape Pause Button 13 14 15 11 Tape Stop Eject Button 13 14 15 12 Tape Fast Forward Button 13 13 Tape Rewind Button 13 14 Tape Play Button 13 15 Tape Record Button 13 14 15 PAUSE FUNCTION OFF ON MIN MAX MIC RADIO TAPE ...

Page 14: ...FM Stereo Mono mode Beat Cancel Selector 12 14 2 Battery Compartment 6 3 Voltage Selector 6 4 AC Input Socket 6 Display Reference page 1 MP3 Indicator 9 2 WMA Indicator 9 3 Disc Play Indicator 8 4 Folder Indicator 9 10 11 5 Repeat mode Indicators 9 6 Memory Indicator 9 10 7 Random Indicator 9 ...

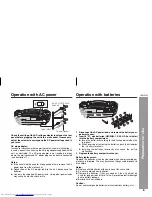
Page 15: ...peration with batteries Battery replacement Replace the batteries when they become weak and or recording or playback is impaired This may occur even though radio broadcasts are audible Notes Replace all old batteries with new ones at the same time Do not mix old and new batteries Remove the batteries if they are weak or if the unit will not be used for long periods of time This will prevent potent...

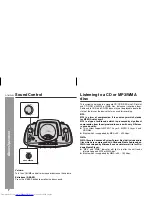
Page 16: ...icant compression from the original audio source with very little loss in sound quality This system supports MPEG 1 Layer 3 MPEG 2 Layer 3 and VBR files Bitrate which is supported by MP3 is 32 320 kbps WMA WMA files are Advanced System Format files that include audio files which are compressed with Windows Media Audio codec WMA is developed by Microsoft as an audio format file for Win dows Media P...

Page 17: ...spindle label side up Be sure to place 8 cm 3 disc in the middle of the disc spindle 4 Close the CD door by firmly pushing the right corner of it 5 Press the button to start playback 12 cm 5 8 cm 3 Function Main unit Operation Play Press in the stop mode Stop Press in the playback mode Pause Press in the playback mode Press the button to resume play back from the paused point Track up Track down P...

Page 18: ...u like 1 Whilst a disc is stop or playing press the REPEAT RANDOM button to Repeat 1 2 Each time the button is pressed the repeat play mode changes in the following order The repeat play mode changes as follows on CD The repeat play mode changes as follows on MP3 WMA disc REPEAT RANDOM REPEAT WMA REPEAT ALL WMA RANDOM REPEAT 1 REPEAT ALL RANDOM NORMAL REPEAT FOLDER WMA REPEAT FOLDER WMA REPEAT ALL...

Page 19: ...ad Bitrate which is supported by MP3 is 32 320 kbps WMA is 64 160 kbps For MP3 WMA files please put MP3 WMA extension Files cannot be played back if there is no MP3 WMA extension Playlists are not supported on this unit Copyright protected WMA files cannot be played back 1 For MP3 WMA CD with folder to tal folder number will be display Folder number 2 Whilst in the stop mode press the MEMORY butto...

Page 20: ...3 WMA files are recorded in several folders only total folder will be display The folder and file order information which is recorded on the disc de pends on the writing software There maybe possibilities that this unit will playback the files not according to our expected playback order Procedure to playback MP3 WMA disc To playback CD R RW 1 Press the OPEN button and load a MP3 WMA disc After di...

Page 21: ...t reception PAUSE FUNCTION OFF ON MIN MAX MIC RADIO TAPE STAND BY CD STOP EJECT F FWD REWIND PLAY RECORD OPEN BAND AM FM KHz 1600 1400 1200 1000 800 700 600 530 AM MHz 108 106 104 102 100 96 92 90 88 FM PUSH CLOSE VOLUME TUNING X BASS FUNCTION BEAT CANCEL RADIO TAPE STAND BY CD BAND AM FM FM ST MONO TUNING 1 2 1 Set the FUNCTION switch to RADIO 2 Set the BAND SELECTOR switch to FM or AM 3 Turn the...

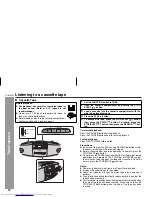
Page 22: ...form Tape play button will automatically released when the end of the tape has been reached Fast forward or rewind button cannot automatically released when the end of the tape has been reached Make sure to press the STOP EJECT button when the end of the tape has been reached Before playback For playback use normal or low noise tapes for the best sound Metal or CrO tapes are not recommended Do not...

Page 23: ...recorded signal Variable Sound Monitor For recording use only normal tapes Do not use metal or CrO tapes Erase prevention tab of cassette tapes When recording on a cassette tape make sure that the erase prevention tabs are not removed Cassettes have removable tabs that prevent accidental recording or erasing To protect the recorded sound remove the tab after recording Cover the tab hole with adhes...

Page 24: ...he FUNCTION switch to TAPE 2 Load a cassette into the cassette compartment 3 Press the PAUSE button 4 Press the RECORD button 5 Press the PAUSE button again to begin recording 1 Set the FUNCTION switch to CD 2 Load a blank cassette into the cassette compartment with the side to be recorded on facing up 3 Press the PAUSE button 4 Press the RECORD button 5 Press the PAUSE button again to begin recor...

Page 25: ...urn the power on Symptom Possible cause When a button is pressed the unit does not respond Set the unit to the power stand by mode and then turn it back on No sound is heard Is the volume level set to 0 Are the headphones connected Symptom Possible cause Playback does not start Is the disc loaded upside down Playback stops in the middle or is not performed properly Does the disc satisfy the standa...

Page 26: ...g the radius Maintenance Cleaning the cabinet Periodically wipe the cabinet with a soft cloth and a diluted soap solution then with a dry cloth Caution Do not use chemicals for cleaning petrol paint thinner etc It may damage the cabinet finish Do not apply oil to the inside of the unit It may cause malfunctions Cleaning the lens and tape handling parts Do not touch the laser pickup lens If finger ...

Page 27: ...SUM 1 R20 or HP 2 battery x 8 Power consumption Power on 13 W Power stand by 1 4 W Output power RMS 4 W 2 W 2 W DC OPERATION 10 T H D Speakers 9 cm 3 1 2 full range speaker x 2 Dimensions Width 410 mm 16 1 8 Height 150 mm 6 Depth 245 mm 9 1 2 Weight 2 7 kg 5 9 lbs without battery Frequency range FM 88 108 MHz AM 531 1602 kHz Frequency response 80 8 000 Hz Normal tape Signal noise ratio 40 dB Wow a...

Page 28: ...92L01TMP300010 06H R KI 1 SHARP CORPORATION ...

Reviews: