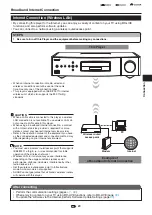
AC cord
Connecting the AC Cord
1
Plug the supplied AC cord into the AC IN terminal
on the rear of the Player.
2
Then, plug into an AC outlet with ground hole.
AC cord
NOTE
•
Place the Player close to the AC outlet, and keep the
power plug within reach.
•
TO PREVENT RISK OF ELECTRIC SHOCK, DO NOT
TOUCH THE UN-INSULATED PARTS OF ANY CABLES
WHILE THE AC CORD IS CONNECTED.
•
If you are not going to use this Player for a long period of
time, be sure to remove the AC cord from the AC outlet.
Before Starting Playback
Turning the Power On
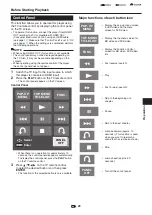
POWER/POWER
(ON/STANDBY) indicator
WiSA indicator
Turning the power on
Press
POWER
to turn on the power of the Player.
•
The POWER indicator lights blue.
NOTE
•
To change language, please see the language setting
(see page
).
•
When you turn on this player, the WiSA system is
automatically started if “Audio Out” is selected at “WiSA
Output” on page
•
If any associated WiSA-compliant receivers and speakers
are not found, an alert message of “A registered receiver
is not found” will be displayed on the screen.
Entering standby
Press
POWER
to enter standby.
•
The POWER indicator lights red.
•
If you press
POWER
again immediately after entering
standby, the Player may not turn on. If this happens, wait
for 10 seconds or more and then turn on the power again.
•
Week electric power is still consumed even when the
player is turned off.
NOTE
•
When you turn off the Player, the WiSA system will
automatically stop.
Indicators on the Player
POWER (ON/STANDBY) indicator
Blue on
Power on
Red on
Standby
NOTE
•
The POWER indicator blinks while the Player is preparing
for starting up. You cannot turn the Player on until the
POWER indicator stops blinking.
WiSA indicator
Blue on
WiSA System On mode
(When “Audio Out” is
selected at “WiSA Output”
To Dim the Display
If you feel that the front panel display and indicator
on the player are too bright when watching movies,
you can dim the front panel display except for the
POWER indicator.
DIMMER
Front panel display
Press
DIMMER
to turn the front panel display and
indicator is turned Dimmer1, Dimmer2, Dimmer3 or
).
29
P
repar
ation


