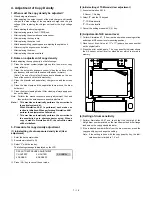
6. Adjustments relating to process control
(The adjustment procedures differ according to the state of service
maintenance.)
A. Adjustment when installing the machine
•
Unpack the machine (lock release).
•
Install and supply the supply parts.
•
Turn on the power.
(1)
Execute simulation No. 25-2.
Toner density reference value
setting
Over toned error
→
EE(EL)
Under toned error
→
EE(EU)
B. Adjustment in maintenance within the life of
supply part
•
Complete the maintenance.
•
Turn on the power.
(1)
Execute simulation No. 44-1. Process control state check
[+ 1] Process control correction valid
[+ 2] Optical system dirt correction valid
[+ 4] OPC drum film wear correction valid
[+10] Toner control A correction valid
[+20] Toner control B correction valid
Note: [37] All valid
For this adjustment, check that the setting value is "7."
(2)
Compulsorily execute simulation No. 44-6 process control.
(3)
Execute simulation No. 46-1 copy exposure adjustment.
Execute copy exposure adjustment according to the procedure
of [8]-5.
C. Adjustment when replacing the developer
•
Complete replacement of the developer.
•
Turn on the power.
(1)
Execute simulation No. 25-2.
Toner density reference value
setting
Over toned error
→
EE(EL)
Under toned error
→
EE(EU)
(2)
Execute simulation No. 46-1 copy exposure adjustment.
Execute the copy exposure adjustment according to the proce-
dure of [8]-5.
D. Adjustment when replacing the drum
(Photoconductor)
•
Complete replacement of the drum.
•
Turn on the power.
(1)
Execute simulation No. 24-7 drum film wear correction counter
reset.
(2)
Execute simulation No. 44-2 drum mark sensor level adjustment.
Standard value: 204
±
10
(3)
Execute simulation No. 44-6 compulsory execution of process
control.
(4)
Execute simulation No. 46-1 copy exposure adjustment.
Execute the copy exposure adjustment according to the proce-
dure of [8]-5.
E. Adjustments when replacing the developer and
the drum (photoconductor)
•
Complete replacement of the drum.
•
Complete replacement of the developer.
•
Turn on the power.
(1)
Execute simulation No. 24-7 drum film wear correction counter
reset.
(2)
Execute simulation No. 25-2 toner density reference value set-
ting
Over toned error
→
EE(EL)
Under toned error
→
EE(EU)
(3)
Execute simulation No. 44-2 drum mark sensor level adjustment.
Standard value: 204
±
10
(4)
Execute simulation No. 44-6 compulsory execution of process
control.
(5)
Execute simulation No. 46-1 copy exposure adjustment.
Execute the copy exposure adjustment according to the proce-
dure of [8]-5.
F. Adjustment when replacing/cleaning the drum
mark sensor
(1)
Execute simulation No. 44-2 drum mark sensor level adjustment.
Standard value: 204
±
10
G. Adjustment when replacing/cleaning the image
density sensor
(1)
Execute simulation No. 44-3 image density sensor level adjust-
ment.
Standard value: 204
±
10
H. Adjustment when replacing the sensor level
adjustment VR PWB
Execute the procedures of F and G in the above.
1. Note: This model emplyes the high-sensitivity drum,
which requires special care against pre-exposure.
1) Never expose the drum outside the bag. (Keep it in a
black bag.)
2) When istalling this model, avoid facing the front cover
toward a light source or window.
Avoid opening the front cover as far as possible.
2. Other note
1) If starting powder is attached to the density sensor
when replacing the drum/blade, it may cause faulty
operations of the sensor. Be sure to clean and remove
powder.
7 – 23
Summary of Contents for SF-2040
Page 27: ...9 Desk unit SF D23 11 12 16 17 13 18 10 9 8 7 6 2 5 4 3 1 23 21 22 19 20 14 15 4 10 ...
Page 63: ...5 5 C F 10 D 7 6 11 G E 8 9 H 12 6 2 ...
Page 65: ...3 B 3 E 13 C 4 5 6 7 8 F 14 D 10 11 9 6 4 ...
Page 67: ...2 1 3 A D 9 8 11 10 B 4 5 E 12 13 14 C 7 6 6 6 ...
Page 69: ...A a 1 1 D 4 4 B 1 b 1 1 E 5 5 7 6 8 9 8 5 C 2 3 3 F 5 11 12 6 8 ...
Page 71: ...1 2 3 3 4 5 A D 13 11 10 7 6 6 7 B E 14 8 12 9 C F 15 G 16 16 6 10 ...
Page 73: ...A a 1 D 11 10 10 9 8 B 4 2 3 E 13 12 12 C 5 7 6 7 6 12 ...
Page 75: ...C 4 F 9 9 9 10 9 5 6 D G 11 E 8 7 6 14 ...
Page 78: ...Volume PWB 8 9 10 10 6 17 ...
Page 80: ...C 5 F 11 P D F R 7 6 6 12 13 G 12 13 E 8 9 a 8 H 14 6 19 ...


