Main code
Sub code
Description
Ref. Page
26
08
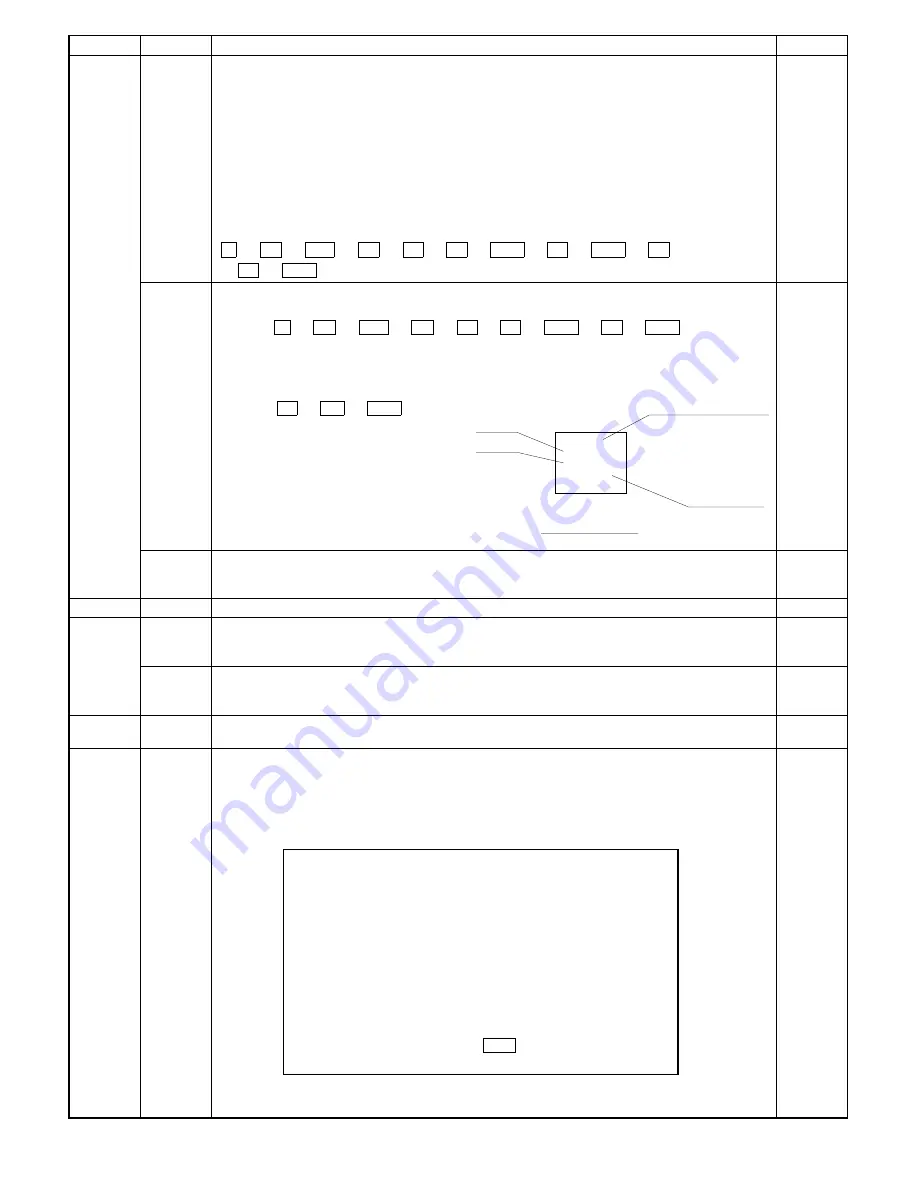
Lens characteristics entry (at a time of lens replacement)
Because each lens has a variance in focal distance, the lens moving distance in any zoom mode must
correspond with the focal distance of the lens. The zoom ratio varies proportionate to the variance of
the lens focal distance.
To avoid focus problem, the class of the lens focal distance (refer to chart on page 7-11) is stored in the
memory using the test command. In a variable zoom mode, the lens moving distance that corresponds
to the lens focal distance is obtained on the basis of the data so as to produce the accurate zoom copy.
[7]-10-(6)
Setup method (26-08)
1
When the test command is executed, the presently stored preset code is displayed and the READY
lamp turns on.
2
After the READY lamp turned on, enter the lens number shown on the top of lens area and press
the PRINT switch to store the value in the memory. The READY lamp now turns off.
C
→
=
↵
→
0/
◊
→
=
↵
→
2
→
6
→
PSW
→
8
→
PSW
→
1
→
4
→
PSW
09
4/5 mirror characteristics entry (at a time of lens replacement)
[7]-10-(6)
1
Set the correction value for lens marked value based on "lens value vs. test command input."
Press C
→
=
↵
→
0/
◊
→
=
↵
→
2
→
6
→
PSW
→
9
→
PSW keys to execute
the test command 26-09.
As the READY lamp turns on, the previously set value 1 to 21 is shown.
2
Enter the new value on the keypad.
EX: If the value shown on the lens is +1, 2, enter "14."
Press the 1
→
4
→
PSW keys.
10
AE original density setting
Used to set the original density. (Set value: 1
∼
9)
Default: 2 Set to 9 if the density is extremely low.
27
01
PPC communication trouble
30
01
Monitoring main unit paper sensor
Used to check the on/off state of paper sensor in the copier.
When the sensor turns on, the display reverses.
02
Monitoring paper cassette size
Used to check the on/off state of paper cassette size. When the switch turns on, the display reverses.
42
*
°
Developer counter clear
Reset the contents of the copy number counter of the installed developing unit.
43
*
When main code "43" is entered, the following message is displayed on the LCD.
°
Fusing temperature setting
Used to set the fusing temperature.
When this simulation is executed, the currently set fusing temperature is displayed.
The fusing temperatures in the single copy mode and the duplex copy mode can be set individually.
Use the message forward scroll key to select the mode. Use the ten key to set the temperature.
SIMULATION No.43-
*
[1
→
1, 2
→
1]
INPUT1
∼
10
1. 160°C
2. 165°C
3. 170°C
4. 175°C
5. 180°C
6. 185°C
7. 190°C
8. 195°C
9. 200°C
0. 205°C
[1
→
2, 2
→
2]
1. 160°C
2. 165°C
3. 170°C
4. 175°C
5. 180°C
6. 185°C
7. 190°C
8. 195°C
9. 200°C
0. 205°C
[1
→
2, 2
→
2] SETTING:PRESS
➡
KEY
901024
O. L
O. i
P. NO
+
1.2
+
2.4
12
0
TOPCON
0
(0-i)
Man ufac tu ring date
Preset val ue
Label contents
(0-L)
8 – 11
Summary of Contents for SF-2040
Page 27: ...9 Desk unit SF D23 11 12 16 17 13 18 10 9 8 7 6 2 5 4 3 1 23 21 22 19 20 14 15 4 10 ...
Page 63: ...5 5 C F 10 D 7 6 11 G E 8 9 H 12 6 2 ...
Page 65: ...3 B 3 E 13 C 4 5 6 7 8 F 14 D 10 11 9 6 4 ...
Page 67: ...2 1 3 A D 9 8 11 10 B 4 5 E 12 13 14 C 7 6 6 6 ...
Page 69: ...A a 1 1 D 4 4 B 1 b 1 1 E 5 5 7 6 8 9 8 5 C 2 3 3 F 5 11 12 6 8 ...
Page 71: ...1 2 3 3 4 5 A D 13 11 10 7 6 6 7 B E 14 8 12 9 C F 15 G 16 16 6 10 ...
Page 73: ...A a 1 D 11 10 10 9 8 B 4 2 3 E 13 12 12 C 5 7 6 7 6 12 ...
Page 75: ...C 4 F 9 9 9 10 9 5 6 D G 11 E 8 7 6 14 ...
Page 78: ...Volume PWB 8 9 10 10 6 17 ...
Page 80: ...C 5 F 11 P D F R 7 6 6 12 13 G 12 13 E 8 9 a 8 H 14 6 19 ...


