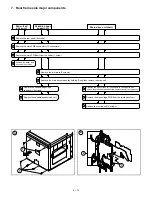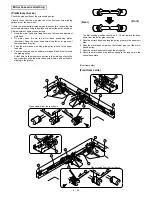
5. Fuser unit
1
2
6
3
4
5
8
7
9
10
12
11
13
Heater lamp
Upper/lower
heat roller
Upper/lower
separation pawls
Upper cleaning
roller
Remove the fuser cover (2 screws).
Unfasten the heater lamp connectors on both sides.
Unfasten the thermistor and thermostat connectors.
Remove the lamp holder unit (2 screws).
Remove the heater lamp.
Remove the tension spring and release the fuser tension.
NOTE:
Remove the clam shell mechanism holding screws (2 screws).
NOTE:
Do not use the spare screw hole.
Open the fuser unit.
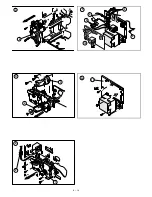
Remove the upper heat
roller assy.
Remove the upper
separation pawls.
(Thermistor)
The center of the thermistor must be
in contact with the heat roller.
Clean thermistor surface
using alcohol.
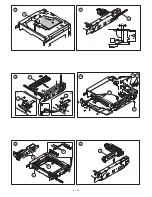
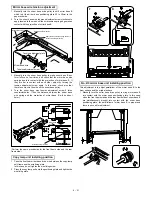
Open the lower pawl holder bracket assy (2 screws).
Remove the lower heat
roller assy.
Remove the lower
separation pawls.
When installing the
lower heat roller, the
pawls must be
positioned away from
the roller before
closing the lower
pawl holding plate,
then restore pawls to
proper position after
installing roller.
(Discharge brush)
The discharge brush must be in contact
with the upper heat roller.
Upper heat roller
Thermistor
Thermistor
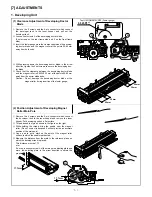
When the clam shell is
assembled, the periphery
of the mechanism must
meet together.
Ensure gear mesh
is correct. Ensure
clamshell is seated
properly.
•
•
NOTE:
16
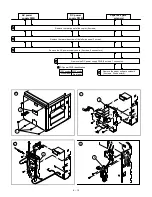
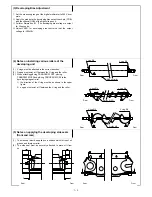
Put the front/rear/under CL
spring in the frame groove
and release the pressure.
Lower
cleaning roller
14
Remove the cleaning roller springs on the
front and the rear sides.
15
Remove the upper cleaning roller
6 – 9
Summary of Contents for SF-2040
Page 27: ...9 Desk unit SF D23 11 12 16 17 13 18 10 9 8 7 6 2 5 4 3 1 23 21 22 19 20 14 15 4 10 ...
Page 63: ...5 5 C F 10 D 7 6 11 G E 8 9 H 12 6 2 ...
Page 65: ...3 B 3 E 13 C 4 5 6 7 8 F 14 D 10 11 9 6 4 ...
Page 67: ...2 1 3 A D 9 8 11 10 B 4 5 E 12 13 14 C 7 6 6 6 ...
Page 69: ...A a 1 1 D 4 4 B 1 b 1 1 E 5 5 7 6 8 9 8 5 C 2 3 3 F 5 11 12 6 8 ...
Page 71: ...1 2 3 3 4 5 A D 13 11 10 7 6 6 7 B E 14 8 12 9 C F 15 G 16 16 6 10 ...
Page 73: ...A a 1 D 11 10 10 9 8 B 4 2 3 E 13 12 12 C 5 7 6 7 6 12 ...
Page 75: ...C 4 F 9 9 9 10 9 5 6 D G 11 E 8 7 6 14 ...
Page 78: ...Volume PWB 8 9 10 10 6 17 ...
Page 80: ...C 5 F 11 P D F R 7 6 6 12 13 G 12 13 E 8 9 a 8 H 14 6 19 ...


