19
Options:
If you press the OK, you can select the “Delete Timer”, “Delete Series Timer” and “Check
Conflicts”.
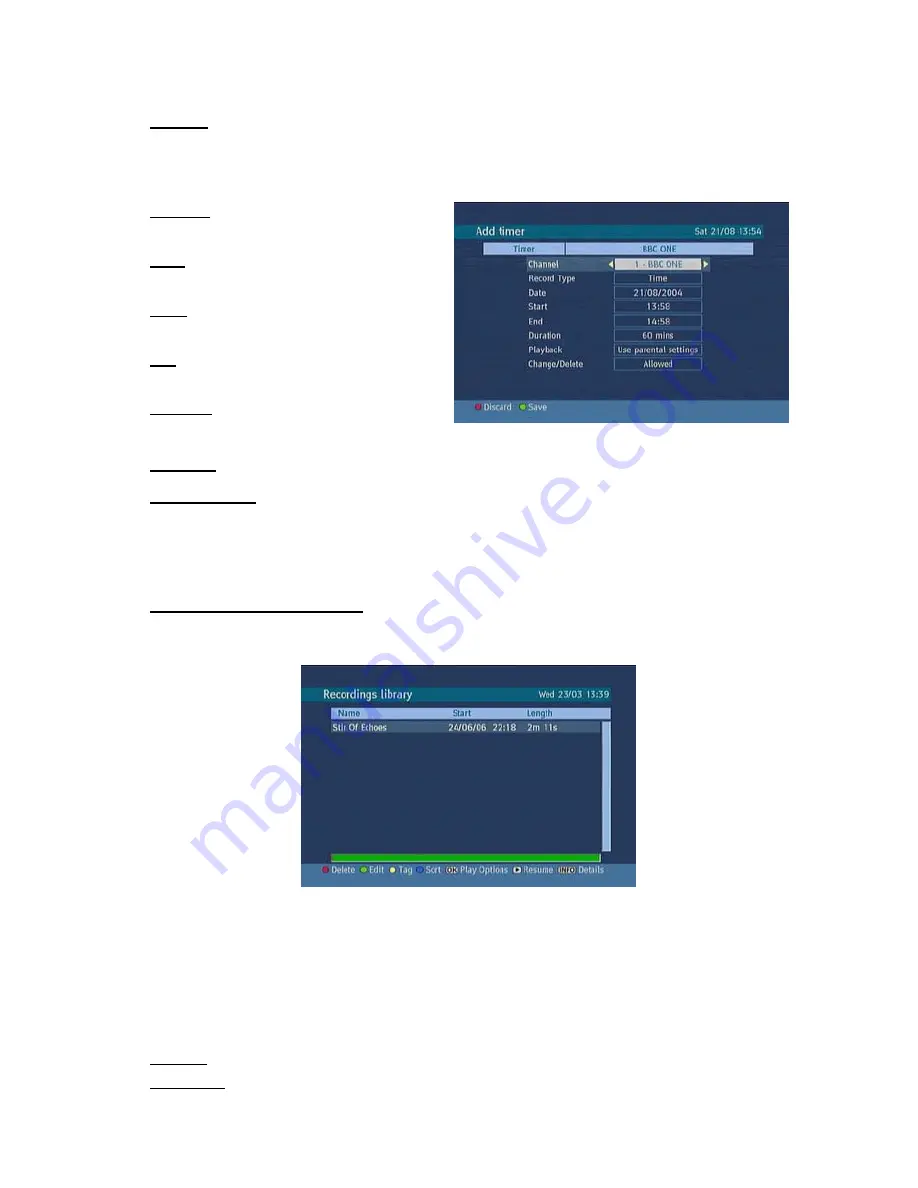
To add a Timer press YELLOW on the remote and the, “Add Timer “ windows appears.
Channel:
“
3
/
4
” will navigate the user
through the TV or Radio list.
Date:
By using either “
3
/
4
” or “0,1,2…,9”
start date is entered.
Start:
By using either “
3
/
4
” or “0,1,2…,9”
start time is entered.
End:
By using either “
3
/
4
” or “0,1,2…,9”
end time is entered.
Duration:
Displays the duration of the
recording.
This is automatically worked out after the start and end times have been entered.
Playback:
permit or block playback for other users."use parental settings" is default.
Change /Delete:
permit or prohibit any modifications for other users.
When a timer Start time is reached, the receiver starts to record the desired program, then when the
end time is reached, the recording stops. Save the adjustments by pressing the GREEN, or cancel by
pressing RED on the remote control. You can edit the list by pressing GREEN, or delete by pressing
RED on the remote control.
4. RECORDINGS LIBRARY
All the recordings are kept in a list. To show the list of recordings press either LIB on the remote
control or access it from the main menu.
RED BUTTON (DELETE)
:
erase the recordings
GREEN BUTTON (EDIT )
:
make changes to the recordings
YELLOW BUTTON (TAG)
:
marks the recordings for archiving
BLUE BUTTON (SORT)
:
change the order of the recordings
INFO (DETAILS)
:
displays the short extended programs in detail
OK BUTTON
:
opens the play options menu
4
(RESUME)
:
recommence the recordings
Red bar:
indicates the used space of the recordings on the hard disk.
Yellow bar:
displays the approximate capacity required for the timers currently set.


