background image

23

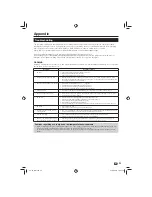
Troubleshooting

The following conditions in the table below do not always indicate a problem. Please perform the checks described 
below before calling for service. If the problem can not be corrected by the use of this manual, remove the mains plug 
from the power socket and contact the Helpline on 0845 880 0421 in order to obtain service or advice.
Where this is not possible please visit our web site www.sharp.co.uk/customersupport.aspx

Customers without Internet access may phone 0845 880 0421 during office hours.
In the unlikely event of this equipment requiring repair during the guarantee period, you will need to provide proof of 
purchase to the repair company. Please keep your purchase invoice or receipt in a safe place.

WARNING

Under no circumstances should you try and repair this product yourself. This will invalidate the warranty. Do not open the 
unit as there is risk of electric shock.

Problem

Possible solution

No power.

• 

Check if you pressed 

• 

a

 on the remote control unit. 

Is the AC power adapter disconnected?

• 

Check if you pressed 

• 

a

 on the Receiver.

The Receiver cannot be operated.

• 

External influences such as lightning, static electricity, etc., may cause improper operation. In this 

• 

case, operate the Receiver after first turning off the power, or unplugging the AC power adapter and 
re-plugging it in after one or two minutes.

Remote control unit does not operate.

• 

Are batteries inserted with polarity (

• 

e

f

) aligned?

Are batteries worn out? (Replace with new batteries.)

• 

Are you using it under strong or fluorescent lighting?

• 

Is a fluorescent light illuminating the remote control sensor?

• 

Picture is cut off.

• 

Are screen mode adjustments (WIDE MODE) such as picture size made correctly? (Page 17)

• 

Power is suddenly turned off.

• 

The Receiver’s internal temperature has increased. Remove any objects blocking the vent or clean.

• 

Is auto standby activated? (Page 21)

• 

No picture.

• 

Are connections to external equipment correct? (Pages 13 to 15)

• 

Is the input signal type selected correctly after connection? (Page 17)

• 

Is the correct output source selected? (Page 10)

• 

Is the antenna connected properly? (Page 9)

• 

Hold the HDMI button on the remote control for 5 seconds to reset the output to 1080i. (Page 17)

• 

No sound.

• 

Is the volume too low?

• 

Check if you pressed mute on the remote control unit.

• 

The Receiver sometimes makes a 

• 

cracking sound.

This is not a malfunction. This happens when the casing slightly expands and contracts according to 

• 

changes in temperature. This does not affect the Receiver’s performance.

Freezing / Blocking

• 

Check Freeview reception information as we have listed on the front of the manual.

• 

Refer to the page 21 and 22 to perform the First Time Installation.

• 

There is noise interference on the TV 

• 

while a broadcast is being received.

Depending on the reception of the broadcast, interference may appear on the picture while you 

• 

watch a TV broadcast and the unit is left on. This is not a malfunction of the unit.

Cautions regarding use in high and low temperature environments

When the Receiver is used in a low temperature space (e.g., room, office), the picture may leave trails or appear slightly delayed. This 

• 

is not a malfunction, and the Receiver will recover when the temperature returns to normal.

Do not leave the Receiver in a hot or cold location. Also, do not leave the Receiver in a location exposed to direct sunlight or near a 

• 

heater.

Appendix

TU-T2_GB.indd   23

TU-T2_GB.indd   23

01/06/2010   16:03:16

01/06/2010   16:03:16

Summary of Contents for TU-T2

Page 1: ...finition Multimedia Interface are trademarks or registered trademarks of HDMI Licensing LLC Important This product can only receive Digital Terrestrial TV signals subject to coverage an aerial upgrade may be required Text your postcode followed by your house name or number to 83331 or go to www freeview co uk availability Costs no more than a normal text Read this operation manual carefully 1 If y...

Page 2: ...view 5 Receiver rear view 5 Preparation 6 Supplied accessories 6 Inserting the batteries 7 Using the remote control unit 7 Quick guide 8 Initial installation overview 8 Before turning on the power 9 Initial auto installation 9 Watching TV 10 Daily operation 10 Channel List 11 Selecting a programme using the EPG 12 Digital text 12 Connecting external devices 13 Video connections 13 Audio connection...

Page 3: ...milar surface since they can block ventilation openings This product is not designed for built in installation do not place the product in an enclosed place such as a bookcase or rack unless proper ventilation is provided or the manufacturer s instructions are followed Heat sources Keep the product away from heat sources such as radiators heaters stoves and other heat generating products including...

Page 4: ...10 SUBT E Switch subtitles on off Page 19 AUDIO R Select the desired audio language Page 10 Colour buttons T The coloured buttons are correspondingly used to select the coloured items on the screen e g Digital Text INFO Y Displays programme information Page 10 EXIT U Exit the MENU screen LAST I Toggles between the current channel and the previous channel Page 10 PROG O Select the channel Numeric b...

Page 5: ... 6 7 8 9 RF IN Antenna in terminal 1 USB terminal For service 2 only RF OUT Antenna out 3 terminal ETHERNET terminal For 4 future services SPDIF Digital audio 5 output terminal HDMI terminal 6 VCR SCART terminal 7 TV SCART terminal 8 12V DC terminal 9 Introduction TU T2_GB indd 5 TU T2_GB indd 5 01 06 2010 16 02 47 01 06 2010 16 02 47 ...

Page 6: ... HDMI WIDE AUDIO TEXT CH LIST SUBT GUIDE INFO BACK EXIT OK VOL VOL LAST MUTE PROG PROG l 2 3 4 5 6 7 8 9 AD 0 A V Page 4 Page 9 Page 9 Page 9 Operation manual this publication AAA size zinc carbon battery x2 page 7 Preparation TU T2_GB indd 6 TU T2_GB indd 6 01 06 2010 16 02 48 01 06 2010 16 02 48 ...

Page 7: ...or an extended period of time remove the batteries from it When replacing the batteries use zinc carbon batteries instead of alkaline ones Note on disposing batteries The batteries provided contain no harmful materials such as cadmium lead or mercury Regulations concerning used batteries stipulate that batteries may no longer be thrown out with the household rubbish Deposit any used batteries free...

Page 8: ...n on the Receiver Page 10 Run the first time installation o Page 9 Ensure the antenna is connected First Time Installation OK Please ensure that an aerial is connected Then press to scan for services Press OK to continue Start searching channels Watch TV Congratulations n Now you can watch TV If necessary adjust the antenna o to attain maximum signal reception Connect external devices Connect exte...

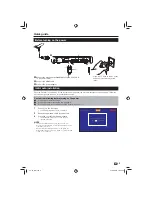
Page 9: ...ter connected and plugged in E Is the HDMI cable connected between the Receiver and your TV E Press 1 a on the Receiver The first time installation screen is displayed Ensure the antenna cable is connected 2 Press OK to start the channel search 3 The Receiver will search for sort and store all receivable channels NOTE The first time installation process will be aborted if the Receiver is left unat...

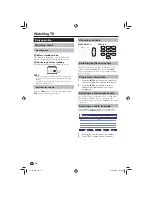
Page 10: ...e current channel and the previous channel by pressing LAST Each press of the LAST button will toggle between the current channel and the previous channel Programme information Press the 1 INFO button once to display times channel programme start and finish dates Press the 2 INFO button again to display additional information about the current programme Selecting a video output source Once the Rec...

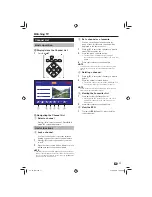
Page 11: ...urite 3 You can set a channel as a favourite for quick access All favourite channels will be displayed in the favourites list Press 1 a b to select the channel you want to add to the favourites list Press the green coloured button 2 The favourites list will be shown listing all favourite channels and the channel you have just added Press 3 c to return to the channel list NOTE To delete a channel f...

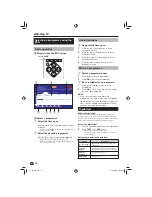
Page 12: ...ress the red coloured button to move 1 backwards 2 hours Press the green coloured button to move 2 forwards 2 hours Press the yellow coloured button to move 3 backwards 24 hours Press the blue coloured button to move 4 forwards 24 hours Watch a programme Watch a programme now 4 Press 1 a b to select a programme Press 2 OK to watch the programme Set a reminder for a programme 5 Press 1 a b c d to s...

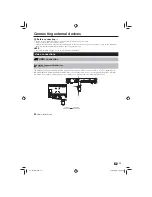
Page 13: ...ed in pages 13 to 15 are commercially available items Video connections HDMI connection Example of connectable devices HD Ready TV E The HDMI connection permits digital video and audio transmission via a connection cable to a TV The digital picture and sound data are transmitted without data compression and therefore lose none of their quality Analogue to digital conversion is no longer necessary ...

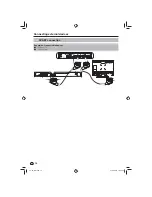
Page 14: ...D Recorder E RF IN RF OUT USB ETHERNET SPDIF HDMI VCR TV 12V DC 2A HDMI SCART OUTPUT 2 CH AUDIO OUT VIDEO OUT DIGITAL AUDIO OUT L R CB PB VIDEO COAXIAL Y S VIDEO CR PR Connecting external devices TU T2_GB indd 14 TU T2_GB indd 14 01 06 2010 16 02 59 01 06 2010 16 02 59 ...

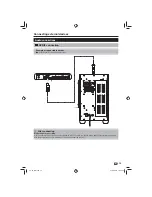
Page 15: ... COAX 2 L R SPEAKER OUTPUT FR FL C RL RR _ POWER FUSE T2AL 250V ON OFF AC 230V 50Hz After connecting E Digital audio output setting After connecting to a surround sound system with a SPDIF cable you should set an audio output format compatible with the programme you are watching or the device connected Page 17 Connecting external devices TU T2_GB indd 15 TU T2_GB indd 15 01 06 2010 16 03 00 01 06 ...

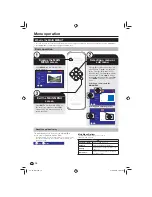
Page 16: ...b menu in the MAIN MENU Settings AV Settings Languages Parental Control General HDMI Video HDMI Audio SCART Output Screen Size Menu Transparency Channel Change Timeout Audio Desacription Volume Audio Delay Settings 720p Exit Menu Select OK Exit Selecting and adjusting options Settings AV Settings Languages Parental Control General HDMI Video HDMI Audio SCART Output Screen Size Menu Transparency Ch...

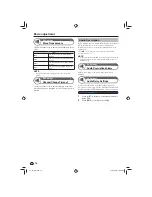
Page 17: ...ut Adjusts the video signal type when the Receiver is connected to your TV using a SCART cable Item RGB This selects an RGB video signal type The video signal will be splits the video output into separate red green and blue signals to provide the best picture quality Composite This selects a composite video signal Produces a single composite video signal which provides poor picture quality NOTE If...

Page 18: ... provides a voice over describing visual information such as scenery body language and facial expressions Press AD on the remote control unit to toggle audio description on or off NOTE If audio description is available for a programme the AD symbol will be displayed in the Information Screen Page 10 and the EPG Page 12 AV Settings Audio Description Volume Adjusts the volume of the audio descriptio...

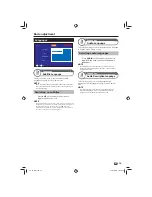
Page 19: ...age 12 If subtitles are available they will be displayed at the bottom of the screen in the default subtitle language Languages Audio Language This function allows you to set the default audio language to English Welsh Gaelic or Irish Selecting audio languages Press AUDIO on the remote control unit to toggle switch between the available audio languages NOTE Not all programmes are broadcast with al...

Page 20: ... PIN Disabled This will prevent a first time installation to be performed unless the parental settings PIN is entered Parental Control Allow parental changes This function allows you to prevent changes within the parental control menu without first entering the parental settings PIN Item Enabled This will allow access to the parental control menu without first entering the parental settings PIN Di...

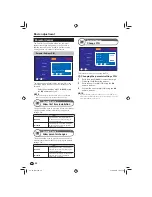
Page 21: ...ware upgrades are installed Item Automatic The receiver will automatically install software upgrades when available Manual The receiver will display a message allowing you to confirm or cancel the software upgrade General Auto Retune This function allows you to control when new services channels are added and stored on the Receiver Item Always Start Whenever new services channels are detected the ...

Page 22: ...ect Bandwidth Press 5 c d to adjust the bandwidth Press 6 b to select System Press 7 c d to select a System Press the blue coloured button to start 8 scanning for the specified channel If the channel is found it will be stored in the Receiver and will be available in the channel list and EPG Item UHF Channel The channel number you want to save the manually tuned channel as Frequency The frequency ...

Page 23: ...cut off Are screen mode adjustments WIDE MODE such as picture size made correctly Page 17 Power is suddenly turned off The Receiver s internal temperature has increased Remove any objects blocking the vent or clean Is auto standby activated Page 21 No picture Are connections to external equipment correct Pages 13 to 15 Is the input signal type selected correctly after connection Page 17 Is the cor...

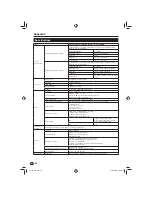
Page 24: ... L4 1 Field Frame Rate 60 30 Hz for NTSC or 50 25 Hz for PAL HD SD Decoding Capability Interlaced Mode Progressive Mode 1080i 720p 576p and 576i Aspect Ratio 16 9 Widescreen 4 3 Widescreen 16 9 4 3 Centre Cut Out 4 3 Letter Box 16 9 Video Input Output Digital Video HDMI with HDCP supported CVBS R G B for TV SCART OUT CVBS for VCR SCART OUT CVBS R G B for VCR SCART IN Output Modes HD 1080P 1080i 72...

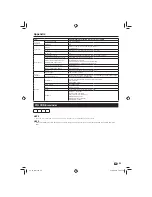
Page 25: ... with unique Mac address Power Interface Input Voltage 100 240 VAC 50 60 z Power Consumption Normal Operation TBD Standby Mode Less than 2W with build in power Save mode to meet European initiatives EuP Others Accessory Customer Selectable Remote Controller and Batteries User s Manual HDMI Cable 1 5M EMC Safety Compliant to CE ATC HDMI 1 3 HDCP Dolby Dolby Digital Stereo Dolby Digital HE AAC Softw...

Page 26: ...media Interface are trademarks or registered trademarks of HDMI Licensing LLC Manufactured under license from Dolby Laboratories Dolby and the double D symbol are trademarks of Dolby Laboratories TU T2_GB indd 26 TU T2_GB indd 26 01 06 2010 16 03 16 01 06 2010 16 03 16 ...

Page 27: ... to discard this product please contact your local authorities and ask for the correct method of disposal For Switzerland Used electrical or electronic equipment can be returned free of charge to the dealer even if you don t purchase a new product Further collection facilities are listed on the homepage of www swico ch or www sens ch B Information on Disposal for Business Users 1 In the European U...

Page 28: ...o reset your channels on each occasion If you do not reset your channels you risk losing some or all of your TV services during and following switchover Please refer to pages 21 and 22 of this manual for help with resetting channels Please note that in order to receive the maximum number of available TV services on your equipment you must preform a first time installation and do not just add chann...

Page 29: ...arantee any fault which occurs must be notified to Sharp or its appointed Service Facility within one year from the date this product was purchased Proof of purchase must be provided 4 In the unlikely event of this product requiring repair please contact the Sharp DTR help line on 5 No person has any authority to vary the terms or conditions of this guarantee 6 This guarantee is offered as an addi...

Page 30: ...30 Notes TU T2_GB indd 30 TU T2_GB indd 30 01 06 2010 16 03 18 01 06 2010 16 03 18 ...

Page 31: ...31 Notes TU T2_GB indd 31 TU T2_GB indd 31 01 06 2010 16 03 18 01 06 2010 16 03 18 ...

Page 32: ...TU T2 EN 03 10 dcs 8595 TU T2_GB indd 32 TU T2_GB indd 32 01 06 2010 16 03 18 01 06 2010 16 03 18 ...

Reviews: