32
VC-A412U/A413U
VC-H812U/H813U
SERVO CIRCUIT ADJUSTMENT
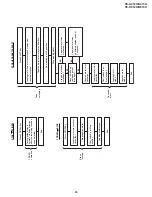
5-1 ADJUSTMENT OF HEAD SWITCHING
POINT
Measuring
Color TV monitor
instrument
Mode
Playback still
Cassette
Self-recorded tape (SP mode)
(See Note below 2)
Control
Tracking control b) or (–)
Specification
No vertical jitter of picture
1. Play a cassette which was recorded by the unit in SP
mode.
2. Press the PAUSE/STILL button to freeze the picture.
3. Look at the monitor screen and adjust (+) or (–) TRACK-
ING buttons so that the vertical jitter of the picture is
minimized.
4. Play and freeze the self-recorded tape in EP mode and
make sure vertical jitter of the picture is not noticeable.
Note:
1 The FV goes back to the it’s initial state when the unit is
put into the system controller reset mode due to power
failure, etc.
In this case, preset the FV once again.
2 Self-recorded tape is a cassette whose program was
recorded by the unit being adjusted.
Measuring
Color TV monitor
instrument
Mode
Playback
Cassette
Self-recorded tape (EP mode)
(See Note below)
Control
Tracking control b) or (–)
Specification
No Poor picture and Hi-Fi sound
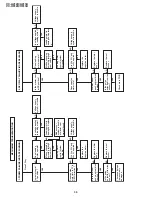
1. Play a cassette which was recorded by the unit in EP
mode.
2. Short circuit between TP801 and TP802 on the opera-
tion PWB to center tracking.
3. Press the tracking buttons (+) or (–) 20 times each to
bring the tracking off center. Make sure that:
1) There is nothing unusual on the playback screen.
2) There is nothing unusual in the Hi-Fi sound (for the Hi-
Fi models only).
4. Press the STOP button to quit test mode.
Note:
Self-recorded tape is a cassette whose program was re-
corded by the unit being adjusted.
5-2 ADJUSTMENT OF FV (False Vertical
Sync) OF STILL PICTURE
5-3 CHECKING OF OFF TRACK
Measuring
Dual-trace oscilloscope
instrument
Mode
Playback
Cassette
Alignment tape (VROEFZHS)
Test point
VIDEO OUT jack to CH2
TP202 (Sig.)~TP203 (GND) to CH1
Control
R701 Head switching point adjust-
ment control
Specification
6.0
±
0.5H (lines)
1. Remove the front panel and play the alignment tape.
2. Connect a dual-trace oscilloscope to the VIDEO OUT
jack and TP202 (Sig.) and TP203 (GND).
(Trigger the oscilloscope with the head switching pulse
on TP202.)
3. Playback the alignment tape, and then short circuit
between TP801 and TP802 on the operation PWB.
4. Adjust R701 so that the leading edge of the head
switching pulse is 6.0H (lines) ahead of the vertical sync
as shown in Figure 5-2.
5. Press the STOP button to quit test mode.
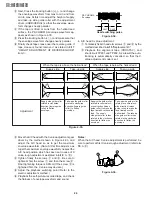
Figure 5-2.
6.0
±
0.5H (lines)
CH-1
HEAD
SWITCHING
PULSE
CH-2
VIDEO OUT
CH-1: 1V/dev 50
µ
sec/dev
CH-2: 2V/dev 50
µ
sec/dev
V-sync.


