28
VC-A565U/H965U
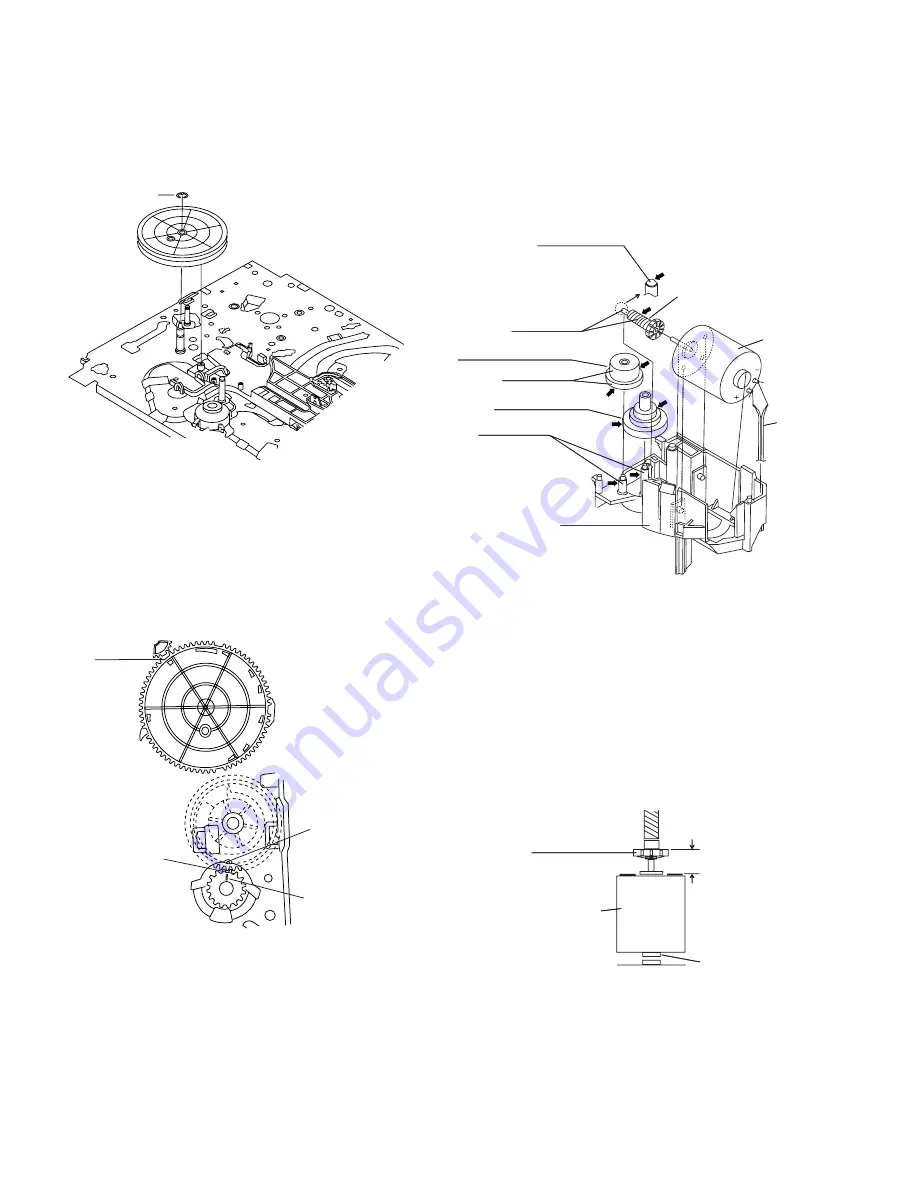
4-23 INSTALLING THE MASTER CAM (AT
REAR SIDE OF MECHANISM CHASSIS)
1. Make sure beforehand that the shifter is at initial posi-
tion.
2. Place the master cam in the position as shown below.
Note:
See the figure below for the phase matching between the
master cam synchro gear and pinch drive cam.
3. Finally fix with the E ring.
4-24 REPLACEMENT OF LOADING MOTOR
• Removal
• Replacement
Remove the loading motor, and install the replacement
loading motor as shown below.
Figure 4-40.
Figure 4-38-2.
The loading motor pressing-in must be less than 14.7 N
(1,500 gf).
Adjust the distance between motor and pulley to 6.95
mm.
Figure 4-38-1.
Figure 4-39.
+0
. 2
–0.15
E-ring
Line of synchro gear.
Phase
matching
Phase
matching
Hole of Pinch
drive cam.
Synchro gear
Master cam
6.95 mm
A part
Worm gear
+0
- 0.15
Loading
motor
To press the motor in, first
receive it by portion A.
Apply grease
Worm gear
Apply grease
Apply grease
Apply grease
L-M-Block.
Worm wheel gear.
Leading connect gear.
*Apply grease to
the tip as well.
Loading
motor.
Wire
+ : Red
- : White
Red
Insert
Summary of Contents for VC-A565U
Page 49: ...49 VC A565U H965U M E M O ...
Page 50: ...VC A565U H965U VC A565U H965U 50 51 8 BLOCK DIAGRAM SYSTEM SERVO BLOCK DIAGRAM ...
Page 51: ...VC A565U H965U VC A565U H965U 52 53 SIGNAL FLOW BLOCK DIAGRAM A565U ...
Page 52: ...VC A565U H965U VC A565U H965U 54 55 SIGNAL FLOW BLOCK DIAGRAM A965U ...
Page 53: ...56 VC A565U H965U POWER CIRCUIT BLOCK DIAGRAM ...
Page 55: ...56 VC A565U H965U POWER CIRCUIT BLOCK DIAGRAM ...
Page 64: ...70 VC A565U H965U M E M O ...


