background image

Ref. No.

Part No.

Description

Code

Ref. No.

Part No.

Description

Code

71

VC-AA350A/L/M/W
VC-AA352W,AA360A,AA370A
VC-AA550A/L/W,AA560A,AA570A

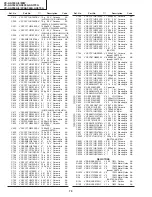
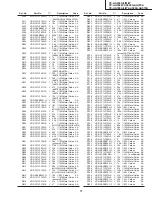
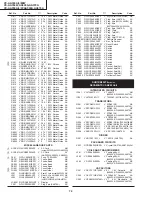
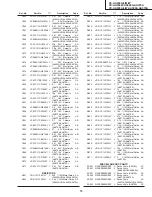
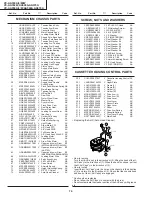
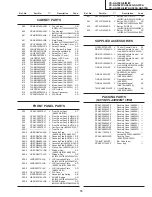
R620

VRS-CY1JF153JS

V 15k

1/16W Metal Oxide AA

R621

VRD-RA2EE4R7JY V 4.7

1/4W Carbon

AA

R623

VRS-CY1JF273JS

V 27k

1/16W Metal Oxide AA

R624

VRS-CY1JF472JS

V 4.7k 1/16W Metal Oxide AA

R625

VRS-CY1JF222JS

V 2.2k 1/16W Metal Oxide AA

R626

VRS-CY1JF101JS

V 100 1/16W Metal Oxide AA

R627

VRS-CY1JF392JS

V 3.9k 1/16W Metal Oxide AA

R631

VRS-CY1JF000JS

V 0

1/16W Metal Oxide AA

R632

VRS-CY1JF104JS

V 100k 1/16W Metal Oxide AA

R633

VRD-RA2BE104JY

V 100k 1/8W Carbon

AA

R634

VRS-CY1JF000JS

V 0

1/16W Metal Oxide AA

R637

VRS-CY1JF682JS

V 6.8k 1/16W Metal Oxide AA

R638

VRD-RA2BE561JY

V 560 1/8W Carbon

AA

R686

VRS-CY1JF272JS

V 2.7k 1/16W Metal Oxide AA

R691

VRD-RA2BE102JY

V 1k

1/8W Carbon

AA

R701

VRD-RA2BE104JY

V 100k 1/8W Carbon

AA

(except AA370A,AA570A)

R702

VRS-CY1JF102JS

V 1k

1/16W Metal Oxide AA

R704

VRS-CY1JF153JS

V 15k

1/16W Metal Oxide AA

R705

VRS-CY1JF153JS

V 15k

1/16W Metal Oxide AA

R706

VRS-CY1JF564JS

V 560k 1/16W Metal Oxide AA

R708

VRS-CY1JF332JS

V 3.3k 1/16W Metal Oxide AA

R709

VRS-CY1JF222JS

V 2.2k 1/16W Metal Oxide AA

R710

VRS-CY1JF822JS

V 8.2k 1/16W Metal Oxide AA

R713

VRS-CY1JF102JS

V 1k

1/16W Metal Oxide AA

R714

VRS-CY1JF223JS

V 22k

1/16W Metal Oxide AA

R715

VRS-CY1JF472JS

V 4.7k 1/16W Metal Oxide AA

R716

VRS-CY1JF182JS

V 1.8k 1/16W Metal Oxide AA

R717

VRS-CY1JF123JS

V 12k

1/16W Metal Oxide AA

R718

VRS-CY1JF563JS

V 56k

1/16W Metal Oxide AA

R719

VRS-CY1JF183JS

V 18k

1/16W Metal Oxide AA

R721

VRS-CY1JF223JS

V 22k

1/16W Metal Oxide AA

R722

VRS-CY1JF473JS

V 47k

1/16W Metal Oxide AA

R724

VRS-CY1JF104JS

V 100k 1/16W Metal Oxide AA

R725

VRS-CY1JF332JS

V 3.3k 1/16W Metal Oxide AA

R726

VRS-CY1JF473JS

V 47k

1/16W Metal Oxide AA

R727

VRS-CY1JF154JS

V 150k 1/16W Metal Oxide AA

R728

VRS-CY1JF332JS

V 3.3k 1/16W Metal Oxide AA

R730

VRS-CY1JF101JS

V 100 1/16W Metal Oxide AA

R731

VRS-CY1JF473JS

V 47k

1/16W Metal Oxide AA

R732

VRD-RA2BE154JY

V 150k 1/8W Carbon

AA

R733

VRS-CY1JF105JS

V 1M

1/16W Metal Oxide AA

R735

VRS-CY1JF104JS

V 100k 1/16W Metal Oxide AA

R736

VRS-CY1JF822JS

V 8.2k 1/16W Metal Oxide AA

R737

VRS-CY1JF103JS

V 10k

1/16W Metal Oxide AA

R738

VRS-CY1JF103JS

V 10k

1/16W Metal Oxide AA

R739

VRD-RA2BE102JY

V 1k

1/8W Carbon

AA

R741

VRS-CY1JF123JS

V 12k

1/16W Metal Oxide AA

R742

VRS-CY1JF223JS

V 22k

1/16W Metal Oxide AA

R743

VRS-CY1JF563JS

V 56k

1/16W Metal Oxide AA

R744

VRS-CY1JF223JS

V 22k

1/16W Metal Oxide AA

R745

VRD-RA2BE102JY

V 1k

1/8W Carbon

AA

R746

VRS-CY1JF182JS

V 1.8k 1/16W Metal Oxide AA

R747

VRS-CY1JF681JS

V 680 1/16W Metal Oxide AA

R748

VRS-CY1JF000JS

V 0

1/16W Metal Oxide AA

R750

VRD-RA2BE473JY

V 47k

1/8W Carbon

AA

R751

VRD-RA2BE562JY

V 5.6k 1/8W Carbon

AA

R752

VRD-RA2BE103JY

V 10k

1/8W Carbon

AA

R754

VRD-RA2EE181JY

V 180 1/4W Carbon

AA

R755

VRD-RA2BE103JY

V 10k

1/8W Carbon

AA

R756

VRS-CY1JF103JS

V 10k

1/16W Metal Oxide AA

R760

VRG-SC

V 1

1/4W FuseResistor AB

R771

VRS-CY1JF103JS

V 10k

1/16W Metal Oxide AA

R781

VRS-CY1JF103JS

V 10k

1/16W Metal Oxide AA

R782

VRS-CY1JF103JS

V 10k

1/16W Metal Oxide AA

R783

VRD-RA2BE102JY

V 1k

1/8W Carbon

AA

R785

VRD-RA2BE391JY

V 390 1/8W Carbon

AA

R786

VRS-CY1JF473JS

V 47k

1/16W Metal Oxide AA

R788

VRS-CY1JF104JS

V 100k 1/16W Metal Oxide AA

R789

VRD-RA2BE391JY

V 390 1/8W Carbon

AA

R790

VRS-CY1JF473JS

V 47k

1/16W Metal Oxide AA

R792

VRS-CY1JF104JS

V 100k 1/16W Metal Oxide AA

R795

VRD-RA2EE151JY

V 150 1/4W Carbon

AA

R796

VRD-RM2HD271JY V 270 1/2W Carbon

AA

R809

VRD-RA2BE101JY

V 100 1/8W Carbon

AA

R108

VRS-CY1JF000JS

V 0

1/16W Metal Oxide AA

(AA550A/L/W,AA560A,AA570A)

R111

VRS-CY1JF153JS

V 15k

1/16W Metal Oxide AA

R112

VRS-CY1JF153JS

V 15k

1/16W Metal Oxide AA

R127

VRS-CY1JF000JS

V 0

1/16W Metal Oxide AA

R152

VRD-RA2BE561JY

V 560 1/8W Carbon

AA

R153

VRS-CY1JF473JS

V 47k

1/16W Metal Oxide AA

R154

VRS-CY1JF822JS

V 8.2k 1/16W Metal Oxide AA

R155

VRD-RA2BE224JY

V 220k 1/8W Carbon

AA

R164

VRS-CY1JF000JS

V 0

1/16W Metal Oxide AA

R201

VRS-CY1JF682JS

V 6.8k 1/16W Metal Oxide AA

R202

VRS-CY1JF182JS

V 1.8k 1/16W Metal Oxide AA

R203

VRS-CY1JF562JS

V 5.6k 1/16W Metal Oxide AA

(AA350A/L/M/W,AA352W,AA360A)

R203

VRS-CY1JF222JS

V 2.2k 1/16W Metal Oxide AA

(AA370A,AA570A)

R203

VRS-CY1JF332JS

V 3.3k 1/16W Metal Oxide AA

(AA550A/L/W,AA560A)

R207

VRS-CY1JF102JS

V 1k

1/16W Metal Oxide AA

R211

VRS-CY1JF153JS

V 15k

1/16W Metal Oxide AA

R212

VRS-CY1JF153JS

V 15k

1/16W Metal Oxide AA

R225

VRS-CY1JF750JS

V 75

1/16W Metal Oxide AA

R227

VRS-CY1JF750JS

V 75

1/16W Metal Oxide AA

R234

VRS-CY1JF123JS

V 12k

1/16W Metal Oxide AA

(AA370A,AA570A)

R235

VRS-CY1JF391JS

V 390 1/16W Metal Oxide AA

(AA370A,AA570A)

R236

VRS-CY1JF391JS

V 390 1/16W Metal Oxide AA

(AA370A,AA570A)

R237

VRS-CY1JF272JS

V 2.7k 1/16W Metal Oxide AA

(AA370A,AA570A)

R238

VRS-CY1JF471JS

V 470 1/16W Metal Oxide AA

(AA370A,AA570A)

R239

VRS-CY1JF391JS

V 390 1/16W Metal Oxide AA

(AA370A,AA570A)

R240

VRS-CY1JF103JS

V 10k

1/16W Metal Oxide AA

(AA370A,AA570A)

R252

VRD-RA2EE331JY

V 330 1/4W Carbon

AA

R253

VRS-CY1JF101JS

V 100 1/16W Metal Oxide AA

R254

VRS-CY1JF183JS

V 18k

1/16W Metal Oxide AA

R282

VRS-CY1JF750JS

V 75

1/16W Metal Oxide AA

(AA352W,AA550/L/W,AA560A,AA570A)

R286

VRS-CY1JF470JS

V 47

1/16W Metal Oxide AA

R301

VRS-CY1JF473JS

V 47k

1/16W Metal Oxide AA

R302

VRS-CY1JF561JS

V 560 1/16W Metal Oxide AA

R303

VRS-CY1JF392JS

V 3.9k 1/16W Metal Oxide AA

R309

VRS-CY1JF222JS

V 2.2k 1/16W Metal Oxide AA

R350

VRS-CY1JF000JS

V 0

1/16W Metal Oxide AA

(AA350A/L/M/W,AA352W,AA360A,AA370A)

R501

VRS-CY1JF102JS

V 1k

1/16W Metal Oxide AA

R502

VRS-CY1JF273JS

V 27k

1/16W Metal Oxide AA

R504

VRS-CY1JF221JS

V 220 1/16W Metal Oxide AA

R505

VRS-CY1JF224JS

V 220k 1/16W Metal Oxide AA

R601

VRS-CY1JF822JS

V 8.2k 1/16W Metal Oxide AA

(AA370A)

R601

VRS-CY1JF183JS

V 18k

1/16W Metal Oxide AA

(except AA370A)

R602

VRS-CY1JF274JS

V 270k 1/16W Metal Oxide AA

R603

VRS-CY1JF221JS

V 220 1/16W Metal Oxide AA

R604

VRS-CY1JF473JS

V 47k

1/16W Metal Oxide AA

R605

VRS-CY1JF153JS

V 15k

1/16W Metal Oxide AA

R606

VRS-CY1JF273JS

V 27k

1/16W Metal Oxide AA

R609

VRS-CY1JF473JS

V 47k

1/16W Metal Oxide AA

R610

VRS-CY1JF183JS

V 18k

1/16W Metal Oxide AA

R611

VRS-CY1JF393JS

V 39k

1/16W Metal Oxide AA

R612

VRS-CY1JF153JS

V 15k

1/16W Metal Oxide AA

R613

VRS-CY1JF393JS

V 39k

1/16W Metal Oxide AA

(AA352W,AA550/L/W,AA560A,AA570A)

R614

VRS-CY1JF153JS

V 15k

1/16W Metal Oxide AA

(AA352W,AA550/L/W,AA560A,AA570A)

R615

VRD-RA2BE153JY

V 15k

1/8W Carbon

AA

R616

VRS-CY1JF183JS

V 18k

1/16W Metal Oxide AA

(except AA370A)

R618

VRS-CY1JF473JS

V 47k

1/16W Metal Oxide AA

R619

VRS-CY1JF470JS

V 47

1/16W Metal Oxide AA

Summary of Contents for VC-AA350A

Page 1: ...ENTS Page 1 SPECIFICATIONS 3 2 DISASSEMBLY AND REASSEMBLY 4 3 FUNCTION OF MAJOR MECHANICAL PARTS 6 4 ADJUSTMENT REPLACEMENT AND ASSEMBLY OF MECHANICAL UNITS 8 5 ELECTRICAL ADJUSTMENT 27 6 MECHANISM OPERATION FLOWCHART AND TROUBLESHOOTING GUIDE 30 7 ELECTRICAL TROUBLESHOOTING 36 8 BLOCK DIAGRAM 47 9 SCHEMATIC DIAGRAM AND PWB FOIL PATTERN 53 10 REPLACEMENT PARTS LIST 68 11 EXPLODED VIEW OF MECHANISM...

Page 2: ...after replacement of part with the mechanism and its PWB in position in the main frame 1 Start and end sensors Q701 and Q702 Insert the sensor s projection deep into the upper hole of the holder Referring to the PWB fix the sensors tight enough 2 Photocoupler IC901 and IC902 Refer to the symbol on the PWB and the anode marking of the part 3 Cam switches A and B S704 Adjust the notch of the part to...

Page 3: ... E69 Adjustable preset to E60 for A M W Version UHF Channel E21 E69 Adjustable preset to E39 for L Version Power requirement AC110 240V 50 60 Hz Power consumption Approx 12W at AC240V 50Hz Operating temperature 5 C to 40 C Storage temperature 20 C to 55 C Weight Approx 2 3 kg Dimensions 360 mm W x 229 mm D x 92 mm H VIDEO Input 1 0 Vp p 75 ohm Output 1 0 Vp p 75 ohm S N ratio 45dB min PAL SP Horiz...

Page 4: ...screws 4 1 screw 5 MAIN PWB Remove 2 screws 6 and 1screw 7 with antenna terminal cover Remove 1 screw 8 with top cabinet fix angle 7 1 C 2 4 2 4 5 8 B E B D A A A D C 6 A LCD HOLDER FRONT PANEL B 3 6 E ANTENNA TERMINAL COVER TOP CABINET MECHANISM MAIN PWB ASSEMBLY FRONT AV JACK TOP CABINET FIX ANGLE MAIN FRAME OPERATION PWB AA352W AA550A L W AA560A AA570A AA352W AA550A L W AA560A AA570A 3 Cushion ...

Page 5: ...um applied voltage is 9V If more than 9V there is apossibility the mechanism will damage After ascertaining the return to the initial set position install the cassette housing in the specified position This method is applied only for the mechanism Rotate the flange of worm gear by using thin stick CW Loading direction CCW Ejection direction Note Be careful not to damage the gear of worm gear and w...

Page 6: ...on arm 4 Idler wheel ass y 5 Open guide 6 Supply reel disk 7 Supply main brake 8 Take up main brake 9 Pinch drive cam 10 A C head ass y 11 Reverse guide lever ass y 12 Reel relay gear 13 Take up reel disk 14 Pinch roller lever ass y 15 Drum ass y 16 Loading motor block 17 Drum driver motor 18 Take up pole base ass y 26 Auto head cleaner ass y 17 15 26 11 5 9 14 12 8 16 13 4 6 2 7 3 1 18 10 ...

Page 7: ...370A VC AA550A L W AA560A AA570A FUNCTION OF MAJOR MECHANICAL PARTS BOTTOM VIEW No Function No Function 19 Syncro Gear 20 Master cam 21 Capstan D D motor 22 Reel belt 23 Clutch lever 24 Limiter pulley ass y 25 Shifter 25 24 21 22 19 20 23 ...

Page 8: ...Part No Code Configuration Remarks JiGTG0090 CM 3 Torque Gauge Head JiGTH0006 AW JiGRH0002 BR JiGSG2000 BS JiGSG0300 BF 7 JiGADP003 BK Tension Gauge These Jigs are used for checking and adjusting the reel disk height When fixing any part to the threaded hole using resin with screw use the jig Specified torque 5 kg This cassette torque meter is used for check ing and adjusting the torque of take up...

Page 9: ... occasionally blocked Abnormal rotation or significant vibration requires replacement Clean tape contact part with the specified cleaning liquid Clean tape contact area with the specified cleaning liquid Clean rubber and rubber contact area with the specified cleaning liquid Screen swaying Cassette not loaded or unloaded No tape running tape slack Tape slack Video head cleaning procedure 1 Apply o...

Page 10: ...ng operation 4 4 TORUNATAPEWITHOUTTHECASSETTE HOUSING CONTROL ASSEMBLY 1 Remove the full surface panel 2 Short circuit between TP803 and TP802 3 Plug in the power cord 4 Turn off the power switch The pole bases move into U L position 5 Open the lid of a cassette tape by hand 6 Hold the lid with two pieces of vinyl tape 7 Set the cassette tape in the mechanism chassis 8 Stabilize the cassette tape ...

Page 11: ...amaged Take care so that grease does not adhere the brake surface 2 After reassembly check the video search rewind back tension see 4 10 and check the brake torque see 4 14 Height checking and adjustment Note 1 Set the master plane with due care so that it does not contact the drum 2 When putting the master plane shift the reverse guide a little in the loading direction Care must be taken since ex...

Page 12: ...ing control assembly After short circuiting between TP803 and TP802 provided at main PWB plug in the power cord Setting 1 Set a torque gauge to zero on the scale Place it on the take up reel disk 2 Press the FF button 3 To calculate the remaining capacity of the play back mode slowly rotate the supply reel disk and then shift it into the forward mode Checking 1 Turn the torque gauge slowly one rot...

Page 13: ...l disk and turn it counterclockwise very slowly one rotation every 1 to 2 seconds and check that the torque is within the set value 14 1 3 5mN m 144 35gf cm Set value LP 6 9 mN m 70 gf cm Figure 4 8 Checking 1 Make sure that value is within the setting 6 9 mN m 70 gf cm 2 The winding up torque fluctuates due to variation of rotation torque of limiter pulley ass y Read the center value of fluctuati...

Page 14: ...weenTP803andTP802pro vided at main PWB plug in the power cord Checking Press the play button to set the playback mode 1 Detach the pinch roller from the capstan shaft Do not separate excessively Or the pinch lever and pinch double action lever may disengage 2 Engage the tension gauge adapter with the pinch roller shaft and pull in the arrow direction 3 Gradually return the pinch roller and measure...

Page 15: ... with the beginning of a E 180 tape Figure 4 16 Figure 4 17 A A A Tensionpole adjustment driver C W C C W Cassette torque meter 500g Weight to prevent float 500g Standard A 0 mm 0 5 0 2 Checking 1 Push the REC button to place the unit in the SP record mode 2 At this time ascertain that the back tension is within the setting 3 9 to 5 5mN m 40 to 56gf cm by seeing the indication of torque cassette m...

Page 16: ...que or take up side brake torque is within the setting clean the felt surface of reel disk supply take up brake lever check again the brake torque If value cannot be set within the setting yet replace the main brake ass y or main brake spring Figure 4 18 4 14 CHECKING THE BRAKE TORQUE Checking the brake torque at the supply side Figure 4 19 Remove the cassette housing control assembly After short ...

Page 17: ...ews 123 Tilt screw 3 Unsolder the PWB fitted to the A C head Notes 1 When replacing never touch the head If you touched clean with the cleaning liquid 2 When removing the screw 3 take care so that the spring may out Figure 4 23 Note 1 If the screw 1 is tighten tentatively too loose the azimuth and height of A C head may change when they are finally tightened Therefore care must be taken 2 After co...

Page 18: ...stment procedure refer to Figure 4 30 7 Turn the tilt screw to remove the tape crease at the fixing guide flange Playback the tape and check for tape crease at the fixing guide flange 1 If there is no tape crease Turn the tilt screw clockwise so that tape crease appears once at the flange and then return the tilt screw so that the crease disappears 2 If there is tape crease Turn counterclockwise t...

Page 19: ... so as to get max audio output 5 The adjustment of 3 and 4 twice or three times repeat and finally adjust 4 Figure 4 27 For X value adjustment Adjust the X value turning the gear type screwdriver Figure 4 28 3 Tape run adjustment 1 Connect the oscilloscope to PB ATR signal output testpoint setoscilloscopesynctoEXT trigger input the PB CHROMA signal head switching pulse 2 Rough adjustment of X valu...

Page 20: ...layback the self picture recorded tape and check the flatness of ATR signal waveform and sound Notes When the A C head X value adjustment is performed be sure to perform at first X value rough adjustment refer to 4 17 3 2 PB ATR Signal Head switching pulse Figure 4 29 4 A C head X value adjustment 1 Fix A C head arm screws 1 by the method described in 4 15 Replacement 3 2 Playback the alignment ta...

Page 21: ...ator or D D rotor ass y 5 After installation adjust the playback switching point for adjustment of servo circuit 4 18 REPLACEMENT OF THE CAPSTAN D D DIRECT DRIVE MOTOR Remove the mechanism from the set Removal Follow the order of indicated numbers 1 Unsolder loading motor wire and drum FFC 2 Remove the reel belt 1 3 Remove the three screws 2 Reassembly 1 Taking care so that the capstan shaft does ...

Page 22: ...tated in 4 19D D motor replace ment 2 Remove the drum earth brush ass y 2 3 Remove the upper and lower drum assembly from main chassis 1 4 Remove the drum FFC holder 3 Cares when replacing the drum 1 Be careful so that the drum earth brush is not lost 2 Do not touch directly the drum surface 3 Fit gently the screwdriver to the screws 4 Since the drum assembly is an extremely precise as sembly it m...

Page 23: ...Matching point as shown below 2 Fix the shifter position setting part to the roading arm T position setting part as shown in figure 3 Make sure tension arm not run on the shifter as shown in figure a b c Loading arm T Shifter Insert point Loading arm T Loading arm S Phase matting Not run on the sifter Sifter Tension arm a c b Drum Capstan D D motor Bottom side of mechanism chassis ...

Page 24: ... and install the replacement loading motor as shown below Figure 4 40 Figure 4 38 2 The loading motor pressing in must be less than 196N 20 kgf Adjust the distance between motor and pulley to 6 95 mm Figure 4 38 1 Figure 4 39 0 2 0 15 E ring 6 95 mm A part Worm gear 0 0 15 Loading motor To press the motor in first receive it by portion A Apply grease Worm gear Apply grease Apply grease Apply greas...

Page 25: ...USING 1 Proof lever Proof lever spring and Holder R Figure 4 41 MSPRD0215AJFJ Proof lever spring fixing direction designated Take care that not to damage this parts out side out side inside bottom top MSPRD0212AJFJ Figure 4 42 Figure 4 43 2 0pen lever Sensor Plate and Frame R 3 Spring to Drive Arm R ...

Page 26: ...0A AA370A VC AA550A L W AA560A AA570A 4 Frame R Frame L Drive Arm R Drive Arm L Upper Plate LANGF9661AJFW Top surface should be free from scratches or soil When assemble drive lever to frame R make sure the hole synchronize Figure 4 44 ...

Page 27: ...herwise adjustments can not be completed Instruments required Colour TV monitor Dual trace oscilloscope Alignment tape Blank video cassette tape DC voltmeter Screwdriver for adjustment Servicing precautions WhentheIC710 E2 PROM hasbeenreplaced makethefollowingreprogramming Dependingonmodels theIC710 E2 PROM has been factory adjusted for it s memory function It s therefore necessary to reprogram th...

Page 28: ...nd play the tape where signal was recorded in above step 4 Press the SLOW button on the remote control and playback the recorded portion in the slow mode 5 Make for a moment short circuit TP801 located at the front side on the main PWB Be sure that all the LCD display light up when press the TEST mode 6 Look at the monitor screen and adjust the or TRACKING buttons until there is minimum or no nois...

Page 29: ...UDIO VIDEO input termi nals 3 The tracking control is enabled with the button Measuring instrument Mode Cassette Colour TV monitor Playback still Self recorded tape SP EP mode See Note below 1 Control Tracking control buttons or Specification ADJUSTMENT OF NTSC SYSTEM FV False Vertical Sync OF STILL PICTURE 1 Play a cassette which was recorded by the unit in SP mode 2 Press the PAUSE STILL button ...

Page 30: ...loading motor stops Start sensor close Cassette is judged caught halfway Cassette LED or some other part is judged defective 6 MECHANISM OPERATION FLOWCHART AND TROUBLESHOOTING GUIDE MECHANISM OPERATION FLOWCHART This flowchart describes the outline of the mechanism s operation but does not give its details 1 0 1 1 1 1 1 1 1 1 1 0 1 0 1 0 0 0 1 0 1 0 0 0 1 0 0 0 0 0 1 0 0 0 1 0 1 0 0 0 1 0 S Senso...

Page 31: ...ing motor stops End Stop capstan motor NO YES Press STILL key Pinch roller releasing Idler swinging Pinch roller pressing Loading motor turns reverse direction and master cam clockwise Turn capstan motor in reverse direction Turn loading motor forward direction Mode switch is at VSR position Set capstan motor to search speed Is take up reel sensor signal outputted Press REW key Release pinch rolle...

Page 32: ...Motor stop rotate Mode SW at PB position Loading motor reverse direction Loading Motor stop rotate Loading motor stops End Loading motor turns in reverse direction and master cam clockwise 4 supply reel pulses outputted Does the take up reel pulse output two edges Capstan motor turns clockwise Loading motor turns reverse direction Mode switch is at Eject position Loading motor stops Capstan motor ...

Page 33: ...Voltage supply system in trouble Does capstan motor turn in FF or REW direction Are idler wheel ass y and reel disk in mesh Is the pulse outputted from reel sensor The cassette tape is presumably damaged 2 REC PLAY FAILURE MODE RELEASE NO NO NO NO NO NO NO YES YES YES YES YES YES YES YES Is the master cam at PB position Does loading motor operate Modes changing smoothly through mode switch Loading...

Page 34: ...er wheel ass y and supply reel disk in mesh Is supply reel disk winding torque normal Is pulse outputted from reel sensor Check main PWB YES YES YES YES YES NO NO NO NO NO YES YES NO NO YES Press REW key 4 i Unusual sound in cassette insertion and ejection mode Is unusal sound heard during cassette control running Unusual sound heard with pinch roller lever going up or down Is unusual sound heard ...

Page 35: ... specified Thrust gap found at reel disk Drive system out of contact with any part on main PWB Turn capstan motor by hand Unusual sound heard Check drive system s gears for damage Replace damaged gear with new one Reel disk Limiter pulley ass y Idler gear ass y Check reel disk and main chassis And replace defective parts Adjust reel disk height Rearrange the parts on main PWB ...

Page 36: ... POWER TROUBLESHOOTING 4 No power is turned on Does power control H signal at pin 96 of IC701 change from L to H level Check IC701 YES YES YES NO NO NO Does the base of Q967 change from about 5 0V to 2 5V Check IC701 and all the way up through to Q967 Is voltage of 5V sent out the collector of Q967 Check peripheral circuit of Q967 and PC 5V line Check peripheral circuit for poor soldering YES YES ...

Page 37: ...S882 STOP 3 081V S886 S887 FF No Use No Use 3 694V No Use No Use TP801 TEST 3 712V No Use No Use TP802 CASSETTE 4 285V KEY 1 IN KEY 0 IN Pin88 of IC701 Pin89 of IC701 A D KEY INPUT SPECIFICATION FLOW CHART NO 6 TIMER TROUBLESHOOTING The LCD display fails to light up Is the supply voltage of 5V fed to pin 37 of IC8001 Check AT 5V line Is the supply voltage of 3 4V 1 7V feed to pin 38 and pin 39 of ...

Page 38: ...H to L level when the cassette tape is inserted Does the start sensor cover go to open when the cassette tape is inserted NO NO NO FLOW CHART NO 10 CASSETTE CONTROL TROUBLESHOOTING 2 A cassette tape is taken in but ejected at once Does the start sensor pulse at pin 87 of IC701 change from L to H level when the cassette tape is loaded Check line between start sensor and pin 87 of IC701 Does the end...

Page 39: ...voltage of pin 5 of P701 1 6 2 7V Check line between the pin 91 of IC701 and pin 5 of P701 Is the supply voltage of 12V 20V fed to pin 2 of P701 YES Replace capstan motor Check MOTOR Vcc line and motor voltage selector circuit FLOW CHART NO 14 DRUM MOTOR TROUBLESHOOTING 2 The drum motor runs only for a few seconds Replace IC on mechanism Check peripheral circuit of IC on mechanism Is drum PG signa...

Page 40: ...tor NO 1 FLOW CHART NO 17 CAPSTAN SERVO TROUBLESHOOTING Capstan servo does not function Only PB mode inoperative YES NO Check 1 Check capstan motor unit and or replace Is there capstan AFC and APC at pins 31 and 33 of IC701 Replace A C head YES NO YES NO NO YES NO Is there capstan AFC signal at pin 31 of IC701 Replace IC701 NO Is there REC CTL signal output at pins 75 and 74 of IC701 Does PB CTL s...

Page 41: ...nd pin 49 of IC701 YES YES YES YES Is there a picture signal outputted from the emitter of Q251 Check peripheral circuit of Q251 NO NO Is there Y C serial data and Y C clock signal applied to pins 63 and 62 of IC201 Check line between pins 63 62 of IC201 and pins 84 85 of IC701 Is the supply voltage of 5V OSD Vcc fed to pin 51 of IC701 Replace IC201 NO Check MICON 5V line collector of Q704 and Q70...

Page 42: ...r in PAL or NTSC mode E E mode is possible NO NO NO YES Is voltage of 5V applied to the chroma power terminal at pin 61 of IC201 Check peripheral circuit pin 61 of IC201 and Y C 5V line Is there chroma signal approx 156mVp p PAL mode or 298mVp p NTSC mode burst input to the pin 46 of IC201 Check line between pins 60 and 46 of IC201 C512 Is there chroma signal approx 197mVp p PAL mode or 375mVp p N...

Page 43: ...lied to the chroma power terminal at pin 61 of IC201 YES Check peripheral circuit of pins 61 of IC201 and Y C 5V line NO Is there chroma signal approx 156mVp p PAL mode or 298mVp p NTSC mode burst input in the pin 46 of IC201 YES NO Is there chroma signal approx 197mVp p PAL mode or 375mVp p NTSC mode burst input to the pin 58 of IC201 Check line between pins 58 and 35 of IC201 R505 C515 NO NO YES...

Page 44: ...el at pin 99 of IC201 Is there a signal at pin 4 of IC201 YES YES No linear sound recording Hi Fi E E mode is possible Is the supply voltage of 12V fed to pin 2 of T601 Check the AUDIO MUTE H line between pin 99 of IC201 and pin 81 of IC701 Replace IC201 Check PC 12V line NO YES YES Is there signal Bias at pin 5 of T601 Check the Bias oscillation circuit T601 Q602 Q603 and FE BIAS CTL line NO Is t...

Page 45: ...the CHANNEL AND buttons select the right function numbers from JP0 to J39 which appear in the LCD display referring to the E2 PROM map Press the DISPLAY button to pickup the functions ON and the CLEAR button to discard the functions OFF DISPLAY and CLEAR buttons are located on the remote control unit when the DISPLAY button has been pressed ON the memory function number starts flashing when the CL...

Page 46: ...RT 0 0 0 0 0 0 0 0 JP21 DECODER 0 0 0 0 0 0 0 0 JP20 SURROUND 0 0 0 0 0 0 0 0 JP19 IGR 0 0 0 0 0 0 0 0 JP18 NICAM 0 0 0 0 0 0 0 0 JP17 G CODE 1 0 1 0 0 0 0 0 0 JP16 G CODE 0 0 0 0 0 0 0 0 0 JP15 LP EP 1 1 1 0 1 1 1 1 JP14 LP EP 0 0 0 0 0 0 0 0 JP13 FRONT AV 0 1 0 0 1 1 1 1 JP12 DUAL SCART 0 0 0 0 0 0 0 0 JP11 RF OUT SETTIG OFF 0 0 0 0 0 0 0 0 JP10 TUNER 2 1 1 1 1 1 1 1 1 JP 9 TUNER 1 1 1 1 1 1 1 1...

Page 47: ...47 VC AA350A L M W VC AA352W AA360A AA370A VC AA550A L W AA560A AA570A 8 BLOCK DIAGRAM POWER CIRCUIT BLOCK DIAGRAM ...

Page 48: ...48 VC AA350A L M W VC AA352W AA360A AA370A VC AA550A L W AA560A AA570A SYSTEM SERVO BLOCK DIAGRAM ...

Page 49: ...49 VC AA350A L M W VC AA352W AA360A AA370A VC AA550A L W AA560A AA570A ...

Page 50: ...50 VC AA350A L M W VC AA352W AA360A AA370A VC AA550A L W AA560A AA570A SIGNAL FLOW BLOCK DIAGRAM ...

Page 51: ...51 VC AA350A L M W VC AA352W AA360A AA370A VC AA550A L W AA560A AA570A ...

Page 52: ...ING NOTES 1 The unit of resistance ohm is omitted k 1000 ohm M 1 Meg ohm 2 All resistors are 1 8 watt unless otherwise noted 3 Theunitofcapacitance F isomitted µ µF p µµF 4 The values in parentheses are the ones in the PB mode the values without parentheses are the ones in the REC mode VOLTAGE MEASUREMENT CONDITIONS 1 DC voltages are measured between points indi cated and chassis ground by VTVM wi...

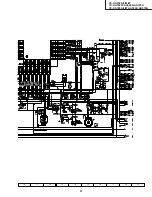
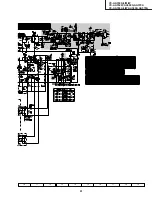
Page 53: ... D E F G H I J 53 VC AA350A L M W VC AA352W AA360A AA370A VC AA550A L W AA560A AA570A VOLTAGE MEASUREMENT MODE PB Parentheses REC Without Parentheses 9 SCHEMATIC DIAGRAM AND PWB FOIL PATTERN OPERATION CIRCUIT BACK LIGHT CIRCUIT ...

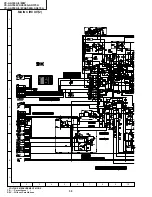
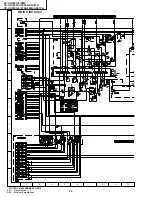
Page 54: ...1 2 3 4 5 6 7 8 9 10 A B C D E F G H I J 54 VC AA350A L M W VC AA352W AA360A AA370A VC AA550A L W AA560A AA570A VOLTAGE MEASUREMENT MODE PB Parentheses REC Without Parentheses MAIN CIRCUIT 1 1 ...

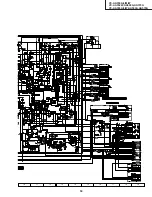
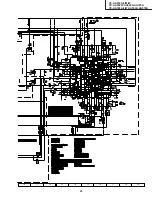
Page 55: ...10 11 12 13 14 15 16 17 18 19 55 VC AA350A L M W VC AA352W AA360A AA370A VC AA550A L W AA560A AA570A ...

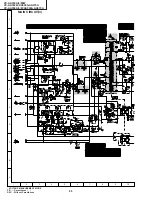
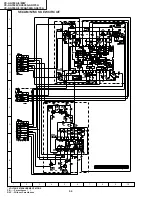
Page 56: ...1 2 3 4 5 6 7 8 9 10 A B C D E F G H I J 56 VC AA350A L M W VC AA352W AA360A AA370A VC AA550A L W AA560A AA570A VOLTAGE MEASUREMENT MODE PB Parentheses REC Without Parentheses MAIN CIRCUIT 1 2 ...

Page 57: ...10 11 12 13 14 15 16 17 18 19 57 VC AA350A L M W VC AA352W AA360A AA370A VC AA550A L W AA560A AA570A ...

Page 58: ...1 2 3 4 5 6 7 8 9 10 A B C D E F G H I J 58 VC AA350A L M W VC AA352W AA360A AA370A VC AA550A L W AA560A AA570A VOLTAGE MEASUREMENT MODE PB Parentheses REC Without Parentheses MAIN CIRCUIT 2 ...

Page 59: ...10 11 12 13 14 15 16 17 18 19 59 VC AA350A L M W VC AA352W AA360A AA370A VC AA550A L W AA560A AA570A ...

Page 60: ...1 2 3 4 5 6 7 8 9 10 A B C D E F G H I J 60 VC AA350A L M W VC AA352W AA360A AA370A VC AA550A L W AA560A AA570A VOLTAGE MEASUREMENT MODE PB Parentheses REC Without Parentheses MAIN CIRCUIT 3 ...

Page 61: ...10 11 12 13 14 15 16 17 18 19 61 VC AA350A L M W VC AA352W AA360A AA370A VC AA550A L W AA560A AA570A ...

Page 62: ...1 2 3 4 5 6 7 8 9 10 A B C D E F G H I J 62 VC AA350A L M W VC AA352W AA360A AA370A VC AA550A L W AA560A AA570A VOLTAGE MEASUREMENT MODE PB Parentheses REC Without Parentheses MAIN CIRCUIT 4 ...

Page 63: ...10 11 12 13 14 15 16 17 18 19 63 VC AA350A L M W VC AA352W AA360A AA370A VC AA550A L W AA560A AA570A ...

Page 64: ...1 2 3 4 5 6 7 8 9 10 A B C D E F G H I J 64 VC AA350A L M W VC AA352W AA360A AA370A VC AA550A L W AA560A AA570A SECAM NTSC SKEW CIRCUIT VOLTAGE MEASUREMENT MODE PB Parentheses REC Without Parentheses ...

Page 65: ...1 2 3 4 5 6 7 8 9 10 A B C D E F G H I J 65 VC AA350A L M W VC AA352W AA360A AA370A VC AA550A L W AA560A AA570A SECAM NTSC SKEW PWB PWB FOIL PATTERN OPERATION PWB BACK LIGHT PWB ...

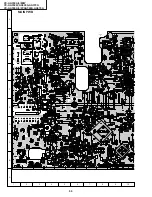
Page 66: ...1 2 3 4 5 6 7 8 9 10 A B C D E F G H I J 66 VC AA350A L M W VC AA352W AA360A AA370A VC AA550A L W AA560A AA570A MAIN PWB ...

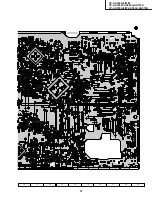
Page 67: ...10 11 12 13 14 15 16 17 18 19 67 VC AA350A L M W VC AA352W AA360A AA370A VC AA550A L W AA560A AA570A ...

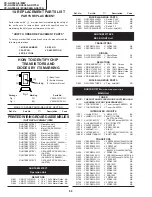
Page 68: ...iode AF D8855 RH PX0433GEZZ V PhotoDiode AF RESISTORS R8853 VRD RA2BE271JY V 270 1 8W Carbon AA R8854 VRD RA2BE331JY V 330 1 8W Carbon AA R8855 VRS CY1JF223JS V 22k 1 16W Metal Oxide AA R8856 VRS CY1JF223JS V 22k 1 16W Metal Oxide AA R8857 VRD RA2BE271JY V 270 1 8W Carbon AA R8858 VRD RA2BE331JY V 330 1 8W Carbon AA MISCELLANEOUS PARTS P883 QPLGZ0457GEZZ V Plug 4pin AM AD DUNTKB110TEVH VJ VK VL VN...
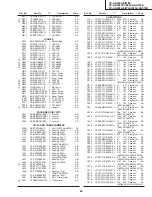
Page 69: ... AA570A C309 VCKYCY1EB103KS V 0 01 25V Ceramic AA AA550A L W AA560A AA570A C310 VCKYCY1EB103KS V 0 01 25V Ceramic AA AA550A L W AA560A AA570A C311 VCKYCY1HF103ZS V 0 01 50V Ceramic AA C313 VCKYCY1HF103ZS V 0 01 50V Ceramic AA C316 VCCCCY1HH180JS V 18p 50V Ceramic AA C317 VCCCCY1HH120JS V 12p 50V Ceramic AA C318 VCCCCY1HH120JS V 12p 50V Ceramic AA C319 VCCCCY1HH270JS V 27p 50V Ceramic AA AA350A L M...

Page 70: ...amic AA C722 VCEA9M0JW107M V 100 6 3V Electrolytic AB C723 VCKYCY1HF473ZS V 0 047 50V Ceramic AA C724 VCKYCY1HF473ZS V 0 047 50V Ceramic AA C725 VCKYCY1HF103ZS V 0 01 50V Ceramic AA C726 VCKYCY1HB102KS V 1000p 50V Ceramic AA C728 VCKYCY1HF103ZS V 0 01 50V Ceramic AA C729 VCKYCY1HB222KS V 2200p 50V Ceramic AA C730 VCKYCY1HF103ZS V 0 01 50V Ceramic AA C731 VCKYCY1HF103ZS V 0 01 50V Ceramic AA C732 V...

Page 71: ...8W Carbon AA R786 VRS CY1JF473JS V 47k 1 16W Metal Oxide AA R788 VRS CY1JF104JS V 100k 1 16W Metal Oxide AA R789 VRD RA2BE391JY V 390 1 8W Carbon AA R790 VRS CY1JF473JS V 47k 1 16W Metal Oxide AA R792 VRS CY1JF104JS V 100k 1 16W Metal Oxide AA R795 VRD RA2EE151JY V 150 1 4W Carbon AA R796 VRD RM2HD271JY V 270 1 2W Carbon AA R809 VRD RA2BE101JY V 100 1 8W Carbon AA R108 VRS CY1JF000JS V 0 1 16W Met...
Page 72: ...R916 VRS CY1JF333JS V 33k 1 16W Metal Oxide AA R917 VRD RA2BE223JY V 22k 1 8W Carbon AA R930 VRD RA2BE102JY V 1k 1 8W Carbon AA R931 VRS CY1JF561JS V 560 1 16W Metal Oxide AA R932 VRD RA2BE331JY V 330 1 8W Carbon AA R933 VRS CY1JF122JS V 1 2k 1 16W Metal Oxide AB R934 VRS CY1JF152JS V 1 5k 1 16W Metal Oxide AA R935 VRS CY1JF102JS V 1k 1 16W Metal Oxide AA R936 VRD RA2BE101JY V 100 1 8W Carbon AA R...

Page 73: ...A550A L W AA560A AA570A R262 VRS CY1JF562JY V 5 6k 1 16W Metal Oxide AA AA550A L W AA560A AA570A R263 VRS CY1JF272JY V 2 7k 1 16W Metal Oxide AA AA550A L W AA560A AA570A R264 VRS CY1JF102JY V 1k 1 16W Metal Oxide AA AA550A L W AA560A AA570A R265 VRS CY1JF271JY V 270 1 16W Metal Oxide AA AA550A L W AA560A AA570A R266 VRS CY1JF102JY V 1k 1 16W Metal Oxide AA AA550A L W AA560A AA570A R267 VRS CY1JF47...

Page 74: ...F AA350A L M W AA352W AA360A 63 DDRMW0041TEX2 V Upper and Lower Drum BF AA370A 63 DDRMW0042TEX2 V Upper and Lower Drum BF AA550A L W AA560A AA570A 64 QCNW A244WJZZ V Loading Motor Wire AB 65 QBRSK0041GEZZ J Earth Brush Ass y AD 66 XBPSD26P04500 V 2 6P 4 5A D M AB 67 PGiDM0187AJZZ V Open Guide AC 70 MSPRC0228AJFJ V Azimuth Spring AB 71 MSPRC0224AJFJ V Height Adjusting Spring AC 72 LHLDW1894AJZZ V R...

Page 75: ...570A AE 500 3 HDECQ2484AJSA V Cassette Flap AA550A L W AE 500 3 HDECQ2484AJSB V Cassette Flap AA560A AE 500 4 HDECQ2477AJSA V Window Dec AA550A L W AE 500 4 HDECQ2477AJSB V Window Dec AE AA350A L M W AA352W 500 4 HDECQ2477AJSC V Window Dec AE AA360A AA370A AA560A AA570A 500 5 HiNDP2237AJSA V LCD Indication Plate AD AA360A AA370A AA560A AA570A 500 5 HiNDP2237AJSB V LCD Indication Plate AD AA350A L ...

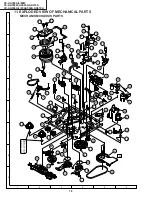
Page 76: ... 222 221 55 17 59 56 70 202 66 65 62 66 62 63 1 33 9 2 58 24 32 7 51 49 73 201 203 49 51 16 71 8 215 6 12 36 31 18 13 224 45 67 41 19 28 204 38 37 61 208 29 10 34 11 30 23 48 46 219 27 35 209 210 211 212 213 214 35 43 5 43 4 21 52 25 72 44 60 64 20 205 216 11 EXPLODED VIEW OF MECHANICAL PARTS MECHANISM CHASSIS PARTS ...

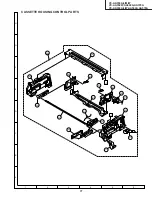
Page 77: ... VC AA350A L M W VC AA352W AA360A AA370A VC AA550A L W AA560A AA570A A B C D E F G H 1 2 3 4 5 6 CASSETTE HOUSING CONTROL PARTS A A 300 302 306 304 301 314 314 305 309 315 303 312 313 317 308 307 310 311 ...

Page 78: ...C AA352W AA360A AA370A VC AA550A L W AA560A AA570A A B C D E F G H 1 2 3 4 5 6 CABINET PARTS C E A D 601 D AA352W AA550 L AA560A AA570A 609 AA370 AA570 606 600 605 612 607 602 605 C B E A B 603 613 604 611 603 610 609 608 ...

Page 79: ...eft side rod Do not mount the front panel with the cassette cover tilted too open Otherwise the cassette covermightwronglyrun onthecassettehousing Keep the cassette over about 45 open and make sure that the cassette cover open le ver is between the front panel and the cassette cover Now fix the front panel in place Before attaching the front panel in position make surethatthecassettecover open lev...

Page 80: ...61AJZZ AA560A SPAKC5262AJZZ AA570A SPAKC5266AJZZ AA550A SPAKC5268AJZZ AA550L SPAKCA092WJZZ AA550W Packing Case Accessories Operation Manual TiNS A021WJZZ AA350A M W AA360A AA550A W AA560A TiNS A022WJZZ AA350L AA550L TiNS A023WJZZ AA352W TiNS A024WJZZ AA370A AA570A Circuit Diagram TMAPCA002WJZZ AA350L AA550L RRMCG1274AJSA AA350A L M W AA360A RRMCG1205AJSA AA352W RRMCG1208AJSA AA370A RRMCG1204AJSA A...

Page 81: ...81 VC AA350A L M W VC AA352W AA360A AA370A VC AA550A L W AA560A AA570A ...

Page 82: ...i 329 2193 Japan No part of this publication may be reproduced stored in a retrieval system or transmitted in any form or by any means electronic mechanical photocopying recording or otherwise without prior written permission of the publisher D SEM P SMM TQ1377 S July 2002 Printed in JAPAN SA KY COPYRIGHT 2002 BY SHARP CORPORATION ALL RIGHTS RESERVED ...

Reviews: