33
VL-NZ10S/H/E
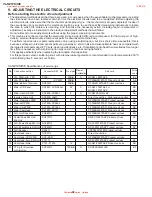
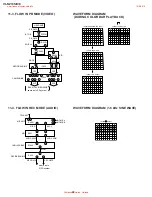
4) Operation flow
5) When the adjustment is complete:
Press the "CONTINUE" key to let the "CAM ADJ" display disappear from the screen.
Note: Before terminating the adjustments, make sure that the adjustment mode is neither the auto-focus function adjustment
mode nor the camera signal system adjustment mode (these modes are mentioned later).
•
Camera unit adjustment modes
The camera unit is adjusted in two types of modes: the auto-focus function adjustment mode and the camera signal system
adjustment mode.
Note: E
2
PROM contains the adjustment item data as shown below. If it is changed, data rewriting and confirmation of latest data
must be performed.
1) E
2
PROM(IC3703) on the Main unit
Lens data and Signal system adjustment data
(3) Auto-focus function adjustment mode
•
The camera unit uses a microprocessor-controlled auto-focus zoom lens.
The auto-focus circuit incorporated in this unit is designed to execute the image processing where the focusing action is done by
taking advantage of the fact that the high-frequency components in the image signals increase as the focus intensifies. Moreover,
to achieve high magnifying power with a small lens, the camera unit incorporates the inner focus system in which the focus is shifted
by moving the master lens (rear lens) back and forth. This inner focus system is a full-range focus type by which the focus can be
shifted from approximately 10 mm to the infinity. It should be noted, however, that since the closest subject distance at the telephoto
end is fixed at 1.5 m, subjects in a closer range than 1.5 m at the telephoto end will be out of focus. For this reason, the unit is
designed so the zoom control is automatically shifted to the wide angle side until the position is found where the subject can be
focused on.
In the auto-focusing system of this until, the following constitute the important factors:
• Master lens position detection data
• Iris position detection data
• Zoom lens position detection data
These detection data are handled and stored by the microprocessor, lens by lens, into the E
2
PROM.
Therefore, in the following cases, (3) auto-focus function adjustment is required:
• When the lens has been replaced
• When the CCD has been replaced
• When the E
2
PROM has been replaced
• When the CCD PWB and Camera PWB has been replaced
1) Shifting to the auto-focus function adjustment mode
Set the data for the address "0000" to " 01".
]
This makes the screen fade temporarily in white and shifts to the auto-focus function adjustment mode.
* When this adjustment mode has been shifted to, make the adjustment according to (5) Camera unit adjustment procedure.
* In this adjustment mode, the lens can not be operated.
2) Shifting to the normal operation mode
Set the data for the address "0000" to " FF".
]
This makes the screen fade temporarily in white and shifts to the normal operation mode.
]
Press the "CONTINUE" key, and the "CAM ADJ" display goes out of the screen, enabling the normal operation.
FF or REW
PLAY
PLAY
STOP
FF or REW
Address is selected and specified, with the data called. Then the called data are selected and
fixed. The operation flows in this sequence.
www.freeservicemanuals.info
12/9/2016
Published in Heiloo, Holland


