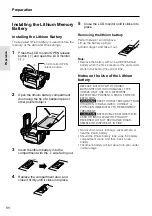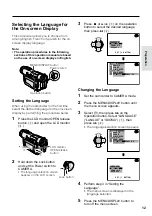
14
Preparation
1 2 H
2 4 H
D I SPL AY
SE T T I NG
1 2 H 2 4 H
C L OCK SE T
2 4 H
2
1 H 2 4 H
D I SPL AY
SE T T I NG
1 2 H 2 4 H
OF F
DA T E
DA T E + T I ME
C L OCK SE T
D I SPL AY
DA T E + T I ME
SP
5 0min
2
0
0
2
.
2
0
3
M
A
:
0
1
JUN.
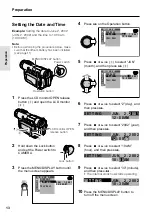
Changing to the 24-hour Time Mode
1
After performing step 9 above, press
d
or
y
(
1
) to select “12H/24H”, and
then press
r
(
2
).
2
Press
d
or
y
to select “24H”, and
then press
e
.
3
Press the MENU/DISPLAY button to
turn off the menu screen.
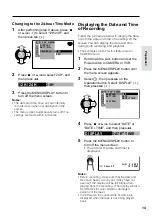
Displaying the Date and Time
of Recording
Follow the procedure below to display the date,
or both the date and time, of recording on the
screen. You can display the date and time
during both recording and playback.
• The example screens for this feature are for
CAMERA mode.
1
Hold down the Lock button and set the
Power switch to CAMERA or VCR.
2
Press the MENU/DISPLAY button until
the menu screen appears.
3
Select
P
, then press
r
on the
Operation button. Select “DISPLAY” (
1
),
then press
r
(
2
).
4
Press
d
or
y
to select “DATE” or
“DATE
H
TIME”, and then press
e
.
5
Press the MENU/DISPLAY button to
turn off the menu screen.
• The date (or the date and time) is
displayed.
Notes:
• Before recording, make sure that the date and
time have been correctly set. If they have not
been set, the display will be left blank when
playing back the recording. (The display will also
be left blank for unrecorded or damaged
portions of the tape.)
• In VCR mode, the current date and time are
displayed when the tape is not being played
back.
Notes:
• The date and time, once set, are internally
recorded even when not displayed on the
screen.
• The menu screen automatically turns off if no
settings are made within 5 minutes.
Summary of Contents for ViewCam VL-WD250U
Page 90: ...Notes ...
Page 91: ......

