WF-2100W
– 8 –
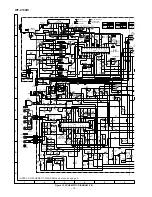
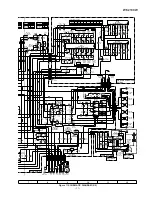
NOTES ON SCHEMATIC DIAGRAM
• Resistor:
To differentiate the units of resistors, The symbol as K and
M are used: the symbol K means 1000 ohm and the symbol
M means 1000 kohm and the resistor without any symbol
is an ohm resistor. The resistor designated “Fusible” is a
fuse type resistor.
• Capacitor:
To indicate the unit of capacitor, a symbol P is used: this
symbol P means pico-farad and the unit of the capacitor
without such a symbol is microfarad. As to electrolytic
capacitor, the expression “capacitance/withstand voltage”
is used.
(CH),(RH),(UJ): Temperature compensation
(ML): Mylar type
(S): Styrol type
• The indicated voltage in each section is the one measured
by Digital Multimeter between such a section and the
chassis with no signal given.
• Schematic diagram and Wiring Side of P.W. Board for this
model are subject to change for improvement without prior
notice.
• Parts marked with “ ” ( ) are important for
maintaining the safety of the set. Be sure to replace these
parts with specified ones for maintaining the safety and
performance of the set.
SW1
TAPE 2 DIRECTION
A—B
SW2
TAPE 1 PLAY
ON—OFF
SW3
TAPE 1 FF/REW
ON—OFF
SW4
TAPE 1 REC
ON—OFF
SW5
TAPE 2 PLAY
ON—OFF
SW6
TAPE 2 FF/REW
ON—OFF
SW101
BAND SELECTOR
SW2—SW1—MW—FM
SW202
BEAT CANCEL
A—B
SW203
DUBBING SPEED/MIC/
HIGH—NORMAL—MIC/
FM MODE
FM STEREO—FM MONO
SW401
SURROUND
ON—OFF
SW501
FUNCTION SELECTOR/
CD/LINE—RADIO—
POWER
TAPE/STAND-BY—ON
SW601
VOLTAGE SELECTOR
110-127 V—220-240 V
REF. NO.
DESCRIPTION
POSITION
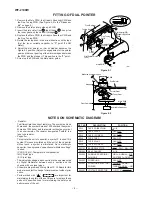
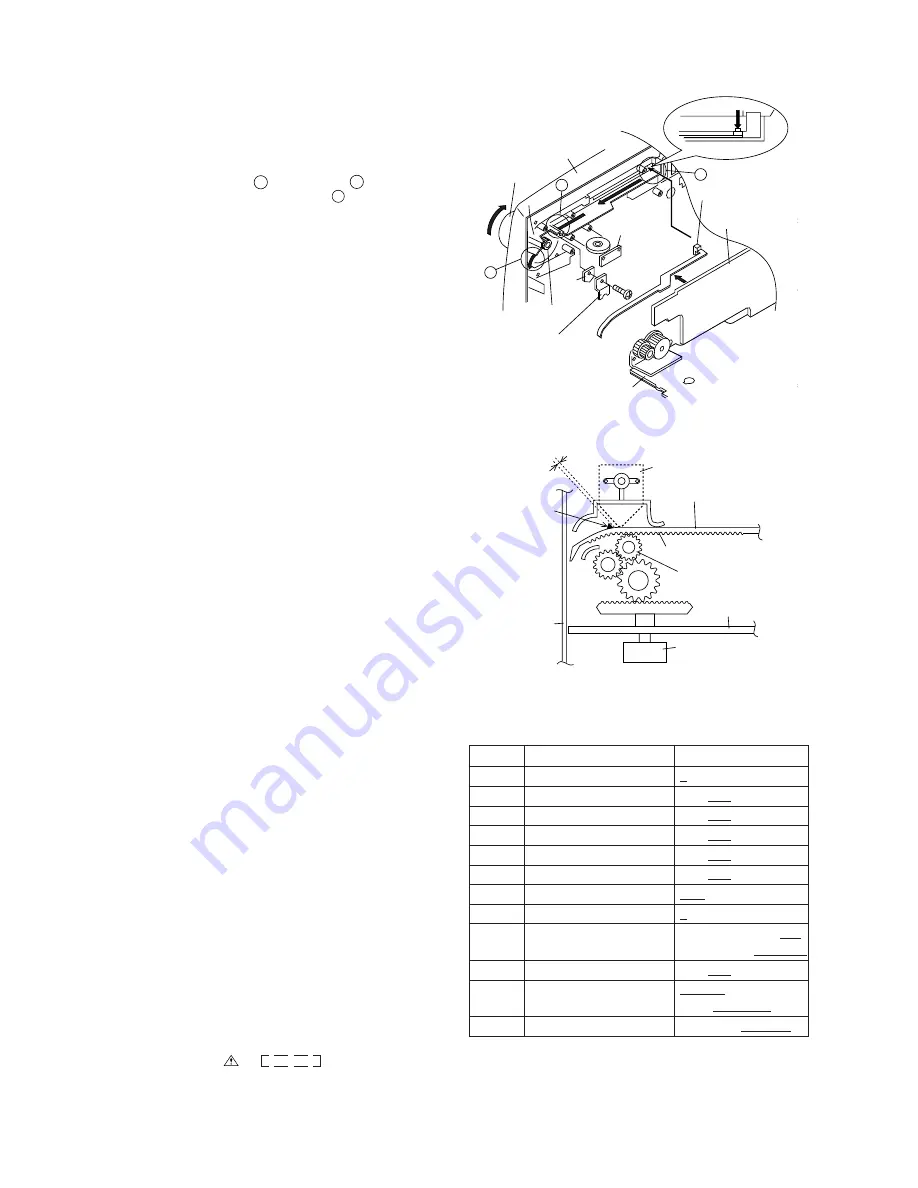
FITTING OF DIAL POINTER
A
B
C
Figure 8-1
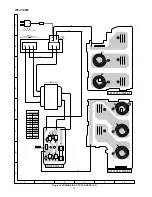
1. Remove the Main PWB, the Graphic Equalizer PWB and
the Fine Tuning PWB. (See Figure 4-2 in the "Disassem-
bly" on page 4.)
2. Remove the dial pointer guide and PWB.
3. Insert the dial pointer from , lead it under , hang it on
the tuner gear and then pass it through .
4. Replace the Main PWB, the Graphic Equalizer PWB and
the Fine Tuning PWB.
5. Rotate the tuning knob in the arrow direction until it stops.
(Set the tuner variable capacitor to "0" point (F-LOW
state).)
6. Adjust the dial pointer so that its stopper becomes the
Figure 8-2 position. (Adjust the engagement of the pointer
gear and the tuner gear to get the minimum space between
the PWB and the stopper.) This position is the "0" point.
7. Screw up the PWB and the dial pointer guide.
Figure 8-2
Tuning Knob
Front Cabinet
C
A
Dial Pointer(207)
Tuner
Gear
PWB
Dial Pointer Guide
(256)
Main PWB
Graphic Equalizer
PWB
Fine Tuning
PWB
Screw(605)
ø3x8mm
B
Dial Pointer(207)
"0" Point
Tuner Gear
Stopper
Main PWB
Variable Capacitor
Dial Pointer
PWB
Make the minimum space.
Front Cabinet
Pointer Gear
Summary of Contents for WF-2100BK
Page 23: ...WF 2100W 8 M E M O ...


