background image

03/11/12

XL-S10H_A_2.fm

11

TINSZA005SJZZ

XL-S10H

8

7

6

5

4

3

2

1

9

10

Ba

sic Ope

ration

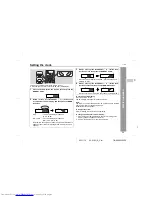
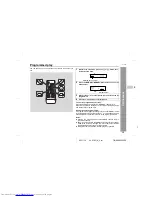
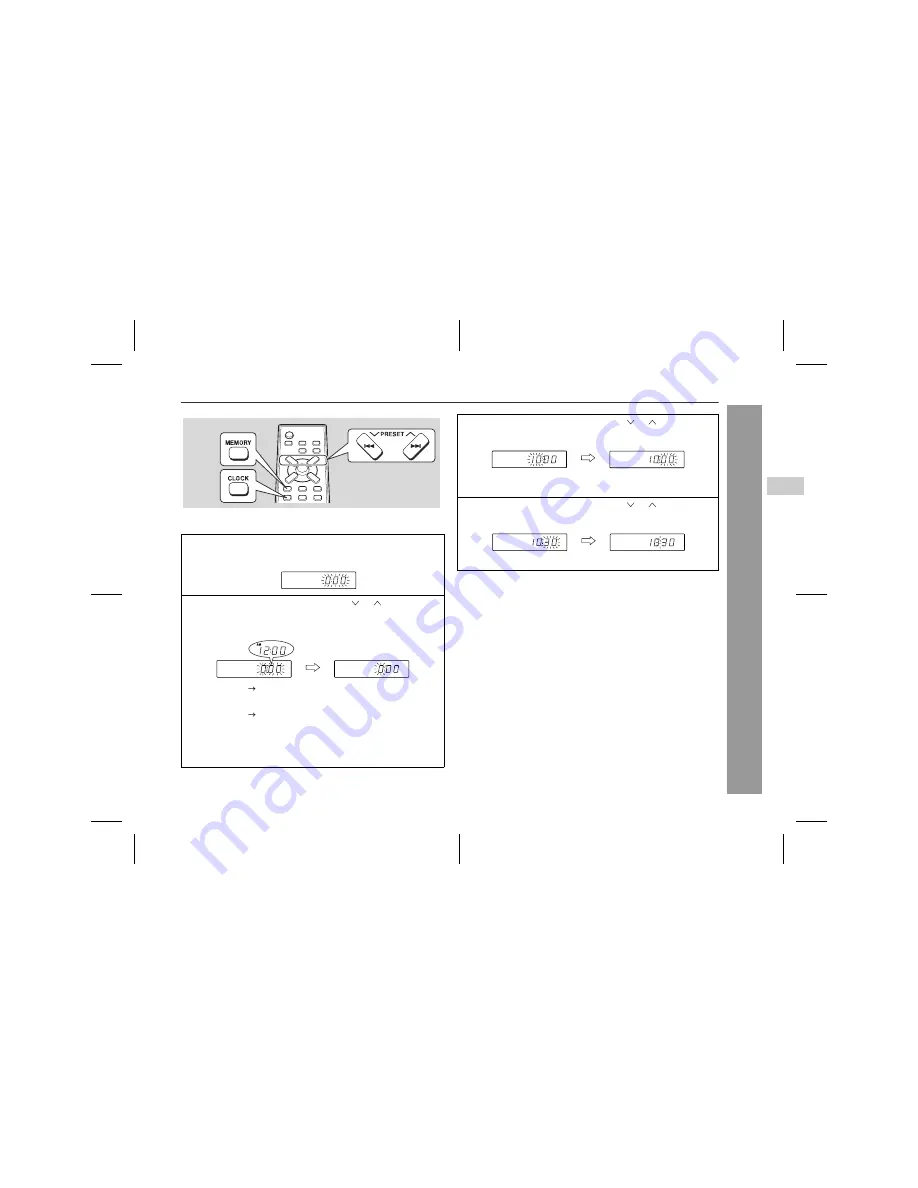
Setting the clock

This may be operated only with the remote control.
In this example, the clock is set for the 24-hour (0:00) display.

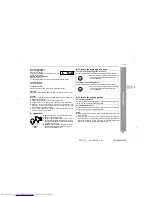
To confirm the time display:
Press the CLOCK button.
The time display will appear for about 5 seconds.

Note:
The "0:00" or time will flash when the AC power supply is restored
after a power failure or unplugging the unit.
Readjust the clock as follows.

To readjust the clock:
Perform "Setting the clock" from the beginning.

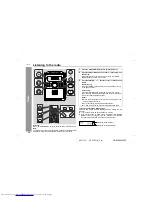
To change the 24-hour or 12-hour display:

1

Press the CLOCK button and within 5 seconds, press the
MEMORY button.

2

Within 1 minute, press the PRESET (  or  ) button to se-
lect 24-hour or 12-hour display and then press the MEMO-
RY button.

"0:00"

The 24-hour display will appear.

 (0:00 

23:59)

"AM 12:00"

The 12-hour display will appear.


(AM 12:00 - PM 11:59)

Note that this can only be set when the unit is first installed or it 
has been reset. (Refer to "Clearing all the memory (reset)" on 
page 24.)

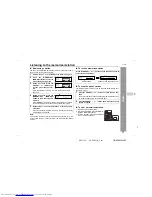
3

Within 1 minute, press the PRESET (  or  ) button to ad-
just the hour and then press the MEMORY button.

When the 12-hour display is selected, "AM" will change auto-
matically to "PM".

4

Within 1 minute, press the PRESET (  or  ) button to ad-
just the minutes and then press the MEMORY button.

The clock starts from "0" second. (Seconds are not displayed.) 

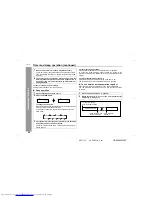
1

Clear all the programmed contents. [Refer to "Clearing all the 
memory (reset)" on page 24 for details.]

2

Perform "Setting the clock" from the beginning.

Summary of Contents for XL-S10H

Page 1: ...hasing this SHARP product To obtain the best performance from this product please read this manual carefully It will guide you in operating your SHARP product XL S10H Micro Component System consisting of XL S10H main unit and CP S10H speaker system XL S10H A TINSZA005SJZZ 1 ...

Page 2: ...terial you wish to record Copying or broadcasting such material without permission of the relevant lic ensees or owners of the copyright is prohibited by law SHARP is not in a position to authorise the copying or broadcasting of copy right materials and nothing in this OPERATION MANUAL should be implied as giving that authority For other countries Audio visual material may consist of copyrighted w...

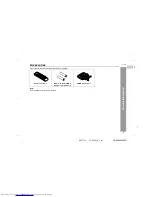
Page 3: ... S10H 8 7 6 5 4 3 2 1 9 10 General Information Accessories Please confirm that the following accessories are included Note Only the above accessories are included Remote control 1 AAA size battery UM 4 R03 HP 16 or similar 2 FM AM loop aerial 1 ...

Page 4: ...tion Sound control 10 Setting the clock 11 CD Playback Listening to a CD 12 14 Programmed play 15 Radio Listening to the radio 16 Listening to the memorised station 17 Page Tape Playback Listening to a cassette tape 18 Tape Recording Recording to a cassette tape 19 20 Advanced Features Timer and sleep operation 21 22 References Troubleshooting chart 23 24 Maintenance 25 Specifications 26 WARRANTY ...

Page 5: ...e held responsible for any damage resulting from use of this unit with a voltage other than that which is specified CD players use a laser pickup which can damage the eyes if viewed directly Do not look at the pickup and do not touch the pickup directly Volume control The sound level at a given volume setting depends on speaker effi ciency location and various other factors It is advisable to avoi...

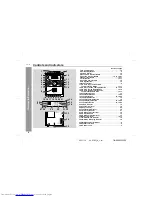
Page 6: ... Fast Reverse Tuner Preset Down Button 13 17 15 Headphone Socket 13 16 Tape Record Button 19 20 17 Tape Play Button 18 19 20 18 Tape Rewind Button 18 19 Tape Fast Forward Button 18 20 Tape Stop Eject Button 18 19 20 21 Tape Pause Button 18 19 20 22 Volume Indicator 10 23 Equaliser Indicator 10 24 Sleep Indicator 22 25 Tape Record Indicator 19 26 Timer Play Indicator 21 27 CD Repeat Play Indicator ...

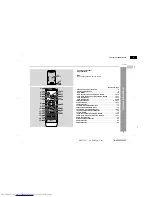
Page 7: ...utton 13 20 10 Memory Button 11 15 17 11 Clear Button 15 17 12 Clock Button 11 13 Treble Up and Down Buttons 10 14 Bass Up and Down Buttons 10 15 Volume Up and Down Buttons 10 21 16 Tuner and Band Selector Button 16 17 Tape Button 18 18 CD Fast Forward Tuning Up Button 13 16 19 CD Track Up Tuner Preset Up Button 13 17 20 CD Pause Button 13 21 Random Repeat Button 14 22 Timer Button 21 23 Sleep But...

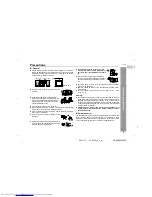
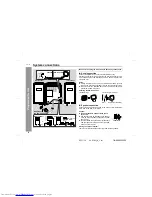
Page 8: ...he AM loop aerial Speaker connection Connect the wire with the white line to the minus terminal and the black wire to the plus terminal Caution Placing the speaker system There is no distinction between the right and the left speakers Right speaker Left speaker AM loop aerial FM aerial Black White line Right speaker Left speaker Wall socket AC 230 240 V 50 Hz Make sure to unplug the AC power lead ...

Page 9: ...el cadmium battery etc Installing the batteries incorrectly may cause the unit to malfunc tion Notes concerning use Replace the batteries if the operating distance is reduced or if the operation becomes erratic Purchase 2 AAA size batteries UM 4 R03 HP 16 or similar Periodically clean the transmitter on the remote control and the sensor on the unit with a soft cloth Exposing the sensor on the unit...

Page 10: ...lume and the VOL UME button to decrease the volume Adjusting the bass Main unit operation 1 Press the BASS TREBLE button to select BASS 2 Within 5 seconds turn the VOLUME control to adjust the bass Remote control operation Press the BASS or button to adjust the bass Adjusting the treble Main unit operation 1 Press the BASS TREBLE button to select TrE 2 Within 5 seconds turn the VOLUME control to a...

Page 11: ...ton 2 Within 1 minute press the PRESET or button to se lect 24 hour or 12 hour display and then press the MEMO RY button 0 00 The 24 hour display will appear 0 00 23 59 AM 12 00 The 12 hour display will appear AM 12 00 PM 11 59 Note that this can only be set when the unit is first installed or it has been reset Refer to Clearing all the memory reset on page 24 3 Within 1 minute press the PRESET or...

Page 12: ...ND BY button to turn the power on 2 Press the FUNCTION button until Cd dISC appears on the display When operating with the remote control press the CD button 3 Press the CD EJECT button to open the CD compart ment 4 Place a CD on the spindle la bel side up 5 Close the CD compartment by firmly pushing the corner marked PUSH CLOSE Total number of tracks Total playing time 6 Press the button to start...

Page 13: ...g fast reverse the disc will start playback automatically To interrupt playback Main unit operation Press the button To resume playback from the same point press the button again Remote control operation Press the button To resume playback from the same point press the button Before plugging in or unplugging the head phones reduce the volume Be sure your headphones have a 3 5 mm 1 8 diameter plug ...

Page 14: ...racks If you press the button during random play you can move to the track selected next by the random operation On the other hand the button does not allow you to move to the previous track The beginning of the track being played will be located Caution After performing repeat or random repeat play be sure to press the button Otherwise the disc will play continuously To cancel repeat or random pl...

Page 15: ...press the ON STAND BY button to enter the stand by mode or the function is changed from CD to some other function the programmed selections will not be cleared During programme operation random play is not possible 1 Whilst in the stop mode press the or button to se lect the desired track Selected track number 2 Press the MEMORY MEMORY SET button to save the track number Playback order 3 Repeat st...

Page 16: ...r 1 Press the ON STAND BY button to turn the power on 2 Press the FUNCTION button until FM or AM appears on the display When operating with the remote control press the TUNER BAND button to select FM or AM 3 Press the TUNING or button to tune in to the desired station Manual tuning Press the TUNING button as many times as required to tune in to the desired station Auto tuning When the TUNING butto...

Page 17: ...m ber Store the stations in memory in order starting with preset channel 1 4 Within 5 seconds press the MEMORY SET MEMORY button to store that station in memory If the MEMORY and preset number indicators go out before the station is memorised repeat the operation from step 2 5 Repeat steps 1 4 to set other stations or to change a pre set station When a new station is stored in memory the station p...

Page 18: ...g from one tape operation to another press the button Before playback For playback use normal or low noise tapes for the best sound Metal or CrO tapes are not rec ommended Do not use C 120 tapes or poor quality tapes as they may cause malfunctions Before loading a tape into the cassette compartment tighten the slack with a pen or a pencil 1 Press the ON STAND BY button to turn the power on 2 Press...

Page 19: ... Press the button To resume recording press the button To stop recording Press the button The tape will stop 1 Press the ON STAND BY button to turn the power on 2 Press the FUNCTION button until Cd dISC appears on the display When operating with the remote control press the CD button 3 Load the desired disc 4 Load a cassette into the cassette compartment with the side to be recorded on facing you ...

Page 20: ...ess the button which also en gages the button 5 Press the button again to begin recording 1 Load the tape to be erased into the cassette compartment with the side to be erased facing toward you 2 Press the FUNCTION button until TAPE appears on the dis play 3 Press the button which also engages the button to begin erasing Erase prevention tabs of cassette tapes When recording on a cassette tape mak...

Page 21: ... STAND BY button to turn the power on 2 Press the CD or TUNER BAND button to select the de sired function If you select TUNER BAND tune in to the desired station 3 Adjust the volume using the VOLUME buttons Do not turn the volume up too high 4 Press the TIMER button and within 6 seconds press the MEMORY button 5 Within 1 minute press the PRESET or button to specify the hour to start then press the...

Page 22: ... gradually until it reaches the volume you were listening at before your system enters the timer stand by mode 8 The unit will enter the stand by mode one hour after the timer playback starts However when CD playback time is one hour or less it will enter the stand by mode after com pleting playback 1 Play back the desired sound source 2 Press the SLEEP button To change the sleep time Press the SL...

Page 23: ...layback stops in the middle or is not performed proper ly Does the disc satisfy the standards Is the disc distorted or scratched Playback sounds are skipped or stopped in the mid dle of a track Is the unit located near excessive vibra tions Is the disc very dirty Has condensation formed inside the unit The radio makes un usual noises contin uously Is the unit placed near the TV or comput er Is the...

Page 24: ...ation Sudden temperature changes storage or operation in an extremely humid environment may cause condensation inside the cabinet CD pickup tape heads etc or on the transmitter on the remote control Condensation can cause the unit to malfunction If this happens leave the power on with no disc or cassette in the unit until normal playback is possible about 1 hour Wipe off any condensation on the tr...

Page 25: ...parts once every 30 hours of playing recording time by using a commercial tape head demagnetiser Read the demagnetiser s instructions carefully before use Care of compact discs Compact discs are fairly resistant to damage however mistracking can occur due to an accumulation of dirt on the disc surface Follow the guidelines below for maximum enjoyment from your CD collec tion and player Do not writ...

Page 26: ...ensions Width 160 mm 6 5 16 Height 242 mm 9 1 2 Depth 250 mm 9 7 8 Weight 2 3 kg 5 1 lbs Output power RMS 10 W 5 W 5 W 10 T H D Output terminals Speakers 4 ohms Headphones 16 50 ohms recommended 32 ohms Frequency range FM 87 5 108 MHz AM 522 1 620 kHz Type Compact disc player Signal readout Non contact 3 beam semiconductor laser pickup D A converter 1 bit D A converter Frequency response 20 20 000...

Page 27: ...as to be returned for repair This warranty does not extend to accessories defects or injuries caused by or resulting from causes not attributable to faulty parts or the manufacture of the product including but not limited to defect or injury caused by or resulting from misuse abuse neglect accidental damage improper voltage liquid spillage vermin infestation software or any alterations made to the...

Page 28: ...RDING YOUR LOCAL SHARP APPROVED SERVICE CENTRE VISIT OUR WEBSITE AT www sharp net au OR CALL SHARP LOCAL CALL 1 300 135 022 SHARP CORPORATION OF AUSTRALIA PTY LIMITED A B N 40 003 039 405 1 Huntingwood Drive Blacktown NSW 2148 FOR PRODUCTS PURCHASED IN NEW ZEALAND CONTACT YOUR SELLING DEALER RETAILER OR CALL SHARP CUSTOMER SERVICES TELEPHONE 09 573 0111 FACSIMILE 09 573 0113 WEB www sharpnz co nz ...

Reviews: