background image

9

Space

WWW Mode

WWW mode is used exclusively for storing name (Uniform Resource
Locator) and a remark to remind you of the URL contents. In this mode, a
WWW listing consists of 3 entries: name, URL, and remark.

1.Storing the WWW Listings

1. Press 

WWW

 to display the name entry

prompt.

2. Enter the name. For example,

SHARP ELECTRONICS CORP.

3. Press 

ENTER

.

The URL entry prompt including
“http://www.” (you can edit) is
displayed.

4. Enter the URL. For example,

sharp-usa.com

       URL
NAME ?

SHARP ELECTRONICS C
URL ?
http://www.–

SHARP ELECTRONICS C
http://www.sharp–us
a.com–

SHARP ELECTRONICS C
http://www.sharp–us
New Jersey–

SHARP ELECTRONICS C
ORP.

a.com

http://www.sharp–us

New Jersey

5. Press 

ENTER

.

The remark entry prompt is displayed.

6. Enter the remark. For example,

New Jersey

7. Press 

ENTER

.

“STORED !”  will be displayed briefly,
then the listing will be displayed.

• The maximum number of characters

(including “http://www.”) that can be entered for each listing is 512 in
all.

See also for Telephone/E-mail and WWW Mode

Recalling the Listings ................ 16

Checking the Memory Storage .. 16

Editing the Listings .................... 18

Freeing Up Memory .................. 16

Deleting the Listings .................. 19

Entering Characters .................... 4

Summary of Contents for YO-190P

Page 1: ... Operations 4 Notes for the Built in Calendar and the Time 5 Clock Mode 5 Note on Storing the Listings in Each Mode 7 Telephone E mail Mode 7 WWW Mode 9 Calendar Mode 10 Schedule Mode 10 To Do Mode 13 Memo Mode 13 Expense Mode 14 Anniversary Mode 15 Checking the Memory Storage 16 Freeing Up Memory 16 Recalling the Listings 16 Editing the Listings 18 Deleting the Listings 19 Calculator Mode 20 Conv...

Page 2: ...ard numbers the loss of or alteration of stored data etc This Organizer is not designed to visit Web sites or transfer receive e mails by using the URL or E mail addresses you will store The information provided in this manual is subject to change without notice CAUTIONS Do not carry the Organizer in the back pocket of slacks or trousers Do not drop the Organizer or apply excessive force to it Do ...

Page 3: ...ay vary depending upon the condition of use Press ON to resume operation Backlight The Backlight allows you to view the display and use the Organizer even in low light conditions Pressing BackLight once illuminates the display for as long as you continue to use the Organizer until you have not typed any key for the interval you set See the following section Setting up the Backlight To turn the Bac...

Page 4: ...ep will sound when a key is pressed The schedule alarm will sound CAPS Capital uppercase letters will be entered To enter small lowercase letters turn CAPS off by pressing CAPS EDIT The listing on the display can be edited 2nd Indicates that 2nd has been pressed Pressing another key in succession to which the special function is assigned performs the function for example as introduced on page 31 S...

Page 5: ...hile holding down press the desired key to be entered 1 The italic and bold type style numbers and letters and space between them for operation are shown as unboxed numbers and letters In this manual the keys are represented by symbols for example Cursor movement keys Power ON OFF key MENU key Mode keys RESET switch Search keys 7 SCHEDULE 7 SCHEDULE Option port 3 pin option jack Clear Clear entry ...

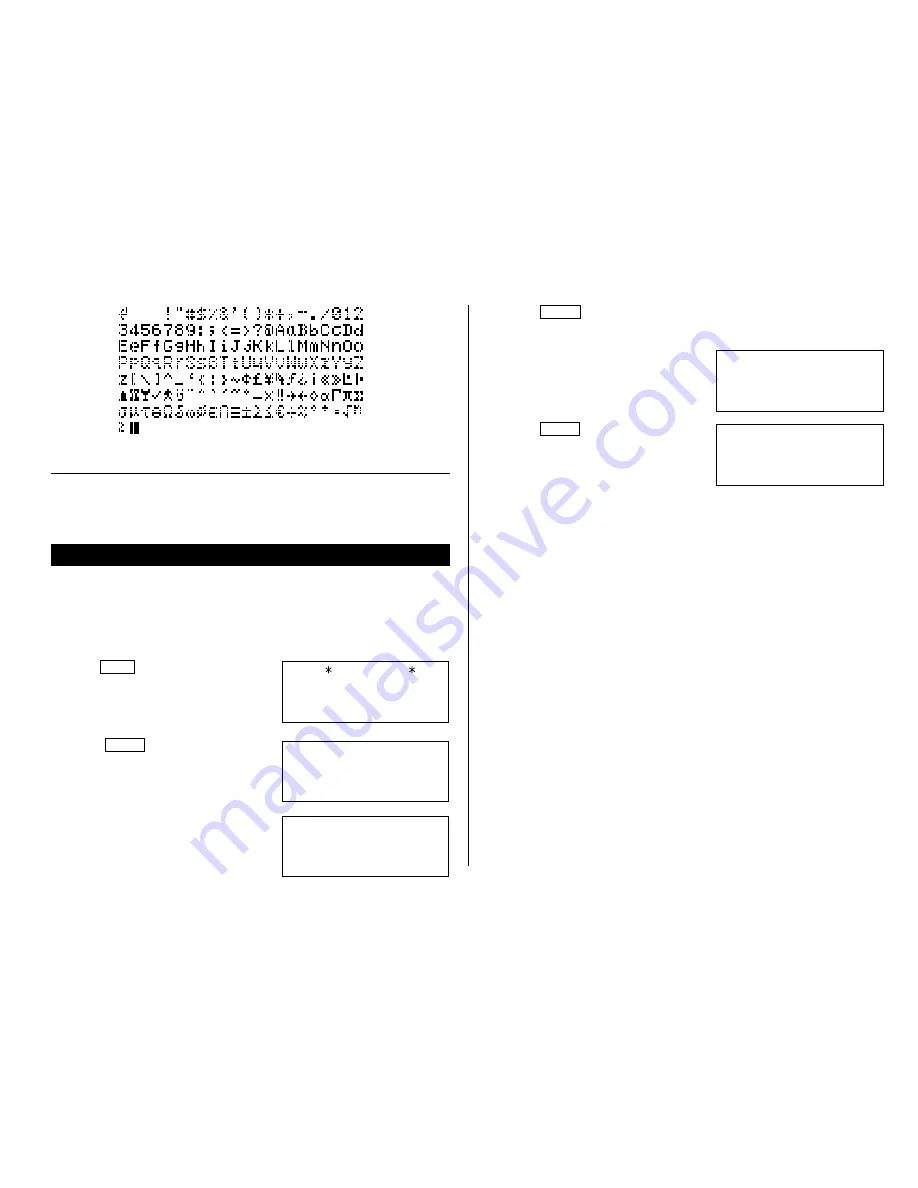
Page 6: ...holding down or 2 Entering Characters 1 Entering letters and numbers After initializing the Organizer the default setting for entering letters will be capital uppercase letters To enter small lowercase letters turn CAPS off by pressing CAPS To enter or press or while holding down 2 Entering graphic symbols and special characters Press SMBL to display the symbol entry mode allowing a total of 90 sy...

Page 7: ...s and zone numbers of 27 cities are stored in the Organizer s memory See the following table Day of the week Month Day Year World city Time Time Day of the week Month Day Year Home city 1 Press CLOCK once or twice to display the Home clock The initial Home city after initialization of the Organizer is New York 2 Press MENU PREV PREV 1 to select 1 CLOCK SETTING 3 Press 1 to select 1 HOME CLOCK 18 0...

Page 8: ... belongs to zone number 12 but is not included in the city list 1 Press MENU PREV PREV 1 to select 1 CLOCK SETTING 2 Press 2 to select 2 WORLD CLOCK 3 Press NEXT or PREV to set the zone number to 12 Initially the city is Paris 4 Enter the city name up to 8 characters ROME Press DEL to delete unnecessary character s if necessary 5 Press ENTER to store the new name To register a city name for the Ho...

Page 9: ... you were before pressing MENU 6 Selecting the Date Format The date format can be switched between MONTH DAY YEAR and DAY MONTH YEAR TIME SYSTEM 1 12 2 24 1 Press MENU PREV PREV 3 to select 3 DATE FORMAT 2 Press 1 or 2 to select MONTH DAY YEAR or DAY MONTH YEAR DATE FORMAT 2 DAY MONTH YEAR 1 MONTH DAY YEAR Note on Storing the Listings in Each Mode If the memory is full MEMORY FULL will be displaye...

Page 10: ...rform the same procedure as step 2 for TEL MAIL2 and URL 4 Press TEL E MAIL or WWW to check the new file name s Johns Pat Johns Pat F 265 1234 201 265 5600 Johns Pat Box G Sharp Plaza m 201 265 5600 johns P sharpsec co 2 Storing the Telephone Listings 1 Press TEL to display the TEL MAIL1 entry prompt 2 Enter the name For example Johns Pat 3 Press ENTER The number entry prompt is displayed 4 Enter ...

Page 11: ...ME SHARP ELECTRONICS C URL http www SHARP ELECTRONICS C http www sharp us a com SHARP ELECTRONICS C http www sharp us New Jersey SHARP ELECTRONICS C ORP a com http www sharp us New Jersey 5 Press ENTER The remark entry prompt is displayed 6 Enter the remark For example New Jersey 7 Press ENTER STORED will be displayed briefly then the listing will be displayed The maximum number of characters incl...

Page 12: ...t monthly calendar will be displayed and the current date will flash See also Recalling the Listings 16 Schedule Mode Schedule mode is selected by pressing SCHEDULE once or twice Each time you press this key the display switches between Schedule mode and Calendar mode A schedule listing consists of 3 entries date time and detail The maximum number of characters for each detail is 512 In the date e...

Page 13: ...r June 24 2001 is displayed 4 Enter the starting and ending time 1130 AM 01 PM For the 24 hour clock press 1130 13 DESCRIPTION is displayed 00 will be entered automatically You can enter schedule details without the ending time Press ENTER or after entering the starting time to display the DESCRIPTION prompt You can also enter schedule details without a specified time except details starting with ...

Page 14: ...display It is possible to perform steps 4 and 5 while you are entering the schedule item Pressing 2 to select 2 OFF makes the disappear and turns off the schedule alarm If the alarm time you attempt to enter has already passed the message ALARM TIME ELAPSED appears briefly Enter the correct alarm time 10 00AM 11 00AM FRI JUN 22 2001 Meeting ALARM SOUND 1 ON 2 OFF After the alarm sounds will disapp...

Page 15: ...ase letters Order of priority is from 0 9 A Z then space 2 Checking off Completed Items 1 Press TO DO ANN once or twice to display the To Do entry prompt 2 Press MENU 2 to select 2 INDEX 3 Press and to select the item 4 Press to mark it as done DESCRIPTION TO DO PRIORITY Call Frank about a MEMO TITLE Items marked with are given the lowest priority and listed at the end of the list You can also che...

Page 16: ...ion and press it again to return to the date entry prompt The description field can be skipped by pressing ENTER EXPENSE DATE M D Y 4 12 2001 THU APR 5 2001 AMOUNT 1 200 00 DESCRIPTION THU APR 5 2001 1 200 00 inspection abroad Flight tickets for THU APR 5 2001 DATE 4 12 2001 DAILY 1 DAILY 2 PERIOD EXPENSE REPORT 2 Expense Summaries Expense summaries are a collection of records stored in Expense mo...

Page 17: ...099 The maximum number of characters for each description is 512 Anniversaries are marked with a tag in the center right of the date See page 11 in the monthly calendar 1 Storing the Anniversary Listings Example 1 Enter the following data Nancy s Birthday on February 12th 1 Press TO DO ANN once or twice to enter the Anniversary mode 2 Press 1 to select 1 MONTH DAY to enter the date entry prompt 3 ...

Page 18: ... 2 31 URL 6 E F FREE UP MEMORY DO YOU WANT TO Yes No The following situations may display the message shown below When the power is turned on When you performed the operation Deleting the Listings on page 19 It is recommended to press Y to free up memory The indication Replace the OPERATING batteries shown at the time of freeing up memory means that the operating batteries are almost exhausted Rep...

Page 19: ...ed listing in Telephone E mail WWW Schedule To Do or Memo mode Example Recall the listings containing the word Sharp in the TEL MAIL1 file 1 Press TEL to display the TEL MAIL1 file 2 Enter the word Sharp Johns Pat 201 265 5600 F 265 1234 Mahwah New Jersey Box G Sharp Plaza Johns Pat Robert Smith Stevenson Dug Shingo Nakahara Tom Robert 3 Press 2nd NEXT Each time 2nd NEXT are pressed subsequent lis...

Page 20: ...ed date in Calendar mode 2 Expense listings Press C CE in the Expense entry prompt then enter the date and press NEXT or PREV YEAR 2001 DAY 12 MONTH 04 MM DD YYYY 7 Other Search in Calendar Mode Recalling the scheduled item from the Calendar mode The scheduled date is displayed with the tag on the right of the date number See page 11 1 Press SCHEDULE once or twice to display the Calendar mode Pres...

Page 21: ...2 When the Secret function is on SECRET ON MODE is displayed and the file cannot be deleted In this case turn the Secret function off page 22 and repeat the above procedure 4 Press Y To cancel the deletion operation press N All of the listings including secret listings in the selected mode will be deleted all at once 2 Deleting all of the scheduled listings for an entire month 1 Press SCHEDULE onc...

Page 22: ...the same way as above 68 25 The first figure 68 40 becomes the constant 91 102 1 700 2 720 Example Operation Display 4 4 096 0 125 25 9 43 2 1 8 25 9 4 8 CDDD 25 5 84 3 68 17 Total CM 25 5 M 84 3 M 68 17 M RM 123456789098 145 17901234419210 E 123456789098 145 17 9012344192 C CE 17 9012344192 17 9012344192 1012 17901234419200 M 125 M 28 M 85 M 182 CALC 0 20 25 220 400 What is 10 of 200 What percent...

Page 23: ...you can change the currency or unit in the conversion patterns No 1 to No 3 1 Repeat steps 1 to 3 of the above section Setting the Rate 2 Press and to move the cursor to the currency to be changed and enter the new currency or unit Up to 7 letters can be entered each for unit A and unit B 3 Press to move the cursor to the rate field and enter the rate 4 Converting Currency Unit To convert unit A t...

Page 24: ... Press ENTER PASSWORD 1234567 IS NOW SET and an S are displayed The S indicates the Secret function is in effect 4 Press C CE to display the entry prompt 2 Turning the Secret Function On and Off When the Secret function is on an S is displayed When the Secret function is off the S is cleared even after the password is registered 1 Turning the Secret function off 1 Press MENU NEXT 3 to select 3 SEC...

Page 25: ...ng the secret listings in each mode To recall and edit the secret listings the Secret function must first be turned off 5 Recalling only the secret listings 1 Turn the Secret function off Refer to page 22 2 Press the desired mode key to display the entry prompt in which you want to recall the listing 3 Press MENU NEXT 4 1 to display the 4 Press 2nd NEXT or 2nd PREV The secret listings only are seq...

Page 26: ...d Press C CE to clear the error check that the Organizers are connected correctly and then start the steps again The indication Replace the OPERATING batteries shown whenever any item is selected on the UNIT TO UNIT menu screen means that the operating batteries are almost exhausted Replace them with new ones then try again to transfer data When MEMORY FULL is displayed and data transfer is aborte...

Page 27: ...he Organizers UNIT TO UNIT SENDING UNIT TO UNIT RECEIVING UNIT TO UNIT VERIFYING UNIT TO UNIT RECEIVING MODE UNIT TO UNIT RECEIVING MODE BACKUP UNIT TO UNIT SEND OK Y N BACKUP UNIT TO UNIT SENDING UNIT TO UNIT RECEIVING 2 Press 5 on the receiving Organizer to select 5 RESTORE 3 Press 4 on the transferring Organizer to select 4 BACKUP A confirmation message is displayed 4 Press Y in answer to the c...

Page 28: ...nnecting Your Organizer to a PC 1 Turn off your PC and the Organizer 2 Connect the standard 9 pin connector of the PC interface cable into a COM port on your PC Using a 25 pin connector instead of the standard 9 pin connector requires an additional adaptor 3 Connect the other end of the PC Interface Cable into the PC interface connector located on the left side of the Organizer 2 Installing 1 Inse...

Page 29: ...MENU NEXT NEXT NEXT and 4 to select 4 BACKUP Then press Y to start the backup process 2 Getting Started Known Incompatibilities While you are backing up or restoring data a transfer error may occur with certain 3D screen saver utility programs enabled Before transferring data disable any 3D screen saver utility programs you may be running PC Interface Software may not run reliably with certain vir...

Page 30: ...start the restoration process The confirmation dialog box appears To cancel the restoration process click NO 5 Click YES The instructions screen appears To cancel the restoration process click Abort on the instructions screen 6 On your Organizer Press MENU NEXT NEXT NEXT and 5 to select 5 RESTORE The data transfer is started 4 Address Utility Click Address Utility on the Main Screen to open the Ad...

Page 31: ...clear the input data in all entry fields 6 Enter the information The cursor appears in the entry field you click for input 7 After entering the information click Send The instructions screen appears To cancel the transferring process click Abort on the instructions screen 8 On your Organizer Press MENU NEXT NEXT NEXT and 2 to select 2 RECEIVE If the transferred data is displayed on the display of ...

Page 32: ...emory backup batteries at the same time Doing so will clear the memory of its contents Be sure to write down any important information stored in the memory before replacing the batteries 1 Precautions Since improper use of the batteries may cause leakage or explosion strictly observe the following instructions Insert the battery with its positive side correctly positioned Never throw batteries int...

Page 33: ...or sharp pointed object 5 Install a new battery with the positive side facing up 6 Replace the seal and the holder cover and secure the cover with the screw 7 The power will be turned on 2 to 3 seconds after ON is pressed If the power does not come on press the RESET switch If nothing appears on the display again replace the operating batteries Shortcut Action See page 12 18 17 24 22 23 23 14 12 2...

Page 34: ...tor mode 12 digits with calculation status symbol Addition subtraction multiplication division percentage square root memory calculation etc Currency Unit conversion mode 10 digits 19 kinds of currencies and units Power consumption 0 1W Operating temperature 0 C 40 C 32 F 104 F Power supply Operating battery 6V DC Lithium battery CR2032 2 Memory backup battery 3V DC Lithium battery CR2032 1 Batter...

Page 35: ...eleccionar el lapso 15 60 segundos Volverá a aparecer el modo en que se encontraba antes de pulsar MENU ESPAÑOL ÍNDICE Empleo del Organizador por primera vez S 1 Función de desactivado automático S 1 Luz de fondo S 1 Ajuste del contraste de LCD S 2 Activación y desactivación del sonido de pulsación de teclas S 2 Liberación de la memoria S 2 Empleo de los relojes LOCAL y MUNDIAL S 2 Almacenamiento ...

Page 36: ...AL 1 Pulse CLOCK una o dos veces para que se visualice el reloj local 2 Pulse MENU PREV PREV 1 para seleccionar 1 CLOCK SETTING 1 Ajuste del reloj 3 Pulse 1 para seleccionar 1 HOME CLOCK 1 Reloj local 4 Introduzca la hora y los minutos 10 05 PM porejemplo 1005 PM 5 Introduzca el mes el día y el año 12 de abril de 2001 por ejemplo 04122001 6 Pulse ENTER 7 Pulse MENU PREV PREV 1 para seleccionar 1 C...

Page 37: ...zca un listin de programa para el 24 de junio de 2001 June 24 2001 1 Pulse SCHEDULE una o dos veces para visualizar la pantalla del modo de programa de actividades 2 Pulse C CE para visualizar el indicador de entrada de fecha 3 Introduzca la fecha la hora de inicio y la hora de fin los detalles del programa 06242001 ENTER 1130 AM 01 PM Lunch with Tom ENTER 4 Ahora pulse SCHEDULE para comprobar que...

Page 38: ...PR 5 2001 South branch UNION BANK 272 0011223 Almacenamiento de los listines de ANIVERSARIOS En el modo de aniversario podrá especificar el mes y el día como los aniversarios de bodas y cumpleaños o el mes la semana y el día de la semana como el Día de la Madre segundo domingo de mayo Mes Día 1 Pulse TO DO ANN una o dos veces para entrar al modo de aniversario 2 Pulse 1 para seleccionar 1 MONTH DA...

Page 39: ...atrás Para ver los listines completos mueva el puntero usando y para seleccionar el listín deseado y pulse ENTER Johns Pat 201 265 5600 F 265 1234 Mahwah New Jersey Box G Sharp Plaza Johns Pat Robert Smith Stevenson Dug Shingo Nakahara Tom Robert Llamada del ítem programado en el modo de calendario La fecha programada aparecerá con una etiqueta a la derecha del número de fecha 1 Pulse SCHEDULE una...

Page 40: ...s podrá perder los datos de la memoria Antes de cambiar las pilas asegúrese de anotar toda la información importante almacenada en la memoria Precauciones Como el uso inapropiado de las pilas puede producir fugas o explosión observe al pie de la letra las siguientes instrucciones Inserte la pila con su lado positivo correctamente posicionado Nunca arroje las pilas al fuego pues podrán explotar Man...

Page 41: ...r ejemplo 11 2001 2 Precauciones al cambiar la pila de respaldo de la memoria Si cambia la pila de respaldo de la memoria con las pilas de funcionamiento agotadas se perderán todos los datos de la memoria Asegúrese de que las pilas de funcionamiento no estén descargadas Si las pilas de funcionamiento están descargadas primero cambie estas pilas antes de cambiar la pila de respaldo de la memoria 3 ...

Page 42: ... and used in accordance with the instructions may cause harmful interference to radio communications However there is no guarantee that interference will not occur in a particular installation If this equipment does cause harmful interference to radio or television reception which can be determined by turning the equipment off and on the user is encouraged to try to correct the interference by one...

Page 43: ...sive warranties granted by Sharp and shall be the sole and exclusive remedy available to the purchaser Correction of defects in the manner and for the period of time described herein shall constitute complete fulfillment of all liabilities and responsibilities of Sharp to the purchaser with respect to the Product and shall constitute full satisfaction of all claims whether based on contract neglig...

Page 44: ...PRINTED IN CHINA IMPRESO EN CHINA 00CTO TINSE0395EHZZ SHARP ELECTRONICS CORPORATION Sharp Plaza Mahwah New Jersey 07430 2135 ...

Reviews: