background image

1

Dear Loyal Customer:

First, thank you for purchasing the Zaurus K-PDA and 
welcome to the Zaurus family. We are sure you will soon 
find that your new assistant will change your life and the 
way you do business. We would briefly like to share with 
you our vision.

Your Zaurus exists today thanks to an incredible amount of 
effort and determination from our entire Zaurus team (not to 
mention numerous pots of black coffee). Our team at Sharp 
has a dream to change the way we all do business. As a 
business person, you already know that access to 
information and people anytime, anywhere is the key to 
gaining a competitive edge in this fast-paced information 
age. We feel Zaurus is the tool that can deliver this to you. It 
is simple to use, has months of battery life, and fits in your 
pocket.

How did we come up with the idea for Zaurus? Many of us 
found that we were lugging around notebook computers to 
take notes, generate summaries, and report back to our 
office and clients. We also found that we had a lot of "down 
time" that could be put to better use; sitting on trains and 
planes, waiting for clients, and even in meetings. Now that 
we are using the Zaurus, we travel lighter, work smarter, 
and stay more in touch with our contacts and each other. 
Best of all, we have very little "down time" as our "Zauri" are 
always with us. Now you know why we say that "Zaurus 
means business anytime, anywhere".

We need your help to spread the word. Show a friend or 
someone at work how you use your Zaurus and what it can 
do for them. As more and more people start using the 
Zaurus, we can spend even more resources on developing 
new accessories, add-on software programs, and new 
versions of the Zaurus. Better yet, if you have a mobile staff 
or sales force that you would like to equip with Zauri, give us 
a call at 800-BE-SHARP. We'll show you how you can 
improve their efficiency and productivity as well as enable 
them to better keep in touch with their clients and each 
other.

Finally, let us know how you feel about your Zaurus. We 
look forward to getting letters from our users about how you 
use it and improvements you would like to see. We cannot 
promise to answer every letter, but you can be sure we read 
all of the suggestions you send us. We value feedback from 
our customers and try to incorporate as many requests as 
we can in our new products. Each of us takes an incredible 
amount of personal pride in our work and the Zaurus. We 
are all Zaurus users. We believe this makes a difference in 
the products we create. After using the Zaurus, we think 
you'll agree.

Thanks again for purchasing the Zaurus and sharing our 
dream. We look forward to shaping the future of the 
information age with you.

Sincerely,

The Z Team

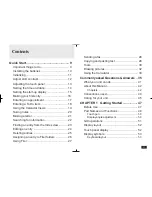
Summary of Contents for Zaurus ZR-5700

Page 1: ...of all we have very little down time as our Zauri are always with us Now you know why we say that Zaurus means business anytime anywhere We need your help to spread the word Show a friend or someone at work how you use your Zaurus and what it can do for them As more and more people start using the Zaurus we can spend even more resources on developing new accessories add on software programs and ne...

Page 2: ...e marks and or registered trademarks of their respective holders There are only two differences between the ZR 5700 and ZR 5800 models Memory capacity ZR 5700 1 MB ZR 5800 2 MB Backlight ZR 5700 Not supported ZR 5800 Supported The display examples and keyboard illustrations used in this manual are taken from the ZR 5800 although they apply equally to both models Unless otherwise specified the info...

Page 3: ...ayout 52 Touch panel display 52 Display symbols 53 Keyboard layout 53 Contents Quick Start 9 Important things to do 9 Installing the batteries 10 Initializing 11 Adjust LCD contrast 12 Adjusting the touch panel 13 Setting the time and date 14 Setting the start up display 15 Making your first entry 16 Entering an appointment 17 Entering a To Do item 18 Using the Calendar Views 19 Taking notes 20 Ma...

Page 4: ...oving or copying graphics 65 Adding text strings to Scrapbook 66 The Stamps tool 67 Deleting Scrapbook entries 69 Filer 69 Assigning entries to folders 69 Collect related entries to one folder 70 Viewing entries via Filer 72 Editing folder entries 73 New Assigned Entry 73 Delete an entry from Filer 74 Removing entries from folders 74 Empty a folder 75 Merging Moving folders 75 Sending folders 76 G...

Page 5: ...Resume 106 Cursor 106 Entering text 106 Moving around the display 107 Moving between fields 107 Inserting text 107 Deleting text 107 Blocks of text 108 Deleting blocks of text 108 Cut Copy and Paste 108 Scroll bars 108 Finding Specific Entries 109 Index View 109 Keyword Search 110 Global Search 111 Using Filer 112 By Date 112 Deleting Entries 112 Deleting single entries from the keyboard 112 Delet...

Page 6: ...132 Finding Birthday Ann entries 133 Editing an deleting entries 133 Holiday 134 Making new entries 134 Finding Holiday entries 135 Editing and deleting entries 135 To Do 136 Making a new To Do entry 137 Entering a Monthly Goal 138 Finding To Do entries 138 Checking off completed entries 139 Using Labels 140 Making To Do entries with labels 140 Reviewing the To Do list by Labels 142 Editing labels...

Page 7: ...es 167 Editing a Documents entry 167 Deleting Documents entries 167 Changing display character size 168 Find Text 168 Text styles 169 Tabs and indents 170 Word wrap 173 Document size 173 Display size 173 Page Setup 174 Inserting a page break 175 Print Preview 176 Check Spelling 176 Make a Letter function 177 Documents with pictures 180 Headers and Footers 180 Exchange Documents with PC Files 181 O...

Page 8: ...sfer with Other Sharp Devices 219 Data transfer between ZR 5700 ZR 5800s or with ZR 5000 219 Wireless infrared transfer Beaming 219 Quick transfer 220 Unit to Unit transfer 220 Data Transfer with Other Computers 223 PC Link 223 Organizer Link software for Other Sharp Products 224 Special Communications Applications 226 Remote Link 226 Terminal Mode 226 Message 226 CompuServe Access 227 AT T Mail A...

Page 9: ...s about particular operations 3 If you have any particular questions about your unit read through the list of commonly asked questions and answers There is a good chance that any questions you have will be answered there 4 When you need help with any operation touch HELP at the left of the display On screen help is a topic specific quick reference guide that explains features and their functions Q...

Page 10: ...pose the red dot 2 Slide the operating battery cover off 3 Insert the two LR6 AA operating batteries Make sure the batteries are correctly aligned for polarity and 4 Replace the operating battery cover 5 Set the battery replacement switch to NORMAL OPERATION On average you can expect to get about two months of battery life Actual battery life will vary depending on individual use If this is the fi...

Page 11: ...t time it is used 1 Press the lock button and open the display 2 Remove the touch pen 3 While holding down the ON key push the RESET button on the back with the touch pen 4 Touch to initialize After initialization the Start up display appears ON Open Press ...

Page 12: ...he left of the display 2 Touch under Preferences twice 3 To adjust LCD contrast touch or 4 When you are satisfied with the setting touch If LCD contrast is too light or dark to see the display you can adjust the contrast directly Turn the unit off hold down the MENU key and then press ON Press and to adjust the contrast ...

Page 13: ...Touch TOOLS 2 Touch under Preferences twice 3 Touch Press the key 4 Touch the exact center of all four cross points with the touch pen As each cross point is touched it will turn grey When all four are touched Adjusted is displayed If for some reason the adjustment fails a Sorry please try again message is displayed Touch the centers of all four cross points again until Adjusted is displayed ...

Page 14: ...default Home City 3 Select your city if available or a city in your time zone and then touch Use the scroll bars to see more cities By default all cities are set to observe daylight saving time DST If your city does not use DST touch the check box to disable it 4 Touch to set the time and date for your Home City Touch each time date field box and then use to change the value Alternately you can en...

Page 15: ...your name telephone number and address on one of two graphic backgrounds 1 Touch TOOLS and then touch twice 2 Select the required setting in each field Select User s Picture when you want to use your own original start up picture For details see p 83 3 Touch to save your settings ...

Page 16: ...at the right of the display 2 Touch and select New Business 1 Business is the default file name of Contact 1 3 Enter a name Select the Company field and enter a company name Select the Address field and enter an address Touch a field name to select the field for data entry Dark outlines around a field indicate that it is selected 4 When you complete the entry press ENTER to save it ...

Page 17: ...TIVITIES again if the Day view has not been displayed 2 Touch and drag the pen across the start and end times of the appointment on the time bar When you lift the pen a new appointment will appear 3 Touch the text box and enter a description 4 When you complete your entry press ENTER ...

Page 18: ...To Do 3 Touch the date box and then use to select the due date if the To Do item has one You can assign up to five labels to a task then later use these to filter the item in a To Do list 4 Enter a priority level number or letter as required 5 Move to the text box and enter a description 6 When you complete your entry press ENTER to save it ...

Page 19: ...t a glance This box indicates today s date Using the Calendar Views Activities has five different calendar views Day initial default view Week Weekly Graph Month and Year These calendar views can be used to show Appointment Birthday Ann Holiday and To Do entries To use the calendar views 1 Touch ACTIVITIES at the right of the display 2 Touch and if necessary select Day view The time bar shows your...

Page 20: ...our Notes entry The entire keyboard including OFF and others is disabled when entering Notes so operations like DEL CANCEL and MENU do not work Touch to unlock the keyboard The keyboard is automatically unlocked when you select another application 4 When you complete your Notes entry touch to unlock the keyboard unless it is already unlocked then press ENTER To give your entry a text title touch a...

Page 21: ...ng a Documents entry see Docu ments on p 165 2 Select the entry you want to make into a letter or create a new entry 3 Touch and select Make a Letter Touch to select a recipient Adjust other settings or simply accept the defaults For details see Make a Letter function on p 177 4 Touch and the Documents entry will be converted into a letter 5 When you complete your letter press ENTER to save it ...

Page 22: ...the left of the display 2 Enter a keyword in the Only Entries Containing field Select Limit by Date Range as required 3 Select the applications you want to search All applications are selected for the search by default 4 Touch Matching entries are assigned temporarily to the Search folder in Filer 5 Touch the entry you want to view twice ...

Page 23: ...s Data Files Notes Outline and Documents 1 Select the application and go to the Index View 2 Press 2nd then F 3 Enter the first few letters of the keyword the word you are searching for 4 Touch to jump to the first entry that contains the keyword 5 Touch or until you see the entry you are looking for Touch to end the search ...

Page 24: ...d cursor keys to move within the display use BS and DEL to delete text and make new entries from the keyboard You can also drag the pen over text to select it then cut the text and paste it elsewhere or just delete it 3 When you complete your changes press ENTER to save them If you want to save these changes as a new entry and preserve the original press 2nd ENTER ...

Page 25: ...y Delete Note in Notes Delete Document in Docu ments Delete Outline in Outline 3 Touch to confirm the deletion Single entries can also be deleted by selecting the entry in Index View and pressing DEL To delete multiple entries 1 Select the application that you want to delete entries from 2 Touch and select Delete Group Use the pop up menus to select the group entries for deletion 3 Touch 4 Touch t...

Page 26: ...the folder they are just assigned to the folder 1 Display the entry you wish to assign to a folder in Index or Detail View 2 Touch 3 Touch the folder s you want to assign the entry to You can select multiple folders Touch once to select a folder Touch again to cancel the selection 4 Touch when you finish selecting the folder s ...

Page 27: ...ged using the original application 1 Touch FILER at the left of the display 2 Touch a folder tab twice to view entries assigned to that folder You can also select a folder tab and press ENTER to view entries 3 Touch an entry twice to examine it in Detail View You can also select the entry and press ENTER to see it in Detail View ...

Page 28: ...acsimile machine 1 Connect your unit and the CE FM4 Fax Modem Make sure the Fax Modem is plugged into a wall jack For details about connecting the CE FM4 see the CE FM4 manual 2 Select a single entry or a Filer folder to be sent 3 Touch and select Fax 4 Touch and select a recipient from your Contacts file 5 Touch For details see Faxes on p 195 ...

Page 29: ...word or sentence The text will be displayed in reverse white on black to indicate it is selected To cancel the selection touch any unhighlighted area 3 Touch and select Copy 4 Display the entry you want to add the text to in Detail View 5 Touch the required place of insertion In Scrapbook use the area tool to select an area to paste into 6 Touch and select Paste ...

Page 30: ... remote PC via a modem and phone line Check the time at home and abroad Check the status of sent faxes Make a backup copy of main memory onto a memory card Transfer data with a remote computer via a modem and phone line Send receive messages email to a remote computer Connect to CompuServe Send and receive AT T Mail messages Send and with Pager card receive Pager mes sages Enter your name etc and ...

Page 31: ...alarm sounds on and off Set the start up display Set the sleep interval Show hide secret entries Stores commonly used words or phrases Select the data source for applications Control duration of the ZR 5800 s Backlight ...

Page 32: ... 2 Touch and select New Entry You can also just start drawing 3 Write whatever you like directly on the display with the touch pen You can also use the stamp function to insert some useful built in pictures 4 Press ENTER when you are finished drawing A similar drawing capability is available in Docu ments and the picture fields of Contacts and Data Files ...

Page 33: ...33 Using the Calculator Calculator works as a standard 10 digit calculator 1 Touch CALC at the left of the display 2 Enter calculations by touching the key pad 3 Touch when finished ...

Page 34: ...34 ...

Page 35: ...r each application you want to transfer See p 218 for details Be sure that the sending unit does not have a blank no characters Telephone Contact or User File Data File field name or else the Zaurus will not be able to receive information an error message will appear If you own an OZ 8000 OZ 7000 series or YO 600 ZQ 5000 series Electronic Organizer you can get information using PC Macintosh link s...

Page 36: ...nto a memory card Flash Memory cards can be used to store multiple archives of the built in application data for backup purposes as well as for loading add on software programs Flash Memory cards are good for backups because you can make multiple backups space permitting and they are more reliable than SRAM cards they require no backup battery Communication cards etc Sharp has provided a number of...

Page 37: ... memory or onto an optional PC memory card Just plug the included RJ 11 phone cable into the CE FM4 modem and the phone jack Note that you cannot use this device with digital phone lines Digital phone lines are likely to be found at your office typically when you have a PBX system installed The basic rule to follow is that if you can use a standard fax machine on the phone line then it is analog a...

Page 38: ... many databases PIMs etc support Note CSV is for multi field multi record informa Q How do I backup my important information A It is important to always have a back up of your important electronic information Here are some ways to do this You can print out a hard copy using the Sharp CE IR1 infrared adaptor for printing You will also need a PC compatible printer see page 192 for details You can ba...

Page 39: ...s possible that the batteries were not fresh when you pur chased them Press the RESET switch If the unit has been dropped for example it may have to be reset This will not delete your data If for any reason data is missing after resetting the unit it was lost before you pressed the RESET switch which simply re starts the unit If none of the procedures above help you should send the unit to a servi...

Page 40: ... could make a number of Documents entries for each piece of information but a better way to manage the information would be to make a single Outlines file called Personal information This file could then contain a number of headings such as Car info Travel info Health info Financial info etc under which relevant pieces of information could be stored This makes it easier to access information and p...

Page 41: ...intment Birthday Ann Holiday and To Do items in convenient daily weekly monthly or yearly formats Information Databases Your unit allows you to store a wide range of information according to your needs Contacts is used to store names phone numbers and other information Data Files lets you set up custom databases Spreadsheets provides a full featured spreadsheet utility Letters Documents The unit o...

Page 42: ...her with remarkable user friendliness make the ZR 5700 ZR 5800 among the world s most powerful and sophisticated hand held information managers About this Manual You will find two manuals with your unit This manual is designed to help you quickly learn and understand the capabilities and operation of your unit The other manual contains detailed explanations of Spreadsheets Termi nal CompuServe AT ...

Page 43: ...ool bar at the top of the display and change to suit the application Time Management Explores Activities operations Appointment Birthday Ann Holiday To Do and the Calendar views Activities helps you manage your time and keep track of important events Databases An introduction to Contacts and Data Files personal databases which store information such as addresses and phone numbers but can also be c...

Page 44: ...th a finger Letters and numbers to be entered in examples are shown in italics for example Lunch at 12 00 indicates that Lunch at 12 00 should be entered from the keyboard Activities Notes Filer Search and similar notations written with initial capitals are names of applications and accessories If the associated touch buttons on the display are to be touched as part of a procedure they will be wri...

Page 45: ...erly The following precautions should ensure your unit gives you many years of reliable use Keep your unit away from extreme heat Do not leave it on the dashboard of a car or near a heater Do not leave it in any place that is extremely damp or dusty Do not drop your unit or subject it to severe impacts Bending the body can damage the circuitry Do not use extreme force when pressing the display or ...

Page 46: ...46 ...

Page 47: ...ssing keys on the keyboard or a combination of both Before Use Before using your unit the following operations are required If you have not performed these operations read the Quick Start section 1 Battery installation see Installing the batteries on page 10 2 Initializing see Initializing on page 11 3 Adjusting the LCD contrast see Adjust LCD contrast on page 12 4 Adjusting the touch panel see Ad...

Page 48: ...ect the accessory Display ADAPTOR Connector for the optional EA 23E AC Adaptor or the CE BK1 battery pack Keyboard For entry of characters and commands ON key Press to turn the unit on OFF key Press to turn the unit off Touch pen holder Holds the touch pen when not in use Touch pen Selects touch buttons and writes on the touch panel Lock button Press to open the unit Shows information and also fun...

Page 49: ...ds operating batteries LR6 AA x 2 PC card slot For inserting a PC card PC card eject button For wireless infrared communications with other units including ZR 5700 ZR 5800 ZR 5000 OZ 9000 OZ 6000 OZ 5000 series and optional Wireless Interfaces CE IR1 IR4 The unit will not operate if the battery replacement switch is in the REPLACE BATTERIES position Press to eject a PC card Indicates you unit s se...

Page 50: ... correctly with the mounting slot Caution Use only the supplied touch pen to operate the display Do not use pens pencils or other sharp pointed objects Keep the touch pen and display clean to avoid scratches and damage to the display Display angle adjustment The display can be adjusted to any angle that suits your reading style 3 4 position When attempting a wireless infrared transfer be sure not ...

Page 51: ... mode All Detail Views except Notes and Scrapbook have a blinking cursor Selecting an application except Activities and Spreadsheets containing no entries brings up a New Entry display with a blinking cursor Cut Copy and Paste from the tool bar EDIT menu can be used to copy or move entries In Detail View the cursor can be moved to another field by touching the field or pressing the cursor keys Sel...

Page 52: ...RCH NOTES OUTLINES ACTIVITIES SPREADSHEET CONTACTS DATA FILES DOCUMENTS 1 2 5 Touch panel display The display not only shows information it is also a touch panel that lets the touch pen select functions and enter information Some operations which are carried out by touch buttons can also be carried out by pressing keys on the keyboard The touch button in bold at the right of the display has the sa...

Page 53: ...ering a password Alarm sound is enabled The display symbols may be hidden in some dialogue Keyboard layout The keyboard is laid out in a standard QWERTY format like a typewriter or computer The key has the same function as the Shift key on a typewriter or computer The CAPS key has the same function as a Caps Lock key The unit operates permanently in insertion mode except for entering the time and ...

Page 54: ...at lead to dialogue are followed by If a particular tool bar item cannot be used for a specific screen it is faded out Tool bar menus can be accessed from the keyboard by pressing MENU then using the PREV NEXT ENTER and CANCEL keys 1 2 11 Detail View and Index View The application tool bar across the top of the display normally offers a choice of either Detail View or Index View for examining unit...

Page 55: ...during normal operations for your guidance 1 2 12 Key Sound A sound beep is made each time a key or button is pressed or the display is touched Key Sound enabled as the default setting To turn the key sound off 1 Touch TOOLS and then touch Sound twice 1 2 13 The Key Sound box is checked to show it is on 2 Touch Key Sound so the cross disappears to turn the key sound off 3 Touch Done to save the se...

Page 56: ...portability by allowing you to operate your unit for long periods of time without depleting the operating batteries e g while traveling on long journeys or working outdoors To use the EA 23E AC adaptor or CE BK1 battery pack first turn off the unit then connect the plug to the ADAPTOR socket at the right of the keyboard then turn your unit back on When using the CE BK1 battery pack make sure the m...

Page 57: ... PC Link More accesses the PC card and the Add on software setup functions Full details are given in chapter 7 Calculator Calculator is a standard 10 digit calculator which Performs mathematical operations including square root percentage and memory R CM M and M Can calculate dates and time durations such as the number of days to project completion Has a paperless printer mode which shows all calc...

Page 58: ...In the basic calculator mode only calculation results are displayed In paperless printer mode the calculation steps are retained and you can edit the sequence This allows you to change numbers and opera tors x and return to intermediate results so that you do not have to reenter entire calculations M M and terminate a calculation se quence Any value entered after these keys begins a new calculatio...

Page 59: ...2A 2 Touch C CE once to return to the display of the final result and touch C CE again to clear the display Inserting new values 1 Move to the line above the point where you want to insert the new value 2 Touch Insert 3 Enter the operator and value to be inserted then press ENTER 4 Press ENTER again to get the new result Changing part of a calculation 1 Move to the entry you want to change by touc...

Page 60: ... calculator The current date is the default start date 2 1 3 2 Touch CANCEL to clear the current date and enter a different start date if desired Prefix single digit months or dates with 0 You can modify part of a date by touching it and then entering the required numbers 3 Touch TO 4 Enter the end date 5 Touch CALCULATE The number of days between the two dates is shown If you enter an invalid dat...

Page 61: ...t of a date by touching it and then entering the required numbers 3 Touch AFTER to get a date in the future Touch BEFORE to get a date in the past 4 Enter the number of days in the past or future 2 1 4 5 Touch CALCULATE and the final date is displayed You can continue to calculate other dates using the calculated date as a new start date Press or keys and the calculated date is automatically enter...

Page 62: ...ion touch the result to highlight it then press 2nd C to copy it 2 Open an entry in Detail View and touch the position where you want to enter the calculated value 3 Touch EDIT and select Paste The copied value is now included in the entry Error indicator E The error indicator E appears when any of the following situations occur Integer part of the rough result has 11 to 20 digits For example 4567...

Page 63: ...uching the upper left corner of moves to the previous entry and touching the lower right corner moves to the next entry Touching the display makes disappear so you can change an entry If Scrapbook is currently displayed and you select another application or you touch SMALL the Scrapbook display is reduced to a movable window To move this window touch the top left corner and drag it to the new loca...

Page 64: ...pbook touch QUIT To save the changes and remain in Scrapbook press ENTER Drawing tools The Scrapbook drawing tools add versatility to creating graphics The pencil tool is the default selection when you first touch the display with the touch pen 2 3 1 Pencil Draws freehand lines Ruler Draws straight lines Grid Draws the lines vertically or holizontally Stamp Inserts built in stamps Area Defines are...

Page 65: ...ine will indicate the selected area 3 Perform the required operation on the selected area as shown below To deselect the area touch anywhere in the drawing area or select another tool 4 Complete your changes then press ENTER Moving or copying graphics Graphics sections can only be moved or copied within Scrapbook To move or copy graphics 1 Touch the area tool and select the graphics area you want ...

Page 66: ...n Adding text strings to Scrapbook You can import text into Scrapbook from other application entries To add text strings to a Scrapbook entry 1 Display the entry with the text you want to import 2 Highlight the required text by dragging the touch pen 3 Touch EDIT and select Copy 4 Touch SCRAPBOOK and display an entry For a new entry touch EDIT and select New Entry ...

Page 67: ... over several lines if necessary If the area is not large enough only part of the text is pasted The Stamps tool You can use the Stamp tool to add one of the 64 built in stamps to your Scrapbook entry To use the stamp tool 1 Display the entry you want to add a stamp to 2 Touch the Stamp tool at the left The stamp menu appears at the top of the display N2 3 4 ...

Page 68: ... any location until the pen is lifted from the display Once the pen is lifted the stamp is set and cannot be moved A stamp can be inserted in multiple locations To remove a stamp select the stamp with the area tool then press DEL The stamp menu is a movable window To move the stamp menu touch the left corner and drag to the new location 5 When you complete your entry press ENTER N2 3 6A ...

Page 69: ...personnel in a Contacts file two pages of meeting notes in Notes a project outline in Outlines three To Do action items and five meeting dates in Appointments With Filer you can assign all entries related to the Andromeda project to a single folder This folder can then be selected when you want to work specifically on Andromeda project information You cannot assign Spreadsheets entries to Filer As...

Page 70: ...y storage for deleted folder entries 2 Touch a tab to specify the folder to hold the collected entries then touch COLLECT in the tool bar 2 4 2 If the selected folder contains entries and you touch COLLECT a message indicates that if you proceed all existing entries will be unassigned from that folder Touch Yes to proceed or touch No to cancel and choose another folder 3 Complete the Collect Entri...

Page 71: ...ly Secret Entries check box to collect only secret entries not displayed if the unit is locked The keyword is optional in this case 4 All applications are selected by default Deselect any applications you do not need 5 Touch Collect A Collecting message appears A message indicates if no entries contain the keyword You can try again using a different keyword or touch Cancel to close the box All ent...

Page 72: ...be easily viewed so you can access informa tion by topic rather than by entry type To view an entry from Filer 1 Touch FILER and touch twice the tab of the folder that contains the entries you want to view 2 4 5 Only one folder can be opened at a time Folder entries are sorted by entry type If the folder has more than eleven entries use the scroll bar to move to other entries 2 Touch the desired e...

Page 73: ...changes to the entry mode of the original application 3 Make the desired changes to the entry 4 When you complete your changes press ENTER then touch FILER to return to the Filer Index New Assigned Entry You can create a new assigned entry in another application directly from within Filer To make a new assigned entry 1 Open the Filer Drawer then touch a tab 2 Touch EDIT and select New Assigned Ent...

Page 74: ...o be deleted 2 Touch EDIT and select Delete Entry 3 Touch Yes to confirm the deletion The entry is deleted and disappears from the Filer Index Removing entries from folders If you assign an entry to the wrong folder or no longer require a particular entry to be assigned to a folder you can remove unassign single entries from folders Removed entries are not deleted from the source application To re...

Page 75: ... the name tab becomes blank indicating an empty folder Merging Moving folders At times you may have two folders whose con tents names or purpose are duplicated You might want to merge combine the two folders into a single folder To delete all entries in a folder an alternate method is to merge that folder with the Garbage folder then touch EDIT and select Delete Garbage Contents To undo the deleti...

Page 76: ... via optional cable Sent folder entries will be assigned to the IN folder of the receiving unit For more information about Unit to Unit transfers see p 220 To send a folder to another unit via infrared trans mission 1 Press GET on the receiving unit Touch SEND in the tool bar select Unit to Unit and then select Receive and touch OK 2 Touch FILER on the sending unit 3 Select the folder in Filer Dra...

Page 77: ... entry In Documents edit the report and then send it by fax 2 4 8 Report format Please note the following important points The generated report page format is letter size with all margins set at 1 inch and uses Elite 12 cpi font For Appointment alarm time and repeat informa tion are not included For Birthday Ann reminder information is not included For Contacts Data Files pictures and link informa...

Page 78: ... View it is also possible to use the Keyword Search function without touching SEARCH See details in General Operations Search The Search function lets you locate entries containing a specific keyword even if you do not know the entry title or the application it was created in The search can be limited to a specific date range for Appointments and To Do entries or limited to secret entries The Sear...

Page 79: ...1 Touch HELP Applications and accessories list Help item list 2 Select an application or accessory from the top list The current application is initially selected 3 Select the Help item from the bottom list Use the scroll bars to move through the list 4 When you complete your selection touch Details 5 Touch Index to return to the previous display Touch Cancel to exit the Help function ...

Page 80: ...and ZR Pager Clock is described on page 91 in this chapter and other Tools utilities are de scribed in chapter 7 Optional Accessories Terminal CompuServe AT T Mail and ZR Pager are described in the manual provided separately Preferences Preferences let you configure your unit to suit your own personal requirements Personal Personal lets you enter your personal information for use at start up when ...

Page 81: ...ed portion in the memory graph 4 Touch Sign to enter your signature for use with the Make a Letter function in Documents For more information on the signature function see p 179 5 When you complete your Personal entry touch OK Memory The memory in your unit ZR 5700 1MB ZR 5800 2MB provides you with a certain amount ZR 5700 approx 600 KB ZR 5800 approx 1 624 KB to store your entries and Add on soft...

Page 82: ...anel should be adjusted to suit your style of writing drawing and touching the display For more information see Quick Start Sound The Tools Sound accessory is used to set Key Sound and Alarm Sound Key Sound is set on as the default setting so a beep sound is made each time a key or touch button is pressed or the display is touched Alarm Sound is off as a default setting but if you set a schedule o...

Page 83: ...by touching Password in TOOLS Personal Show Owner s Information Start up can be set to Show Owner s Information increasing the chances of your unit being returned if it is lost Your personal information must first be registered with TOOLS Personal see p 80 To display owner s information at start up 1 Touch TOOLS and touch Start up twice 2 Touch On to set Start up to On 3 The start up display pictu...

Page 84: ... twice 2 6 8A 2 Use the touch pen to touch and drag the Sleep setting Sleep time can be set to 1 5 15 or 30 minutes 3 When you complete your setting touch OK 5 Check the Show box then touch the Owner s Information button N2 6 4 6 Select the owner s information to be shown at start up When you complete your selection touch OK Selecting the owner s information is only useful if you first use Tools P...

Page 85: ...to indicate this is a secret entry Secret The Secret function keeps your information secure hidden requiring a password that you specify Entries marked as secret are hidden until the password is entered Individual entries can be marked as secret or you can simply prevent access to the entire machine by requiring a password each time the unit is turned on Marking entries as secret has no effect unt...

Page 86: ...ur password and touch Unlock The Unlocked message is displayed To change a secret entry to a normal entry 1 Unlock your unit with the procedure above 2 Display the secret entry you want to make normal 3 Touch EDIT and select Normal Entry The asterisk disappears from the top right corner and the entry is no longer secret Locking your unit When a password has been registered even if you unlock your ...

Page 87: ...protected until a new password is registered If you forget your password If you forget your password to use the Secret function again you must delete all entries marked secret If you have installed an optional RAM card which has the same password as the main unit secret data on the card will also be deleted by this operation To delete all secret entries 1 Touch TOOLS and touch Secret twice 2 Touch...

Page 88: ... password or unit will not recognize the card You cannot register a password for a Flash Memory card However if you archive unit data that includes a password into a Flash Memory card the password is also stored in the card Word List You may find that you must enter the same word many times for example in lists or you may need to write several memos or letters on the same topic The WORD key lets y...

Page 89: ... bar to move through the list 4 Touch Recall The Word window closes and the word is inserted in the entry at the cursor position In step 3 above touching the word twice also inserts it into the entry Editing a Word list entry You can edit any Word list entry using a similar procedure to making Word list entries but instead of touching New in step 2 on page 88 touch the word you want to edit twice ...

Page 90: ...5800 to operate 1 Touch TOOLS and then touch Backlight twice 2 Using the pen drag the slider to the desired number of seconds after which you want the Backlight to turn off automatically OPTION Touch the check box if you want the Backlight to come on automatically whenever you type or touch the display This would be useful when using the unit for long periods in a dark location If you turn off the...

Page 91: ...n another World City When Clock is selected from Tools the clock remains displayed until another application is selected You can choose from a built in list of 212 cities If you cannot find the city you require you can make your own customized list of three User s Cities Clock Home City time is used for all time based operations Home City selection is described in the Quick Start section A similar...

Page 92: ... cities can then be selected as your Home City or World City 3 Select your World City If the city you want is not on the list touch More Cities and another list will appear 2 2 2 The first three cities are User s Cities you can specify The rest of the list is in alphabetical order by country and by city 4 Use the scroll bar to find your world city then touch and highlight it As a shortcut enter th...

Page 93: ... use DST touch the box to deselect it 4 Complete your User s City settings then touch OK You can now select a User s City as Home or World City Setting daily alarms Daily alarms are set like a regular alarm clock and sound even if your unit is turned off You can set up to seven daily alarms and these are separate from Activities alarms This is handy when you need to quickly set a wake up alarm but...

Page 94: ...d However alarms will still be indicated on the display at the set time even if your unit is turned off You can enable and disable each alarm by touching the corresponding check box Even if an alarm time is set the alarm will not sound if the box is unchecked 4 When you complete your daily alarm settings touch OK appears at the top right of the display to show that alarms will sound at the set ala...

Page 95: ...a flexible spreadsheet format With its worksheets and editing features Spreadsheets looks and feels similar to most of the popular spreadsheet programs currently available so you can get used to it in no time It even allows Spreadsheets data to be im ported and exported between Microsoft Excel for compatibility with your home or office PC Spreadsheets offers a comprehensive range of powerful built...

Page 96: ...96 ...

Page 97: ... Contacts see Section 5 Databases For a full explanation of Scrapbook see Section 2 Desk Accessories Opening Applications and Accessories To start using an application or accessory touch the required touch button at the right or left side of the display Each time you touch a button the selected application or accessory will appear Any application that is currently open on the display will be hidde...

Page 98: ... View is available for Contacts Data Files Documents and Outlines More advanced Detail Views are available for Activities Notes and Filer Index View Index View shows a one line view for each entry making it easier to find a particular entry 3 2 1 Tool Bar Functions The tool bar across the top of the display has many common functions as follows VIEWS INDEX FILTER SHOW LINKS SET UP EDIT LINK TO FILE...

Page 99: ...f the display 3 Use the touch pen to select the Detail View from the list in the menu For example select Weekly Graph The display should now be similar to that shown below 3 2 2 4 Touch VIEWS and select an Index View from the list For example touch VIEWS and select To Do Index The display should now be similar to that shown below N3 2 3 ...

Page 100: ...in the description field If a block of text is selected before touching FILTER the text will be automatically displayed as the filter description Check the Secret Only box to filter only secret entries not displayed if the unit is locked 4 Touch Filter Filtered entries that match your criteria can be viewed in Index View A message indicates if no entries match your request To turn on the filter fo...

Page 101: ...n makes it possible to delete a group of entries related to a specific topic This can be helpful if you finish a project with many related entries You can save time by deleting a filtered group instead of deleting individual entries In Contacts or Data Files 1 Turn on Filter and use a keyword to filter the entries you want to delete an example may be a company name 2 Touch EDIT and select Delete G...

Page 102: ... Gridlines Show Formulas Hide Column Row Labels Show Full Screen Show 10 Key Pad Scrapbook First Entry Last Entry These Show functions provide access to applica tion specific views tools and functions For more information see the related section Set Up The Set Up function is available for Activities Contacts Data Files and Notes Set Up allows you to change the configuration of the applications as ...

Page 103: ...Title Documents New Document New Copy Docu ment Title Outlines New Outline New Topic Spreadsheets New Worksheet New Chart Worksheet Title Scrapbook New Entry Filer New Assigned Entry Folder Name Contacts Data Files Use Set Up to select the following File Name Enter the file name and number of fields Field Name View and change field names and field types Text or Picture Note that if you change a fi...

Page 104: ...see Secret in Section 2 Desk Accessories Link To The Link To function is a feature that allows entries in different applications to be linked together This helps you to better manage your information and projects Link To lets you link any entries to Contacts or Data Files entries The Link To function is available for all applica tions Links Contacts and Data Files also have a separate LINKS featur...

Page 105: ... in any application Notes has additional features for working with text see Section 6 Writing and Letters Fields Many applications divide the display into field boxes The types and number of fields vary for each application The different field types include text date time picture and special fields Contacts and Data Files let you define the number type and names of fields see p 159 You can enter a...

Page 106: ...uppercase letters hold down either the key while pressing the letter key s or press the CAPS key to lock the keyboard in the CAPS mode the CAPS symbol is displayed and any letters entered will be in uppercase To enter lowercase letters while in CAPS mode hold down while pressing the letter key Press CAPS again to turn CAPS mode off Numbers Number keys are located on the keyboard above the letter k...

Page 107: ...irst line 2nd Moves the cursor to the bottom of the field or top of the next field if already on the last line Moving between fields You can move the cursor directly to the next field in an entry by touching the desired field name on the display or by pressing or In either case the cursor moves to the beginning of the desired field Inserting text To insert new text in the middle of existing text m...

Page 108: ...ocks of text Working with blocks of text is easy The first step is to select the text to work with Position the touch pen at the beginning of the required text and drag it to select and highlight reverse the text Lift the pen to complete your selection 3 3 1 If text is selected any new text that is entered will replace the selected text Deleting blocks of text To delete blocks of text touch and dr...

Page 109: ...s the top of the display normally offers a choice of Detail View or Index View for viewing entries Index View lets you view a list of entry titles for an application To use Index View to find entries 1 Touch the desired application key 2 Touch INDEX or touch VIEW and select INDEX Touch the tab for the entry as required If the Index is full and the desired entry is not displayed use the scroll bars...

Page 110: ... keyword search 1 Select the Index View of an application 2 Press 2nd then F A Search window will appear This window varies according to the application 3 Enter the keyword directly from the keyboard N3 4 1 4 For Contacts and Data Files select Field 1 Only to restrict the search to the Field 1 as required 3 4 2 For Documents and Outlines select Title Only to restrict the search to the Title as req...

Page 111: ...he Spreadsheets using global search To use the global Search function 1 Touch SEARCH at the left of the display 2 Enter the keyword in the Only Entries Containing field Select Limit by Date Range and enter From and To dates to restrict the search to a date range for Appointments and To Do Select Only Secret Entries to limit the search to secret entries When the unit is locked Only Secret Entries i...

Page 112: ...ion by date To use the calender views 1 Touch ACTIVITIES 2 Touch VIEWS and select the desired view Year Month Week Weekly Graph or Day 3 Locate the entry you require then use VIEWS Details to view the entry Deleting Entries Single entries can be deleted by two methods either from the keyboard or using the tool bar EDIT function Group entries can be deleted using the EDIT Delete Group function This...

Page 113: ...o begin the group deletion 5 Touch Yes to confirm the deletion Deleting single entries The EDIT Delete Entry function in the tool bar can be used to delete single entries To delete single entries 1 Open the required application 2 Select the entry in Index View or display it in Detail View 3 Touch EDIT and select Delete Entry The EDIT menu may also offer Delete Note Delete Document Delete Outline o...

Page 114: ... can be stored in the clipboard at a time and it will remain there until new text or graphics is cut or copied You can paste text or graphics from the clipboard as many times as you wish To copy or move blocks of text 1 Display an entry in Detail View 2 Drag the touch pen to select the text 3 To move blocks of text touch EDIT and select Cut or press 2nd X To copy blocks of text touch EDIT and sele...

Page 115: ... and select Copy 3 Select the destination application You can also append to an existing entry In Detail View select the required position 4 Touch EDIT and select Paste 5 The entry is now moved or copied to the new location Make any necessary changes to the moved copied entry In Outlines Detail View to copy or move an entire outline you must select the title If you select a topic only that topic a...

Page 116: ...entering data or editing an entry To insert a symbol 1 Move the cursor to the position where you want to insert a symbol or special character 2 Press SMBL on the keyboard The Symbol menu appears Time Stamp and Date Stamp The Time Stamp and Date Stamp functions let you insert the current time and or date into your data so that in the future you can verify when important events occurred Time Stamp c...

Page 117: ... at the cursor position 4 If the symbol you selected is an accent mark ˆ or _ type the letter you want to enter with that accent mark Only certain letters can be combined with each accent mark When printing some symbols and characters may not print correctly depending on the capabilities of your printer Consult your printer manual ...

Page 118: ...118 ...

Page 119: ...endar view to the one you find most convenient You can change three settings Default View Day is the initial default view Select the default view from Day Week or Month Date Format Month Day Year is the initial default date format Select from Month Day Year or Day Month Year This date format is used for all time based operations Time Management T he Activities application helps you to structure an...

Page 120: ...ek or Weekly Graph views by touching a date twice The appointments line graph for the day is shown across the center Touch to display earlier appointment and to display later appointment Shaded portions indicate appointments black portions indicate conflicts A Month calendar is displayed in the upper left for reference Touch a day in this Calendar to see the activities for that day The To Do list ...

Page 121: ...view provides an overview of all months in a year Note that no activities are indicated in this view Press PREV or NEXT to see the previous or next year Touch any month twice within the selected year and the view changes to the selected month Month view Today s date has a bold border Monthly goals Appointments are indicated on dates with dots A top dot indicates an Early appointment 00 00 AM to 11...

Page 122: ...ndar Touch after completing your hand written entry to return the Month calendar to the normal mode To write and draw on the Month calendar view 1 In Activities touch VIEWS and select Month Clear All Pencil Eraser 2 Press PREV and NEXT to select the desired Month calendar view 3 Use the pencil tool to write directly on the Month view Use the eraser tool to remove unwanted drawings Use the clear al...

Page 123: ... This lets you check for free time at a glance and helps avoid conflicts Black portions indicate you have a conflict more than one appointment in that period Appointment times are indicated using 5 minute blocks Shaded portions indicate times when you have appointments or other commitments 4 1 8 Touch Early or Night to see earlier or later appointments Press PREV or NEXT to display the preceding o...

Page 124: ...n also touch the entry twice to view the details Selecting a date In any calendar view you can scroll to the previous or next time period day week month or year by pressing PREV or NEXT Show A Specific Date Another convenient way of selecting a date is to touch SHOW and select A Specific Date To show a Specific Date 1 In Activities select any calendar view 2 Touch SHOW and select A Specific Date 4...

Page 125: ... you of an impending appointment This makes it easy to organize your day and always get to appointments on time Appointment entries are indicated in the Month view by a dot to the right of the date Making new Appointment entries Appointment entries have four components date time alarm and description When you touch EDIT and select New Appointment there are four basic steps to making new entries Se...

Page 126: ... start and end times are automatically entered for you Finding entries You can find an Appointment entry using the Calendar views the Index View or a keyword search Using calendar views You can access an Appointment entry directly from the Day view by touching the required entry twice To find an entry using Index View 1 In Activities touch VIEWS and select Appointment Index 4 2 2 Appointment entri...

Page 127: ...earch box will automatically appear 2 Enter the search keyword then touch Search The search function displays the first entry that contains the keyword Touch Prev or Next to move to additional entries if any that contain the keyword 3 When you find the desired entry or to exit the search function touch Done Editing Appointment entries You can easily change the time date or descrip tion of an appoi...

Page 128: ... Deleting group entries You can delete groups of Appointment entries by choosing from Delete All entries or specifying a deletion period You cannot delete group entries if the unit is locked see p 86 You must be in a calendar view which includes the period you want to delete Monday Sunday is recognized as one week for deletion even if the default format is Sunday Saturday To delete groups of Appoi...

Page 129: ...ointments created with the Repeat function can be individually edited later like any other entry The REPEAT function has six different types of events Daily Repeats an appointment on consecutive days Daily Work Days Only Repeats an appointment on consecutive work days from Monday to Friday only Every Week Repeats an appointment on the same day each week Every Other Week Repeats an appointment on t...

Page 130: ...onth 4 2 5 5 Select Daily from the list of options 6 The entry date MAR 5 1996 is automatically entered as the From date Select the final repeat date for the To field Touch the day box then touch four times or enter 03 09 1996 from the keyboard 7 Touch Repeat Your five day vacation is now stored Select a calendar view to confirm your vacation has been entered To repeat an entry that has already be...

Page 131: ...rm time box then use to select the time 4 2 6 To set an alarm for an entry that has already been stored display the entry in Detail View touch the Alarm check box and set the alarm time You can also set daily alarms in Clock see p 91 Clearing a set alarm To clear an alarm that has been set for an Appoint ment entry display the entry in Detail View touch the Alarm box to deselect the Alarm then pre...

Page 132: ...ntries are indicated in the Month calendar view by Reminder function The Reminder function can be set to remind you of a birthday or anniversary To set the Reminder function check the Remind box and select On That Day or 7 Days before Whenever you turn on your unit within the Reminder period the start up display will include a Birthday Ann Reminder message When you no longer need a reminder turn i...

Page 133: ...he same procedure described in Editing Appointment entries Deleting single entries 1 Select the entry in Index View or in Day view Alternatively display the entry in Detail View 2 Touch EDIT and select Delete Entry 3 Touch Yes to confirm the deletion In Index View or Day view you can also delete single entries by pressing DEL in step 2 above Deleting all Birthday Ann entries 1 Touch EDIT and selec...

Page 134: ...early by Date Holiday Example Make a Holiday entry for New Year s Day To make a new Yearly by Date Holiday entry 1 In Activities touch EDIT and select New Holiday 4 4 1 2 Check that Yearly by Date is selected 3 Touch the Date boxes then use to select 1 1 month and day only year is not required 4 Enter New Year s Day as a description 5 To complete the entry press ENTER Yearly by Day Holiday Example...

Page 135: ...o select it If the desired entry is not displayed use the scroll bars to find the entry or press PREV or NEXT 4 Touch VIEWS and select Details Touch the entry twice to examine details Using calendar views In calendar views Holiday entries are indicated by You can access Holiday entries from calendar views by touching the desired entry twice see p 120 Editing and deleting entries Editing Holiday en...

Page 136: ...ries are automatically categorized as To Be Done Done or Monthly Goal New To Do entries can have a due date a description and a priority level The LABELS icon lets you define and assign labels that are used to manage tasks by project personnel etc Display of To Do entries in calendar views differs according to the Due Date field contents as follows Entries with no due date are shown on Today s dat...

Page 137: ...ion 4 To complete your entry press ENTER The date and priority fields are optional Priority levels You can enter a number 0 9 or a letter A Z in the priority field to indicate the task importance Numbers have higher priority than letters Do not use symbols or accented characters Even though a lowercase letter has been en tered it will be saved as uppercase Making a new To Do entry Example Enter Pr...

Page 138: ...ed in the Monthly Goal To Do Index Finding To Do entries Index View shows To Do entries sorted by date or priority The default setting is Sort by Date If you select Sort by Priority entries with a set priority are displayed first in order of number then letter followed by entries with no assigned priority You can select Sort by Priority to display an index sorted by priority Select Sort by Date to...

Page 139: ...You can use a keyword search for any field including Date and Priority to directly access an entry For more information see General Operation Checking off completed entries Once you achieve a target or goal it is important to check off that entry as done so that you can focus on tasks that are still outstanding Entries marked Done are sorted into the Done file and the completion date is indicated ...

Page 140: ...phabeti cally in the label list from which you assign entry labels You can also add edit and delete labels directly in the label list Take care when adding labels directly to the list as uppercase and lowercase letters are recog nized as separate labels Making To Do entries with labels Example Enter Call Frank about Alpha Project on Mar 15 1996 To make a To Do entry with labels 1 In Activities tou...

Page 141: ...bel entry and selection 8 To complete the To Do entry press ENTER The new entry is shown in the To Be Done Index Touch and to view the label tabs To assign labels using the Labels list 1 Select the To Do entry in Detail View then touch SHOW and select Labels 4 5 7 2 To assign a label to the To Do entry touch the check box to the left Each entry can have a maximum of five labels The Labels list is ...

Page 142: ...entries with that label assigned To edit the labels list 1 From the To Do Detail View touch SHOW and select Labels 2 To add a new label touch a blank label twice Enter the new label text then touch OK 3 To edit an existing label touch the label twice If the selected label is already assigned to an entry touch Yes to confirm the selection Make your changes directly to the label then touch OK 4 To d...

Page 143: ...Production Report that is due every other week starting on February 29 1996 until the end of May To copy a To Do entry 1 Touch EDIT and select New To Do 4 5 8 2 Touch the Due Date field then use to select 2 29 1996 for Thursday February 29 1996 3 Enter Production Report as a description 4 Touch COPY in the upper right of the display Every Month for Monthly goal entry Last Day of Each Month for Las...

Page 144: ...DEL Deleting groups of To Do entries 1 In Index View select the file containing entries you want to delete 2 Touch EDIT and select Delete Group 3 Select All in Current View or Checked as Done 4 Touch Delete and then touch Yes to confirm deletion You cannot delete groups of To Do entries if the unit is locked see p 86 Changing Activity type You can change the Activity type if necessary For example ...

Page 145: ...es operations are similar Contacts will be used for the examples provided but the procedures are the same for Data Files Databases T his section describes the use of Contacts and Data Files These are personal database applications and they both have similar functions The only difference between them is that they have different default file and field names for different types of information These t...

Page 146: ...croll the menu touch or in the bottom of the menu 5 The current index tab is shown at the bottom of the display To display to entries beginning with a different letter touch the appropriate tab For example if you touch the H tab you will see the entries beginning with H at the top of the list If you want to move between Contacts entries and Data Files entries touch the application key Making a new...

Page 147: ...r entry press ENTER Finding entries Contacts and Data Files entries are stored alpha betically based on the contents of the currently selected sort field You can find and display an entry by three methods Using Index View Using Keyword search Using Direct search Using Index View Example Find the Contacts Business file entry for Jonathan Smith of Brown Corporation To find the entry using Index View...

Page 148: ... and lowercase letters The search can be limited to Field 1 only Field 1 is set to Name Field by default A message indicates if no entries contain the keyword For more information on keyword search see p 110 To use keyword search to find an entry 1 Select the Contacts Index View Touch the Show button and select Business from the pop up menu 2 Press 2nd then F 3 Enter the keyword Jonathan Check the...

Page 149: ...omatically displayed and the keyword you just typed will appear Use the touch pen and drag the Go To window to wherever you like 3 Touch OK The first entry starting from the keyword will be selected in the Index View Filter function The Filter function is available for both Contacts and Data Files Filter function lets you filter your database files to display only entries with matching field conte...

Page 150: ...ry or document can be linked to any Contacts or Data Files entry This allows you to do the following You can jump directly to a Contacts or Data Files entry from a linked entry While viewing a Contacts or Data Files entry you can view a list of linked entries You can also jump directly to any of these linked entries Linked Entries Before you can start using the Link function to find related entrie...

Page 151: ...touch Jump Link by Searching The Link by Searching function can link a Contacts or Data Files entry to all related entries that contain a keyword To use Link by Searching 1 Open the Contacts Business file and select the entry to be linked to N5 2 3 2 Touch LINKS and select New Linked Entry Press 2nd then NEW ENTRY 5 2 1 3 Select BIRTHDAY and then touch New 4 Complete the Birthday entry and press E...

Page 152: ... deselect it 5 Touch Search 5 2 5 The search is completed and you can view the linked entries Viewing linked entries To see Linked entries in the Contacts Detail View touch LINKS and select Show Linked Entries This will be done automatically when you touch the Link icon to see the contacts entry in another application Touch any application tab at the bottom of the display to see linked entries in ...

Page 153: ...e right 5 To jump to the linked Contacts entry touch and select the desired entry then touch Jump In the Contacts Detail View pressing 2nd and W toggles the screen between Show Linked Entries and Hide Linked Entries Link To function The Link To function provides a method of linking entries from any application to Contacts or Data Files entries To use the Link To function from an Appointment entry ...

Page 154: ...f the entry has links to Data Files you will see If the entry has links to both Contacts and Data Files entries you will see LINK To use the Jump To function 1 Select a Birthday Ann Index entry with links 5 2 7 2 Touch or LINK 3 For LINK select CONTACTS or DATA FILES and touch OK 5 2 8 If you jump to Contacts 5 2 9 If there is only one link the Jump To display above is not shown and that entry is ...

Page 155: ...ct the Contacts entry in Index View or display it in Detail View 2 Touch EDIT and select Delete Entry 3 Touch Yes to confirm the deletion 4 If there is more than one link select the required entry and then touch Jump Otherwise you will jump directly to the linked entry The linked Contacts or Data Files entry is shown in Detail View Breaking Links You may want to break links you have made For examp...

Page 156: ...d to picture fields To create a picture field 1 In Contacts Index or Detail View touch SETUP and select the file in which you want to create the picture field 5 4 1 Deleting Groups of entries You can use EDIT Delete Group to delete groups of Contacts or Data Files entries Select group deletion from All entries all in Contact 1 all in Contact 2 or all in Contact 3 For more informa tion see p 113 Yo...

Page 157: ...ing a picture to an entry To add a picture to any entry that file must have at least one field set up as a picture field Touch Empty picture field twice to open the picture drawing screen You can then draw directly After drawing touch OK To add a picture to a Contacts entry 1 Touch SCRAPBOOK and display the required drawing if necessary create the drawing 2 Copy the drawing to clipboard Touch EDIT...

Page 158: ...copy or paste the Notes or Spreadsheets entries to Contacts by specifying a range Editing contents of picture fields The contents of picture fields can be edited directly within Contacts or Data Files For example you may want to edit the map in a map field To delete picture field contents 1 Display the Contacts or Data Files entry and select the picture field with the contents you want to delete 2...

Page 159: ...re deleted The first field is always fixed as a text field This cannot be changed Setup for Contacts and Data Files You can customize Contacts or Data Files in the follow ing three ways File names Each file can have a new name of up to 10 characters Fields You can change field names up to 12 characters field type text or picture and the number of fields that each entry can have up to 16 Index View...

Page 160: ...eld separator icons and adjust them to suit your requirements 9 To complete your changes touch OK Check your changes in the new Index View display Fax number field The Fax number field is used by the fax function for automatic dialing The Contacts Business file Contact 1 has a Fax field as a default setting but Fax field must be set up for Contact 2 3 and Data Files Use the above procedure to do t...

Page 161: ...nvenient during meetings when you are too busy to enter text through the keyboard After your meeting is over you can review your notes and comments add titles from the keyboard and then use these notes as a reference while working with other applications such as Documents Taking Notes Making a Notes entry at a meeting or appointment is very quick and easy Notes has the following features The drawi...

Page 162: ...4 When you complete your Notes entry touch KEYS to unlock the keyboard then press ENTER 6 1 2 The first line is used as the title in the Index 5 To change the title touch EDIT and select Topic Title 6 1 3 6 Enter the title then touch OK When drawing lines across the screen always draw from left to right otherwise the line may not be stored correctly If you want to write something at one edge of th...

Page 163: ... using Notes The keyboard is locked as the default setting Touch KEYS at the top of the display to lock or unlock the keyboard When the KEYS icon has a white background the keyboard is locked and when it is black the keyboard is unlocked When the keyboards is locked all the keys including OFF do not operate To turn the Backlight on while the keyboard is locked in Notes check the Option box before ...

Page 164: ...e touch pen to touch and drag the bar Drawing delay determines when your handwriting becomes a single object for moving or deleting 5 If there are any problems touch Default to return to the default settings 6 When you complete your setup touch OK Review Notes After your meeting you can review your Notes entry modify it as required and save it for future reference The Review Notes function is also...

Page 165: ...size and change fonts If you connect a printer to your unit you can print out professional looking full page letters reports and other documents The Make a Letter feature helps you produce high quality letters with your own signature You can use advanced editing techniques and the Check Spelling function helps you eliminate spelling mistakes To make a new Documents entry 1 Touch DOCUMENTS 2 Touch ...

Page 166: ...ntry based on an existing entry Once you have written the memo to Frank you may need to write a similar memo to someone else Rather than creating another new memo you can make a copy of this existing memo and change the addressee s name and address To copy an existing Documents entry 1 Select the entry in Index View 2 Press 2nd ENTER to copy that entry Touch EDIT and select New Copy 3 Make any nec...

Page 167: ...he scroll bars to move through the sorted Index and find the entry you require 4 To display details select the entry and touch VIEW Using Keyword search and the Search function For how to use keyword search and the Search function see the General Operations chapter on p 110 Editing a Documents entry 1 Select the entry in Detail View 2 Make required changes directly to the entry Use the scroll bars...

Page 168: ...character size is easier to read but the small size lets you fit more text on the display Find Text When editing a Documents entry in Detail View you may want to find a specific text string to edit or delete Find Text can find text strings of up to 20 characters including spaces To use Find Text in a Documents entry 1 Touch UTILS and select Find Text or press 2nd then F 6 2 9 2 Enter the text stri...

Page 169: ...he STYLE menu A indicates current settings Style is selected from Plain default Bold or Italic Underline can be combined with Plain Bold or Italic Style settings remain in effect until another style is selected Documents printed from your printer should also contain the text styles consult your printer manual Text style keyboard shortcuts You can use keyboard shortcuts to change text styles on the...

Page 170: ...The style cannot be changed for the Title field Underline remains in effect until plain is selected Inserted text assumes the style of the text block Align The ALIGN menu lets you change the alignment of the paragraph containing the cursor Text align ment can be selected from Left Center or Right Tabs and indents Tabs and indents let you format the appearance of text blocks A tab changes an indivi...

Page 171: ... the next tab position to the right and shifts follow ing text There are eight tab markers at default settings four characters apart You can change the default tab settings by dragging the tab markers to new locations on the ruler To change tab settings 1 To see the ruler touch SHOW and select Show Ruler Tab markers at default settings 6 2 11 2 Touch the tab marker you wish to change and drag it t...

Page 172: ...ndent touch the left indent marker and drag it to the new position 5 To set the right indent use the horizontal scroll bar to move to the right side then touch the right indent marker and drag it to the new position If Show Special Symbols is enabled the indent indicator I is shown at the left of any paragraph that has an indent setting first line left or right Changing or canceling indents You ca...

Page 173: ...ion automatically moves words that will not fit at the end of a line to a new line This prevents words from being split and there is no need to press Word wrap is permanently selected Document size So far you have worked only in the limited space of the display However you can make Documents entries that fit standard letter size paper so you can print out full size documents For more information o...

Page 174: ...Elite is a popular font set at 12 cpi characters per inch Pica is another popular font set at 10 cpi PS is a proportional spacing font spacing adjusts to suit text width set at 12 cpi You can fit more text on a page with a 12 cpi font than a 10 cpi font Selected fonts are not shown accurately on the display and can only be seen when printed However you can use Print Preview to check the layout To ...

Page 175: ...printers may not correctly print the display image because the font of the printer is different from the font of the unit If this occurs use Pica or Elite font for printing Inserting a page break Page breaks are automatically inserted at the end of each page according to page size and indi cated on the display by dotted lines However you can also manually insert a page break for layout purposes In...

Page 176: ...iew touch Done Check Spelling The Check Spellings function lets you check the spelling of an entire Documents entry or just a single word entered from the keyboard or dragged in text Change accepts a suggestion for a spelling correction Use the scroll bar to move through the suggestions Ignore accepts the word being checked as OK Ignore All accepts the word being checked as OK whenever it occurs t...

Page 177: ...yboard Your layout changes are reflected in the layout preview at the top of the display Once your Make a Letter format is established it can easily be used to create other letters To use the Make a Letter function 1 Enter the text of your letter as a Documents entry 2 Touch UTILS and select Make a Letter 6 2 17 3 Select the date layout from Left US Center or Right British Changes should be reflec...

Page 178: ...lected Mail Directory using pop up menus In the pop up menus touch or to scroll the menu and if you want to leave the field blank select none Complete your setup then touch OK 7 Select the addressee from the list You can also enter the addressee directly from the keyboard after touching Cancel to return to the Make a Letter screen 8 Enter the subject of the letter into the Subject field 9 Enter th...

Page 179: ...d in the Personal display For more informa tion see section 2 Desk Accessories When you complete your setup touch OK 12 If you want to use a different signature from the one saved under the Personal display touch Sign 6 2 21 Use the touch pen to write your signature When you complete your signature touch OK 13 To complete your letter touch Make The letter will be displayed in Detail View To save t...

Page 180: ... ENTER Unused area of the picture are not inserted into the document entry to save space To delete a picture touch it and press DEL You can also copy or paste single entries in the Scrapbook application or Notes or Spreadsheets entries to Documents entries by specifying a range It is possible to copy or paste a Spreadsheets entry larger than the display width However if the pasted entry is modifie...

Page 181: ...ch OK You can use a similar procedure to set a Footer You can check headers and footers in the Print Preview screen Exchange Documents with PC Files To copy a Documents entry to PC Files 1 Select the Documents entry you want to copy to PC Files in Index View 2 Touch SEND and select Copy to PC Files 3 Type the file name and the description for the created PC File 4 Select RTF or TXT 5 Touch OK To g...

Page 182: ...Get from PC File any graphics center or right alighnment information or header and footer information will be lost Outlines Outlines is a simple convenient tool to help you arrange your thoughts into a clear easy to understand hierarchi cal structure This is ideal for organizing plans and ideas and the order can be restructured whenever necessary The outline structure consists of topics that are p...

Page 183: ...ENTER To save the topic To demote the topic one level To promote the topic one level To make an Outlines entry 1 Touch OUTLINES 2 Touch EDIT and select New Outline 6 3 2 The new outline opens in Detail View Example outline Below is an example of an Outlines entry in Detail View 6 3 1 Each individual topic heading is marked with a diamond Each single topic can have more than one line and can contai...

Page 184: ... ENTER on a blank topic Finding outlines Outlines are stored alphabetically by title You can find a desired outline using several methods Using Index View Use the alphabetical sorting of the outline titles and the letter tabs to find the entry Using Search function Use the Search function at the left to find the entry Using Keyword search Press 2nd then F in Index View enter a keyword and touch Se...

Page 185: ...dually Restructuring is carried out in Detail View Selecting topics Touch a topic to select it A flashing diamond indicates the currently selected topic You can also move between topics using the cursor keys Press to move directly to the last topic Press to move directly to the first topic i e title To edit a topic 1 Display the outline in Detail View 2 Press and to move to the topic you want to e...

Page 186: ... also add a topic between existing topics by touching the location and entering the new topic from the keyboard If the existing topics are parent topics the added topic becomes a subtopic However if between subtopics this topic will have the same level as the topic above it Moving topics You can change a topic s position even after it is saved To move a topic 1 In Detail View select the topic you ...

Page 187: ...or example add a space and etc If you attempt to join two topics that will exceed 2 048 characters when joined a warning message will be displayed and the operation will be auto matically canceled Splitting one topic into two 1 In Detail View select the topic you want to split 2 Touch UTILS and select Split 1 Topic into 2 6 3 3 The selected topic is displayed with the cursor positioned on the firs...

Page 188: ...ion You can also delete an outline by pressing DEL in step 2 above To do this in Detail View the title must be selected Deleting all outlines 1 Touch EDIT and select Delete Group All Outlines is the only option 2 Touch Delete 3 Touch Yes to confirm the deletion You cannot delete all outlines simultaneously if your unit is locked see p 86 Using subtopics children Outlines examples used so far have ...

Page 189: ...ollapse an outline to concen trate on the topics and families that interest you Expand Collapse Subtopics toggles between Expand show all subtopics and Collapse hide all subtopics Expand Family shows all subtopics for a specific topic Collapse All displays only 1st and 2nd level topics hiding all other levels To collapse families 1 Display the complete outline in Detail View 2 Touch SHOW and selec...

Page 190: ... topics or families You cannot demote a topic more than one level below the topic directly above it Topics cannot be added below a collapsed family you must expand the family first You cannot promote a topic one level if this would split up a parent and child Move the selected topic to another location and then promote it If you divide a topic that has subtopics children the second half of the div...

Page 191: ...e peripheral functions to get you up and running with these features Tools Utilities These functions make the unit a powerful commu nications tool that keeps you connected to your busy world through backups information services electronic mail and messages PC links etc N7 1 Tools Utilities include PC Link Remote Clock Fax Log Backup Terminal Message CompuServe AT T Mail and ZR Pager Clock is descr...

Page 192: ...n or a file Printing options depend on the particular application you are using The unit has built in printer drivers software that tells printers how to format and print data for the following printers Canon BJ 10e series IBM Proprinter series Epson FX 80 FX 850 and LQ series Hewlett Packard LaserJet II and III series Other US Characters International You can also print from printers with emulati...

Page 193: ...Optional printer resident fonts like those on a cartridge cannot be used Proprinter Series supports X24E Printers that emulate other Proprinter models may not function properly FX Series supports FX 80 and FX 850 LQ Series supports the LQ 510 If you use PS font some printers may not correctly print the display image because the font of the printer is different from the font of the unit If this occ...

Page 194: ...appear so you cannot change the settings It will be printed with the current settings To print a specified group of entries 1 Select an application 2 Touch SEND and select Print 3 Select group from the Print pop up menu Select Printer Emulation and Printer Path if required 4 Touch OK Printing the current display You can print a copy of almost any display Excep tions are confirmation displays Yes N...

Page 195: ...d LaserJet Series printer the paper will exit automatically after printing All four pages of the Notes will be printed even if you have only drawn on one of them Faxes With the optional Sharp CE FM4 Fax Modem connected to your unit you can fax single Notes Documents or Scrapbook entries or an entire Filer folder See the next section for more information about using PC card Fax Modems Fax communica...

Page 196: ...selected the unit will automatically use that person s fax number and extract other information for the cover sheet etc By default Contact 1 Business is selected as the fax directory To set up the fax directory 1 From Notes Documents Scrapbook or Filer select the entry to be sent as a fax 2 Touch SEND and select Fax 7 2 2 3 Touch the To button 7 2 3 4 Touch Setup 7 2 3A 5 Set all fields to properl...

Page 197: ...4 Fax Modem select 15 pin Line type Select from Tone or Pulse Contact your telephone company if you are unsure of which to use Volume Select 1 2 or 3 to adjust the speaker volume for dial connect tones Mute turns the speaker off Speaker volume does not function with the CE FM4 Fax Modem Detect Select Dial Tone for normal settings If using a line without dial tone e g PBX select None Modem string C...

Page 198: ...complete your settings touch OK Cover sheets and headers You can set up cover sheets and headers so that your name and phone number appear on each fax page To set up cover sheets and headers 1 Touch SEND and select Fax 2 Touch Options and then touch the Cover Sheet tab at the bottom of the display 7 2 5 3 Enter the sender s name and telephone number in the header fields ...

Page 199: ...eet box to use a shorter cover sheet with less blank space 8 When you complete your Cover Sheet set up touch OK Before sending a fax check that the home time and date set in your unit are correct By law your name fax number time and date must appear on the top of each fax page sent see the inside front cover of this manual This information is inserted automatically if entered correctly Speed butto...

Page 200: ...s touch OK Sending a fax You can fax a single Notes Documents or Scrapbook entry or you can fax an entire Filer folder The fax can be dialed automatically or you can use manual dialing To send a fax 1 From Notes Documents or Scrapbook select an entry touch SEND and select Fax From Filer select a folder touch SEND and select Fax N7 2 9 2 Touch the To button select the recipient from the directory a...

Page 201: ...atic redial function A message will indicate if the line is busy and the fax transmission will be terminated All four pages of the Notes will be faxed even if you have only drawn on one of them When a fax transmission is completed without any errors the fax mode closes automatically and the display returns to the last application used Some public phones need a special procedure 1 Go through the no...

Page 202: ...receiving fax machine then touch Start After touching Manual and initializing the Fax Modem the Manual button changes to the Hang up button Touch Hang up to stop the fax transmission Press ON to stop fax transmission at any time Manual fax dialing is not supported when using a cellular phone to send a fax Fax Log Fax Log is a useful feature that keeps a record of the faxes you have sent Fax Log le...

Page 203: ... used you cannot select the font or size If legal size paper is selected and the receiving fax machine has roll paper legal size pages are printed If the receiving fax uses single sheets legal size pages are printed across two single sheets Optional Cards A range of optional cards are available to suit your unit These include RAM cards Flash Memory cards Not all types of PC card can be used Warnin...

Page 204: ... so the protection card pops out 2 1 4 Pull the protection card out Protection card 5 Hold the card so its back faces the bottom of the unit Insert the card fully into the card slot Be sure to insert the card to this point if possible ...

Page 205: ...the batteries very quickly We recommend using the AC adaptor or the external battery pack when possible When the batteries are low many cards will not work Some cards may not work at all without the AC adaptor or external battery If you will frequently be using a Fax Modem card you may want to consider using Lithium batteries which perform well under high power drain conditions Even though the BAT...

Page 206: ...ing or you will lose the data stored on the card The ZR 5700 ZR 5800 will only provide enough power to protect the card during a battery change when this message is displayed on the screen For more details refer to the manual for the card SRAM and FLASH Memory Cards The ZR 5700 ZR 5800 support up to 2MB SRAM cards and up to 16MB FLASH cards which provide you with different benefits as outlined bel...

Page 207: ...will delete all data on the card Never move the protection switch while the card is inserted in the unit SRAM cards An SRAM card can be used to expand your unit s memory capacity Additional Add on software programs and additional data for the built in applications can be stored on an SRAM card It is important to note that SRAM cards DO NOT expand the amount of main memory but instead add a second ...

Page 208: ...ard it cannot be accessed from there This data will however be copied back to the main memory if you ever decide to copy all data back from the SRAM card to the main memory 1 Install the card and then turn the unit on 2 First be sure your unit is unlocked and touch TOOLS then select Backup 3 Touch Backup to make a copy of the major built in application data onto the card Note that will delete ALL ...

Page 209: ...urce to be the SRAM card the communication applications on the ZR 5700 ZR 5800 found in TOOLS DO NOT use this memory for data storage Thus when you switch the data source to the SRAM card but then touch TOOLS and then CompuServe for example the data you view and create for CompuServe will still reside in the main unit This can be useful for the user who wants to simulate using the main memory and ...

Page 210: ...initializing screen will appear 2 Touch and to adjust the memory partition size Data Backup Area is used for archives of the main unit This size can be set for as much memory as the card has Be sure that you leave enough space for Backup file A full ZR 5800 uses about 1 7MB of space A full ZR 5700 uses about 650KB of space Program Area is used for storing Add on software programs and can be set to...

Page 211: ...ew seconds to re start after this operation Note that this operation backs up ALL main unit data including Add on software programs and their data A backup operation does not delete your main unit data To delete an archive from a FLASH card First be sure your unit is unlocked 1 Touch TOOLS and then touch Backup twice 2 Select the Backup file you want to delete and then touch Delete 3 Touch Yes to ...

Page 212: ...t on a ZR 5800 the Add on software program s will not work and vice versa Notes about FLASH cards FLASH cards do not require a backup battery Add on software programs installed onto a FLASH card automatically store their data onto the main memory Backup time depends on the amount of data stored in your unit Approximate backup and restore times when the unit memory is full ZR 5700 Backup 1 5 minute...

Page 213: ...r our Fax on demand service at 612 397 8601 More The MORE area provides access to optionally pur chased Add on software programs you install as well as a generic file storage area called PC FILES Add on software programs Add on software programs add functionality to your ZR 5700 ZR 5800 These programs are especially written for your ZR 5700 ZR 5800 by Sharp and independent software developers You ...

Page 214: ...t download Add on software e g from CompuServe or have software beamed to you from another ZR 5700 ZR 5800 This software could be installed via the PC Files area see PC Files See the directions included in the Add on software program instruction manual for more details about installation Software on SRAM cards Up to 20 Add on software programs can be installed into the ZR 5700 ZR 5800 You can also...

Page 215: ...ossible You can attach these files to an E mail attach ment Because you can store generic file formats here these attachments very likely can be viewed by the recipient Deleting add on software programs Using the delete tool you can delete either all installed programs or the last installed program farthest down and to the right in the MORE display You cannot simply delete any individual program s...

Page 216: ... file The files you have got into the PC Files area are listed in chronological order PC Files tool bar The PC Files tool bar includes the following functions S WARE Returns you to the MORE display INSTALL Installs an Add on software program to the main memory or the PC memory card DELETE Deletes the currently selected file TO DOC Converts an ASCII text file to Docu ments COPY Copies a file from t...

Page 217: ... program file and touch INSTALL When you convert a TXT or RTF PC File imported from a PC or Macintosh to a Documents entry by selecting Get from PC File see p 181 be sure the last three characters of the File Name are TXT or RTF Data Exchange There are many different ways to exchange data entries folders or all entries between your unit and other devices including Sharp organizers and personal com...

Page 218: ...R 5800 to ZR 5700 ZR 5800 Transfer device Data and transfer direction Main application data Add on software programs PC Files Peripherals required Recom mended tasks RAM Card All entries Single file All files NA NA All files All programs NA NA NA NA Application memory and extra application features Flash Memory Card All entries Memory for multiple archive files Another ZR 5000 series Single entry ...

Page 219: ...R 5700 ZR 5800 via infrared transfer or cable To From ZR 5000 via infrared transfer or cable To From OZ 5000 OZ 6000 OZ 9000 series units via infrared transfer or cable Data transfer between ZR 5700 ZR 5800s or with ZR 5000 Data can be transferred easily from one unit to another using the GET and SEND keys You can also use SEND Unit to Unit via infrared port or Data Transfer Cable Transfer procedu...

Page 220: ...ust on the port restricts data transfer Avoid direct sunlight Infrared transfer is simple but it is easily affected by ambient conditions such as external light distance transfer angle etc Received data should be confirmed after the transfer Quick transfer Single entries can be quickly exchanged between two units at any time using the wireless infrared transfer To quickly transfer single entries 1...

Page 221: ...ng Contacts or Data Files entries check the With Link Information box as required 5 Select the Unit to Unit Path from Wireless or Cable 6 When you complete your settings and the other unit is ready to receive data touch OK to transfer the data To receive a Unit to Unit data transfer 1 Open the application you want to receive If you are in the Contacts Data Files or Holiday also select the file 2 T...

Page 222: ...ata via the infrared port requires no other devices However infrared transfer is easily affected by interference from ambient conditions Use the optional data transfer cable CE 315L to ensure a more reliable connection see p 220 Corresponding applications When transferring data from your unit to OZ 5000 OZ 6000 OZ 9000 series the following applica tions correspond Schedule Appointment To Do To Do ...

Page 223: ...h Other Computers Your unit can exchange data with personal computers PCs and other computers PC Link Using Sharp s optional PC Link software and hardware package or third party software pack ages you can exchange data with a personal computer Some PC Link software allows data transfer via the infrared port using the optional CE IR4 wireless interface You can also use your unit in a remote locatio...

Page 224: ...000 OZ 8000 YO 600 ZQ 5000 series the following conditions apply When sending data Application data not supported by Organizer Link cannot be sent Data File 1 corresponds to Business Card in the OZ 8000 YO 600 series If you try to exceed link character transfer limits excess data is not sent Documents entry tab codes are converted to carriage return characters on a computer If you restore the Docu...

Page 225: ...en using OZ 8000 series Organizer Link You cannot transfer the following data DAILY ALARM TEL FILE NAME TEL BUSINESS CARD corresponds to Data File 1 FREE FIELD NAME and USER S DICTIONARY corresponds to Word key If you attempt these transfers no error messages are displayed but the data is not transferred You cannot transfer a Data File 1 Business entry if it has no data in its Name field and you c...

Page 226: ...lability of Zaurus Mail software for your PC Special Communications Applications Certain built in or optional applications allow your unit to serve as a powerful hand held data communications tool Connecting to a variety of information services or networks via telephone or cellular phone lets you stay in touch with the world wherever you are Remote Link Remote Link allows you to exchange informati...

Page 227: ... the touch pen for all convenience of a true graphical user interface GUI For details see the separate manual provided with your unit AT T Mail Access AT T Mail Access allows you to use your unit to send and receive mail messages from almost anywhere via AT T Mail After selecting AT T Mail Access from TOOLS you can use a fax modem or PC card to let your unit connect to the AT T Mail service via te...

Page 228: ...coming pager messages using your unit ZR Pager and a Pager Card transform your unit into a sophisticated personal communications tool Use ZR Pager to create pager messages for any pager service you register then send via tel ephone or cellular phone Use a Pager Card to receive messages from pager services as well as CompuServe America Online and other on line services Register the details of any p...

Page 229: ...ts application Press again to switch between Contact 1 2 and 3 DATA FILES DATA FILES Opens the Data Files application Press again to switch between Data File 1 2 and 3 NOTES NOTES Opens the Notes application DOCUMENTS DOCUMENTS Opens the Documents application OUTLINES OUTLINES Opens the Outlines application SPREADSHEET SPREADSHEET Opens the Spreadsheets application CALC CALC Opens the Calculator S...

Page 230: ... port 2nd SEND Prints selected entry or folder when a printer is connected Key Representation in text Function CANCEL CANCEL Clears entries that have not been stored Cancels a menu selection or operation returns to a previous display MENU MENU Opens the tool bar menu NEW ENTRY NEW ENTRY Opens a new entry in an applica tion NEW ENTRY Clears field contents when enter ing or editing data Moves the cu...

Page 231: ...s Steps down through entries or screens Continues a keyword search forward 1 0 1 0 Enters numerals 1 to 0 1 0 Enters symbols Key Representation in text Function Enters a hyphen Enters the symbol BS BS Backspace key deletes the character to the left of the cursor BS Enters the symbol A Z A Z Enters the letters A to Z 2nd Q Inserts a new topic in Outlines 2nd W Moves family in Outlines Shows Hides L...

Page 232: ... mark then enter a letter 2nd J Enters an accent mark then enter a letter Key Representation in text Function 2nd K Enters an accent mark then enter a letter 2nd L Enters an accent mark then enter a letter 2nd Z Undo DEL in Notes and last operation in Spreadsheets 2nd X Cuts the specified text picture or entry to the clipboard for pasting 2nd C Copies the selected text picture or entry to the clip...

Page 233: ...e 2nd CAPS Turns the Backlight on and off applies only to the ZR 5800 2nd 2nd Press with another key to access keyboard shortcuts Key Representation in text Function WORD WORD Accesses the user word list WORD Enters a slash SMBL SMBL Accesses the symbol selection display SMBL Enters a question mark SPACE SPACE Space key DEL DEL Deletes the character to the right of the cursor when entering or edit...

Page 234: ...trical fields and other unusual conditions may render the unit inoperative pressing keys and touching the display has no effect If this occurs you must press the RESET switch on the back using the touch pen or a similar object Conditions that make the unit inoperative may also erase part or all of the data stored in memory Do not use sharp objects or objects with break able tips to press the RESET...

Page 235: ...lank no characters Telephone Contact or User File Data File field name Calibrate the touch panel using TOOLS Display see p 13 C Troubleshooting When the unit is not functioning properly refer to the list below for solutions before contacting your Sharp dealer Problem Solution The display remains blank after pressing ON Make sure the battery replacement switch is in the NORMAL OPERATION position Ad...

Page 236: ...eries in a fire this may cause explosions D Battery Replacement General guidelines Your unit uses the following battery types Use Type Size Model Qty Operations Alkaline batteries LR6 AA 2 Memory backup Lithium battery CR2032 1 Important points to remember when installing new batteries Be certain to use alkaline batteries with your unit under normal conditions We also recommend that you use High E...

Page 237: ...itch is set to NORMAL OPERATION Repeat the battery replacement procedure step by step Replacing operating batteries When using the unit if BATT appears at the top of the display the operating batteries may need to be replaced To confirm this turn the unit off and then on again The unit will display a message if the operating batteries need to be replaced To replace the operating batteries 1 Turn t...

Page 238: ... quickly than normal Memory backup battery lifetime approx 1 month if operating batteries are depleted 5 years when operating batteries are replaced promptly Do not replace the memory backup battery if the operating batteries are weak as this may result in the loss of all data If necessary replace the operating batteries before replacing the memory backup battery To replace the memory backup batte...

Page 239: ... backup battery cover and secure it with the screw 8 Set the battery replacement switch to the NORMAL OPERATION position If nothing happens when you press ON Setting the battery replacement switch to RE PLACE BATTERIES shuts off operating power Check that this switch is set to NORMAL OPERATION Repeat the battery replacement procedure step by step ...

Page 240: ...the name field 12 characters entry in the number field E Specifications Model ZR 5700 Display 320 x 240 dot matrix liquid crystal display Model ZR 5800 Display 320 x 240 dot matrix liquid crystal display with Backlight function Electronic unit Applications Activities Contacts Data Files Notes Documents Outlines Spreadsheets Desk accessories Calculator Scrapbook Filer Search Help Tools and More Mem...

Page 241: ...s maximum at speeds of 9600 bps to 19 2 Kbps using Sharp IR ASK protocol IR distance may change depending on the system used Cable jack 15 pin PC card slot 1 Type II Maximum data per entry Documents 16 Kbytes Outlines 32 Kbytes for an entire outline 2 Kbytes for each topic Contacts Data Files 2 Kbytes for text data 61 7 Kbytes for graphics data Others 2 Kbytes User interfaces Touch panel keyboard ...

Page 242: ...hs of 1 hour per day continuous display at ambient temperature of 23 C 73 F 45 hours approx 1 5 months of 1 hour per day use searching data for 5 minutes and display for 55 minutes at ambient temperature of 23 C 73 F ZR 5800 70 hours approx 2 months of 1 hour per day continuous display at ambient temperature of 23 C 73 F 45 hours approx 1 5 months of 1 hour per day use searching data for 5 minutes...

Page 243: ...mensions Open 170 W x 191 D x 18 H mm 6 11 16 W x 7 17 32 D x 23 32 H inch Closed 170 W x 100 D x 25 4 H mm 6 11 16 W x 3 15 16 D x 1 H inch Weight ZR 5700 Approx 380 g 0 84 lb including batteries ZR 5800 Approx 390 g 0 86 lb including batteries Accessories Alkaline batteries LR6 AA x 2 lithium battery CR2032 x 1 installed operation manuals protection card installed touch pen ...

Page 244: ...244 ...

Page 245: ...phic entries 66 Topics 186 User s Cities 93 Add on Software 37 213 Deleting 215 Installing 214 Alarms Daily 94 Disabling all alarms 94 Appointments 131 Index Align 170 All Reset 234 Anniversaries 132 Appendices 229 Appointments 125 Alarms 131 Editing 127 Making an entry 17 125 REPEAT function 129 Application buttons 48 Archive files 206 210 Assigning Due date 136 Entries to Filer folders 26 69 Lab...

Page 246: ...serting new values 59 Performing 57 With dates 60 With other entries 62 Calendar views 19 119 Changing default 119 Day 120 Month 121 Week 123 Weekly Graph 123 Year 121 Canceling indents 172 Cards 203 Caring for unit 45 CE 137T level converter 218 Changing Calendar view format 119 Contacts Data Files 145 Display character size 168 Fax options 197 Home City 14 91 Indents 173 Password 87 Text styles ...

Page 247: ... To Do entries 142 Cover sheet 198 Creating new entry 103 Cursor 106 Cut 108 114 D Daily alarms Setting 93 Removing 94 Disabling 94 Databases 145 Data exchange 217 Data Files 145 See also Contacts Date Calculations 60 Changing default format 119 Show specific 124 Stamp 116 Daylight saving time DST 91 Day view 120 Deleting Add on software 215 All secret entries 87 Appointment entries 128 Blocks of ...

Page 248: ...Exchanging with PC files 181 Find Text 168 Headers footers 180 Make a Letter 21 177 Page Setup 174 Spelling check 176 Tabs indents 170 Text styles 169 Drag and drop 106 Drawing On Month calendar 122 Pictures 32 64 Tools 64 E Edit 103 Appointments 127 Contacts Data Files 155 General techniques 105 Labels 142 Outlines 185 Picture field 158 Scrapbook 64 Entering Monthly goals 138 Subtopics 188 Text 1...

Page 249: ... filtered entries 101 Turning off 101 Finding entries 109 see also Search Appointment entries 126 Scrapbook entries 64 Using calendar views 126 Using direct search 149 Using Index View 23 109 Using keyword search 110 127 148 Using global search 111 Find Text 168 Flash Memory cards 36 206 Initializing 210 Folders Assigning entries 26 69 71 Collecting entries 70 IN 220 222 Merging Moving 75 Multiple...

Page 250: ...g 172 Setting 172 Index View 54 98 Infrared transfer 219 Initializing Flash Memory cards 210 RAM cards 208 Units 11 Inserting Page break 175 Text 107 Topic 186 Installing Add on software 214 Batteries 10 236 238 PC cards 203 J Joining two topics 187 Jump To function 154 K Key sound 55 82 Keyboard Layout 53 Locking 163 Key notations 229 L Labels 140 Assigning to entries 141 Editing deleting 142 Rev...

Page 251: ... Month view 121 More 213 Movable window display 58 Moving Appointments 127 Between fields 107 Blocks of text 114 Cursor 106 Entries 115 Graphics sections 65 Topics 186 N New entries Based on existing 166 Creating 103 Notes 20 161 Keyboard lock 163 Making 161 Reviewing 164 Setting up 163 O Opening applications 97 Organizer Link 224 Outlines 40 182 Creating 183 Deleting 188 Displaying full topics 18...

Page 252: ...0 Power AC Adaptor 56 Battery pack 56 ON key 48 Sleep function 56 Preferences 80 191 Printing Connections 192 Current display 194 Group entries 194 Page size font type 174 Single entry 193 Printer emulations 193 Priority levels 137 Q Questions and answers 35 R RAM cards 90 206 207 see also PC cards Initializing 208 Memory expansion 207 Secret function 88 Using 207 Redial 201 REPEAT function 129 Re...

Page 253: ...cting Calendar views 120 Data source 90 Date 124 Display View 98 Paper size print font 173 174 Topics 185 Send function 105 Sending a fax Automatic Dialing 200 Manual Dialing 202 Setting Appointment alarms 131 Backlight 90 Clock 14 91 Daily alarms 93 Date format 119 Fax options 197 Indents 172 LCD contrast 12 Margins 175 Start up display 15 83 Tabs 171 Time and date 14 Setting up Activities defaul...

Page 254: ...tamp 116 To Do 18 136 Checking off 139 Copying 142 Tools 30 80 191 Tool bar 52 98 PC files 216 Topics 1 line Full 184 Adding Moving 186 Editing 185 Joining two 187 Selecting 185 Splitting one into two 187 Subtopics 188 Touch buttons 44 Touch panel display 52 Adjusting 13 Transferring data 219 Between two ZR 5700 5800s 219 Filer folders 76 Quick transfer 220 Wireless infrared 219 With other Sharp d...

Page 255: ...2 Utilities 80 191 W Weekly Graph view 123 Week view 123 Window display 58 163 Wireless infrared transfer 192 219 220 Wizard Sharp OZ 9000 series 35 Word List 88 Editing deleting words 89 Registering words 88 Using 89 Word wrap 173 World City 91 Z ZR Pager 228 ...

Page 256: ... with an existing worksheet 25 Entering data 26 Entering numbers 27 Entering labels 28 Selecting cells 29 Entering formulas 30 Guidelines for entering formulas 32 Contents General 1 Disclaimer and warnings 1 Trademarks and copyrights 1 About this manual 1 Important things to do 2 Manual conventions 2 Spreadsheet Quick Start 5 Starting PenCell 5 Creating a worksheet 6 Saving a worksheet 6 Entering ...

Page 257: ...ts 63 Chart titles 64 Displaying gridlines 64 Displaying the legend 64 Exchanging the X and Y axes 64 Exiting and saving a chart 64 Saving a chart 64 Viewing saved charts 65 Deleting a chart 66 Printing and adding mark ups to a chart 66 Managing Worksheets 67 Index mode operations 67 Entering the Index mode 67 Managing worksheets 68 Duplicating a worksheet 68 Changing a worksheet name 68 Deleting ...

Page 258: ...ppendix C Spreadsheet Limits 98 Appendix D Keyboard Reference 99 Appendix E File Compatibility 102 Communication Applications Before you start 105 Connecting to a modem 105 Connecting to the SHARP CE FM4 Fax Modem 105 Connecting to a PC Card modem 106 CompuServe Quick Start 109 Starting CompuServe Access Software 109 Setting up your modem 110 Setting up connections 110 Connecting to CompuServe 111...

Page 259: ...um message off line 130 Posting messages to a forum on line 131 Getting responses to your forum messages 131 Executive News Service 133 Setting up a personal folder 133 Getting news 134 Reading news stories off line 134 Other Functions 135 Setting preferences 135 Setting up an address book 136 Checking what has been sent out 137 Deleting data 138 Troubleshooting 139 Troubleshooting checklist 139 A...

Page 260: ...6 Selecting recipients of a message 167 Attaching data to a message 168 Modifying a message 169 Setting up an address book 170 Sending messages 171 Getting messages from your Pager Card 173 Reading incoming messages 173 Messages containing errors 174 Viewing and saving attachments 175 Converting messages to documents 175 Deleting messages in the unit 176 Deleting a single message 176 Deleting a gr...

Page 261: ...6 Appendix B AT T Mail traveler s access numbers 238 Australia 238 Canada 238 Hong Kong 238 Singapore 238 AT T Mail Quick Start 189 Starting AT T Mail Access 189 Setting up AT T Mail Access 190 Creating a new message 191 Sending messages 192 Receiving messages 193 Commonly Asked Questions Answers 194 Introduction 195 Obtaining an AT T Mail account 195 Setting up AT T Mail Access 196 Setting up the...

Page 262: ...minal 245 Setting up your modem 246 Modem settings 246 Making Terminal dial setting entry 247 About directory settings 249 Changing dial settings 250 Using Terminal 251 Making a call 251 Hanging up 252 Receiving a call 253 On line operations 254 Data transfer 255 Auto log on 256 Terminal emulation 257 Terminal display setup 257 Troubleshooting 258 Troubleshooting checklist 258 ASCII Control Codes ...

Page 263: ...viii ...

Page 264: ...mes are trademarks and or registered trademarks of their respective folders For the Spreadsheet chapter Copyright 1996 PenWare Inc About this manual This manual introduces you to the spreadsheet and communication functions of the unit It consists of the following five chapters Spreadsheet Describes how to create a worksheet build formulas enter data and create charts Communication CompuServe Acces...

Page 265: ...ction of each chapter It will quickly get you up and run ning Refer to the rest of the chapter for more details about particular operations 2 If you have any particular questions about the software read through the list of com monly asked questions and answers There is a good chance that any questions you have will be answered there 3 When you need help with any operation touch HELP at the left of...

Page 266: ... Utility for ZR 5000 Data Exchange Utility version 1 02 or prior If you attempt to backup a ZR 5700 ZR 5800 with Data Exchange Utility version 1 02 or prior and then restore your data all spreadsheet data will be lost Please be sure to use only version 1 1 or higher of the Data Exchange Utility with your ZR 5700 ZR 5800 If you already own an older version of the Data Exchange Utility check on Comp...

Page 267: ...4 ...

Page 268: ...t T his section is a quick start to setting up and running PenCell a spreadsheet application On your unit PenCell is referred to as SPREADSHEETS and indicated by the icon Starting PenCell 1 Turn on the unit 2 Touch ...

Page 269: ...a file name that is 20 characters or less 3 Touch OK Creating a worksheet Press NEW ENTRY A new blank worksheet appears in the display The worksheet has the name Untitled until you save it and give it a name of your choice 20 characters or less The worksheet name ...

Page 270: ...mistakes while you enter data press BS backspace If you want to quit entering data without changing the cell press CANCEL Entering data in worksheet cells A cell is referred to by its column letter and row number for example cell B4 When you select a cell by touching it its reference appears in the cell indicator To enter data in a worksheet cell 1 Touch cell B4 to select it 2 Press 5 The data you...

Page 271: ...displayed in the cell When you select a cell that contains a formula the formula appears in the edit bar 4 Touch cell C4 5 Press 5 replacing the previous cell content 6 Touch another cell or press ENTER Formula results are updated automatically when you edit data Changing data in C4 also changes the formula result in E4 The formula appears in the edit bar The result of the formula appears in the c...

Page 272: ...uilt in functions make it easier to enter complex formulas The following example use the MAX function to determine the maximum value from data in a specified range of cells 1 Touch cell F4 2 Touch to use a built in function 3 Touch the up and down scroll arrows or the scroll bar beneath the arrows until the function you want to use is visible 4 Touch MAX values to select it 5 Touch Insert to enter...

Page 273: ... or dragging with the pen Erase selected characters by pressing DEL or BS Cut or copy and paste selected characters in the edit bar Replace selected characters by typing Creating a worksheet from a template To create a new worksheet using a template 1 While in the Index mode touch the Templates tab to see the list of available templates 2 Touch the template you want to use to high light it 3 Touch...

Page 274: ...the pen to the edge of the worksheet to select a range that extends past the edge of the display Press or to move the selection one cell at a time Press or to add or remove the adjacent cell to the selection NOTE Drag the pen within the edit bar to select characters that you want to edit This works even if the edit cursor is not displayed or blinking Touch here to select all cells in column D Touc...

Page 275: ...l in a selected range the cell you touched becomes selected If you press 2nd and then touch a cell the selection is extended or reduced to the cell you touched You can use the keyboard for many operations For details see Appendix D Moving and copying data To move the contents of a cell or range 1 Select a cell or range 2 Touch and hold the pen within the selection and drag the selected cell or ran...

Page 276: ... Formatting cells You can control the displayed content of cells by assigning specific formats For example you can format a cell to display U S dollar values or labels or numbers with 4 decimal places To change cell formats 1 Select the cell or range you want to format 2 Touch FORMAT then select Format 3 Select one of the format choices 4 Touch OK If you change your mind you can revert the cell ba...

Page 277: ...ells containing the data you want to chart 2 Touch EDIT then select New Chart Select a range of cells to create a chart Chart legend To change the chart format Touch PIE LINE COLUMN or STACK To save the chart Touch VIEWS then select Worksheet When prompted enter a chart title ...

Page 278: ...e heading and slowly dragging it to the desired width Adjust rows using the same steps Touch Done when complete Commonly Asked Questions Answers Q I want to print or Fax a worksheet Is there any way to accomplish this A Yes You have three options although PenCell does not support Print or Fax directly as other applications do 1 You may use the 2nd P PRINT SCREEN key This sends the screen image to ...

Page 279: ...s A Press 2nd and then press Q How do I enter and symbols in formulas A Press SMBL and select etc Q Do I have to be concerned about file format conven tions when I import MS Excel files into Spreadsheet A No Spreadsheet will read and write MS Excel 4 0 worksheet and can read MS Excel 3 0 Q I have been using Excel 5 0 on my PC Can I import my spreadsheet files to PenCell A Save your spreadsheets in...

Page 280: ...eadsheets operations Starting PenCell 1 Turn on your unit 2 Touch When you start the application you enter the Worksheet mode and see a display like this The display you see when you enter the application is the same display that had been present when you last used the application ...

Page 281: ...eet before they can be linked or filed Selecting display modes Once in PenCell you can move between three display modes Index Worksheet and Charts Each mode has its own appearance and purpose To change to another mode touch VIEWS and select the appropriate mode Index mode The Index mode shows you a list of templates and a list of the worksheets you have named and saved The primary functions of Ind...

Page 282: ...culated results of formulas are automatically displayed in the worksheet cells New results are automatically calculated and dis played if you change data or formulas in the worksheet Chart mode The Chart mode gives you the power to graphically display meaningful interpretations of your worksheet data ...

Page 283: ...at is already open PenCell displays a message that gives you the opportunity to save the changes or quit the worksheet without saving it If you quit without saving the worksheet reverts to the content that was last saved Tool bar There is a special tool bar for each application The tool bar is located across the top of the display and has the following features A small pointer in the upper right o...

Page 284: ...splay the pop up menu Keyboard shortcuts Many operations in PenCell have keyboard equivalents Refer to Appendix D Keyboard Reference for a summary of keyboard operations If a menu option has a keyboard equivalent it appears beside the command in the menu For example to copy a selected item touch EDIT and then select Copy or press 2nd C ...

Page 285: ...22 ...

Page 286: ...ate a new worksheet in either the Worksheet or Index mode To create a new blank worksheet Touch EDIT then select New Worksheet or press NEW ENTRY By default the new worksheet has the name Untitled until you name and save it In the worksheet mode only one worksheet is open at a time When you create a new worksheet from the worksheet mode a message appears in the display asking if you want to save a...

Page 287: ...n the Index mode the name appears in the index along with its memory size and date Starting with a template PenCell includes worksheet templates that can save you time when you create a new worksheet When you choose a template a new worksheet opens in the worksheet mode with useful data and formula and sample data already entered To create a new worksheet 1 Touch the Templates tab while in the Ind...

Page 288: ...Starting with an existing worksheet Another way to create a new worksheet is to open an existing one save it with a different name and use the copy as a starting point for a new worksheet To create from an existing worksheet 1 Select the worksheet you want to open from the Index mode index If the Index mode of worksheets extends past the bottom of the display touch the scroll arrows to page throug...

Page 289: ...ve as 4 Type a new worksheet name 5 Touch OK Entering data To enter data in a worksheet 1 Touch a cell to select it The cell becomes highlighted and the cell reference appears in the cell indicator See Entering formulas later in this section for more information about cell references For more information about selecting see Selecting cells later in this section ...

Page 290: ...e worksheet cell Press or to complete data entry and move cell highlighting in the direction of the arrow Entering numbers PenCell recognizes a variety of number formats such as percentages scientific notation and logical values For example if you enter 7 PenCell interprets this as 0 07 If you enter a number that has too many digits to fit in a General cell PenCell rounds up decimal places or chan...

Page 291: ... PenCell assumes that the text is a label and automatically adds quotes around it The quotes only appear in the edit bar after you enter the label They are not displayed in the worksheet cell You can also enter text by enclosing it in quotes For example if you want to enter a numeric label or a label that begins with a number such as 2001 Projections you have two choices add quotes when you enter ...

Page 292: ...electing cells Many worksheet functions operate on selected cells only Selecting a cell distinguishes it from others in the worksheet When a cell is selected it is highlighted To select a single cell Touch the cell once The selected cell is highlighted and the edit bar displays its contents To select a range of cells Drag the pen from the cell that will be one corner of the range to the cell in th...

Page 293: ...that not only lists raw data but also calculates useful results based on that data To enter formulas in the worksheet 1 Touch a cell to select it The cell becomes highlighted 2 Enter the formula See Guidelines for entering formulas later in this section for information about the many easy ways to create formulas Press BS to make corrections while you type Press CANCEL if you change your mind and w...

Page 294: ... 3 Touch OK To manually recalculate the worksheet 1 While in the manual calculation mode you can force recalculation Turn off Auto Recal culation in the Recalc Options dialog 2 Touch UTILS and select Calculate Now Manual recalculation is useful while you enter data and formulas to prevent recalculation after each entry Computation iterations When PenCell computes the value of the formula in a cell...

Page 295: ...begin with a number an opening parenthesis a cell reference a function name or the or symbols A formula can contain up to 255 characters A formula can have either upper or lower case letters All of the following are valid and have the same meaning SUM A4 A8 sum a4 a8 SuM A4 a8 A formula can have spaces between a function name and its arguments All of the following are valid and have the same meani...

Page 296: ...orksheet cells when inserting a cell reference would be appropriate Using the built in functions PenCell supports certain mathematic business statisti cal and miscellaneous functions You can include built in functions in your worksheet by typing them or more simply by inserting them using See Appendix B Function Reference for the syntax and examples of built in functions To use a built in function...

Page 297: ...mple if you want to compute the statistical average of a set of data in your worksheet use the AVERAGE function AVERAGE requires a set of numbers as its argument When you select AVERAGE AVERAGE values appears in the edit bar and values is highlighted Highlighted characters in edit bar are replaced when you type or when you touch a cell or range in the worksheet Press PREV or NEXT to move the highl...

Page 298: ...ula C 5 2 in cell A1 to cell K9 the formula in K9 remains the same as C 5 2 Relative cell references Relative cell references point to a cell by referring to its location relative to the cell which contains the reference Relative cell references do not use the dollar sign syntax For instance if a formula in cell B3 includes the relative cell reference C5 PenCell interprets this pointer as one cell...

Page 299: ...n use in formulas and their order of precedence The lower the precedence number the earlier the worksheet performs the operation Operations with the same precedence number are performed sequentially from left to right Precedence Operator Operation 1 Identifying value as positive or negative binary operators 2 Exponentiation 3 Multiplication and division 4 Addition and subtraction binary operators ...

Page 300: ...gical formulas use the logical and relational functions described in the following pages Date formulas Date formulas return results expressed as dates or time About built in functions A formula can include one or more built in functions You can include built in functions in your worksheet by typing them or more simply by inserting them using the icon See Appendix B Function Reference for details T...

Page 301: ...uilt in or touch UTILS and select Insert Func tion the appropriate syntax is included For the arithmetic and relational operators the syntax is argument1 OPERATOR argument2 For the remainder of the functions the syntax is FUNCTION argument1 argument2 argumentN Where FUNCTION Represents the name of the function Parenthesis You must enclose a function s arguments in parentheses For example in INT SU...

Page 302: ...ic formula literal string or cell refer ence PenCell assigns the value 0 to blank cells used as arguments in financial logical and mathematical functions A blank cell is ignored in the computation of statistical functions MIN MAX AVERAGE STDEVP and VARP NOTE Your unit provides a way of entering symbols like and or and Press SMBL to see the list of symbols Touch one to enter it to the selected cell...

Page 303: ... the cell contents to remain the same Use Revert to Saved to abort all the changes made to the worksheet Use Undo or press 2nd Z to revert back to the cell contents prior to the last operation Press WORD to add words from the custom word list you create using the unit s Word function Press SMBL to insert one of the unit s list of special characters like and You can also cut copy and paste Editing ...

Page 304: ...enCell remembers the Current selection and the next time you use Go to it appears as the destination in the Go to dialog This is an easy way to alternate between two areas of a worksheet Moving around a worksheet Your unit displays a portion of the cells in a worksheet at one time There are several methods to display other parts of the worksheet You can move around the worksheet in the following w...

Page 305: ...4 Repeat steps 1 and 3 to find the same information in other locations in the worksheet NOTE By default formulas do not appear in cells the value calculated by the formula is displayed instead Before you can search for a formula you need to show formulas by touching SHOW and selecting Show Formulas See Formatting a worksheet for more information Copying and moving data You can use the pen menu com...

Page 306: ... To copy or move a column or row select the column or row and 2nd drag drop it to the destination column or row Copying and cutting using menu commands 1 Select the cell or range whose contents you want to copy or cut 2 To copy touch EDIT and then select Copy To cut touch EDIT and then select Cut The contents of the cell or range disappear 3 Select a new location for the data either one cell or a ...

Page 307: ...are modified to refer to the new positions except as noted below For example if you enter SUM A1 B2 in cell A5 then move A1 B2 to C3 D4 PenCell automatically updates the formula in A5 to become SUM C3 D4 However if you move only part of the data such as A1 B1 to a new location the formula in A5 remains unchanged because only a part of the range A1 B2 was moved If you move a formula to a new locati...

Page 308: ...e an operation you just performed NOTE If you touch a cell in a selected range the cell you touched becomes selected If you press 2nd and then touch a cell the selection is extended or reduced to the cell you touched You can use the keyboard for many operations For details see Appendix D Copying and annotating a worksheet To copy the current worksheet as an image that you can paste in the Scrapboo...

Page 309: ...ents in a short term memory allocation enabling you to use the Paste command as if you were moving the data The Cut command also deletes the cell format returning the cell to the General format The Clear command immedi ately erases the data but has no effect on the cell format Sorting You can sort a range in ascending or descending order based on the key cell you enter If you sort by rows the orde...

Page 310: ...nCell lets you add and delete cells while automatically maintaining cell refer ences in the remainder of the worksheet When you insert new blank cells all the cell and range references automatically continue to refer to the same cells even if those cells have changed location To add new empty cells to your worksheet 1 Select the cell or range that is currently at the location where you want to pla...

Page 311: ...ange that appears in a formula the formula is updated appropriately Formatting a worksheet Formatting not only enhances the appearance of your worksheet it also can aid in analysis You can format worksheets on two levels Worksheet characteristics affect the entire worksheet Cell characteristics affect individual cells Worksheet characteristics Worksheet characteristics affect the entire worksheet ...

Page 312: ...u choose these items you toggle the functions on and off The following sections explain in detail each worksheet characteristic and the alternatives to the default settings Hiding or displaying gridlines Touch SHOW then select Hide Gridlines To redisplay them touch SHOW and select Show Gridlines Any changes in this setting will affect only this worksheet Gridlines are always displayed between row ...

Page 313: ... the lower right corner to select a different zooming mode NOTE When in 70 viewing zoom out mode all texts are shown in plain text and accent characters are not available Showing full screen To view more cells you can set the display to full screen Touch SHOW then select Show Full Screen You can revert back to the normal viewing by touching NOTE You can show the full screen while in any zoom mode ...

Page 314: ... while the appropriate row or column labels remain stationary and visible For example if your table has long columns of data that extend beyond the bottom of the screen you can scroll while column labels remain visible using Set Titles To turn on Set Titles 1 Create appropriate row and column labels above and to the left of the scrolling data 2 Select the cell that occupies the top left position o...

Page 315: ... not be able to scroll or select cells In this case unset titles by choosing UTILS and selecting Unset Titles Protecting worksheet You can lock up part or all of a worksheet so that protected area cannot be modified Protection takes two steps cell protection then worksheet protection By default all cells are protected To protect the whole worksheet so that it cannot be modified 1 Touch UTILS 2 Sel...

Page 316: ...ault settings Cell Characteristic Default Setting Cell Type General Column width 7 characters Row height 1 character Alignment Left for text right for numbers dates time Font style Plain Cell protection On Cell formatting operations can be reversed using the undo operation Cell type By default all cells in a worksheet are defined as General cells meaning they can contain data labels or formulas Ot...

Page 317: ...mber If the cell contains a value it is displayed in one of the following formats Format Name Example nnnn nn general default 1976 10 nnnEnn scientific notation 1 98e3 n nnn nn Currency U S 1 976 10 nn nn percentage 197610 00 n nnn nn punctuated 1 976 10 The number of displayed decimal points is controlled by entering a value in the Decimals box in the Format Cells dialog If the numeric value is t...

Page 318: ...ults are computed from logical and relational operations in formulas or can be entered directly See Appendix B Function Refer ence Cell Type Description Date Time Displays cell content in one of the selected date time format Date time formats are Format Example DD MMM YY 28 Dec 96 DD MMM 28 Dec MMM YY Dec 96 HH MM SS AM PM 02 34 51 AM HH MM AM PM 02 34 AM MM DD YY 12 28 96 MM DD 12 28 HH MM SS 02 ...

Page 319: ... Enter a value between 0 and 15 in the box beside Decimals 5 Touch OK If you see asterisks displayed across a cell this means that the cell is not wide enough to display its value To solve this problem adjust the column width See Adjusting column and row size later in this section NOTE PenCell uses true values when formulas are calculated to at least 15 decimals of precision The rounded value appe...

Page 320: ... choice 4 Touch OK Changing font style Cells can include bold italic or plain characters that you can combine with underlining The default font style is plain To change the font style for a cell or range 1 Select a cell or range NOTE To change the default font style touch All in the upper left corner of the worksheet This will have no effect on cells previously changed from the default 2 Touch FOR...

Page 321: ...n the dialog is opened Outline is unchecked For multi cell selection the other buttons are initially grayed When Outline is not checked the other buttons control all the borders of the selected cells When Outline is checked the outermost edge of the selection is given a border and the interior edges are set according to the other buttons When the dialog is closed with OK the grayed buttons leave t...

Page 322: ...d with the new column or row size 6 You may change the size of other columns or rows not in the selection 7 Touch Done to finish NOTE To change the widths of a group of columns or rows select the columns or rows Then perform the above operation by changing the width of any of the selected columns or rows All of the selected columns or rows will be changed to the same width Initially all columns an...

Page 323: ...60 ...

Page 324: ...et To create a new chart you need to start in the Worksheet mode 1 Select the range of cells containing data you want to chart The cells you select in the Worksheet mode form the basis of the chart The selected range determines the chart content The column to the left of the selected range determines the chart legend The row above the selected range determines the horizontal axis labels ...

Page 325: ... chart You can display the same data in a pie chart line chart or stack chart In addition you can add a chart title add gridlines remove the chart legend and reverse the chart axes To change the chart format touch PIE LINE COLUMN or STACK The number of bars comes from the number of rows in the selected range The horizontal X axis labels come from the row above the selected range The chart legend c...

Page 326: ...a connected by a line Column charts A column chart displays all the data for each row or column in the worksheet as a single column with each category of data distinguished by its pattern Stacked column charts A stacked column chart displays all the data for each row or column in the selected range as a single column with each category of data distinguished by its pattern ...

Page 327: ... To show the legend touch SHOW and select Show Legend To hide repeat the same and select Hide Legend Exchanging the X and Y axes When you originally create your chart the horizontal or x axis is determined by the data in the selected rows The vertical or y axis comes from the data in the selected columns You can switch the axes so the x axis comes from column data and y axis comes from row data To...

Page 328: ...n touch OK A prompt will indicate the chart has been saved to the current worksheet The name of the worksheet in which the chart is saved does not appear in the Chart mode To see the name of the worksheet go to the Worksheet mode or touch VIEWS then select Charts 3 The next display depends on the mode change you selected Worksheet returns you to the worksheet display Chart displays the list of sav...

Page 329: ...s like your PenCell Scrapbook has graphic options to edit the image directly The charts cannot return to PenCell however Refer to the other Operation Manual for details on using the Documents or Scrapbook applications and printing from the Documents or Scrapbook applica tions To put a chart into the Documents or Scrapbook applications 1 Touch EDIT then select Copy Image 2 Touch the Documents or Sc...

Page 330: ... create a new worksheet create a new worksheet from a template assign secret status to a worksheet In addition use the Index mode when you transfer worksheet files between other unit s as well as per sonal computers Entering the Index mode The index mode is active when you enter PenCell for the first time so you can create your first new worksheet Thereafter you can switch to the Index mode by tou...

Page 331: ...plicate 2 Touch EDIT and select Duplicate Worksheet 3 Type a name for the duplicate Worksheet 4 Touch OK NOTE Links are not duplicated Changing a worksheet name 1 Select the worksheet you want to rename 2 Touch EDIT then select Worksheet Title 3 Type a name for the Worksheet up to 20 characters 4 Touch OK NOTE You can also change the worksheet name in the worksheet mode by touching the worksheet t...

Page 332: ...om the Worksheets tab index if your unit is locked Therefore you must unlock it before deleting the worksheets To delete all worksheets 1 Touch EDIT then select Delete Group 2 If your unit is locked a message appears to prompt you to unlock it before performing the delete operation Touch OK If your unit is not locked the following window appears 3 Touch Delete to delete 4 Touch Yes to confirm All ...

Page 333: ...t mode To turn a secret worksheet normal 1 Unlock your unit 2 Touch EDIT then select Normal Entry Transferring worksheets You can transfer worksheets to another unit using the built in infrared ports or direct cable connection You can also exchange files between PenCell and PC Files Unit to unit transfer 1 While in the Index or Worksheet mode touch SEND and select Unit to Unit If the worksheet has...

Page 334: ...K The worksheet is copied to a new PC File in MORE 3 Set the Unit to Unit Path on both units to the correct option 4 Touch OK on both units To quit during the transfer press ON The data is transferred as PenCell data but not assigned to Filer s IN folder To transfer a worksheet via the infrared port you can also use the following simpler method 1 Make sure you are either in the Worksheet mode or i...

Page 335: ...D then select Get from PC Files If the worksheet has not been saved you will be prompted to do so otherwise the following dialog box appears 2 From the Select a File pop up menu select the data source then select a file from the list 3 If necessary change the suggested worksheet title 4 Touch OK ...

Page 336: ...Main Unit or PC Card Select the PC file Touch OK 4 Touch OK Data in the worksheet is replaced with the new one NOTE PenCell can read Excel 3 0 and 4 0 files It writes Excel 4 0 files See Appendix E on file compatibility For more details about PC Files see the other Operation Manual Use an optional Link Software to transfer PC files from to a PC For more details on operating the Link Software see t...

Page 337: ...s as required 3 If the worksheet has not been saved you will be prompted to do so otherwise the following dialog box appears Contacts only 4 Select an entry to link by checking the box Contacts in this example Viewing linked entries 1 When viewing a Contacts or Data Files entry touch LINKS and select Show Linked Entries 2 Touch the spreadsheet icon then select a spreadsheet entry to view You can a...

Page 338: ... mode touch SETUP and select Workspace Size 2 Use or to increase or decrease the extra workspace in multiple of 32KB The maximum extra workspace is 384KB The extra workspace increases at the expense of the user memory 3 Touch OK NOTE If you set a value for the extra workspace then when you look at the user memory by touching Memory in TOOLS this is indicated by the gray shaded portion in the memor...

Page 339: ...76 ...

Page 340: ...nd to remove the 10 Key Pad from the screen When the 10 Key Pad is no longer needed touch CLOSE on the key pad to close it When the formula in a cell is copied into another cell the formula contents are changed Can the contents be fixed To fix the contents of a formula so that it will not be changed during copying use the absolute cell reference when specifying the contents A built in function doe...

Page 341: ... that no longer exists ERR appears in a cell Zero is used as denominator in the formula Parameter range in a function is incorrect There is errors in the formula If the formula depends on other cells check to see if any one of the cells displays ERR The gridlines no longer appear Touch SHOW then select Show Gridlines to bring it back A message always pops up saying that the cells are protected and...

Page 342: ...ch mode you are in Index Worksheet or Charts In Index mode VIEWS menu Index Use the Index mode to manage worksheets and templates See page 18 Worksheet Use the Worksheet mode to work on the contents of a worksheet See page 19 Charts Use the Charts mode to create and manage charts See page 19 A checkmark appears in front of the current mode SETUP menu Workspace Size Changes the workspace size to al...

Page 343: ...nt worksheet to a Contacts entry See page 74 Data Files Links the current worksheet to a Data Files entry See page 74 SEND menu Unit to Unit Transfers worksheets among units using the Unit to Unit method See page 70 Copy to PC Files Copies a worksheet to a PC Files entry See page 71 Get from PC Files Copies a PC Files entry into PenCell as a new worksheet See page 72 Replace with PC File Copies a ...

Page 344: ... the worksheet in full screen mode See page 50 Show Hide 10 Key Pad Shows or hides the 10 key numeric pad See page 28 FORMAT menu Format Changes the way contents of the selected cells should be displayed See page 56 Font Style Changes the font style of the selected cells See page 57 Alignment Aligns the contents of the selected cells See page 57 Borders Changes the borders of the selected cells Se...

Page 345: ...ion in the worksheet See page 33 EDIT menu New Worksheet Opens a new worksheet See page 23 New Chart Creates a new chart based on the selected cells in the worksheet See page 62 Worksheet Title Changes the worksheet title See page 68 Revert to Saved Aborts all the changes made to the worksheet See page 40 Save as Saves the worksheet under a new title See page 24 Cut Cuts contents of the selected c...

Page 346: ... from PC Files Copies a PC Files entry into PenCell as a new worksheet See page 72 Replace with PC File Copies a PC Files entry into PenCell to replace the current worksheet See page 73 In Charts mode VIEWS menu Index Uses the Index mode to manage worksheets and templates See page 18 Worksheet Uses the Worksheet mode to work on the contents of a worksheet See page 19 Charts Uses the Charts mode to...

Page 347: ...n spreadsheet formulas Each function is described in detail below Arithmetic functions Arithmetic functions or operators operate on numeric values or references to numeric values value1 value2 Returns the result of multiplying value1 by value2 Example 6 5 returns 30 value1 value2 Returns the result of adding value1 to value2 Example 6 5 returns 11 value1 value2 Returns the result of subtracting va...

Page 348: ...se Returns the common logarithm of a value to the base you specify or base 10 if base is omitted Example LOG 100 returns 2 Log A10 3 returns the log base 3 of the value in cell A10 LOG10 value Returns the base 10 logarithm of a value Example LOG10 86 returns 1 934498451 MOD value base Returns the remainder modulus after value is divided by base Example MOD 24 9 returns 6 PI Returns the value of π ...

Page 349: ...ys 23 Mar 96 NOTE When you enter a year after 2000 be sure to enter it in four digits SUM values Returns the sum of all the values in list of arguments Example SUM 23 293 97 63 returns 282 SUM A1 A4 returns the sum of values in cells A1 to A4 Date time functions All time functions use a 24 hour clock The spreadsheets represent date and time information in cells as serial numbers Creating date and ...

Page 350: ... of 1900 Example DATEVALUE 10 7 96 returns 35345 This number is displayed as 07 Oct 96 if the cell is formated as DD MMM YY TIMEVALUE time_text Converts its time_text argument to a fractional number since the beginning of the day i e midnight Example TIMEVALUE 10 30 PM is equal to 0 9375 This number is displayed as 22 30 00 if the cell is formatted as HH MM SS NOTE Valid date text and time text ar...

Page 351: ...6 returns 9 YEAR date Returns the value of the year in date which is a 4 digit integer representing the year Example YEAR DATE 96 9 11 returns 1996 YEAER 9 11 96 returns 1996 HOUR time Returns the value of the hour in time which is an integer in the range 0 to 23 Example HOUR TIME 15 08 0 returns 15 HOUR 15 08 0 returns 15 MINUTE time Returns the value of the minute in time which is an integer in ...

Page 352: ...h the specified life and estimated final salvage for the specified period It assumes the rate at which the balance declines to be 2 double declining if factor is omitted Accelerates the depreciation rate to give larger depreciation in earlier periods Example DDB 5500 900 4 1 returns 2750 DDB 2400 300 10 2 1 5 returns 306 FV rate nper pmt pv type Calculates the future value for fixed payments pmt m...

Page 353: ...R 1 100 1000 returns approxi mately 11 NPER 12 12 100 1000 10000 1 returns approximately 60 NPV rate values Computes the net present value for a range or a series of values that occur at equal and regular intervals when discounted at a fixed periodic interest rate It assumes that cash flow occurs at the end of each period Example NPV 8 C15 G15 returns 41922 1 where C15 G15 contains 8000 9200 10000...

Page 354: ...It assumes payments to be made at the end of the periods if type is 0 or omitted and at the beginning of the periods if type is 1 guess is as a starting approxi mation to the expected result it is assumed to be 10 if omitted Example RATE 48 200 8000 returns 0 77 The annual rate would be 0 77 12 which is 9 2 RATE 60 700 100000 140000 1 1 returns 0 0117 or 1 17 SLN cost salvage life Computes the str...

Page 355: ...urns FALSE if one or more is FALSE Example AND TRUE TRUE FALSE returns FALSE FALSE Returns the logical value FALSE IF cond true false Evaluates the cond expression If cond is true it evaluates and returns the value of true part Otherwise it evaluates and returns the value of false part or FALSE if false part is omitted Example IF B5 5 Bigger Smaller returns Bigger if B5 is greater than 5 and Small...

Page 356: ...r alphabetic comparison the search is case sensitive That is the key Orange will match Orange and not orange Example HLOOKUP 5 A1 D3 2 returns c where the content of range A1 D3 in row order is 2 3 5 8 8 b c d 10 f g h INDEX range row col Uses a row and col index to choose a value from a range Example Assume C10 E11 in row order contains the values 5 2 7 8 4 9 Then INDEX C10 E11 1 3 returns 7 whic...

Page 357: ...omputation ROWS range Returns the number of rows in a reference Example ROWS A3 G6 returns 4 VLOOKUP key range col Looks in the first column of the range for the largest value that is less than or equal to key Then it moves in the right direction in the row and returns the value in the specified col The column index starts from one The values in the first column key column must be sorted in ascend...

Page 358: ... value2 FALSE otherwise Example 8 8 returns FALSE value1 value2 Returns TRUE if value1 is greater than or equal to value2 FALSE otherwise Example 9 3 returns TRUE Statistical functions For statistical functions that accept a list of values as arguments the values can be any combination of numbers numeric formulas cell references and cell ranges AVERAGE values Returns the average of the values Exam...

Page 359: ...STDEVP VARP and AVERAGE Trigonometric functions Trigonometric functions operate on numeric values or references to numeric values The angle values are generally expressed in radians ACOS value Returns the arccosine of a value The value cannot be less than 1 or greater than 1 Example ACOS 0 5 returns 2 094 ASIN value Returns the arcsine of a value The value cannot be less than 1 or greater than 1 E...

Page 360: ...a value which is an angle Example COS 1 047 returns 0 500171 SIN value Returns the sine of a value which is an angle Example SIN PI 2 returns 1 TAN value Returns the tangent of a value which is an angle Example TAN 2 328 returns 1 058041 ...

Page 361: ...ing level of parentheses in a formula 0 12 Number of arguments in a function var arg function like SUM OR etc 30 Number of terms in a formula 60 Depth of chained circular formulas N A 40 Numeric value 2 225073e 308 1 797693e308 Number of iterations 1 99 Description Minimum Maximum Iteration epsilon 1e 6 99 Number of characters in a cell N A 255 Number of decimal places in numerics 0 15 File size D...

Page 362: ...Delete worksheet Clear Delete chart CANCEL ON QUIT Cancel edit bar mode View worksheet RETURN Go to first column of next row NEW ENTRY New worksheet New worksheet New worksheet PREV Page up Page up Page up Previous chart NEXT Page down Page down Page down Next chart 2nd PREV Page left 2nd NEXT Page right UP Move to worksheet entry above Move to template entry above Move to cell above DOWN Move to ...

Page 363: ... Get operation SEND Unit to Unit Send operation Unit to Unit Send operation MENU Open VIEWS menu Open VIEWS menu Worksheet open VIEWS menu Full screen collapse and open VIEWS menu Open VIEWS menu 2nd MENU Open VIEWS menu Open VIEWS menu Open pop up menu Open VIEWS menu Touch Select entry Select entry Select a single cell Select Drag In selection drag move Outside selection select range 2nd Touch I...

Page 364: ...tbar inactive Chart Mode 2nd X Cut 2nd C Copy Copy image 2nd V Paste 2nd Z Undo 2nd A Redo 2nd P Print screen Print screen Print screen Print screen 2nd Y Use plain font style 2nd U Use underline font style 2nd I Use italic font style 2nd O Use bold font style 2nd F Open find dialog ...

Page 365: ...d Excel 4 0 files It writes to Excel 4 0 files Only a subset of Excel s features and functions are supported in PenCell Unsupported functions after being imported into PenCell evaluate to error value and are displayed in edit bar with the prefix XL_ such as XL_DMAX ...

Page 366: ...103 Communication Applications ...

Page 367: ...104 ...

Page 368: ... 2 Slide up and remove the protective cover of the unit s Computer Link Port to expose the 15 pin connector Remove the two rubber plugs on either side of the connector and install them and the port cover in their storage positions on the modem 3 Connect the modem s 15 pin interface connector to the Computer Link Port on the unit and secure the unit with the thumb screws 4 With a modular telephone ...

Page 369: ... is compatible consult your SHARP dealer You also need the modular telephone cable supplied with the modem to complete the steps below 1 Make sure the unit is turned off 2 Insert the PC Card into the PC Card slot on the side of the unit 3 With the supplied modular cable connect the modem to a telephone outlet or a cellular phone 4 Turn on the unit The connection varies with the PCMCIA card The con...

Page 370: ...107 CompuServe Quick Start 109 Commonly Asked Questions Answers 115 Introduction 117 Mail 121 Forums 126 Executive News Service 133 Other Functions 135 Troubleshooting 139 Appendix 141 ...

Page 371: ...108 ...

Page 372: ...is section assumes you have already joined CompuServe Starting CompuServe Access Software 1 Touch TOOLS The contents of the TOOLS screen may differ depending on the version for your country 2 Touch the CompuServe icon twice If the unit is locked you need to enter the password The main screen will appear ...

Page 373: ... save the changes Setting up connections You can connect to CompuServe from different places or via different networks as follows 1 From the main screen touch the Setup button 2 Touch Add and enter a new connection name Then touch OK 3 Enter your name ID password and access number Use NEXT PREV keys to move between fields 4 Touch OK to save the changes ...

Page 374: ...r ences you are ready to connect to CompuServe 1 From the main screen use the Connection pop up menu to select a connection 2 Touch the icon then OK to connect to CompuServe To disconnect To disconnect touch NOTE Many operations in CompuServe can be done both on line and off line ...

Page 375: ...you have specified all the desired recipients then touch Done 5 If desired touch OPTION to specify Impor tance and Sensitivity To attach a file one file maximum touch ATTACH 6 Type a subject title and a message in the Subject and Message fileds respectively 7 Press ENTER to save the message to the OUT tray Creating Mail 1 If necessary touch MAIN to go back to the main screen then touch the OUT tra...

Page 376: ...the New Mail icon 2 A list of new mail messages will appear The Receipt Notification and Sensitivity informa tion of the selected message if available will also appear above the list To read a message on line Touch a message entry twice To save messages to the unit Tag any messages you want to save Then touch SEND and select Save to IN to save mail messages to the IN tray When the Save to IN dialo...

Page 377: ... twice to read it To reply 1 While reading a message or from the Mail index view of the IN tray touch EDIT then select Reply 2 Select Reply to Author Only or Reply to All Recipients Check the Include Original Message box to include a copy of the original message in the reply message 3 Touch OK 4 Type in a message and press ENTER to save the reply ...

Page 378: ...puServe is Zaaurus discussed A Put Zaurus into your forum list and go to that forum There you will find a lot of ideas to help you use your Zaurus more effectively Q Can I reply to mail or forum messages while on line A No You cannot create messages on line You must first download messages Save to IN and then reply off line You can then send these messages next time you connect to CompuServe You c...

Page 379: ...116 ...

Page 380: ...ftware application in your unit Starting CompuServeAccess Software 1 Touch TOOLS The contents of the TOOLS screen may differ depending on the version for your country 2 Touch the CompuServe icon twice If the unit is locked you need to further enter the password The main screen will appear ...

Page 381: ...a the 15 pin connector or the PC card Volume If your modem has a built in speaker you can adjust the sound you hear when the modem is dialing or connecting A value of 3 gives you the highest volume Selecting Mute turns off the speaker This function is not valid for the CE FM4 Fax Modem MNP Check to use MNP Microcom Network Protocol if this is supported by your modem MNP corrects data errors caused...

Page 382: ...ed to access CompuServe Password The password required to access CompuServe The number of the access point to CompuServe Timeout The time to wait before hanging up the phone Redial The number of times the unit should redial if it Attempts cannot connect successfully The acceptable redial range is from 0 to 2 A value of 0 means there will be no redial Network Use this pop up menu to select a networ...

Page 383: ...ferences you are ready to connect to CompuServe 1 From the main screen use the Connection pop up menu to select a connection point 2 Touch the icon to connect to CompuServe To disconnect To disconnect touch NOTE Many operations in CompuServe can be done both on line and off line ...

Page 384: ... Create a mail message as follow 1 If necessary touch MAIN to go back to the main screen then touch the OUT tray 2 From the Mail index view touch EDIT then select Create Mail Mail Y ou can create send get and read mail ...

Page 385: ... touch OPTION to specify Impor tance and Sensitivity The Importance pop up menu contains Low Normal and High The Sensitivity pop up menu has Normal Personal Private and Confidential To attach a file only one file allowed touch ATTACH 6 Type a subject title and a message in the Subject and Message fields respectively 7 Press ENTER to save the message to the OUT tray NOTE Touch or 2nd W to display t...

Page 386: ... select Send Mail To attach data 1 While composing a message you can touch ATTACH to attach Filer or PC File data to the message only one file allowed 2 Touch Attach 3 Select the attachment type then touch OK to select the data 4 Select a Folder or a PC File then touch Attach 5 Touch Done to attach the data NOTE You can also use the Send menu in FILER to send a Filer folder as an attachment ...

Page 387: ...tion of the selected message if available will also appear above the list The Importance status can be Low Normal or High The Sensitivity status can be Normal Personal Private or Confidential To read a message on line Touch a message entry twice To filter out unwanted messages Touch FILTER and check the desired options Only messages meeting the filter conditions appear on the list To save messages...

Page 388: ...f the message in the same way you create a new message in the OUT tray Be sure to press ENTER to save the message when finished To forward a message 1 While reading a message or from the Mail index view of the IN tray touch EDIT then select Forward A copy of the original message is included in the message body 2 Complete the rest of the message in the same way you create a new message in the OUT t...

Page 389: ...in a topic may grow as more and more people respond If no one replies to a message the topic will consist of only 1 message The result is three levels consisting of a section index a topic index and the individual message details Note there is no index of messages Going to a forum 1 If necessary touch MAIN to go back to the main screen then touch Forums 2 Select a forum then touch GO If necessary ...

Page 390: ...the message Touch FULL to get a full screen view or touch SMALL to return to the normal view Use MORE to see the next message To go to another topic touch or MORE will continue to display the next message even across topics Use PREV key to see the top message of the topic Filtering messages While in the section view touch FILTER and select Forum Message Then set the filter condition and touch Filt...

Page 391: ...ages of this topic are tagged 3 Touch SEND then select Save to IN 4 Select the download option then touch OK to start the download NOTE You can only download topics and or messages from one section at a time Downloading messages from different sections in a forum at once is not possible In the Save to IN dialog if you have selected the Disconnect after receiving checkbox then unit will disconnect ...

Page 392: ...l actually be downloaded to the PC Files area 3 Select the download options then touch OK Reading forum messages off line 1 Touch the IN tray and touch Forum M 2 Use the Forum pop up menu to select a forum Each entry consists of the topic thread title the section it belongs and the number of messages in the thread 3 Touch or press ENTER or touch VIEW a message entry twice to see its contents Respo...

Page 393: ...op up menu to specify a forum and the Section pop up menu to specify a section Then type a title in the Topic box Check the Private checkbox if you want the message to be visible to only the recipients use the Via Mail checkbox to send the message to the mail box of the recipients instead 4 Touch To and enter the names of recipients in the same the way you create a mail message ...

Page 394: ... then touch OK NOTE You must post the messages while you are in the OUT tray To post messages to a forum you must be in the same forum Getting responses to your forum messages 1 When you are connected the following prompt appears if there are waiting mes sages 2 Touch Yes to see these messages If you touch No you can still see the waiting messages later when you are on line while in the section vi...

Page 395: ...132 ...

Page 396: ...etting up your modem on page 110 If you are not sure of the proper string leave the entry blank The unit always dials the wrong number Make sure the access phone number of the CompuServe service is correct Make sure the line type setting on the unit is same as that of the telephone line The unit fails to connect to CompuServe Make sure the Connection information is correct See Setting up connectio...

Page 397: ...ent cannot be sent out Make sure the attachment is Filer or PC File data All other type of data cannot be attached to a message Some of the messages no longer appear on the unit Make sure there is no filter active ...

Page 398: ...menu items This button toggles between the details of a selected message View and a list of the current messages in the selected tab Index MAIN Go to the main screen Appendix T he appendix lists all menu functions you can use in the application ...

Page 399: ... clipping See page 133 icon Tap to Connect or Disconnect from CompuServe EDIT Create Mail Create a new mail message See page 121 Create Forum Message Create a new forum message See page 130 Reply Replay to a message See page 125 Forward Forward a message to someone else See page 125 Delete Entry Delete the current message See page 138 Delete Group Delete a group of messages See page 138 Convert to...

Page 400: ... and displayed See page 131 Forum Message Specify filter keyword so that only filtered forum messages can be viewed See page 127 Forum Library Specify filter keyword so that only filtered files can be listed and downloaded See page 129 Turn Off View Filter Turn off the filter if it has been set See page 127 SEND Send Mail Send mail messages See page 123 Send forum messages See page 131 Save to IN ...

Page 401: ...144 ...

Page 402: ...145 Pager Access Quick Start 147 Commonly Asked Questions Answers 154 Introduction 157 Using Pager Access 164 Troubleshooting 183 Appendix 185 ...

Page 403: ...146 ...

Page 404: ...t T his section is a quick start to setting up and running Pager Access Starting Pager Access 1 Touch TOOLS The contents of the TOOLS screen may differ depending on the version for your country 2 Touch ZR Pager twice ...

Page 405: ...r Access Paging Service Send to user with a Pager Card Send to a text based alphanumeric Pager Send Pager Messages from your unit AnyTime Anywhere Use Pager Access software with CE FM4 Fax Modem Or PC Card and cellular phone ...

Page 406: ...o your Pager Access IN folder Internet CompuServe America Online Receive information to your unit and Pager Card Forward Mail messages to your unit and Pager Card Pager Access and Pager Card Paging Service provides information to your unit Messages from others through operator dispatch News Updates Stock quotes Financial information Sports Scores ...

Page 407: ...e contact each Paging Service provider for the appropriate TAP access phone number modem baud rate and maximum message limit for your service area 1 From the Message screen in Index view touch SETUP then select Paging Service 2 Select the paging service from the Name list If it is not on the list you must touch Delete to delete one or more paging services you re not going to use from the Name list...

Page 408: ...nts list Repeat this step until all recipients have been set Touch Done 4 In the Subject field type the subject of this message up to 30 characters 5 In the Message field type in your message When you are done press ENTER to save the message in the OUT folder Composing a message 1 Press NEW ENTRY Or touch EDIT then select New Message 2 Select a paging service Paging Network in this example from th...

Page 409: ...ction the Now Send ing status box appears and the messages are sent 4 When there are no more messages to send Pager Access disconnects and the SENT folder appears Getting messages from your Pager Card Make sure your Pager Card is inserted in the unit 1 Touch PAGER then select Get New Pager Messages 2 When the loading process is complete new messages appear in the IN folder ...

Page 410: ... or touch INDEX to return to index view An opened envelope icon is used to indicate the message has been read Searching messages 1 Touch FIND The Find Messages dialog appears 2 Enter a search string into the All Entries Containing box in upper or lower case The search is case insensitive 3 Touch one or more folders you wish to search 4 Touch Find If the string is found the Find String dialog appea...

Page 411: ...ach group of recipi ents on the same paging service Q I have some data on my unit that I would like to send to others Can I do that A Of course you can Appointment or To Do data is ac cepted When you compose a new message use the ATTACH button to attach data to the message You can attach only one entry to each message and the size of the entry plus the message text must not exceed the message limi...

Page 412: ...What are some good habits I can develop when using Pager Access A Here are some Always back up important messages When you no longer need to keep the old messages delete them to make room for new messages Q At times I receive messages which contain garbled data and or strange characters What is the cause A You may have been inside a building or in a location where your Paging Service provider does...

Page 413: ...156 ...

Page 414: ...ional telephone line or a cellular phone for modem connection To read incoming messages from your Pager Card insert the Pager Card into the unit and use Pager Access to load the messages Although you can send messages to any paging service with this software you must subscribe to a paging service to receive messages via that paging service and that paging service must support alphanumeric or text ...

Page 415: ... have entered a secret password into the unit then regardless of whether the unit is locked or unlocked the following screen appears when you select ZR Pager Enter the correct password and the Message screen will appear About the ZR Pager icon When you see the ZR Pager icon you can touch it and the following screen appears to give you a graphic description of the working of this software ...

Page 416: ...in Index view touch SETUP then select Paging Ser vice The following screen appears Obtaining a Pager Card and pag ing service Pager Access works with a Motorola NewsCard Pager Card For more information about where to obtain one please check with your SHARP dealer or call 800 BE Sharp In addition you can call our automated Fax on Demand service at 612 397 8601 NOTE All alphanumeric Pager Cards reco...

Page 417: ...n existing paging service 1 From the Paging Service screen select a paging service 2 Make changes to this entry such as speed bps Phone Number and Message Limit You cannot change the name of the service 3 Touch OK to save the changes 2 Select the paging service from the Name list If it is not on the list you must touch Delete to delete one or more paging services you re not going to use from the N...

Page 418: ...e messages you will not be allowed to delete the paging service from the list Configuring your modem After you have connected to a modem you need to configure Pager Access for your modem as follows 1 Touch SETUP then select Modem Setup 2 Touch and select any required setting or type in the desired value See the Modem settings section below for a detailed description of each setting You can restore...

Page 419: ... your local telephone company Redial Specify the number of times the unit should redial if it cannot connect successfully due to a busy line etc The acceptable redial range is from 0 to 9 A value of 0 means there will be no redial Volume If your modem has a built in speaker you can adjust the sound you hear when the modem is dialing and connecting A value of 3 gives you the highest volume Selectin...

Page 420: ...ly F0B1C1 C2 N1 C0S7 100S10 100 B2400 F0B1C1 C2 N1 C0S7 100S10 100 B2400 2400 baud 2400baud and Nokia 121 128 phone only Megahertz XJ1144 None Not Applicable XJ2144 None Not Applicable CC4144 None F4N0 C0S7 100S10 100S37 5 NEC P100 and MIT 3500 4000 phones Motorola Lifestyle None Not Applicable Power None J2 B1200S7 100S10 100 Motorola Microtac phone CELLect 14 4 None J2 B1200S7 100S10 100 Motorol...

Page 421: ...les between the details of a selected mes sage VIEW and a list of the current messages in the selected folder INDEX FILTER Accesses the View Filter The View Filter controls the display of messages in each of the IN OUT and SENT folders according to criteria you set SETUP Sets up the modem a paging service your preferences as well as address book EDIT Accesses various message commands message creat...

Page 422: ...e the attachment OUT folder The OUT folder stores all messages waiting to be sent including messages which have not been successfully transmitted New messages are composed in the OUT folder To Touch to specify one or more recipients of this message All of the recipients of this message must reside on the same paging service Subject Type a subject for this message up to 30 characters Message Type i...

Page 423: ...ge 1 Press NEW ENTRY Or touch EDIT and then select New Message 2 Select a paging service Paging Network in this example from the Name pop up menu for this message then touch OK 3 Touch the To button to select one or more recipients of this message For details see Selecting recipients of a message on page 167 ...

Page 424: ...ecting recipients of a message Each outgoing message can be sent to only one paging service but you can send the same message to multiple recipients on the same paging service If you need to send to groups on different paging services create a new message use copy paste in the subject or message field for each group of recipi ents on the same paging service When composing a new message touch the T...

Page 425: ...red in the OUT folder No Dial Tone The telephone line is not correctly connected Line Busy TAP Access number is busy Line Error The line was cut off due to commu nication error No Pager PIN There is a problem in the PIN Number number TAP Error There was a problem in the communications protocol User aborted You pressed the ON key operation Attaching data to a message You can attach Appointment or T...

Page 426: ...iler folder If an attachment already exists A prompt appears and you can replace it with the new attachment Modifying a message Sometimes you may want to modify a message or its attachment before it is sent You cannot modify mes sages in the IN and SENT folders though you can copy them to another location 1 Select the OUT folder 2 Touch the desired entry twice The details of the message appears ...

Page 427: ...e Attaching data to a message on page 168 for more information 4 Press ENTER to save the modifications and return to the Message screen Setting up an address book An address book makes addressing outgoing messages simpler and quicker Use an address book to select names you want to send a message to 1 Touch SETUP then select Address Book The following screen appears ...

Page 428: ...pager PIN in the address book Pager Service Field Select which field in the source information is assigned as the recipient s pager service in the address book This information is provided for reference when the user is addressing a message and is not included in the actual message that is sent 3 Touch OK to save the changes Sending messages Before sending messages make sure is connected to a tele...

Page 429: ...nd the SENT folder appears About message transmission When a message is successfully sent that means it has reached the paging service only Pager Access cannot determine if the recipients have actually received the message If message transmission succeeds the message is copied to the SENT folder If message transmission fails the message remains in the OUT folder If a failure occurs on any recipien...

Page 430: ...n the loading process is complete new messages appear in the IN folder 3 An alternative is to use the Show All Pager Messages selection to get old messages from the Pager Card Reading incoming messages 1 From the IN folder touch the message you want to read twice If the message originator was not included in the message the From field will show Not Specified 2 Read the message using the scroll bar...

Page 431: ... to return to index view An opened envelope icon appears to indicate the message has been read Messages containing errors If messages received in the Pager Card contain any errors Access Pager indicates this in the message detail view ...

Page 432: ...ent or a To Do accordingly 3 If you do not want to detach the attachment touch Done Converting messages to documents You can convert one or more messages to Documents as follows 1 Touch EDIT then select Convert Mes sage 2 Enter a title for the Document You can convert the current message tagged messages or all messages 3 If you have chosen Delete messages after conversion the selected messages wil...

Page 433: ...ollowing message appears touch Yes Deleting a group of messages You can delete a group of messages from the IN OUT or SENT folder as follows 1 Touch EDIT then select Delete Group 2 Select the folder where messages will be deleted IN OUT SENT or ALL 3 Further specify to delete Tagged Messages or All Messages in the selected folder 4 Touch Delete and the following prompt appears 5 Touch Yes to delet...

Page 434: ...fter copied into the IN folder 1 Touch PAGER then select Show All Pager Messages A list of all the messages stored in Pager Card memory appears 2 Touch Delete The following screen appears You can delete the current message only messages tagged with a check mark on the Index screen or all messages 3 Select the type of messages to delete then touch OK If some of the messages have not been read The f...

Page 435: ...ch FILTER to start filtering all messages Deactivating the filter Touch the FILTER button and select Turn Off View Filter or touch the Turn Off Filter box to display all messages again Applying a filter to view selected messages This function lets you focus on messages that contain specific information For example you can view only entries related to a particular company name The function does thi...

Page 436: ...search stops at each occurrence of the search string To enter a new string touch the Find String button in the Search dialog When you have completed the search touch Done Searching messages You can search for messages containing a text string in any or all of the IN OUT and SENT folders Only the Subject and Message fields of each message are searched for the entered text string 1 Touch FIND The Fi...

Page 437: ...place of insertion 5 Press 2nd and V Or touch EDIT and select Paste Customizing Pager Access 1 From the Message screen in Index view touch SETUP then select Preferences 2 Check the box if you want to use the option Delete messages from Pager Card after reading Messages are automatically deleted from Pager Card memory after copied into the IN folder Save sent messages in SENT folder By default sent...

Page 438: ...here this name will appear in the message area when you create a new message thus saving time in typing your name You may also touch Use Owner s Name to copy the Owner s Name registered in Personal under the TOOLS area 3 Touch OK to save the changes ...

Page 439: ...182 ...

Page 440: ...per initialization string for the modem you are using make sure it is entered correctly Refer to your modem user manual for information on modem commands If you are not sure of the proper string leave the entry blank Pager Access always dials the wrong number Make sure the access phone number of the paging service is correct Make sure the line type setting in Pager Access is the same as that of th...

Page 441: ...use the message size to exceed the limit Make sure the attachment is either an Appointment or To Do entry All other types of data cannot be attached to a message Cannot detach data from a message The attachment is not in your unit s format or there was a transmission error which corrupted the message You can call the paging service provider and they may be able to re transmit the message Cannot se...

Page 442: ...tered entries can be viewed edited and deleted See page 178 Turn Off View Filter Turn off the filter if it has been set See page 178 SETUP Modem Setup Configure your modem See page 161 Paging Service Add modify or remove a paging service See page 159 Preferences Customize Pager Access to the way you prefer See page 180 Address Book Enter recipients of your pager messages See page 170 Appendix T he...

Page 443: ...o the clipboard See page 180 Paste Paste contents from the clipboard See page 180 Convert Message Convert messages to a document See page 175 FIND There are no menu items Use FIND to search for desired messages PAGER Send Messages Connect to a paging service to send messages See page 171 Get New Pager Copy new messages from the Messages Pager Card into memory See page 173 Show All Pager Build an i...

Page 444: ...187 AT T Mail Quick Start 189 Commonly Asked Questions Answers 194 Introduction 195 Mail Basic 203 Managing Your Messages 227 Troubleshooting 231 Appendixes 233 ...

Page 445: ...188 ...

Page 446: ...ail Access 1 Touch TOOLS The contents of the TOOLS screen may differ depending on the version for your country 2 Touch AT T Mail twice Quick Start T his section is a quick start to setting up and running AT T Mail Access ...

Page 447: ...Setting up AT T Mail Access AT T Mail Access requires you to enter your AT T Mail account and modem information to connect to the AT T Mail service Use E Mail Setup to specify setup informa tion for AT T Mail the modem and the login script You may need to change these settings if there is a change to your account modem or when you connect to AT T Mail from different locations To change E Mail Setu...

Page 448: ...age box and type a message 5 Touch OPTION to include any message options 6 Touch ATTACH to include any attachments with the message 7 Press ENTER to save the message to the OUT folder Creating a new message The first step in sending a message is to create the message To create a message 1 Touch EDIT then select New Message to get a blank message display 2 Type a brief subject that describes the na...

Page 449: ...ssages 1 If you have more than one message in your OUT folder you can tag selected messages that you want to send 2 Touch MAIL then select Send Only or Send Receive Note that these selections are available only if the currently displayed folder is the OUT folder 3 Select the messages that you want to send and touch OK ...

Page 450: ...and when the unit is disconnecting from the AT T Mail host Receiving messages To receive messages 1 Touch MAIL then select Turn on Receive Filter to use the receive filter If the receive filter is turned off then all new messages are received 2 Touch MAIL then touch Receive Only or Send Receive You see the Receive Filter display if the receive filter is turned on ...

Page 451: ...ages Alternatively you may choose to Send all messages Q I would like to put my company logo on all paper and fax messages sent via AT T Mail How can I do that A You need to register the logo with AT T for an additional cost Refer to your AT T Mail Welcome Kit for details Q Can I attach some data in my unit to a mail message A Yes From the New Message screen touch ATTACH to attach FILER folders or...

Page 452: ...il you need to get a user name and password To register with AT T EasyLink Services call 1 800 242 6005 within the U S and say Department Zaurus They will then mail you an AT T Mail Welcome Kit with your account information and documentation To register with AT T from outside of the U S see the international support list in Appendix A ...

Page 453: ...e the user name with an exclama tion point or any other characters that may be necessary when specifying user addresses Password The AT T Mail passwords Everyone receives one password but you may configure a second password for added security If you have one password leave Password 2 blank Lock your unit using the secret password to prevent any unauthorized use of your AT T Mail account by others ...

Page 454: ...end To use a private logo you must register it with AT T for an additional cost Refer to your AT T Mail Welcome Kit for more information about logos File Transfer The type of file transfer protocol that you need to use with your modem The default is FMODEM If you are having trouble sending and receiving messages such as when connecting via a cellular phone try using XMODEM or YMODEM 3 Touch the Mo...

Page 455: ...rol not selected Modem String blank If using a PC card modem change the Port setting to PC Card and enter a Modem String if recommended by your modem manual If you select a speed bps greater than 2400 we recommend that you select the Hardware Flow Control box Refer to your modem user manual for more information on these settings Redial The number of times that AT T Mail Access tries to connect to ...

Page 456: ...the local provider To customize a login script select the script and enter a title For more information on X 25 packet access refer to your AT T Mail User s Guide To restore a login script to its default configuration touch Restore 5 Touch OK to save the new settings and return to the mail folders Touch Cancel to return to the old settings 4 Touch the Login Script tab and select one of the followi...

Page 457: ...fields To enter addresses into a Contacts file Example Enter the following into Contacts 1 Allison Wicks of ABC Consulting Co P O Box 85 Lee New Jersey 07000 phone 908 555 4321 fax 908 555 4567 AT T Mail User ID auser 1 Touch CONTACTS 2 Touch EDIT and select New Business 1 3 Select the following fields and enter the desired information into them You do not need to enter information into all of the...

Page 458: ... are used with the recipients ID or number to identify the complete mailing address When you select the type of address the appropriate prefix is included in the address AT T Mail AT T Mail subscriber user ID attmail CompuServe CompuServe subscriber user ID mhs csmail dd id Telex Telex number telex X 400 X 400 address mhs Internet Internet address internet SkyMail SkyTel pager PIN mhs skymail s Re...

Page 459: ...202 ...

Page 460: ...essages that you create include the date and time Therefore you should adjust this information if it is not set correctly in your unit Mail Basic T his section explains he basic operations about AT T Mail Access that you can perform ...

Page 461: ...age counter The first number is the number of the selected message messages are numbered sequentially The second number is the total number of messages in the folder Mail folders AT T Mail Access has three mail folders for storing messages IN Folder Lists the messages that you have received OUT Folder Lists the messages that you will be sending SENT Folder Lists messages that you have mailed Touch...

Page 462: ...Touch the font button in the scroll bar to change the font size displayed in the mes sage 5 Touch OPTION to include any message options See the selecting message op tions section that follows 6 Touch ATTACH to include any attachments with the message See the Attachments section that follows 7 Press ENTER to save the message to the OUT folder NOTE The message is saved in the unit s main memory even...

Page 463: ...s information and options that are available for the message See the Address types section that follows for the types of available messages 3 Select the name of a recipient from the Address Book listing to display their full Name and Mail ID at the top of the page If the incorrect address book is listed or the address book is using the incorrect field you can change the address book setup by touch...

Page 464: ...ecipient s detailed address infor mation touch the recipient s name You can then modify that recipient s address informa tion 5 Touch Done to return to the New Message display Address types The address type affects the address information and available options The following address types are available AT T Mail Internet Paper Fax CompuServe SkyMail Telex X 400 Touch the TYPE pop up menu to select ...

Page 465: ...sender s name and address recipient s name and address message subject total number of pages and logo This only applies if you also select usmail overnight Sends the message by overnight courier service on business days if the recipient is in the courier s overnight delivery zone This only applies if you also select usmail receipt Sends a receipt of delivery to the sender when the message is opene...

Page 466: ...equires the Address and Phone number Paper recipient options The following paper recipient options are available by touching PAPER OPTION Format Business format is the standard letter format with the date and recipient information at the top of the page and the sender information and copy list at the bottom of the page Memo format has the recipient and sender information date and subject at the to...

Page 467: ...D Sends the message COD cash on delivery to all recipients of the message so the recipients are billed when they read it This does not apply to some address types such as fax Return receipt Notifies the sender when the recipient reads the message This feature is useful if the recipient is traveling and you are having difficulty reaching them Save sent messages Saves sent messages in the SENT mail ...

Page 468: ...riginal format To add attachments to a message 1 From the New Message display touch ATTACH to include attachments with the message 2 Touch Attach and select the type of attach ment the unit FILER Folders or PC FILES Directory then touch OK 3 For FILER folders select a folder and touch Attach Only folders can be attached not individual entries For PC Files select a file and touch Attach 4 Touch Don...

Page 469: ...eping the original message untouched 3 Touch EDIT and select Paste to place a copy of the message in the OUT folder 4 Touch VIEW to display the message then change or add new information to it 5 Press ENTER to save the message Connecting to the host After creating messages you can send them using AT T Mail Access You have the option of selecting the messages that you want to send The currently sel...

Page 470: ...e The one message that is selected Tagged Messages The messages that are tagged with the checkmark in the tag box All Messages Every message in the OUT folder 3 If you need to change the AT T Mail or Modem setup before connecting touch Setup 4 After verifying your modem and phone line connection touch OK to connect to AT T Mail The following display shows you the status of the connection during th...

Page 471: ...tly which messages you want to receive These options can save time if you receive a lot of mail and you need to search for selected items You can then view these messages in your IN folder AT T Mail Access also has features for quickly answer ing or forwarding messages that you receive After connecting to AT T Mail you see the following status display while it is sending messages This status displ...

Page 472: ...to specify the number of days 1 6 days that the IN OLD folder retains these messages SENT Sent messages User Folder Messages stored in a folder that you create When registering your AT T Mail account you must request that your account has the capability to create user folders Shared Folder Messages stored in another AT T Mail user s folder that is shared with a group of users 4 Select the criteria...

Page 473: ...o change the AT T Mail or Modem setup before connecting touch Setup 8 After verifying your modem and phone line connection touch OK to connect to AT T Mail The following display shows you the status of the connection during this process For a successful connection you see the following messages Configuring Modem Dialing the AT T Mail Access phone number Logging into Host Completing communication l...

Page 474: ...ge In addition the listing shows the approximate size of the message 9 Select a message in the summary and touch VIEW to get more information about the message on the Message Details display The Details display is useful if the message information could not all fit in the summary listing for example when you see on the summary Touch Done to return to the Preview Mail display 10 Touch FILTER to cha...

Page 475: ...necting after you receive the mes sages If you do not choose this option you are asked if you want to disconnect after receiving messages If you do not discon nect you return to the message summary display You see the following status display when receiving messages This status display has a status bar that graphically shows how much of the transfer is completed Status messages are displayed when ...

Page 476: ...via AT T Mail Access and lets you preview mail summaries before entering terminal mode To connect to AT T Mail using terminal mode 1 Touch MAIL then select Terminal to select terminal mode 2 Touch OK from the Connect to Host display to connect to the AT T Mail network Once connected you can then use the terminal mode displays to create send and receive messages directly on the AT T Mail network Th...

Page 477: ...ration settings are on two pages Touch the bottom right hand corner of the display to switch between pages Refer to the AT T Mail User s Guide for a list of commands that you can use in terminal mode 4 Touch QUIT to return to the Receive Filter display or LOG OFF to disconnect from AT T Mail ...

Page 478: ...return to the message display Viewing Received Messages The IN mail folder lists received messages You can display all of the messages in the folder or use the view filter to show selected messages To view received messages 1 Touch the IN folder tab to view the index listing of messages in the IN folder 2 Select a message in the IN folder 3 Touch VIEW or press ENTER to read the message Touch the f...

Page 479: ... status icon has changed from a closed envelope to an opened envelope You can then use this same procedure to view another message To use the view filter The view filter lets you select the type of messages that are listed in a mail folder It can use the following criteria for displaying messages Priority Sender using the From field messages in IN folder only Recipients using the To Cc field Subje...

Page 480: ...t match the set criteria A box is displayed at the bottom of the folder to remind you that the view filter is activated and the folder is not displaying the full list of messages 4 Touch the Turn Off Filter reminder or touch FILTER and select Turn Off View Filter to return to the full list of messages To view the status of the last connection and transfer 1 Touch the AT T MAIL icon at the top of t...

Page 481: ... a message If you need to respond to a message that you received you can use the Answer Message feature This is easier than creating a new message since AT T Mail Access automatically addresses the message and enters a subject such as Re original subject You simply type in the reply To answer a message in the IN folder 1 While viewing the received message or with it selected in Index view touch ED...

Page 482: ... Mail Access uses the same subject in the form Re original subject message and attachments as the original message and you only need to enter the new address and add to the message if necessary To forward a message in the IN folder 1 While viewing the received message or with it selected in Index view touch EDIT then select Forward Message You see the new message display with the subject and messa...

Page 483: ...226 ...

Page 484: ... organize your messages Finding messages If the mail folders contain many messages you can use this feature to automatically search for a specific message To find a message 1 Touch FIND to search for messages 2 Enter the search criteria 3 Select the mail folders that you want to search ...

Page 485: ...eleting messages The editing functions let you delete messages to reduce the clutter in your mail folders You can delete messages from the index or detail view To delete a message 1 Touch EDIT to use the delete commands 2 Select the delete function based on the number of messages that you need to delete Select Delete Message to remove the selected message from the folder Select Delete Group to rem...

Page 486: ...after conver sion box if you want to delete the messages from the mail folder after converting them to documents Converting messages to Documents AT T Mail Access lets you convert a message to a Document so you can format and edit it or file a copy of it in Filer To convert a message 1 In Index view select a message or tag several messages that you want to convert to documents 2 Touch EDIT and sel...

Page 487: ...ins the date and time sender s address recipient s address subject and message If you convert a message with attachments and delete the original message then AT T Mail Access does not retain the attachments anywhere on the unit Therefore AT T Mail Access displays a warning that reminds you to detach any attachments before it converts the message ...

Page 488: ...nnection to a phone line AT T Mail settings AT T Mail phone number Phone number prefix if you are dialing from a location that needs additional numbers to access an outside line Login script Memory is full Delete data from the main memory such as Docu ments Notes Contacts Data Files or old messages to free up memory Unable to send messages The AT T Mail message was rejected Check the recipient lis...

Page 489: ...232 ...

Page 490: ...ectory AT T Mail traveller s access number and AT T Mail login scripts Appendix A AT T EasyLink Ser vices Global Alliance program member directory Use the following international customerservice numbers to get information about registration access numbers or other questions about using AT T Mail ...

Page 491: ...communications Ltd Konkoly Theze M ut 29 33 Budapest XIII Tel 361 160 2497 Fax 361 175 8056 zsolt Tel 982 1 623 208 304 806 Fax 982 1 629 258 parshelp Tel 972 3 543 3777 Fax 972 3 544 4199 goldhelp Tel 39 2 850 7300 Fax 39 2 850 7290 sevahelp Tel 961 1 496 430 Fax 961 1 500 706 libatel Tel 70 95 229 7846 Fax 70 95 229 3237 iasnet Tel 44 71 537 4115 Fax 44 71 537 3765 attukhelp Iran Pars Supala 31 ...

Page 492: ...r 88 Gloucester Road Wanchai Hong Kong Tel 8522 511 5828 Fax 8522 598 0810 elsaphelp Tel 813 5561 3411 Fax 813 3584 1125 jenshelp Japan AT T Jens No 25 Mori Building 1 4 30 Roppongi Minato ku Tokyo 106 Rep of Korea S T Lee International Co Room 1805 Jung Dong Bldg 15 5 Jung Dong Choong ku Seoul Tel 82 2 752 4597 Fax 82 2 773 2948 stlee Philippines TIN Asia Inc 22 Filmore St Greenhills San Juan Met...

Page 493: ...511 210 3211 Fax 5511 210 3838 msshelp Tel 1 809 295 4777 Fax 1 809 295 7909 rtbassett Canada Unitel Communications Inc 2005 Sheppard Ave East Suite 215 Willowdale Ontario M2J 5B4 Tel 1 416 502 1740 Fax 1 416 490 3633 cndahelp Chile EasyMail Chile S A Marchant Pereira 605 Providencia Santiago Tel 562 274 0072 Fax 562 235 7529 helpchile Colombia ComWare Calle 99 Numero 11 A 32 Santa Fe de Bogota D ...

Page 494: ...eru Limatel Conquistadores 396 OF 305 Lima 27 Tel 5114 411319 Fax 5114 410830 limatel Uruguay EasyMail S A Yaguaron 1225 11100 Montevideo Tel 598 2 92 01 27 Fax 598 2 92 01 14 elsuruguay or mvdsales Venezuela ComWare La Urbina Edificio Mulimar Piso 3 Calle 5 con Calle 8 Caracas Tel 582 242 5144 5122 Fax 582 242 4216 comwarehelp Tel 595 21 20 8290 Fax same as phone paraguayhelp ...

Page 495: ...access numbers You will access AT T Mail in the US and internationally from over 160 countries To receive the detail interna tional access numbers call AT T international customer service mentioned in Appendix A Australia Country Wide Access Number 61 13 1136 Charges Local call Speed Standard 2400 V 22 9600 V 32 MNP5 Script AT T Mail Direct installed in Zaurus Canada 200 cities via DATAPAC service...

Page 496: ...S M WAIT 900 REDI ACCESS Packet X 25 For a listing of REDI ACCESS telephone numbers for each state in the U S check your AT T Mail User s Guide DELAY 50 SEND 1 M WAIT 300 OR __ SEND 1 set 21 0 M DELAY 10 SEND 1 attmail M WAIT 300 Welcome OR COM DELAY 10 SEND 0 M DELAY 20 SEND 0 M WAIT 450 Name SEND 0 USERID M WAIT 300 Password SEND 0 ATTPASS M WAIT 900 word OR OR ion IFGOT 2 SKIP 7 IFGOT 1 SKIP 4 ...

Page 497: ...R 0 SEND 0 1 M WAIT 900 word OR IFGOT 2 SKIP 2 SEND 0 SECPASS M WAIT 900 LAS Local Access Service In the following script substitute A with the LAS ID and C with the LAS password DELAY 50 SEND 5 M M M DELAY 50 SEND 0 c M DELAY 50 SEND 0 A C M WAIT 400 Welcome DELAY 10 SEND 0 M DELAY 20 SEND 0 M WAIT 450 Name SEND 0 USERID M WAIT 300 Password SEND 0 ATTPASS M WAIT 900 word OR OR ion IFGOT 2 SKIP 7 ...

Page 498: ...ses the Information Services menu Pressing 1 CR for AT T Mail skips lines2 lines down Pressing anything else skips lines1 lines down SEND t seconds string Sends string with t seconds tenths of a second delay before every character is sent Use 0 for t seconds for no delay Quotes are required but not sent SKIP lines Transfer control lines down unconditionally WAIT t seconds string 1 Wait for string ...

Page 499: ...242 ...

Page 500: ...243 Terminal Introduction 245 Using Terminal 251 Troubleshooting 258 ...

Page 501: ...244 ...

Page 502: ...tion service and to transfer data via phone lines between your unit and a personal computer For example Terminal makes it possible to link your unit with a computer at home or the office using ordinary telephone lines or to download receive information from public or private subscription databases Introduction T his section describes how to use the unit s Terminal to communicate with other compute...

Page 503: ...K Modem settings The modem settings are as follows Port Select 15 pin CE FM4 or PC Card Line type Telephones use either tone or pulse dialing Normally push button phones use tone dialing and rotary phones use pulse dialling but not always Select Tone or Pulse Contact your telephone company if unsure Redial Sets the number of redial tries if a connection is not made on the first attempt number is b...

Page 504: ...here are other hard ware and software requirements For more information contact your local Sharp dealer Hardware Flow Control Provides enhanced data flow control for high speed greater than 2400 bps communications Modem String Used to input commands for initializing the modem To use it touch the Modem String checkbox first When using the CE FM4 you do not have to set this field NOTE You can restor...

Page 505: ...ea code if required If calling from a private PBX telephone system you may need to dial 9 or some other number to get an outside line before dialing a required number PBX outside line connection usually has a delay If the modem dials continuously part of the number may be lost Insert a comma in the number to instruct the modem to pause when dialing For example 9 555 1212 5 Touch the Speed bps butt...

Page 506: ...etting displays and Configura tion has two Parameters that can be set Name Name of the dialing entry Number Phone number to dial Speed bps Transmission speed in bits per second Parity Simple form of transmission error checking Data Bits Size of each data character transmitted 8 or 7 bits Stop Bits Signals sent to indicate the end of each transmitted character Emulation Type of computer terminal em...

Page 507: ...cond Shift In Out Switch to distinguish between accented and unaccented alphanu meric characters 7F Code Conversion Switch to interpret transmission code as a delete or backspace in 7 bit data Auto Repeat Repeat key function for press and hold Send LF after CR Adds a line feed to a sent carriage return Receive LF after CR Adds a line feed to a received carriage return Wrap Around Moves characters ...

Page 508: ...ommunicate To make a call 1 Touch TOOLS and select Terminal 2 Select the entry you want to call 3 Touch LOG ON to dial the number A message indicates when a connection is made with the other modem If the other modem answers but no connection is made due to a setting mismatch or other problem or if a connection is made but garbled characters are displayed press ON to discon nect and try again If yo...

Page 509: ...onnection but do not see any characters on the display when you enter text or you see double characters change the local echo setting for the entry turn it on or off You must unlock your unit before selecting a secret entry Hanging up When you want to disconnect you must log off from the remote computer BBS and information services have specific log off procedures that you should follow Do not jus...

Page 510: ...uld set it up just prior to the call Receiving a call In addition to making outgoing calls your unit can also receive calls from other modems when set to auto answer To receive a call 1 Touch TOOLS and touch Terminal twice 2 Select a blank entry field touch SETUP and then select Dial Setting 3 Enter a name for the expected caller or a general name such as Answer Leave the Number field blank Make s...

Page 511: ...en connected to another computer via modem anything you enter on your keyboard is sent to the remote computer and anything received appears on your display Terminal mode commands add power and flexibility to the process To use ASCII control codes while your unit is on line touch UTILS select Use Control Code or press NEW ENTRY then press the appropriate key To interrupt a process touch UTILS and s...

Page 512: ...rvice provider for details Data transfer Your unit can upload send Documents entries in either ASCII text format or using XMODEM file transfer protocol It can also upload Filer folders and PC Files using XMODEM and upload and download text and files using either ASCII or XMODEM For a Documents entry the number of downloaded pages is displayed as in Index View Once down loaded open the entry in Det...

Page 513: ... example RJOHN JOHNSON means send the text JOHN JOHN SON W Wait in tenths of a second For example W2 would introduce a 0 2 second pause before the next step Insert a carriage return after a character string Must be included at the end of lines where you would normally press ENTER Use SMBL to enter To use auto log on 1 Touch TOOLS and touch Terminal twice 2 Select the entry that requires auto log o...

Page 514: ...ypad as required The keypad is a movable window so you can move it to any place on the display Touch the top left corner and drag the keypad to the new location The keyboard is inactive when the keypad is displayed 3 Touch Cancel when you have finished with the keypad Terminal display setup Your unit s display is smaller than most standard personal computers Terminal SETUP lets you select a Fixed ...

Page 515: ...lect Dial setting and check the configuration data speed parity data bits stop bits Wait a short period of time and try again Problem Remote system answers but received characters are garbled User message None Cause Incorrect setting for parity data bits or stop bits Excessive line noise Solution Change the settings for parity data bits or stop bits Wait a short period of time and try again Troubl...

Page 516: ... connected to a phone line Solution Check phone number in Dialing Directory Check Line Type setting in Modem Setup Check modem is correctly con nected to your unit and a telephone line Problem Auto log on fails User message There was a problem during auto log on Check the auto log on commands Cause Incorrect auto log on settings Excessive line noise Solution Check auto log on settings Make sure S ...

Page 517: ...y as shown in the table below Hex Value Key ASCII Code 00 NUL 01 A SOH 02 B STX 03 C ETX 04 D EOT 05 E ENQ 06 F ACK 07 G BEL 08 H or BS BS 09 I or HT 0A J LF 0B K VT 0C L FF 0D M or CR 0E N SO 0F O SI 10 P DLE 12 R DC2 14 T DC4 15 U NAK 16 V SYN 17 W ETB 18 X CAN Hex Value Key ASCII Code 19 Y EM 1A Z SUB 1B or CANCEL ESC 1C FS 1D GS 1E RS 1F US ...

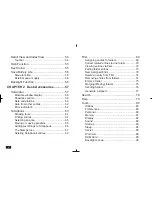
Page 518: ...261 Index Spreadsheet 263 CompuServe 266 Pager Access 268 AT T Mail 270 Terminal 271 ...

Page 519: ...262 ...

Page 520: ...ing mark ups 66 Column charts 63 Creating 14 61 Deleting 66 Exchanging X and Y axes 64 Formatting 62 Legend 64 Line charts 63 Marking up 66 Pie charts 63 Saving 64 Stacked column charts 63 Column row 51 Adjusting sizes 59 Displaying labels 51 Column and size 59 Adjusting 59 Common Questions Answers 15 Copy data 12 42 Create chart 14 61 Create worksheet from Existing worksheet 25 Template 10 24 D D...

Page 521: ...0 35 37 40 Labels 28 Numbers 27 F Formulas 8 30 35 37 40 Types of 37 Font style 53 Changing 57 Full screen 50 Functions 33 Built in 33 G Gridlines Displaying 64 K Keyboard 21 Shortcuts 21 L Legend 64 Displaying 64 M Menu functions 79 Moving data 12 42 P Pop up menu 21 Q Questions and answers 15 Quick start 5 R Recalculation 31 ...

Page 522: ...ing with PC File 73 Unit to unit 70 U Undo 12 13 28 W Word list 29 Worksheet 23 Changing worksheet name 68 Characteristics 48 Clearing data 46 Creating 6 10 23 Deleting 69 Duplicating 68 Editing guidelines 40 Formatting 48 Inserting and deleting data 47 Linking 74 Navigating 13 Protecting 52 Sorting 18 Starting 23 24 25 Transferring 70 Workspace Setting size 75 Z Zooming 50 ...

Page 523: ...etting news 134 Reading news 134 Setting up folders 133 F Filter 124 127 129 143 Turning off 143 Forum 126 Creating messages 130 Downloading files 128 Filtering messages 129 Getting responses 125 Going to 131 Posting messages 131 Reading messages 127 129 Responding to messages 129 I IN tray 124 125 134 136 Index 113 114 141 M Mail 121 Creating 121 130 Filtering 124 Forwarding 125 142 Getting 124 R...

Page 524: ... Forum 136 Mails 135 Q Questions Answers 115 Quick Start 109 R Recipient 114 125 Selecting 114 125 S Setting up 110 119 136 Address book 130 Connections 119 Modem 110 118 Settings 118 Connections 119 Modem 118 Starting 109 117 SENT tray 124 135 136 T Tray IN 124 125 134 136 OUT 112 121 122 123 130 136 SENT 124 135 136 Troubleshooting 139 V View 141 ...

Page 525: ...r Access 180 D Detail view 173 Reading incoming messages 153 173 F Filter 164 178 Applying 178 Deactivating 178 Folder 165 IN 165 OUT 165 SENT 166 I IN folder 165 Index 164 M Menu functions 185 Message Addressing 151 167 Attachment 165 168 Composing 151 166 Converting to Documents 175 Copying and moving 180 Deleting 176 177 Getting 152 173 Modifying 169 Transmission 172 Reading 153 173 Screen 164 ...

Page 526: ...ying 160 Setting up 159 171 Password screen 158 PIN 168 Preferences 180 Q Quick Start 147 R Recipient 167 Selecting 167 Redial 162 S Seaching messages 153 179 Secret password 158 SENT folder 166 Setting up 159 170 Address book 170 Modem 161 Paging service 159 171 Preference 180 Show All Pager messages 177 System diagram 148 T Troubleshooting 183 Tool bar 164 ...

Page 527: ...achment 211 I Internet 210 L Login script 199 M Mail basic 203 Message Addressing 206 Answering 224 Converting to Document 229 Creating 191 205 Deleting 228 Editing 212 Filtering 217 222 Finding 227 Forwarding 225 Receiving 193 214 Sending 192 Viewing 221 Modem setup 190 S Setting up 196 Address book 200 Starting AT T Mail Access 189 T Terminal 219 ...

Page 528: ...ging up 252 Making 251 Receiving 253 D Data transfer 255 Dial setting 247 H Hanging up 252 M Making a call 251 Modem 246 Setting up 246 Settings 246 O On line operations 254 R Receiving a call 253 T Terminal 251 257 Display setup 257 Emulation 257 ...

Page 529: ...272 ...

Reviews: