background image

Marking/unmarking entries as Secret

You can mark or unmark any entry as secret in Edit mode.

Open the application containing the 

entry 

you want to mark

as secret.

Display the entry in Edit mode.

Press [MENU] twice to display the PREFERENCES menu,

select SET SECRET STATUS.

If the Organizer has been locked (which hides all secret

entries), an entry which has just been marked as secret
will be hidden together with all other secret entries (for
more information, see the next section).

Accessing Secret entries

Entries marked as secret are not shown in any of the
Organizer’s display modes when it is locked, and cannot be
accessed using any of the search methods. To be able to recall
and access secret entries, the Organizer 

must first

 be unlocked.

1. 

Press [MENU] twice to open the PREFERENCES menu.

Select SECRET

The 

Secret submenu appears.

2. Select LOCK ORGANIZER.

A window appears, prompting you to enter your password.

3. Enter your password exactly as you registered it.

4. Press [ENTER].

If the password is correct,   disappears.

If the password is incorrect, a message appears indicating this.

5.

*

After unlocking the Organizer, access any entry you want

using the normal procedures.

If you forget your password, you will not be able to unlock

the Organizer and access your secret information. If this

happens, you will have to delete all entries marked as

secret. For a full explanation of what to do if this occurs,

see p.66.

You can press [SEARCH] and then press [2nd]


 to find

only those entries marked as secret once the Organizer

is unlocked (see p.27).

Automatic Relocking

Once a password has been registered, even if you unlock the

Organizer using the procedure above, the Organizer will

automatically lock itself each time you turn it on. This automatic
relock feature protects your secret data in case you forget to

relock the unit. The feature remains in effect as long as a

password is registered. To disable this feature, the password

must be deleted once the Organizer is unlocked.

85

Summary of Contents for ZQ-570

Page 1: ...ement Creating Your Own Database Memo Desk Accessories 5 19 33 45 51 55 Expense Function 67 Features Utilities for Added Power 73 Using the Optional Peripherals 77 Personalizing Your Organizer 83 Appendices 89 Separate the Quick Reference Guide from this manual and keep for reference ...

Page 2: ...della direttiva 89 336 EEC come emendata dalla direttiva 93 68 EEC H cTicar oraoq aurfi avranorcpcpiverat ort anatr sctS rev o nT rn Eupoxai r Evwsqs 89 336lEOK 6nw o tcavovtop6s au s oupxhnpc 3qK ax6 qv o6q a 93 68 EOK Este equipamento obedece as exigencias da directiva 89 336 CEE na sua versa0 corrigida pela directiva 93 68 CEE Este aparato satisface las exigencias de la Directiva 89 336 CEE mod...

Page 3: ... important data Data may be lost or altered in virtually any electronic memory product under certain circumstances Therefore SHARP assumes no responsibility for data lost or otherwise rendered unusable whether as a result of improper use repairs defects battery replacement use after the specified battery life has expired or any other cause SHARP assumes no responsibility directly or indirectly for...

Page 4: ...anagement 33 44 The Calendar Application The Schedule Application The To Do Application The ANN Anniversary Application Chapter 4 Creating Your Own Database 45 50 The Tel Application The User File Application Customizing the User File Application Chapter 5 Memo 51 54 The Memo Application Chapter 6 Desk Accessories 55 66 The Calc Calculator Application The Clock Application Chapter 7 Expense Functi...

Page 5: ...nformation Locking the Organizer Changing the Calendar Display Format Selecting the Large Font View Appendices 89 93 A Resetting the Organizer All reset operation B Battery Replacement General guidelines Replacing the operating batteries C Specifications Index 94 98 ...

Page 6: ... any sharp pointed object or even your fingernails to press them Sharp or hard object can scratch and damage the Organizer Make sure it is adequately protected when carried with other objects Do not carry it loose in a bag or briefcase find a pocket or secure compartment within your bag Clean the Organizer only with a soft dry cloth Do not use solvents Do not carry the Organizer around in your bac...

Page 7: ...know to set up and begin working with your Organizer from installing the batteries to initialization The chapter also includes a labeled illustration of the parts of the Organizer and basic explanation of its key features from the keyboard to the display and its symbols 5 ...

Page 8: ...e various functions Numeric keypad Used for operating the calculator and entering numbers in other applications Application keys Starts appropriate applications Arrow cursor keys Keyboard For entry of characters and commands 4 pin cable jack Connects 4 pin Communication Cable for other interfaces etc 6 ...

Page 9: ...ing battery compartment Holds operating battery Getting the Organizer Up and Running Installing the batteries 1 Set the battery replacement switch on the bottom of the Organizer to REPLACE BATTERIES the red dot becomes visible 2 Slide off the operating batteries cover 3 Insert two batteries on top of the ribbon tab making sure they are positioned correctly according to plus and minus polarity as s...

Page 10: ...ect The following message will appear Do you really want to initialize the organizer s memory this will delete a l l data 3 Press Y to initialize the Organizer The message Working Please Wait appears while the Organizer proceeds with the initialization procedure The LCD Contrast screen then appears 4 If the display is not clear press A and v or PREV and NEXT until the display is satisfactory 5 Pre...

Page 11: ...hat your new organizer can do T r a c k your expense Store hundreds of names and numbers When 7 and 4 are displayed hidden entries can be displayed by pressing NEXT IV I or PREV A I Press ENTER once or twice to proceed with the Name Field Setting Name Field Setting 1 Press NEXT j NEXTto turn to next page o p t i o n ll or 2 a n d press ENTER Od L ast r F i r s t 0 First Last 2 Press l or 2 to sele...

Page 12: ...phone number etc Then press VI The cursor moves to the ADDRESS field 4 Enter your full address Press J to move the start of the next line in ADDRESS 5 Press ENTER when done Press ENTER to proceed with setting up the Clock as described below or CANCEL to quit the User Setup procedure Setting the Clock In order for the Calendar Schedule To Do and other time based applications to work correctly the b...

Page 13: ... preceding single digit hours and minutes with 0 Press PM to select PM or AM for AM then press ENTER A new screen then appears to inform you that the basic setup procedure is now completed and the Organizer is ready for use However there are other areas in which you can customize your Organizer further by setting various options You can select START ORGANIZING to start using the Organizer Or you c...

Page 14: ... it and then press ENTER Or select numbers l 4 directly Setting the Password and Locking the Organizer The Organizer allows you to keep selected entries in your Organizer secure by locking it with a password Once the Organizer is locked the Secret entries cannot be accessed until the Organizer is Unlocked for which the password must be given Select this option if you want to define a password and ...

Page 15: ...and v or PREV and NEXTI Press ENTER when you are satisfied with the contrast Turning the key beep on and off The Organizer can be set to make a sound a beep each time q a key is pressed This may help you to know whether a key has been pressed properly The default setting is on indicated by a musical symbol on the bottom of the display You can use the TOOLS menu to change the setting 1 Press MENU t...

Page 16: ...light unnecessarily Since the Backlight drains power from the operating batteries excessive use of the Backlight will significantly reduce your battery life Continuous use of the Backlight will over time lead to gradual loss of brightness 14 Operations on the Organizer are performed using applications The Organizer s Calendar and Schedule for example are applications that record and display time r...

Page 17: ...r can press y to display the special pop up one month calendar You can use PREV and jNEXTj to select the desired month then the arrow keys to select thedesired date You may find this more convenient than typing in the date directly since the pop up calendar also shows the days of the week The keyboard The Organizer s keyboard has a standard layout just like a typewriter or computer Q works just li...

Page 18: ...et cannot be accessed without first entering the password and unlocking the Organizer see p 65 EDIT The entry on the display can be edited Q All alarms are enabled When this symbol is not shown the alarm sound for any alarms that have been set is disabled see p 65 2 The key sound is on see p 13 q This symbol appears at the bottom of the display while the backlight is on Built in help and other mes...

Page 19: ...st page of help for corresponding topic is displayed If you make a selection from the above menu the display that appears will resemble the following example Uie INEXTI o r In this type of display pressing NEXT takes you to the next page of the display pressing PREV takes you to the previous page and pressing CANCEL takes you back to the HELP INDEX menu From time to time during normal operation th...

Page 20: ...ation simply press the corresponding key located on the top of the keyboard Each time you press CALENDAR SCHEDULE TO DO ANN CLOCK TEL USER FILE MEMO EXPENSE DAlLY or CALC CONV the selected application will appear Any application already being displayed will be hidden whenever a new application is selected You can always return to another application at the exact point where you left off simply by ...

Page 21: ...eing created by pressing NEW The Calc except Conversion function and Clock applications do not have Index View or Edit modes Index mode Other operations NEW Creates a new entry for the current application in Edit mode EDlT Displays the currently selected entry and edits it Edit mode DELI Deletes the currently selected entry PPEVI Displays any previous subsequent entries not Nucrl shown Al VI Selec...

Page 22: ...any previous subsequent entries not shown Displays any information not shown within an entry Tl Displays field names Under the View mode of Tel application m a m q andm will be shown to indicate office phone number fax number home phone number mobile phone number and pager number respectively Other operations CANCEL ENTER I PRW Nucrl When user cancel to edit the data in edit mode Do you really wan...

Page 23: ... 3 Press A to move to the CATEGORY field Press y to 22 4 5 6 7 8 9 10 11 12 13 14 15 open the pop up menu Select BUSINESS Press v to move to the LAST NAME field Type in the last nameJones Press v to move to the FIRST NAME field Type in Pat Press v to move to the COMPANY field Type in SHARP CORPORATION Press v to move to the TITLE field Type in SUPERVISOR Press v to move to the OFFICE field Type in...

Page 24: ...ion Fields Most applications divide the display into field boxes The number of fields in each application varies as do the types of fields The different types of field include text fields a date field time fields and pop up fields There are also a few special types of text fields In the User Files application you can define the names of fields according to your preferences see p 48 You can type an...

Page 25: ...s as_ Typing in text Typing in text is simple and straightforward The Organizer s keyboard layout is just like the keyboard on a typewriter or computer Letters lower case and upper case Any of the standard letters A to 2 can be entered by pressing the corresponding key All letters will normally appear in lower case Hold down either of the Q keys while pressing letter key s to enter upper case lett...

Page 26: ... as _ Typing in text Typing in text is simple and straightforward The Organizer s keyboard layout is just like the keyboard on a typewriter or computer Letters lower case and upper case Any of the standard letters A to 2 can be entered by pressing the corresponding key All letters will normally appear in lower case Hold down either of the keys while pressing letter key s to enter upper case letter...

Page 27: ...typing Insertion mode is the Organizer s default setting indicated by the triangle cursor 4 To switch to the overwriting mode press INS Any text you enter will replace the existing text The cursor appears as 1 in the overwrite mode To switch back to the previous mode press INS again Deleting text If you make a mistake while entering text use the following keys to erase the incorrect text then ente...

Page 28: ...he bottom of the display The arrows indicate the direction you need to scroll in Press v or A to scroll the information one line at a time Finding Specific Entries iu Your Organizer There are a number of ways that you can locate entries and information in your Organizer One is to scroll between entries using the NEXT and PREV keys Others are as follows Using index mode Index mode gives you a listi...

Page 29: ...RCH The Search window will open COllTIIItlIllG 2 Enter the name you are looking for For example type SUMMER select the appropriate application sn ALL F 0 SCHEDULE C i N XERS RY la 0 TEL i J FILE I 0 EXPENSE 4 Press ENTER when ready To search only secret entries see p 85 press 2nd to check the SECRET ONLY item The Organizer will now display the first entry that contains the keyword that you entered...

Page 30: ... 1 Press CALENDAR The calendar appears in the preset view S M T W T F S I aI 2 Select a day using the arrow keys then press ENTER to see the Weekly Calendar 4 Press ENTER again to return to P Month Calendar For more information about using the Calendar application see p 33 You can open the Calendar menu by pressing MENU to select the desired Calendar view 28 ...

Page 31: ...ou want to delete the selected entry 4 Press VI or N to cancel the deletion Deleting entries using the application menu 5 Select SELECTED DATA A warning message appears asking if you are sure you want to delete the entry 6 Press VI or N to cancel the deletion You can also make deletions using the application menu The DATA DELETION submenu allows you to do this flexibly and easily 1 Open the desire...

Page 32: ...ge applications To avoid these problems you should check the remaining memory space regularly and free up space 2 Press any other application key to close the Clock when necessary by deleting out of date entries The Check application Memory function allows you to easily check the amount of free memory available in the Organizer and thus avoid the For a full explanation of the Clock application see...

Page 33: ...ures such as the display contrast An illustration and summary of the TOOLS menu including page references where full explanations can be found are provided below Shows the amount of free and used memory see p 30 Adjusts the contrast of the LCD I TOOLS 0 CHECK MEMORY 0 LCD CONTRAST O KEY SOUND ON WRLARM SOUND ON display see p 13 Turns the key beep on and off see p 13 Sets the alarm sound on and off...

Page 34: ...endar that can display details of any month from January 1901 to December 2999 The Calendar also provides you with a convenient way of accessing viewing and making new entries in the Ann Schedule and To Do applications The Calendar provides you several Calendar views l Month Calendar 2 Month Calendar Weekly Calendar and Weekly Graph You can also jump to Daily Calendar just by pressing DAlLY key 1 ...

Page 35: ...day by pressing PREV or NEXT then moving the cursor to a specific date to select it for display in another Calendar view However another convenient way of selecting a date that is not on the display is using SPECIFIC DATE in the Calendar application menu 1 Press MENU in any Calendar view and select SPECIFIC DATE 0 GO TO TODAY 0 SPECIFIC DATE I DClTR DELETION A date entry window appears I I 2 Enter...

Page 36: ...tered as secret can be accessed in 1 Month and P Month views The Calendar application menu Select the Calendar view see I CALENDAR MENU I I P 39 The Schedule Application The Schedule application allows you to enter appointments times and dates for meetings parties and events and also to set an alarm to sound prior to or at the time of a scheduled entry This makes it easy to organize your entire da...

Page 37: ... Six different types of repeating events include Daily Repeats on the following one or more days for events that span consecutive days Work day The same as Daily repeat but excludes weekends Weekly Repeats the same day each week for regular weekly events Bi weekly Repeats every other week Monthly by day Repeats the same day of each month for example the first Tuesday for regular monthly events on ...

Page 38: ...larm A Schedule alarm can be set to remind you of scheduled events such as appointments and meetings You can set an alarm for any entry that has a starting time set Alarms that have been set will sound even if the unit is turned off Enter the following information with an alarm set for one hour in advance Date July 16 1999 Time 1 OO 2 00 pm Description Lunch with Sally 1 Press NEW to open a new en...

Page 39: ...etting a Schedule alarm A Schedule alarm can be set to remind you of scheduled events such as appointments and meetings You can set an alarm for any entry that has a starting time set Alarms that have been set will sound even if the unit is turned off Enter the following information with an alarm set for one hour in advance Date July 16 1999 Time 1 OO 2 00 pm Description Lunch with Sally 1 Press N...

Page 40: ...s before the entry s starting time If the start time of a Schedule entry is before 0 14 and 2nd ALARM are pressed 0 00 will be set as the alarm time automatically Clearing a set alarm To clear an alarm that has been set for a Schedule entry display the entry in Edit mode then press 2nd ALARM The Schedule application menu Selects the Calendar view see p 33 I SCHEDULE MENU 0 VIEWS 0 GO TO TOIMY 0 SP...

Page 41: ...eld which you can define yourself and assign as you like can be used to manage tasks according to project the personnel involved in them or any other groupings you wish to define Assigning priority to entries In the PRIORITY field you can enter a number 1 5 or letter N which then indicates the importance of a task or project Enter the following information Description Make comparison chart Priorit...

Page 42: ...e an entry for which the due date has passed Findincl entries using Index mode 1 Go to Index mode There are two Index modes in the To Do application One is TO BE DONE and the other is DONE You can press TO DO or select VIEWS from the application menu to switch between TO BE DONE index mode or DONE index mode Index mode in the To Do application can show entries based either on their priority level ...

Page 43: ... 2 Display the date you want to check If the entry you want to check off is not displayed press v until it appears 3 Go to the entry you have completed and press SMBL The entry is checked off and marked with and the completed entry will be kept under today s day El Check off entries in the To Do application 1 Select the entry in Index mode 2 Press Q SMBL The entry is checked off and marked with Th...

Page 44: ...f existing categories 1 From the To Do application s Indexview press MENU 11 2 Select CATEGORIES The CATEGORIES window appears 3 Make the desired change to the category list 4 Press ENTER to store the edited entry The To Do Index view appears ISetsthelndexsortingorder Lby date or by priority see P 40 Selects the specific entries for deletion see p 29 When you edit a category name any To Do entries...

Page 45: ...keep track of annual events such as wedding anniversaries and birthdays of friends relatives and business associates Once entered the dates of annual events are displayed on the Calendar giving you plenty of warning to prepare for them well in advance every year The Ann application menu 43 ...

Page 46: ...he Tel Application The Tel application stores the names telephone numbers and addresses of business clients companies personal friends and so on Updating the Category list You may wish to edit the names of existing categories 1 From the TEL application s Index view press MENU q 2 Select CATEGORIES The CATEGORIES window appears 3 Make the desired change to the category list 4 Press ENTER to store t...

Page 47: ...can assign a kind of field order for each category Two kinds of field order Personal and Business are available for you to choose 1 Press TEL to open the application 2 Press MENU select FIELD ORDER The FIELD ORDER window appears 3 Assign a kind of field order for each category 4 Press ENTER when you have finished Or CANCEL to cancel the changes For the details of the Tel application see p 19 The T...

Page 48: ...ffice or Name and Home will be displayed on the Index mode of the Tel application Modifying the Field Order The Tel application also allow you to define the field order of each category You can assign a kind of field order for each category Two kinds of field order Personal and Business are available for you to choose 1 Press TEL to open the application 2 Press MENU select FIELD ORDER The FIELD OR...

Page 49: ...in the following four ways Category You can update the category list File name You can rename the file name of your choice Fields You can change the field names Sorting order You can specify which fields are used to sort the entries displayed in Index mode Updating the Category list You may wish to edit the names of existing categories 1 From the USER FILE application s Index view press MENU 2 Sel...

Page 50: ...d fields and change them as required Enter the new name up to 12 characters The name can contain letters numbers and symbols 4 Press ENTER when you have finished Or CANCEL to cancel the changes and leave the fields as they were Modifying the index display and the Index sort order You can set up a different Index format for the User File application designating two fields you want to display in Ind...

Page 51: ... 4 Press v and use the same methods to enter INDEX 2 5 Press ENTER when you have finished or CANCEL to I cancel the changes The Index view reappears with the entries sorted by Name The User File application menu iUSER FILE MENU W 0 ChTEGORIES 0 FILE NAME I 0 FIELD NMIE kl INDEX ITEMS 0 DATR DELETION Opens the CATEGORIES window so you can edit category names Edits the File name see P W Edits the fi...

Page 52: ... capability in a hand held device Before reading this chapter be sure you have read Editing Techniques in Chapter 2 More advanced editing features are used in this chapter Be sure you have a good understanding of the Organizer s basic editing procedures before beginning to use the Memo application Creating documents 1 Press MEMO to open the application I The Memo application opens in Index mode 1 ...

Page 53: ...rt a carriage return to move to the This shouldn t cause any delay in ourproduction schedules next line The default setting for the Organizer s word wrap function is on There may be times however when you want Sincerely to turn off the word wrap function This can be done for each individual entry It is not necessary to press cl at the end of each line The unit will automatically perform word wrapp...

Page 54: ...The Memo application menu L Selects specific entries for deletion see p 29 53 ...

Page 55: ...and percentage calculations The Calc application also provides support for cost selling price markup and margin calculations In addition it has a powerful currency units conversion function There are four different display options in the Calc application and the application always opens with the most recently used display To move between the different calculator modes either press CALC CONV repeat...

Page 56: ...When any of the following situations occur the error indicator E is displayed and calculations are suspended Press CCE to clear the error The integer part of the calculation result is exceeds 12 digits a rough calculation is obtained Example 4567890123 x 458 2 08295789608 is displayed with E which indicates that the rough result is 2 08295789608 x 10 ie 2 082 957 896 080 The integer part of the ca...

Page 57: ... Move to the field whose new value you want to calculate and press to indicate the missing value 3 Press SOLVE The new value is calculated and appears in the field Setting the number of decimal places When using the Cost Selling price Markup and Cost Selling price Margin calculator you can choose whether the number of decimal places used in calculations is 0 or 2 In either Cost Selling price Marku...

Page 58: ...ferent currencies and units of length area volume mass temperature and energy There are 3 conversion index groups The first index group comprises eight currency conversion screens in which you can set and edit the exchange rates yourself The other two index groups have preset conversion factors so conversion can be performed right away Changing the currency rate 1 Press CALCCONVJ several times unt...

Page 59: ...l the changes If you want to set another currency exchange rate start again from step 1 above You can use each currency conversion at any time once it has been set You can press ENTER to switch between conversion display and conversion index display For example you want to find out how many liters there are in 10 gallons 1 Press CALClCONv several times until the Conversion index display appears 2 ...

Page 60: ...arkup or I I If you want to know how many gallons are equal to 10 liters press A4 B key to change from gal I to gal I The method of converting currencies units of length area mass temperature energy is the same as above The following table shows the conversion factors that are preset in your Organizer L c o n v e r s i o n c a l c u l a t o r mode Sets the number of decimal places see p 57 60 ...

Page 61: ...l time When you first use your Organizer the default Local city is set 1 as New York To change this setting 1 Press MENU to open the Clock menu 2 Select CHANGE LOCAL CITY A list of cities appears The currently selected city is at the top of the list The cities are listed in alphabetical order by country and then by city name 3 Type the first letter of the name of the country in which the target ci...

Page 62: ...op up calendar Use PREV and NEXT to display the desired month then A v 4 b to move to the current day You can set any date from January lst 1901 to December 31 st 2099 5 Move to the TIME field enter the current time and press AM or PM for AM or PM Be sure to enter a 0 before a single digit hour or minute entry 1 Press MENU to open the Clock menu 6 Press ENTER or CANCEL to cancel the changes 2 Sele...

Page 63: ... selected World city appears at the top of the list 3 If the city you want to select as your World city is on the list select it and then press proceed from step 6 below If not type the first letter of the country containing the target City A list of cities appears Just as for the LOCAL CITY list all cities in this list are in alphabetical order according to country name Use PREV and NEXT to displ...

Page 64: ...eparately you can simply disable the Organizer s DST feature itself which then applies to all cities within the Organizer When these cities switch back to DST you can simply re enable the feature without having to change any city s entry 1 Press MENU to open the Clock menu 2 Select ENABLE DST 3 The current DST setting enabled or disabled is indicated by a tick Select ENABLE DST to change the setti...

Page 65: ... organizer is on Q at the bottom of the display indicates that any alarm that is set will sound at the appropriate time There may be times when you do not want to hear any of the set alarms You can disable all Schedule and Daily alarms sound easily with a single operation 1 Press MENU three times to open the TOOLS menu 2 Select ALARM SOUND ON The Q disappears from the display All alarm sounds are ...

Page 66: ...ou to see the total expenses for a single day or for a certain period Entering Expense Record 1 Press EXPENSE to open the application The Expense application opens in Index mode 2 Press NEW A blank form opens in Edit mode EXPENSE CATEGORY I PERSONAL DATE rvD Y Ii i 1999 q AIIOUWT I 0 m PBVliEHT TWE 3 Enter the date in the order of month day year Type in the date 08101999 or press y use PREV and NE...

Page 67: ... Press l 4 toselect Select TO BE SUBMITTED 9 Press A to move to the Category field Press AJ to select the desired category Press l 8 to choose item Select BUSINESS PAWEHT TYPE 1 0 Press ENTER to store the entry The message Stored appears briefly The entry is now stored and displayed in view mode EXPENSE A U G 10r1999 ITUE 1 0 0 0 0 AMEX r l Car rental at A B C RENTAL SERVICE TO BE SUBMITTED Press ...

Page 68: ...izing expense records for a specific date To summarize all records in the Business category for AMEX on Aug 151999 for example 1 Press EXPENSE to open the application 2 Press MENU to open the Expense menu 3 Select EXPENSE REPORT 4 Press YJ to select BUSINESS 5 Press v to move to the Period field Enter the From date or the To date Type in 08151999 6 Move to the Payment Type field Press y to select ...

Page 69: ...to the Status field and select TO BE SUBMITTED amount for the specified period is calculated and displayed AUG 1791999 Entering and changing category and payment type settings In the CATEGORIES and PAYMENTTYPE reference lists there are 12 types of categories and 8 types of payments You can change the order of these existing categories and payment types or use another name or enter some new names 1...

Page 70: ...Expense application menu I L L Selects the Expense Repott function Selects the specific entries for deletion see p 29 71 ...

Page 71: ...cut copy or paste blocks of text using the keyboard The first step in cutting copying and pasting is to select the block of text you want to work with Text that has been cut or copied is stored on the unit s internal clipboard Only one block of text can be stored in the clipboard at a time and it will remain there until a new block of text is cut or copied There is no limit to the number of times ...

Page 72: ...ced with the pasted text Thus you can easily replace one block of text with another by highlighting it before pasting Copying or Moving Entries The CUT COPY PASTE operations provide a quick convenient way for you to copy or move an entire entry to another location Entries have to be in the same file and same application 1 Select an entry that you want to copy or move in Index mode 2 Press 2nd CUT ...

Page 73: ...get the selected symbol The symbol window closes and the selected character is entered at the current cursor position 5 If the symbol you just selected is an accent mark 0 A or Type the letter for which you want that accent mark to be used When you next open the Symbol menu the character you selected will be selected again as the default The Organizer automatically displays the ten characters most...

Page 74: ...complish a broad range of tasks It has the flexibility to connect to other Organizers and transfer data to desktop computers using data transfer facilities which are accessed through the PERIPHERALS menu This chapter provides descriptions and examples to get you up and running quickly with these powerful features The Peripherals Menu d I 7 7 ...

Page 75: ...ansfer modes When transferring data from other models only entries in a mode application supported on the ZQ 570 Organizer can be sent Transferring between two ZQ 570 Organizers Data can be transferred directly between two ZQ 570 Organizers via a 4 pin cable Single entry or all the entries in an application can be transferred in the Schedule To Do Ann Memo Expense Tel and User File applications Th...

Page 76: ...DATfi 0 SEND fiLL THIS MODE 0 GET DATh RPPEND rl 4 5 I 1 Select GET DATA APPEND On the sending Organizer select the entry you want to send Press MENU four times to open the PERIPHERALS menu Select UNITTO UNIT A submenu opens 6 Select SEND SELECTED DATA The selected entry is transferred and appended to data in the appropriate application Transferring all entries in an application All entries in Sch...

Page 77: ...Open the cover of the 4 pin cable jack on each Organizer 3 Plug each end of the cable into the cable jack on each Organizer To conserve battery power disconnect the cable as soon as a transfer is completed Transferring data 1 Turn on both Organizers 2 On ZQ 570 Organizer open the application in which you want to receive the data Only data corresponding to the application selected on the receiving ...

Page 78: ... Organizer and space will be shown in the receiving unit instead l After transferring a Memo record to ZQ 570 from other SHARP Organizer nothing will be shown on the Title field of the receiving unit There are some other restrictions See p 82 Exchanging Information with a Personal Computer Using SHARP s optional Organizer Link software and cable package or certain third party software packages you...

Page 79: ...nserve battery power always press ON to leave the PC Link mode as soon as you have finished transferring data Points to Remember when Using Peripherals When using Organizer Link software deslgned for an Organizer other than ZQ 570 Organizer Data in applications that are not compatible with the Organizer Link cannot be transferred When receiving data from an Organizer other than ZQ 570 Organizer or...

Page 80: ...e Organizer offers a level of security for its entries and operations lt is to define particular entries within various applications as secret and then enable the LOCK ORGANIZER option within the PREFERENCES menu Setting the Owner Information The Owner Information comprises your name address and number 1 Press MENU twice to display the PREFERENCES menu 2 Select OWNER INFORMATION The cursor starts ...

Page 81: ...s that upper and lower case letters are treated differently The password SHARP for example is different from the passwords Sharp or sharp Choose your password carefully If you forget your password there is no way to bypass the Secret function or enter a new password without losing all data marked as Secret It is strongly recommended that you use a password that you will always be able to remember ...

Page 82: ...u to enter your password 3 Enter your password exactly as you registered it 4 Press ENTER If the password is correct Q disappears If the password is incorrect a message appears indicating this 5 After unlocking the Organizer access any entry you want using the normal procedures If you forget your password you will not be able to unlock the Organizer and access your secret information If this happe...

Page 83: ...sage appears indicating that the Organizer is unlocked Entries that were marked as secret can be accessed until a new password is registered to register a new password use the procedure for Registering a password on p 84 If you forget your password If you have forgotten your password the only way you will be able to delete it and continue to use the Secret function Is to delete all entries marked ...

Page 84: ... 1 Press MENU twice to open the PREFERENCES menu Select CALENDAR SETUP A submenu appears The current setting is indicated by a tick 2 Select the desired calendar view Almost all Organizer applications require a date to be entered at some point The default format for date entry is MM DD YYYY where MM is the two digit month DD is the two digit day of the month and YYYY is the four digit year The dat...

Page 85: ...t selection is marked with a tick displayed information easier to read if it is changed into a large font view 3 Select the desired format In general all of the Organizer s applications except Clock Calc Calendar Expense Report applications share this feature If you want to change the screen to be a larger font view just press A A key on the keyboard If you want to resume it press A again 88 ...

Page 86: ...ndition that makes the unit inoperative may erase some or all of the data stored in memory Do not use anything breakable anything with a sharp tip or anything that might break to press the RESET switch All reset operation If the unit still fails to function after it has been reset using the procedure above you will have to reset it using a slightly more complicated procedure 1 While pressing and h...

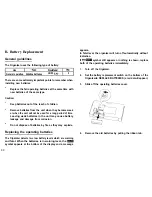
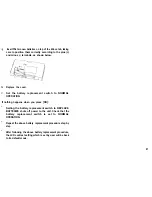
Page 87: ...it may cause battery leakage and damage from corrosion Do not dispose of batteries by fire as they may explode Replacing the operating batteries appears In fatal level the organizer will turn off automatically without indication If them symbol still appears or nothing is shown replace both of the operating batteries immediately 1 Turn off the Organizer 2 Set the battery replacement switch on the b...

Page 88: ...NORMAL OPERATION If nothing happens when you press ON Setting the battery replacement switch to REPLACE BATTERIES shuts off power to the unit Check that the battery replacement switch is set to NORMAL OPERATION Repeat the above battery replacement procedure step by step After following the above battery replacement procedure the LCD contrast setting which is set by user will be back to its default...

Page 89: ... entry in the name field 12 characters entry in the number field Maximum data size per entry User interfaces Other features Calculator digits 12 Functions Addition subtraction multiplication division constant square root percent memory calculation cost sell margin calculation cost sell markup calculation conversion calculation Clock Crystal oscillation frequency Accuracy Display information Time s...

Page 90: ...fe may vary depending on usage Operating batteries Approx 70 hours 2 3 months of 1 hour continuous use per day Continuous display at an ambient temperature of 25 C 77 F Dimensions Open 139 W x 146 D x 17 H mm 5l W x5 qD x2l H Closed 139 W x60 D x 20 1 H mm 51532 W x3 32 0xzqHj Weight 17Og 0 38lb including batteries Approx 65 hours 2 months of 1 hour continuous use par day Using the Backlight for 2...

Page 91: ... Working with blocks of text 25 C Calc ulator application 55 Date calculations 35 Calculations Examples 58 Performing 59 Date calculation 35 Conversion 58 Cost price margin calculations 56 Cost price markup calculations 56 Calendar application Setting up the initial display 87 Calendar view Daily 33 l Month 33 Selecting 34 P Month 33 Weekly 33 Caring for the Organizer 4 Categories To Do applicatio...

Page 92: ...3 Setting 67 Daylight Saving Time DST 64 Assigning to a city 64 Enabling disabling 64 Decimal point setting 57 Deleting All Secret entries 66 Single entries 29 Text 25 Using the application menu 29 Display Setting LCD contrast 13 Symbols 16 Display modes Edit mode 21 Index mode 20 View mode 21 E Edit mode 21 Editing Techniques 23 Editing Categories 42 Entries 23 Error indicator 56 F Fields 23 Fiel...

Page 93: ... Memo application 51 Memory check 30 Menu 14 Application 35 38 42 43 46 49 53 60 65 71 Peripherals 77 Tools 31 Modifying the Field Order 46 Moving Blocks of text 73 Entries 74 N New entries Making 22 39 51 67 0 Organizer Link 81 Overwriting text 25 Owner information lo 83 P Part names and functions 6 Password Deleting changing 86 Forgotten 86 Registering 84 Paste 26 74 PC Link 81 Peripherals menu ...

Page 94: ...64 Date format 87 12 90 LCD contrast 13 Local city 61 Weekly format 87 Owner Information lo 83 Password 84 Schedule alarms 37 World city 63 Setting up Calendar s initial display 87 For data transfer 78 80 Simple Calculation in Amount Field 68 Symbols On the display 16 Entering 75 T Tel application 45 To Do application 39 Tools menu 31 Transferring data 78 Between two ZQ 570 Organizers 78 With an O...

Page 95: ...U Unlocking the Organizer 85 User File application 47 W Weekly format 87 Weekly view 33 Word wrap 52 World city 83 98 ...

Page 96: ...SHARF Electronic Organizer Quick Reference Guide ...

Page 97: ...FIELD ORDER in the Tel application In the User File application press MENU and select FILE NAME FIELD NAME or INDEX ITEMS to configure the file name the field names and the index Search Function This function allows you to locate any previously stored entry by using partial or specific data as a search key 1 2 3 4 5 Press SEARCH Type in any word stored in the entries you want to find Press m to op...

Page 98: ...d CUT to paste it elsewhere If you make a mistake and want to restore the original entry simply press CANCEL Anniversary Application Makes it easy for you to keep track of annual events such as wedding anniversaries and birthdays of friends relatives and business associates Press ANN then NEW and Anniversary by Date appears Enter the month and day then the description and press ENTER to store Or p...

Page 99: ...hen enter the new rate Press Ir to move to the currency name field and make the desired changes Press ENTER when you have finished or CANCEL to cancel the changes Performing a conversion 1 Press CALC CONv several times until the CONVERSION mode appears 2 Press ENTER to open the conversion index display 3 Press PREY NEXTJ W or m to selectthe desired item 4 Press ENTER 5 Enter the amounts you want t...

Page 100: ...tment Press ENTER to store the entry To Do Application Used for organizing and tracking tasks and objectives assigning them priorities and assigning a category to each entry making it possible to access them selectively in a variety of ways Press TO DO and then press NEW Enter a description of the task then press m Enter DUE DATE which is the date by which the task must be completed Move to the PR...

Page 101: ...n Edit mode the entry to which you want to add the copied or cut text and press 2nd PASTE Clock Makes it possible not only to know the correct time and date in your area but also to know the time in other cities or any region around the world Setting the time and date 1 2 3 4 5 6 Press MENU to open the Clock menu SelectADJUSTTIME DATE Select the TIME SYSTEM field Press I or b to indicate whether y...

Page 102: ...ersonal and business finances etc 1 2 3 4 5 6 7 6 9 10 Press EXPENSE Press NEW Enter the date in the order of month day year Press v to move to the AMOUNT field Enter the expense amount using up to ten digits including up to two decimal places Move to the PAYMENT TYPE field Press m to select the desired paymenttype Press l 6 to select the desired item Move to the MEMO field and use the keyboard to...

Page 103: ...d as soon as possible 1 2 3 4 5 6 7 Turn off the Organizer Set the battery replacement switch on the bottom of the Organizer to REPLACE BATTERIES A red dot will appear Slide off the operating batteries cover Remove the old batteries by pulling the ribbon tab Insert the two new batteries on top of the ribbon tab taking care to position them correctly according to the plus and minus terminals Replac...

Reviews: