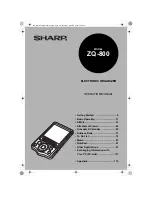
background image

MODEL

ZQ-800

ELECTRONIC ORGANIZER

OPERATION MANUAL

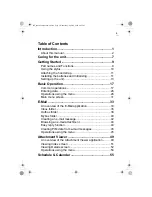
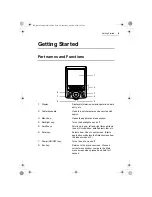
• Getting Started .................................. 9
• Basic Operation............................... 17
• E-Mail................................................ 33
• Attachment Viewer .......................... 49
• Schedule & Calendar ...................... 55
• Address Book .................................. 71
• To Do List......................................... 79
• Memo ................................................ 87
• NotePad............................................ 91
• Other Applications .......................... 97
• Exchanging Information with 

Your PC (PC-Link)

• Appendix ........................................ 115

.......................... 113

e00_zq800(introduction)60.book  Page 1  Wednesday, April 24, 2002  8:45 PM

Summary of Contents for ZQ-800

Page 1: ...asic Operation 17 E Mail 33 Attachment Viewer 49 Schedule Calendar 55 Address Book 71 To Do List 79 Memo 87 NotePad 91 Other Applications 97 Exchanging Information with Your PC PC Link Appendix 115 113 e00_zq800 introduction 60 book Page 1 Wednesday April 24 2002 8 45 PM ...

Page 2: ...e00_zq800 cover 60 fm Page 2 Wednesday May 1 2002 4 53 PM ...

Page 3: ...usable whether as a result of improper use repairs defects battery replacement use after the specified battery life has expired or any other cause SHARP assumes no responsibility directly or indirectly for financial losses or claims from third parties resulting from the use of this product and any of its functions such as stolen credit card numbers the loss or alteration of stored data etc The inf...

Page 4: ...he basic operation for using keys Buttons and keys Operation buttons on the screen These buttons such as OK button for executing operation are indicated as OK etc The application icons such as Address are indicated as Address etc Alphabetic Q key SHIFT key Escape key Scroll keys Scroll up key Scroll down key Scroll left key Scroll right key Enter key Power ON OFF key Menu key Backlight key e00_zq8...

Page 5: ...26 Main menu screen 31 E Mail 33 An overview of the E Mail application 33 Inbox folder 35 Outbox folder 38 Mybox folder 40 Creating an e mail message 42 Browsing an e mail attachment 44 Easy reply function 44 Creating PIM data from e mail messages 45 Operations using the menu 45 Attachment Viewer 49 An overview of the Attachment Viewer application 49 Viewing Index screen 51 Viewing Details screen ...

Page 6: ...dress Book entry 75 Changing the sorting order 75 Creating an e mail message from an Address Book entry 77 Operations using the menu 78 To Do List 79 An overview of the To Do List application 79 Creating a new To Do List entry 81 Viewing a list of To Do List entries 82 Viewing the details of a To Do List entry 83 Modifying a To Do List entry 83 Changing the sorting order 84 Operations using the me...

Page 7: ... Other Applications 97 Calculator 97 Clock 99 Customizing the unit Settings 103 Checking memory information Memory 107 Setting a password Secret 107 Entering owner information 111 About Add on software 112 Exchanging Information with Your PC PC Link 113 PC software set up 113 Appendix 115 Resetting the unit 115 Battery replacement 116 Specifications 118 Index 121 Troubleshooting 123 e00_zq800 intr...

Page 8: ...6 e00_zq800 introduction 60 book Page 6 Wednesday April 24 2002 8 45 PM ...

Page 9: ...t Make sure it is adequately protected when carried with other objects Do not carry it loose in a bag or briefcase Put it in a pocket or secure compartment within your bag Clean the unit only with a soft dry cloth Do not use solvents Do not carry the unit in your back pocket as it may break when you sit down The display is made of glass and is very delicate This product is not waterproof Do not us...

Page 10: ...8 Caring for the unit e00_zq800 introduction 60 book Page 8 Wednesday April 24 2002 8 45 PM ...

Page 11: ... Scroll keys Scrolls up down left and right through items icons Scrolls index detailed text view etc 6 Enter key Selects item Goes to next screen Starts application or displays the Details screen from the Index screen etc 7 Power ON OFF key Turns the unit on and off 8 Esc key Returns to the previous screen Closes a current menu window Jumps to the Main menu screen when pressed and held for 1 secon...

Page 12: ...talling removing the batteries 12 PC Link port Connects PC Link cable 13 RESET button Resets the unit 14 Stylus Use to tap buttons and input data Using the stylus This unit comes equipped with a telescopic stylus Remove and extend the stylus as illustrated below To replace it insert it until the pointed end locks into place 9 14 13 12 11 10 e00_zq800 introduction 60 book Page 10 Wednesday April 24...

Page 13: ...rough the loop as illustrated below Installing the batteries and Initializing Installing the batteries 1 Slide the battery replacement switch on the back of the unit to the REPLACE BATTERIES position 2 Open the battery compartment lid then gently remove it e00_zq800 introduction 60 book Page 11 Wednesday April 24 2002 8 45 PM ...

Page 14: ... While pressing and holding press and release the RESET button on the back of the unit using the stylus or similar object A message appears 2 Release 3 Highlight OK by pressing and press or tap OK Note The following data will be lost when the batteries are replaced or extremely low It is recommended to copy important data to the Mybox folder See page 34 50 E Mail messages in the Inbox folder E Mai...

Page 15: ...ep 1 until you tap the target at the bottom right of the screen 3 Tap Q followed by P on the tablet keyboard according to the instructions displayed on the screen Adjusting the LCD contrast After adjusting the touch panel the Contrast screen appears 1 Press or tap icons on the screen to adjust the LCD contrast 2 Tap NEXT Setting the CLOCK After setting the LCD contrast the Time Date Setting screen...

Page 16: ... Press adjust the hour by pressing then press 3 Press adjust the first digit of the minute by pressing then press 4 Press adjust the second digit of the minute by pressing then press 5 Press select AM or PM by pressing then press The AM PM menu does not appear if you have selected 24hr for format 6 Press After setting the above press Turning the unit on and off 1 Press to turn the unit on 2 If you...

Page 17: ... automatically turn off to save the battery For details on setting the Auto off function see page 104 Adjusting the Auto off function Restarting the unit will restore the most recently used screen to the display when the resume function is turned on Restarting the unit while an entry is edited will restore that entry to the display when the resume function is turned on e00_zq800 introduction 60 bo...

Page 18: ...16 Getting Started e00_zq800 introduction 60 book Page 16 Wednesday April 24 2002 8 45 PM ...

Page 19: ...les These techniques can be applied to all of the applications Pressing keys and tapping buttons icons and tablet keys You can operate the unit by pressing keys on the unit and selecting commands from menus The unit can be operated by pressing the keys or tapping on screen with the stylus To open an application on the Main menu screen The Main menu screen displays all major applications This outli...

Page 20: ...u screen Main menu screen Entering characters This section explains general data entry techniques used to edit an existing entry or create a new one in each application The unit has two types of keyboards tablet keyboard and on screen keyboard The Tablet keyboard You can input alphabet letters commas and periods by tapping the tablet keyboard The keyboard corresponds to a QWERTY keyboard The On sc...

Page 21: ...character to the left of the cursor 6 Carriage return Starts a new line 7 Inserts a space Symbols Tap SMBL to display the symbol keyboard Select the symbol display containing the desired symbol by tapping or then tap on it The unit automatically displays the 18 characters most recently selected On screen keyboard Tablet keyboard 1 2 3 4 5 6 7 Close box Tap here to return the keyboard to the previo...

Page 22: ...een appears 2 Select the desired word or phrase by pressing and press Note You can quickly find a word or phrase by typing it in the Find field Adding a new word or phrase 1 Tap Words Phrases The Words and Phrases screen appears 2 Tap New The Enter Word Phrase screen appears 3 Enter the word or phrase you want to store 4 Tap SAVE The field Most applications divide the display into field boxes The ...

Page 23: ... text Working with a block of text is sometimes easier than working with individual characters Selecting text 1 Drag the stylus over the entire text you want to work with in the Edit screen of an application The selected text is highlighted 2 You can now perform the following operations on the highlighted text Note While the text is selected Pressing deletes the text Entering a character deletes t...

Page 24: ... to see the details of the entry The Edit screen allows you to modify an existing entry Name of the application Category menu See page 23 Scroll up down Operation buttons Close Scroll buttons Save Saves the modified data Close Tap this box to cancel the modification Data Field name Scroll buttons e00_zq800 introduction 60 book Page 22 Wednesday April 24 2002 8 45 PM ...

Page 25: ...s of menus available in the present screen See page 26 Tapping the operation button ex New executes the command ex creating a new entry Pressing returns to the Main menu screen Refer to the description of the respective application regarding the screen opened by pressing Selecting a Category In the All category all entries are displayed You can limit the entries displayed by selecting other catego...

Page 26: ...e page 30 If you do not set a category the category becomes UNFILED by default You can also set a category by pressing and selecting Categorize You cannot categorize an entry into more than one category Operations for pop up menu radio buttons and check boxes When you carry out a certain operation screens that contain pop up menu radio buttons and check boxes may appear for selecting settings For ...

Page 27: ...ous page are as follows 1 Highlight a check box or a radio button by using Press Or Tap the box or the button The selected item is turned on or 2 Highlight OK by using and press or tap OK to store the selected setting The new setting will be activated Or Press or tap Cancel to cancel the selected setting The former setting will continue to be active In selecting a radio button you can select only ...

Page 28: ...entry you want to modify 2 Tap Edit The Edit screen of the highlighted entry appears 3 Modify the entry 4 Press or tap SAVE to store the modification If you press or tap the close box a confirmation message appears asking you if you really want to throw away all of the changes To cancel the modification highlight OK by pressing and press or tap OK Operations using the menu Operations using the men...

Page 29: ...or outside of the menu window to return to the previous screen If the menu window consists of two pages the 1 2 page is displayed when you press To display the 2 2 page press again Copying and moving text Select the text at first Then press and select the following commands by pressing Then press Cut Cuts the selected text Copy Copies the selected text Paste Pastes the text that you have copied or...

Page 30: ...Index screen highlight the entry you want to delete by pressing 2 Press 3 Select Data Deletion by pressing and press 4 Select Selected Entry by pressing and press The confirmation message appears before the entry is deleted 5 Highlight OK by pressing and press or tap OK The selected entry will be deleted If you press or tap Cancel the deletion is canceled Note The sub menus of Data Deletion differ...

Page 31: ... Details screens can be changed between Large and Small The default character size is set to Small 1 Press on the Address Book Index screen as an example 2 Select View Setting by pressing and press The Index View Setting screen appears 3 Highlight Font by using select the desired font size by pressing and then press 4 Highlight OK by using and press or tap OK The Index View Setting screen returns ...

Page 32: ...d press 5 Highlight OK by using and press or tap OK The secret status icon appears to the left of the close box Editing a Category You can classify entries into a category for easy review You can also rename an existing category PERSONAL and BUSINESS are default categories and you can use up to 12 categories Note Editing of categories in one application does not affect those in other applications ...

Page 33: ...ule alarm is set in the Schedule Calendar application Secret icon appears only when you lock the unit with a password Changing the Application menu The unit has three Application menu screens You can select the desired screen by using the application menu at the top of the screen 1 Press to turn the unit on 2 Tap the desired application menu Scroll up down Application icons Application menu Clock ...

Page 34: ...select Copy to My Menu by pressing then press A confirmation message appears asking you if you really want to copy the selected application icon to the My Menu screen Press or tap OK The selected application icon is now copied into the My Menu screen You can confirm it by displaying the My Menu screen Moving application icons on the screen You can move an application icon on the screen by performi...

Page 35: ...messages page 45 An overview of the E Mail application There are three main screens in the E Mail application Index screen you can check e mail messages for the Inbox Outbox or Mybox folder Details screen you can read e mail messages that are selected on the Index screen Edit screen you can create a new e mail message or edit an existing one To use the E Mail application 1 Highlight the E Mail ico...

Page 36: ...E mail messages stored in the Inbox folder and any attachments that accompany the e mail message will be lost when the batteries are replaced or the batteries are extremely low It is recommended to copy important messages from the Inbox folder to the Mybox folder Inbox Outbox Mybox Press Press Press Press Press Press e00_zq800 introduction 60 book Page 34 Wednesday April 24 2002 8 45 PM ...

Page 37: ...ox Press or tap the close box Edit screen for a new e mail message Attachment screen Tap New Tap Del Delete the current e mail message Press or tap Press or tap Where an e mail message has one attachment Tap Reply Folder menu Close Message categories box Scroll up down Reply button New button Message icons Unread message counter Total message number Delete button e00_zq800 introduction 60 book Pag...

Page 38: ...ng the message categories box You can select a filter from All Unread and Read 1 Open the Index screen 2 Select the Inbox folder by pressing 3 Tap the message categories box The category list appears 4 Tap the desired category command The e mail messages are now limited according to the chosen category This icon Indicates Unread Unread with attachment Read Read with attachment Message has been rep...

Page 39: ... bottom of the Details screen This icon Indicates One attachment accompanies the e mail message Tap this icon to view the contents of the attachment Several attachments accompany the e mail message Tap or to view the contents of the respective attachments Close Scroll bar Attachment icon Delete button Reply button Contents Headers e00_zq800 introduction 60 book Page 37 Wednesday April 24 2002 8 45...

Page 40: ... following way Tapping Edit on the Index or Details screen displays the Edit screen for editing an existing message Press or tap the close box Press Index screen Details screen Edit screen for a new e mail message Tap New Tap New e00_zq800 introduction 60 book Page 38 Wednesday April 24 2002 8 45 PM ...

Page 41: ...egory from the following All Unsent Sent and Draft 1 Open the Index screen 2 Select the Outbox folder by pressing 3 Tap the message categories box The category list appears 4 Tap the desired category command The e mail messages are now limited according to the chosen category This icon Indicates Unsent will be sent in next PC Link connection Sent Draft Folder menu Close Message categories box Scro...

Page 42: ...associated with the Mybox folder are related to each other in the following way Close Scroll bar Edit button New button Contents Headers Delete button Press or tap the close box Press Index screen Details screen Edit screen for a new e mail message Tap New e00_zq800 introduction 60 book Page 40 Wednesday April 24 2002 8 45 PM ...

Page 43: ...categorize and press 2 Select Categorize by pressing and press The Select Category screen appears 3 Select the desired category by pressing and press The highlighted e mail message is now categorized The Mybox Details screen The Details screen of the Mybox folder is common to the Details screen of the Inbox or Outbox folder Folder menu Close Message categories box Scroll up down Message icons Dele...

Page 44: ...e Guide for details on the PC Link You can create new e mail messages to be sent To send the message you must transfer the message to your PC by using the PC software ZQ 800 Synchronization Software and Desktop Software and then send it from your PC You can also create draft messages 1 Open the Index or Details screen of the Outbox folder or open the Index screen of the Inbox or Mybox folder 2 Tap...

Page 45: ...you want to enter the recipient in the CC or BCC field move the cursor to the desired field before performing the above steps Tapping the TO field in the New Message screen also opens the Add Recipients screen You can quickly find the recipient you are looking for by typing it in the FIND field Tapping any part of the recipient s entry brings the full length e mail address into view Smart Addressi...

Page 46: ...older 1 Open the Index or Details screen of the Inbox folder 2 Press 3 Select Forward by pressing and press The Edit screen for forwarding appears 4 Enter the TO and Message field 5 Press or tap SEND Note You cannot forward the attachments that accompany the forwarded message Browsing an e mail attachment If a message in the Inbox folder has an attachment you can view it using the Attachment Viewe...

Page 47: ...ime creating PIM data Schedule Calendar Address Book To Do List Memo by copying the desired block of text from an e mail message to a PIM application 1 Open the Details screen of the Inbox Outbox or Mybox folder 2 Drag the stylus over the desired block of text of the e mail message and release the stylus The pop up menu appears 3 Select the application where you want to copy the dragged text by ta...

Page 48: ...l application Reply Creates a reply Forward Forwards message stored in the Inbox folder Add to Address Book Sender of the selected e mail message is added to the Address Book File to Mybox Selected e mail message in the Inbox or Outbox folder is copied to the Mybox folder Categorize Sets category to the e mail message selected in the Mybox folder View Setting On the Index screen selects a sorting ...

Page 49: ...in the TO CC or BCC field of the Edit screen for a new e mail message Enable BCC Enables you to enter the BCC field of the Edit screen for a new e mail message Save as Draft Saves the e mail message as a draft e00_zq800 introduction 60 book Page 47 Wednesday April 24 2002 8 45 PM ...

Page 50: ...48 E Mail e00_zq800 introduction 60 book Page 48 Wednesday April 24 2002 8 45 PM ...

Page 51: ...n on a format leading track tab font ruled line etc or images that the Attachment Viewer application does not support the file may be laid out incorrectly If an Excel file has more than one sheet each sheet is handled as a separate file Empty sheets are removed Title FileName field has sheet order and number with original filename Example 1 3 ZQ800 spec xls Type of the file Extension Type in the A...

Page 52: ...Inbox folder Mybox folder The attachments in this folder are linked with the e mail messages in the E Mail Mybox folder except when separated from messages and solely copied Note Attachments in the Inbox folder will be lost when the batteries are replaced or the batteries are extremely low It is recommended to copy important attachments to the Mybox folder The Index screens are related to each oth...

Page 53: ...ighted file appears Setting a category 1 On the Index screen of the Mybox folder highlight the attachment you want to categorize and press 2 Select Categorize by pressing and press The Select Category screen appears 3 Select the desired category by pressing and press The highlighted attachment is now categorized Close Scroll up down Property button Attachment icons Folder menu File name E mail sub...

Page 54: ... Tap this button to change the font size to large To return to original size tap this button again Cell width button Tap this button to change the cell width in three steps Cell height button Tap this button to change the cell height in four steps for the small font view mode and in three steps for the large font view mode Worksheet name button Tap this button to display the worksheet name Tapping...

Page 55: ... the attachment and e mail link icons By tapping these icons you can jump to the e mail message E Mail Details screen that links to the current file or if that E Mail Details screen links to another file you can jump directly to that file Attachment Viewer Details screen from the current file This icon Indicates Only the current file accompanies the e mail message Tap this icon to jump to the e ma...

Page 56: ...ail message that links to the attachment you want to delete using the Data Deletion menu in the E Mail application Selected Entry Deletes selected attachment in the Mybox folder All in this category Deletes all attachments in the selected category of the Mybox folder All in Mybox Deletes all attachments in the Mybox folder Property Displays properties of the selected attachment File to Mybox Selec...

Page 57: ... calendar with various icons indicating your schedule Daily Index screen you can view a schedule list on a specified date Weekly Index screen you can view weekly schedules Details screen you can view the details of the schedule entry Edit screen you can create a new entry or modify an existing entry To use the Schedule Calendar application 1 Highlight the Schedule icon on the Main menu screen by u...

Page 58: ... 1 second in any Index screen the screen returns to the Main menu screen Monthly Index screen Weekly Index screen Press Tap MONTH and select WEEK Daily Index screen Details screen Press Press Press Tap WEEK and select MONTH Tap DAY and select WEEK Tap WEEK and select DAY View mode menu Edit screen Tap Edit Press or tap a Schedule Calendar entry Press e00_zq800 introduction 60 book Page 56 Wednesda...

Page 59: ...e time 6 Select the Title field by pressing and enter the title 7 Select the Location field by pressing and enter the location 8 Select the Note field by pressing and enter the description 9 Tap SAVE to store the entry The Edit screen turns into the Details screen If you press or tap the close box a confirmation message appears asking you if you really want to throw away all of the changes To canc...

Page 60: ... 1 Select a month by tapping or Tapping chooses the next month and tapping chooses the previous month 2 Select a date by using 3 Press Or Tap the desired date If you press the setting is canceled and the pop up calendar is closed Pop up calendar Current day button Close Monthly calendar button e00_zq800 introduction 60 book Page 58 Wednesday April 24 2002 8 45 PM ...

Page 61: ... time minute by pressing then press 6 Press or tap OK to store the setting The Set Time screen turns into the Edit screen for the time If you press or tap Cancel the setting is canceled Creating an event entry A schedule that will last all day and requires no specified time can be entered as an event 1 Perform steps 1 to 5 in Creating a new Schedule Calendar entry on page 57 2 In the Set Time scre...

Page 62: ...he Details screen press About the Daily Index Screen Entries are listed in the order of event entry without a specified time and schedule Pressing displays the Details screen for the highlighted entry or tap an entry Tapping New opens the Edit screen for a new entry Tapping Edit opens the Edit screen for the selected entry Tapping Today opens the Daily Index screen for today Pressing selecting Go ...

Page 63: ...cific Date screen appears 2 Specify the month by tapping 3 Specify the date by using 4 Press or tap OK The Go to Specific Date screen turns to the Daily Index screen for the specified date To display today s schedule 1 Tap Today Or Press select Go to Specific Date by pressing and then tap Today followed by OK Selecting a Category In the All category all entries are displayed You can limit the entr...

Page 64: ...en for that date Tapping Today opens the Weekly Index screen on which today s date is highlighted Pressing selecting Go to Specific Date by pressing and then tapping Today followed by OK also opens the today screen Displaying schedules for another week To display the next or previous week s schedule 1 Press or tap to display the next week s schedule Press or tap to display the previous week s sche...

Page 65: ...ng a Category In the All category all entries are displayed You can limit the entries displayed by selecting other categories See page 23 Viewing a Monthly schedule 1 On any Index screen select MONTH from the view mode menu The Monthly Index screen appears About the Monthly Index Screen Pressing displays the Daily Index screen for the highlighted day or tap the day Current day Number of Number of ...

Page 66: ...previous month s schedule To display the schedule of a desired month 1 Press select Go to Specific Date by pressing then press The Go to Specific Date screen appears 2 Select the desired month by tapping or and press The Go to Specific Date screen turns into the Monthly Index screen of the specified month To display schedule of this month 1 Tap Today Or Press select Go to Specific Date by pressing...

Page 67: ...y Index screen for today Pressing selecting Go to Specific Date by pressing and then tapping Today followed by OK also opens the today screen Displaying a schedule of another date To display the next or the previous day s schedule 1 Press to display the next entry Press to display the previous entry To display the schedule of a desired date 1 Press select Go to Specific Date by pressing then press...

Page 68: ...e page 26 for the basic operations Setting a schedule alarm You can set an alarm for each Schedule Calendar entry 1 Open the Edit screen 2 Tap Alarm The Alarm screen appears 3 Check the alarm check box by pressing 4 Press and specify the reminder time in increments of ten by pressing or by tapping The figure counts up each time is pressed or is tapped and counts down each time is tapped Alarm chec...

Page 69: ...d and the Schedule Alarm screen will be displayed Press or tap OK to stop the alarm The Daily Index screen including that schedule will be displayed The title date and time for the appointment will be displayed in the Schedule Alarm screen If the appointment has been designated as secret only the date and time will be displayed Setting a reminder You can set a reminder for all day event entries in...

Page 70: ...s when you are using the Schedule Calendar application the menus available for the Schedule Calendar application appear in the menu window The menus unique to the Schedule Calendar application are explained as follows See page 26 for general operations using the menu Data Deletion Selected Day Deletes all entries for the selected day All this Month Deletes all entries for the selected month Delete...

Page 71: ... Calendar 69 View Setting Changes the font size on the Weekly Daily Index or Details screen Alarm Tone You can select a desired alarm type e00_zq800 introduction 60 book Page 69 Wednesday April 24 2002 8 45 PM ...

Page 72: ...70 Schedule Calendar e00_zq800 introduction 60 book Page 70 Wednesday April 24 2002 8 45 PM ...

Page 73: ...ree main screens in the Address Book application Index screen you can view Address Book entries displayed in alphabetical order by name Details screen you can review the details of an entry Edit screen you can create a new entry or modify an existing one To use the Address Book application 1 Highlight the Address icon on the Main menu screen by using 2 Press The Index screen appears If you press o...

Page 74: ...g a new entry Creating a new Address Book entry 1 In the Index or Details screen tap New The Edit screen for a new entry appears 2 Press to display the category menu Index screen Details screen Edit screen Press Press Tap Edit Tap SAVE Press Tap Edit Field names Save Category menu Scroll buttons e00_zq800 introduction 60 book Page 72 Wednesday April 24 2002 8 45 PM ...

Page 75: ... or D M Y can be selected by changing the Date Format setting in the Settings application Custom 1 Custom 2 Note 6 Tap SAVE to store the new entry The Edit screen turns into the Details screen If you tap the close box the new entry is canceled Viewing a list of Address Book entries 1 Open the Index screen Address Book entries are displayed in alphabetical order according to the name under a specif...

Page 76: ...d entry is not found the subsequent entry will be displayed Entries can also be recalled directly by using the first name or company by setting the 1st field using the menu command View Setting menu 3 Press when the desired listing or entry is recalled Note On the Details screen you can recall the entries only by the last name Selecting a Category In the All category all entries are displayed You ...

Page 77: ...ct the next entry and press to select the previous entry in alphabetical order under the same category Modifying an Address Book entry See page 26 for the basic operations Changing the sorting order You can change view on the Index screen 1 Press and select View Setting 2 Press Only the fields containing the data are displayed Scroll buttons New button Edit button Mail button Address field icons C...

Page 78: ...d between them default setting If you select First Name Last Name the first and last name will be displayed in the 1st field of the Index screen 5 Press to display the 2nd field menu 6 Select the desired item for the 2nd field of the Index screen by pressing and press 7 Press twice and press or tap OK to save the setting The screen returns to the Index screen If you press or tap Cancel the setting...

Page 79: ...E mail 2 field for the Address Book entry is filled Press If both the E mail 1 and E mail 2 field for the Address Book entry are filled Select the e mail address you want to send a message to from MAIL 1 or MAIL 2 by pressing and press The New Message screen appears with the TO field filled with the selected e mail address 3 Enter the CC SUB Message field and then press or tap SEND Where both the ...

Page 80: ...cation appear in the menu window The menu unique to the Address Book application is explained as follows See page 26 for general operations using the menu View Setting Selects the 1st and 2nd field view for the Index screen and changes the font size of the Index or Details screen e00_zq800 introduction 60 book Page 78 Wednesday April 24 2002 8 45 PM ...

Page 81: ... application Index screen you can view a list of To Do List entries Details screen you can confirm the details of an entry Edit screen you can create a new entry or modify an existing one To use the To Do List application 1 Highlight the ToDo icon on the Main menu screen by using 2 Press The Index screen appears If you press or tap the close box the Index screen returns to the Main menu screen e00...

Page 82: ...creen displays the Edit screen for creating a new entry Index screen Details screen To Be Done Press or tap the entry Press Tap Edit Tap SAVE Tap Edit Edit screen To Be Done Details screen Done You can check or uncheck the status check box by pressing e00_zq800 introduction 60 book Page 80 Wednesday April 24 2002 8 45 PM ...

Page 83: ...pop up calendar by using then press 6 Press select priority from 1 most important to 5 least important by pressing then press 7 Press and enter the description 8 Press or tap SAVE to store the new entry If you press or tap the close box a confirmation message appears asking you if you really want to throw away all of the changes To cancel the new entry highlight OK by pressing and press or tap OK ...

Page 84: ...ne or To Be Done by using the index item pop up menu 1 Tap the index item pop up menu 2 Tap the desired index item The desired index screen will be displayed Selecting a Category In the All category all entries are displayed You can limit the entries displayed by selecting other categories See page 23 Finish check box Scroll up down Priority Due date Category menu New button Edit button Index item...

Page 85: ...E field Checking a finished entry When you finish a To Do List task check the Finish check box If you do not check the box the To Do List entry is recognized as unfinished To check on the Index or Details screen 1 On the Index screen highlight the finished entry by pressing Or Open the Details screen 2 Tap check box DUE DATE will change to DONE DATE that has today s date Repeating the above proced...

Page 86: ...n and press 5 Press or tap OK to store the setting The screen returns to the Index screen If you press or tap Cancel the setting is canceled Note You can also change the font size on the Details screen by pressing and selecting View Setting on the Details screen Operations using the menu If you press when you are using the To Do List application the menus available for the To Do List application a...

Page 87: ...etes all Done entries in the To Do List application All To Do Entries Deletes all entries in the To Do List application View Setting Selects a sorting order for the To Do List entries by Date or by Priority on the Index screen and changes the font size on the Index or Details screen e00_zq800 introduction 60 book Page 85 Wednesday April 24 2002 8 45 PM ...

Page 88: ...86 To Do List e00_zq800 introduction 60 book Page 86 Wednesday April 24 2002 8 45 PM ...

Page 89: ...mo application 1 Highlight the Memo icon on the Main menu screen by using 2 Press The Index screen appears If you press or tap the close box the Index screen returns to the Main menu screen The three main screens are related to each other in the following way Tapping Edit on the Index or Details screen displays the Edit screen for editing an existing entry Index screen Details screen Edit screen f...

Page 90: ...x and Details screen 3 Press or tap SAVE to store the new entry If you press the new entry is canceled Viewing a list of Memo entries 1 Open the Index screen Memo entries are displayed by Title or by Date under in a specified category See page 23 SAVE button Title line Close Edit button New button Close Category menu Scroll up down e00_zq800 introduction 60 book Page 88 Wednesday April 24 2002 8 4...

Page 91: ...f a Memo entry 1 On the Index screen highlight the entry you want to confirm by pressing 2 Press Or Tap the desired entry The Details screen of the selected entry appears Press to scroll line Modifying a Memo entry See page 26 for the basic operations Changing the sorting order You can sort Memo entries by Title or by Date and change the font size on the Index screen 1 On the Index screen press Sc...

Page 92: ...ss or tap Cancel the setting is canceled Note You can also change the font size on the Details screen by pressing and selecting View Setting on the Details screen Operations using the menu If you press when you are using the Memo application the menus available for the Memo application appear in the menu window The menus unique to the Memo application are explained as follows See page 26 for gener...

Page 93: ...ng one To use the NotePad application 1 Highlight the NotePad icon on the Main menu screen by using 2 Press The Index screen appears If you press or tap the close box the Index screen returns to the Main menu screen The three main screens are related to each other in the following way Tapping New on the Index or Details screen displays the Edit screen for creating a new entry Details screen Index ...

Page 94: ...available in three sizes Draws a box whose line starts from the point where the stylus is in contact with the screen to the point where the stylus is released Draws a circle whose line starts from the point where the stylus is in contact with the screen to the point where the stylus is released Clears the screen 2 Draw a desired line with the stylus by using the tool box 3 Press or tap SAVE to sto...

Page 95: ...e or by Date under a specified category Selecting a Category In the All category all entries are displayed You can limit the entries displayed by selecting other categories See page 23 Category menu Scroll up down Edit button New button e00_zq800 introduction 60 book Page 93 Wednesday April 24 2002 8 45 PM ...

Page 96: ...ing order You can sort NotePad entries by Title or by Date and change the font size on the Index screen 1 On the Index screen press 2 Select View Setting by pressing and press The View Setting screen appears 3 Select the Title or Date radio button 4 Select the Small or Large radio button If you choose the Title radio button NotePad entries are listed in the order of numbers letters uppercase lower...

Page 97: ... NotePad application the menus available for the NotePad application appear in the menu window The menus unique to the NotePad application are explained as follows See page 26 for general operations using the menu Data Deletion All Notepad Entries Deletes all entries in the NotePad application Title Edits the title of the selected entry View Setting Selects a sorting order for NotePad entries by T...

Page 98: ...96 NotePad e00_zq800 introduction 60 book Page 96 Wednesday April 24 2002 8 45 PM ...

Page 99: ... Press The Calculator screen appears If you press on the Calculator screen the screen returns to the Main menu screen 3 Perform a calculation by tapping the numeric and mathematical symbol keys on the screen C Clears the current calculation Changes sign of number CM Clears the memory M Subtracts a number from the memory M Adds a number to the memory CE Clears the number entered last RM Displays th...

Page 100: ...8 25 The multiplicand becomes a constant 40 91 102 1 700 2 720 Percentage 200 10 9 36 200 10 9 36 20 25 Add on 200 200 10 200 10 220 Discount What is 500 after a 20 discount 500 20 or 500 20 400 Square root 25 9 4 Power 43 2 4 4 096 Reciprocal 1 8 8 0 125 Memory Summation 25 5 125 84 3 28 68 17 85 Total Temporary memory 14 3x2 x 52 35 Clear the memory 25 5 84 3 68 17 14 3 2 52 35 M 125 M 28 M 85 M...

Page 101: ...896 080 The integer part of a calculation result exceeds 24 digits The integer part of a numerical value in the memory exceeds 12 digits A number is divided by 0 Clock The Clock application allows you to check local and foreign city times and set daily alarms To use the Clock application 1 Highlight Clock icon on the Main menu screen by using 2 Press The Clock Local Clock screen appears If you pre...

Page 102: ...g and press 2 Type the first letter of the desired city on the tablet keyboard A list of cities that begin with that letter appears 3 Select the desired city by pressing and press Format 1 Highlight Format by pressing 2 Select the desired format by pressing 3 Press Local Clock screen Alarm Clock screen World Clock screen Press Press Timer Clock screen Press Press Press Press Press Press e00_zq800 ...

Page 103: ...ng then press 4 Press adjust the second digit of the minute by pressing then press 5 Press select AM or PM by pressing then press The AM PM menu does not appear if you have selected 24hr for format 6 Press After setting the above press If necessary tap the DST check box to adjust for daylight saving time Setting a world city time 1 Open the World Clock screen 2 Tap the world city box World Date DS...

Page 104: ...ess 4 Press adjust the first digit of the minute by pressing then press 5 Press adjust the second digit of the minute by pressing then press 6 Press select AM or PM by pressing then press The AM PM menu does not appear if you have selected 24hr for format in setting your local city 7 Press 8 Tap the Alarm on check box to turn on alarm If you want an alarm to sound on a daily basis tap the daily ch...

Page 105: ...tings application allows you to customize the various settings such as start up screen opening screen auto off function backlight function sound LCD contrast touch panel calibration time format and word completion feature To use the Settings application 1 Highlight the Settings icon on the Main menu screen by using 2 Press The Settings screen appears Start button Pause button Reset button e00_zq80...

Page 106: ...not when the unit is turned on 1 Highlight Opening by pressing 2 Select the On or Off radio button by pressing and press Adjusting the Auto off function To conserve the battery power the unit will turn itself off if it has not been used for a set number of minutes 1 Highlight Auto off by pressing and press 2 Select the desired auto off time by pressing and press Note In order to avoid accidentally...

Page 107: ...1 Highlight Contrast by pressing and press The Contrast screen appears 2 Press to adjust the LCD contrast 3 Highlight OK by pressing and press or tap OK The screen returns to the Settings screen 4 Tap OK to store the settings Adjusting the touch panel Calibration 1 Highlight Calibration by pressing and press 2 Tap the center of the target with the stylus The target moves to another position 3 Repe...

Page 108: ...ss or tap OK The screen returns to the Settings screen 6 Tap OK to store the settings Setting the word completion feature 1 Highlight Word Completion by pressing and press The Word Completion Settings screen appears 2 Set each item according to your preference To store a new word into the user dictionary 1 Tap Add Word to Dictionary The User Dictionary screen appears 2 Type the word or phrase you ...

Page 109: ...opy them to Mybox folder for each application The Memory application allows you to check the memory usage of each memory Checking the memory usage 1 Highlight the Memory icon on the Main menu screen by using 2 Press The Memory screen FLASH memory appears 3 Press to display the Memory screen RAM memory If you press or tap the close box the Memory screen returns to the Main menu screen Setting a pas...

Page 110: ...ication 1 Highlight the Secret icon on the Main menu screen by using 2 Press The Secret screen appears If you press or tap the close box the Secret screen returns to the Main menu screen Setting a password and locking the unit 1 On the Secret screen with Lock highlighted press or tap Lock The Lock screen appears 2 Enter a password within 20 characters Entered characters are displayed as Letters nu...

Page 111: ...ncorrect Press and re enter the password by performing steps 2 to 5 When you enter the correct password a dialog requesting you to memorize the password appears Press Locked is displayed briefly and the screen returns to the Main menu screen with displayed at the bottom of it Note When you set a password and the security function works locked status the following functions are carried out Hides en...

Page 112: ...an incorrect password a dialog box appears showing it is incorrect Unlocked is displayed briefly and the screen returns to the Main menu screen Locking the unit again On the Security screen with Lock highlighted press or tap Lock The unit is locked again Note The unit will automatically be locked again when the unit is turned off and then turned on Deleting the password 1 On the Secret screen with...

Page 113: ...elete all secret entries and the password in the following way 1 On the Secret screen with Lock or Unlock highlighted highlight Delete All Secret Data by pressing 2 Press A confirmation dialog box appears To cancel deleting all secret entries and the password press 3 Press Deleted is displayed briefly and the screen returns to the Main menu screen The unit returns to the status with no password Un...

Page 114: ...are ZQ 800 Desktop Software you can install Add on software from your PC to the unit Add on software will be saved in the Add on menu on the unit For details on Add on software refer to Software Guide e11_zq800 other 60 fm Page 112 Wednesday May 1 2002 4 23 PM ...

Page 115: ...onnect the supplied cable to the PC Link port of the unit 4 Turn on the unit and your PC The connection between the unit and your PC is automatically established and the unit is now ready to exchange data Note Press at any time to exit the PC Link mode If you leave the unit in PC Link mode more power is consumed from the batteries than usual and the Auto off function will not work To conserve batt...

Page 116: ...114 Exchanging Information with Your PC PC Link e00_zq800 introduction 60 book Page 114 Wednesday April 24 2002 8 45 PM ...

Page 117: ... to press the RESET button If the unit does not work properly after resetting it remove the batteries and wait for several seconds before replacing them Then press the RESET button All reset operation If the unit still fails to function after it has been reset using the procedure above or you have forgotten the password to be entered in the start up display you will have to reset it using a slight...

Page 118: ...immediately Should fluid from a leaking battery come into contact with your skin or clothes immediately wash with clean water If the unit will not be used for an extended period of time to avoid damaging the unit remove batteries and store in a safe place Do not leave exhausted batteries inside the unit Do not mix different types of batteries or partially used batteries Keep batteries out of the r...

Page 119: ...NORMAL OPERATION position 8 Turn on the unit and follow the setup procedures displayed See page 13 If nothing happens when you press Setting the battery replacement switch to REPLACE BATTERIES shuts off power to the unit Check that the battery replacement switch is set to NORMAL OPERATION Repeat the above battery replacement procedure step by step Note The following data will be lost when the batt...

Page 120: ...ze 2 5KB Average attachment size 30KB on PC User interfaces Pen touch screen and Tablet keyboard Other features Secret PC Link find function word completion feature words and phrase function Calculator Digits 12 Functions Addition subtraction multiplication division constant memory calculation Clock Crystal oscillation frequency 32 768 Hz Accuracy Average variance per day 2 seconds at 25 C 77 F Di...

Page 121: ...re of 25 C 77 F Replace batteries at least once every 2 months Backlight life Backlight life may vary depending on usage If the backlight is on for 10 minutes per day e g 1 minute 10 times a day the brightness will be reduced by half after 10 years at an ambient temperature of 25 C and 65 humidity This figure may vary depending on the surrounding environment Operating temperature 0 C to 40 C 32 F ...

Page 122: ...120 Appendix e00_zq800 introduction 60 book Page 120 Wednesday April 24 2002 8 45 PM ...

Page 123: ...y 41 51 Changing Application menu 31 Character size 29 Sorting order 75 84 89 94 Check box 25 Checking memory 107 Clock application 99 Copy 27 Cursor 20 Cut 27 D Daily schedule 60 Direct search 74 E E Mail application 33 Creating PIM data 45 Easy reply function 44 Forwarded message 44 Reply message 43 Smart Addressing 43 Exchanging information with your PC 113 F Field 20 Finding entries 28 Formats...

Page 124: ...lendar application 55 Schedule alarm 66 Screens and elements in applications 21 Details screen 22 Edit screen 22 Index screen 22 Secret application 108 Deleting all secret entries and the password 111 Deleting the password 110 Locking secret entries 108 Setting a password 108 Unlocking the secret entries 110 Setting a password 108 Setting up 13 Settings application 103 Stylus 10 T Text Copying and...

Page 125: ...ears on the display Reset the unit See page 115 Check the battery indicator status on the Main menu screen If it appears on the screen change the batteries A message notifying Not enough memory appears Delete unnecessary messages and entries See page 28 The device turns itself off You have not operated the unit for a certain period and Auto off function is activated See page 104 Check the battery ...

Page 126: ...e00_zq800 introduction 60 book Page 124 Wednesday April 24 2002 8 45 PM ...

Page 127: ...e00_zq800 introduction 60 book Page 125 Wednesday April 24 2002 8 45 PM ...

Page 128: ...SHARP CORPORATION PRINTED IN CHINA 02ETO 0LY85JS010111 85 JS01 011102 e16_zq800 h4 60 fm Page 128 Wednesday May 1 2002 4 30 PM ...

Reviews: