Thank you for choosing the Sharper Image Nose
Hair Trimmer. Please take a moment to read this
guide and store it for future reference.
INSTALLING BATTERIES
This device is powered by 2 AAA batteries
(included). To install:
•
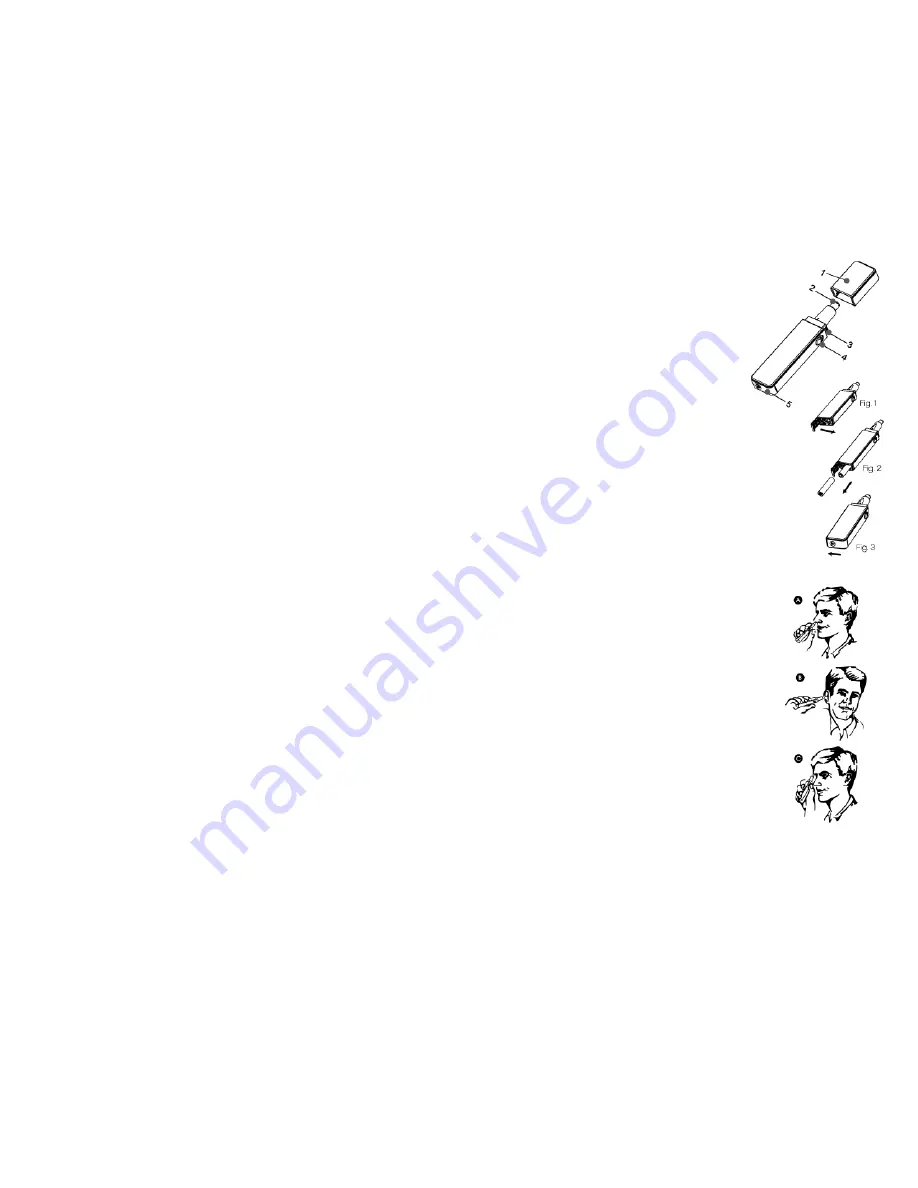
Press and slide the battery case cover to
the right to open. (See Fig. 1)
•
Insert batteries according to the(+) (-)
guides printed on the device (See Fig. 2)
•
Replace the battery case cover and slide
to the left to close. (See Fig. 3)
BUILT-IN LED GROOMING LIGHT
The nose hair trimmer features a bright LED
grooming light to assist with precision and
accuracy while trimming.
TRIMMING NOSE HAIR (FIGURE A)
Turn trimmer on and gently insert into nostril-do
not insert more than 1 cm. Use smooth circular
movements to remove hairs .
TRIMMING EAR HAIR (FIGURE B)
Turn trimmer on and gently insert into the outer
ear-do not insert further than 1 cm to avoid
damage to the eardrum. Carefully run trimmer
along all parts with unwanted hair.
TRIMMING EYEBROWS (FIGURE C)
Turn trimmer on and run slowly over hairs that
need trimming. Hair length is determined by the
distance between the cutting head and the skin.
PRODUCT FEATURES
1.
Blade guard cap
2.
High-grade steel cutting head
3.
1 LED Grooming Light
4.
On/Off switch
5.
Battery case cover
SAFETY WARNINGS
•
The nose hair trimmer is only
intended for trimming hair.
•
Do not use on children and
keep the device out of their
reach.
•
Do not leave unattended when
switched on.
•
Switch off after use and
replace blade guard cap.
•
Remove batteries if you will
not be using for an extended
period.
•
Do not rinse or submerge
in water.
WARRANTY / CUSTOMER SERVICE
Sharper Image branded items
purchased from SharperImage.com
include a 1-year limited replacement
warranty. For Customer Service,
please call +1 (877) 210-3449.


