background image

8

9

Setting Clock Time:

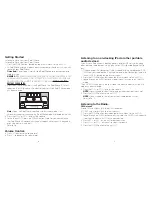
1. Press TIME SET button located on the top panel of unit, HOUR will be flashing. 

Press the SET+ / SET - button to select hour. 

2. Press TIME SET button again, MINUTE will be flashing. Press the SET + / SET - 

button to select minute. 

3. If the time showing is not correct, please press the TIME SET button again to 

repeat steps 1 and 2. 

Setting and Using the Alarms:

Setting Alarm1 or Alarm2 (Individually)

1. Press the AL1 /  AL2 button on the unit, the al1 or al2 icon will appear on the 

display to indicate which alarm is activated.

2. Press the AL SET button, HOUR digit will begin flashing. Press the SET + / SET 

- button until the desired hour is displayed.

3. Press the AL SET button again, MINUTE digits will begin flashing. Press the 

SET + / SET - button until the desired minute is displayed.

4. Press the AL SET button again to exit the alarm setting mode or the display will 

stop flashing after 5 seconds to indicate the alarm is set.

5. Toggle through the AL MODE button until the corresponding LED light 

illuminates next to the wake mode of your choice: iPod/iPhone, Radio, or Beep 
tone.

6. When the alarm is sounding, press the POWER button on the unit to turn the 

alarm OFF. The alarm will automatically sound the next day at the same time.

7. To STOP the alarm from sounding the next day, press the AL 1 / AL 2 button 

to the OFF position. The al1 or al2 icon will disappear on the LCD display to 

indicate the alarm is disarmed.

Setting Alarm1 and Alarm2 (Together)

1. Press the AL 1 / AL 2 button on the unit, the al1 and al2 icon will appear on the 

display to indicate BOTH alarms are activated.

Note:

 You cannot change the alarm time when BOTH are selected. 

If you need to change the alarm time for either alarm, follow step 1 under 

“Setting Alarm1 or Alarm 2” (Individually).

2. Toggle through the AL MODE button until the corresponding LED light 

illuminates next to the wake mode of your choice: iPod/iPhone, Radio or Beep 

tone. Both al1 and al2 must wake to the same mode.

Note:

 To wake to iPod/iPhone, your iPod/iPhone must be properly docked in 

the unit or it will default to beep tone wake mode.

3. When the alarm is sounding, press the POWER button to turn the alarm OFF. 

The alarm will automatically sound the next day at the same time.

4. To stop the alarm from sounding the next day, press the al1 / al2 button to 

the OFF position. The al1 and al2 icons will disappear on the LCD display to 

indicate the alarms are disarmed.

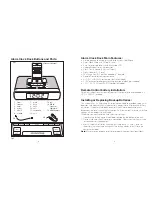
Refer to Fig. 2.

Snooze Operation:

Press the SNOOZE/NAP bar after the alarm sounds. The alarm will be silenced 
and return 9 minutes later. Snooze can be pressed several times during the 1 
hour alarm cycle. You may use this feature until you turn the alarm OFF.

Nap Operation:

The Nap function will wake you after a nap of 15, 30, 45 or 60 minutes – without 
the need to change your regular al1 or al2 settings.

1. If the system is playing audio, press the POWER button to OFF.

2. Toggle through the SNOOZE/NAP bar to the corresponding time of your 

choice: 15, 30, 45 or 60 minutes – it will show on the LCD display. 

3. Toggle through the AL MODE button until the corresponding wake mode icon 

of your choice lights up on the LCD display: iPod/iPhone, Radio or Beep tone.

4. The alarm will sound to wake you up after the selected number of minutes 

have passed.

5. To cancel the Nap timer, press the SNOOZE/NAP bar until OFF shows on the 

LCD display, which indicates the Nap function is disarmed.

Dimmer Control:

Press the DIMMER button (located behind unit) to adjust the backlight intensity of 
the LCD display.

Summary of Contents for EC-B145

Page 1: ...iera modificaciones o adaptación para habilitar su funcionamiento en cualquier país que no sea aquel para el que fue diseñado fabricado aprobado y o autorizado o la reparación de productos dañados por estas modificaciones no está cubierto bajo esta garantía LA GARANTÍA AQUÍ ESTABLECIDA SERÁ LA ÚNICA Y EXCLUSIVA GARANTÍA NO HABRÁ NINGUNA OTRA GARANTÍA EXPRESA NI IMPLÍCITA INCLUYENDO NINGUNA GARANTÍ...

Page 2: ...manual Do not use attachments not recommended by THE SHARPER IMAGE specifically any attachments not provided with the unit Never operate this appliance if it has a damaged cord plug cable or housing If it is not working properly if it has been dropped or damaged return it to THE SHARPER IMAGE Service Center for examination and repair Keep cord away from heated surfaces Never drop or insert any obj...

Page 3: ... settings in the event of a power failure After backup battery installation if a power failure does occur or if the AC cord does accidentally disconnect the display backlight will not remain lit but current time and alarm time settings will be temporarily maintained Otherwise you must reset the time and alarm settings 1 Open backup battery compartment door located on the bottom of the unit 2 Pleas...

Page 4: ...me level Listening to a non docking iPod or other portable audio devices If you have an iPod without a docking port or a different MP3 player including other portable audio devices simply plug it into AUX IN located behind unit to play 1 Plug one end of the Connection Cable included into the headphone or AUX IN jack on your audio device Plug the other end of the Connection Cable into the unit AUX ...

Page 5: ...If you need to change the alarm time for either alarm follow step 1 under Setting Alarm1 or Alarm 2 Individually 2 Toggle through the AL MODE button until the corresponding LED light illuminates next to the wake mode of your choice iPod iPhone Radio or Beep tone Both al1 and al2 must wake to the same mode Note To wake to iPod iPhone your iPod iPhone must be properly docked in the unit or it will d...

Page 6: ...ce to radio communications However there is no guarantee that interference will not occur in a particular installation If this equipment does cause harmful interference to radio or television reception which can be determined by turning the equipment off and on the user is encouraged to try to correct the interference by one or more of the following measures Reorient or relocate the receiving ante...

Page 7: ...ires modifications or adoption to enable it to operate in any other country than the country for which it was designed manufactured approved and or authorized or repair of products damaged by these modifications is not covered under this warranty THE WARRANTY PROVIDED HEREIN SHALL BE THE SOLE AND EXCLUSIVE WARRANTY THERE SHALL BE NO OTHER WARRANTIES EXPRESS OR IMPLIED INCLUDING ANY IMPLIED WARRANT...

Page 8: ...ados por THE SHARPER IMAGE especialmente si no han sido incluidos con la unidad Nunca haga funcionar este artefacto si tiene el cordón el enchufe el cable o el armazón dañado Si no trabaja correctamente si se ha dejado caer o se ha dañado devuélvalo al Centro de servicio de THE SHARPER IMAGE para que lo examinen y lo reparen Mantenga el cable alejado de superficies calientes Nunca lo deje caer ni ...

Page 9: ...ara instalar o reemplazar las baterías de respaldo Este sistema usa 3 baterías de reserva AA no incluidas para permitir el respaldo del funcionamiento de la alarma y de los ajustes del reloj en caso de un apagón Después de la instalación de las baterías de reserva si un apagón realmente ocurre o si el cordón de corriente alterna se desconecta accidentalmente el fondo luminoso no permanecerá encend...

Page 10: ...niencia el iPod iPhone seguirá cargándose en la plataforma mientras la unidad esté enchufada aun si la energía está apagada Control de volumen Presione para aumentar el nivel de volumen Presione para reducir el nivel de volumen Para escuchar un iPod desconectado de la plataforma u otros dispositivos de sonido portátiles Si usted tiene un iPod sin un puerto para plataforma o un dispositivo MP3 dife...

Page 11: ...LCD para indicar que la alarma está desactivada Ajuste de la Alarma1 o Alarma2 juntas 1 Presione la tecla AL1 AL2 en la unidad el icono al1 o al2 aparecerá en la pantalla para indicar que AMBAS alarmas están activadas Atención Usted no puede cambiar la hora de la alarma cuando la modalidad BOTH ambas ha sido seleccionada Si desea cambiar la hora de la alarma para cualquiera de las dos alarmas siga...

Page 12: ...rotección razonable contra interferencias dañinas en una instalación residencial Este equipo genera usa y puede irradiar energía de radiofrecuencia y si no se instala y usa según las recomendaciones puede causar interferencias dañinas a las comunicaciones de radio Sin embargo no hay garantías de que no se produzca interferencia en una instalación en particular Si este equipo causara interferencias...

Reviews: