background image

J

( 1 : 12 )

K

( 1 : 4 )

J ( 0,06 : 1 )

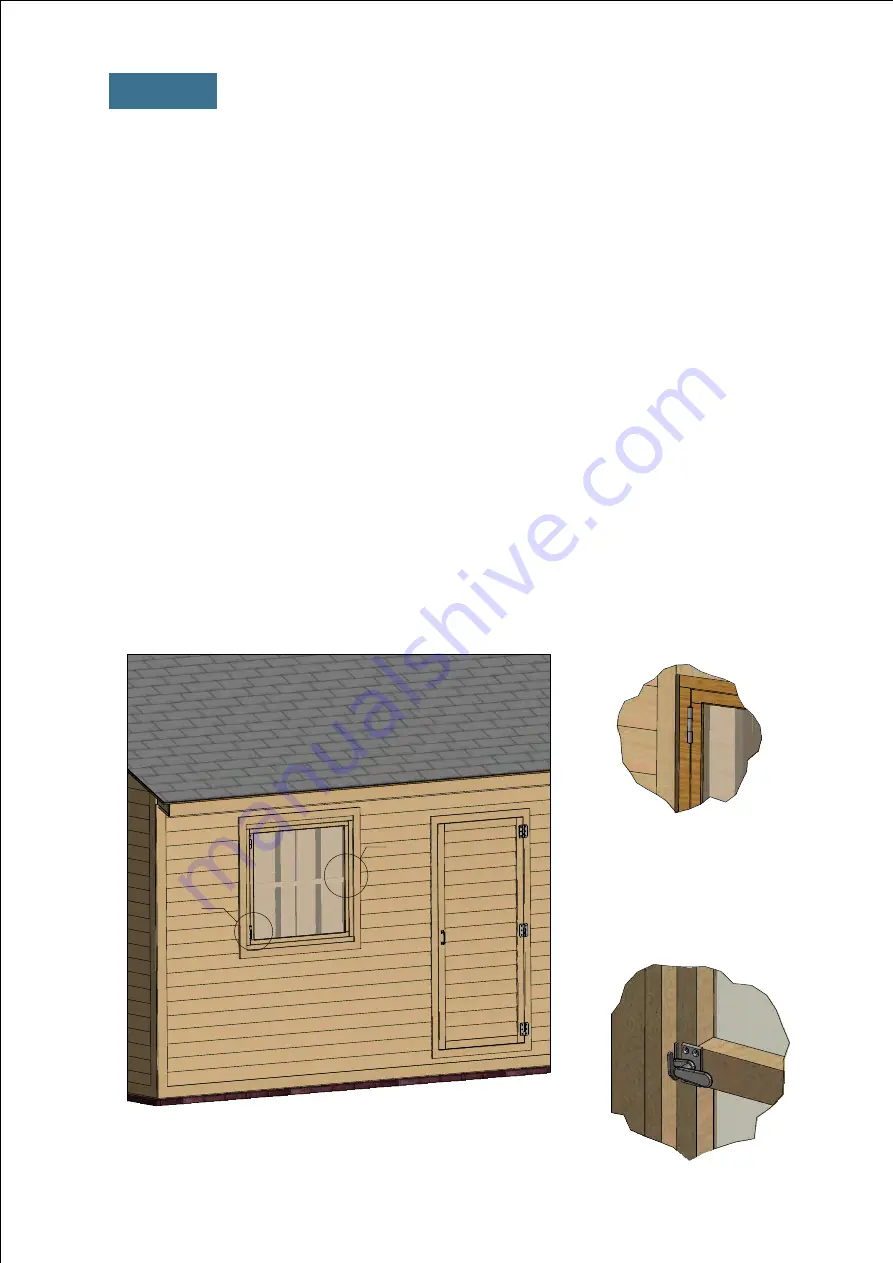
Window Installation for the Front Wall

10

.1

  Using  1  1/2  “  x  2  1/2  “  pressure-treated  lumber,  assemble  the  outer  frame  for  the  window  as 

shown in the drawing below. You will need two boards cut to 3'-1" that will be the vertical girts and two 

boards  cut  to  3'-4"  that  will  be  the  horizontal  girts.  Additionally,  add  vertical  2'-11  1/2"  long  and 

horizontal 3'-1" long supports using 3/4“ x 1“ lumber


and cut the recesses for the window hinges

.

10

.2 

Use 1 1/2 “ x 1 1/2 “ pressure-treated material to make the inner frame and secure with 3” 

wood screws.  You will need two boards cut to 2'-9 3/4" that will be the vertical girts and two boards 

cut to 3'-3/4" that will be the horizontal girts. Mill a recess for the glass panes


and for the hinges

.

10

.3

 Use 1 1/4 “ x 1 1/2 “ pressure-treated material to make the inner frame supports and secure 

with 3” wood screws.  You will need two boards cut to 2'-9 3/4" and mill a recess for interconnection.

10

.4

 Prepare and install glass into inner frame groove and fasten it by window beading from four 

sides. Use 1/2" galvanized nails.

10

.5

 Install two hinges (3") with 6x1" wood screws and assemble the window. Install a lock on the 

inner side of the window

.

STEP 

10

K

J

Summary of Contents for 16'x20' Garage Shed Plan

Page 1: ...16 x20 Garage Shed Plan...

Page 2: ...e curing times vary between brands read the packaging for recommended curing times 1 2 Once the concrete has cured use standard sized bricks and lay them across the foundation You will need roughly 32...

Page 3: ...the frame using 1 1 2 x 7 1 4 pressure treated lumber You will need fifteen boards cut to 15 9 that will be the joist 2 2 Secure the beams with 8x5 wood screws 2 3 Using a speed square or carpenter s...

Page 4: ...boards cut to 3 4 that will be the window header and rough sill sixteen boards cut to 6 11 and two boards to 2 10 that will be the studs two boards cut to 8 8 that will be the bottom plates and one b...

Page 5: ...construct back wall frame using the drawing below as a reference You will need seventeen boards cut to 6 11 that will be the studs and two boards cut to 20 that will be the top and bottom plates 4 2...

Page 6: ...all frames using the drawing below as a reference You will need thirteen boards cut to 6 11 that will be the studs and two boards cut to 15 5 that will be the top and bottom plates 5 2 Connect the bea...

Page 7: ...eed eight boards cut to 6 11 that will be the studs two boards cut to 3 8 1 2 that will be the bottom plates and one board cut to 15 5 that will be the top plate 6 2 Connect the beams with 2x4 wood sc...

Page 8: ...3 3 4 long according to the dimensions 7 2 Using 1 1 2 x 3 1 2 pressure treated lumber cut thirteen collar ties 10 4 long according to the dimensions 7 3 Using 3 4 x 7 1 4 pressure treated board cut t...

Page 9: ...the door according to the drawing 8 3 Use 2 1 2 x 3 4 pressure treated lumber for the door trim and fasten with 2 wood screws You will need two boards cut to 2 2 3 4 and two boards cut to 5 11 3 4 8 4...

Page 10: ...athing Installation 9 1 You will need 405 Sq Ft of asphalt shingle roofing 9 2 Add the metal drip edge to the fascias 9 3 Cover the plywood with building paper 9 4 Install asphalt shingle roofing usin...

Page 11: ...make the inner frame and secure with 3 wood screws You will need two boards cut to 2 9 3 4 that will be the vertical girts and two boards cut to 3 3 4 that will be the horizontal girts Mill a recess...

Page 12: ...11 2 Use 2 1 2 x 3 4 pressure treated lumber for the door trim and fasten with 2 wood screws You will need two boards cut to 3 6 3 4 and two boards cut to 7 1 4 11 3 Using 1 4 x 3 4 pressure treated...

Page 13: ...x 2 1 2 board cut to 3 2 1 2 and one 1 1 2 x 3 1 2 board cut to 6 1 4 12 2 Connect and secure all frames using one 1 1 2 x 2 1 2 board 8 1 1 2 long and 3 wood screws 12 3 Using 5 1 2 x 3 4 pressure tr...

Page 14: ...Thank You Now that your shed is all done you are ready to decorate it any way you want using your favorite paint stain or preservative STEP 13...

Page 15: ...lication sale or distribution of any portion of these plans without prior written consent from the original designer will be subject to the appropriate penalties for copyright infringement Sharing thi...

Reviews: