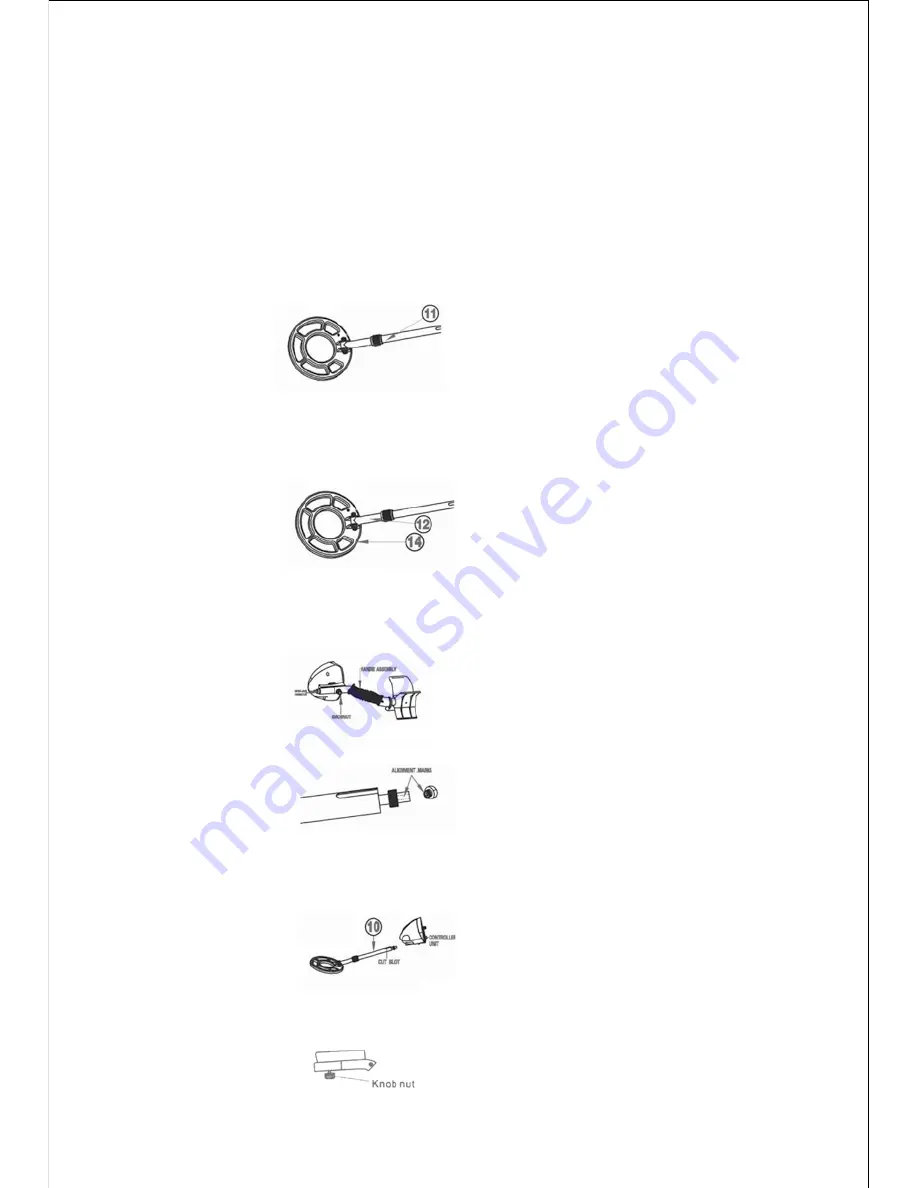
3.1 ASSEMBLING THE DETECTOR
You don t need any special tools to assemble your metal detector. All you need is a small
Philips-head screw driver. After unpack your detector, you may start the following
assembling and adjustment:
3.1.1 Rotate the STEM LOCK NUT
(
11
)
Clockwise until loosens.
3.1.2Slide the UPPER STEM (12) towards the SEARCH COIL (14) as indicated by an
arrow until you can see a micro-plug metal connector. Pull out the plug so that you can
hold it on your hand.
3.1.3 Locate the micro-jack connector in the HANDLE ASSEMBLY (6). Connect the plug
and the jack together and care of alignment marks showing on the surface of the jack and
plug.
3.1.4 Slide the UPPER STEM (10) towards to the CONTROLLER UNIT. Cares should be
taken for the direction of the cut slot (of the upper stem) which should be pull underneath
the support of the controller unit.
3.1.5 Tighten the KNOB NUT which is located under the CONTROLLER UNIT (7).
3. PREPARATION
Summary of Contents for MD-3010?
Page 1: ...MD 3010Ⅱ INSTRUCTION MANUAL ...
Page 4: ...2 PARTS AND NAMES NOMENCLATURES ...
Page 14: ......


