7
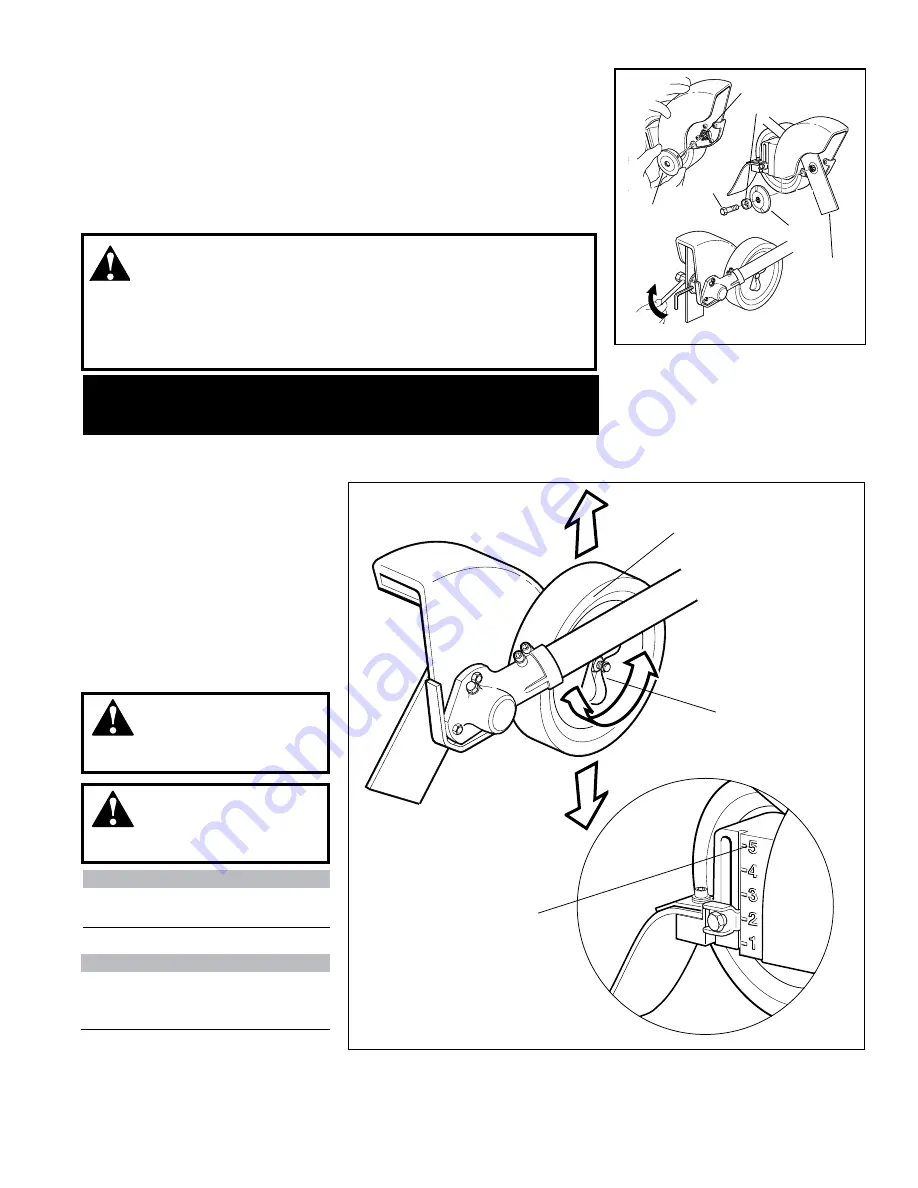
Mount the Edger Blade
Install the holder (A) onto the output shaft (D).
1.
Mount the edger blade (C) and holder (B) onto the output shaft, and then
2.
install the bolt guard (E) and shaft bolt (F) (turn bolt counterclockwise to
install).
Align the hole in holder (A) with the matched hole in the gearcase, and then
3.
use the hex wrench to temporarily lock the output shaft.
Firmly tighten the shaft bolt. Remove the hex wrench.
4.
WARNING!
The edger is designed for use with an edger blade only!
■
Never operate the edger without the cutting attachment shield installed and
■
tightly secured!
26018
65010-94010_MLE230_07LP
11/21/01, 11:19 AM
10
The Multipurpose Edger Tool should now be completely
assembled.
A
B
C
D
E
F
NOTE:
The numbers (C) are for reference
only; they do NOT refer to depth in
inches
The edger’s depth of cut is controlled
by a combination of operator height,
blade wear, and the positioning of the
edger’s guide wheel.
To adjust blade height:
Loosen the guide wheel adjusting
1.
knob (A).
Raise or lower the guide wheel (B)
2.
to the desired setting.
Tighten the guide wheel adjusting
3.
knob firmly.
NOTE:
Guide wheel adjustment is also
required to compensate for blade wear.
Adjusting blade cutting depth
WARNING!
Use only Shindaiwa
replacement edger blades.
WARNING!
Never adjust the guide
wheel while the engine is running.
A
B
C
Summary of Contents for 65010
Page 11: ...11...


