9
■
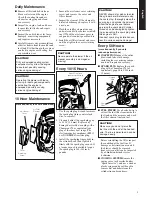
Remove all dirt and debris from
blower exterior and the engine.
Check the cooling fins and air
cleaner for clogging and clean
as necessary.
■
Inspect the engine, tank, and hoses
for possible fuel leaks, and repair
as necessary.
■
Inspect the entire blower for loose,
damaged, or missing components,
and repair as necessary.
■
Carefully remove any accumulations
of dirt or debris from the muffler and
fuel tank. Dirt build-up in these areas
can lead to engine overheating, fire
or premature wear.
CAUTION!
Dirty or damaged cooling system
components may allow the engine
to overheat, possibly causing
serious engine damage!
CAUTION!
Operating the blower with loose,
missing, or damaged components
could allow the engine to
overspeed, possibly causing
serious engine damage!
Daily Maintenance
24011
10 Hour Maintenance
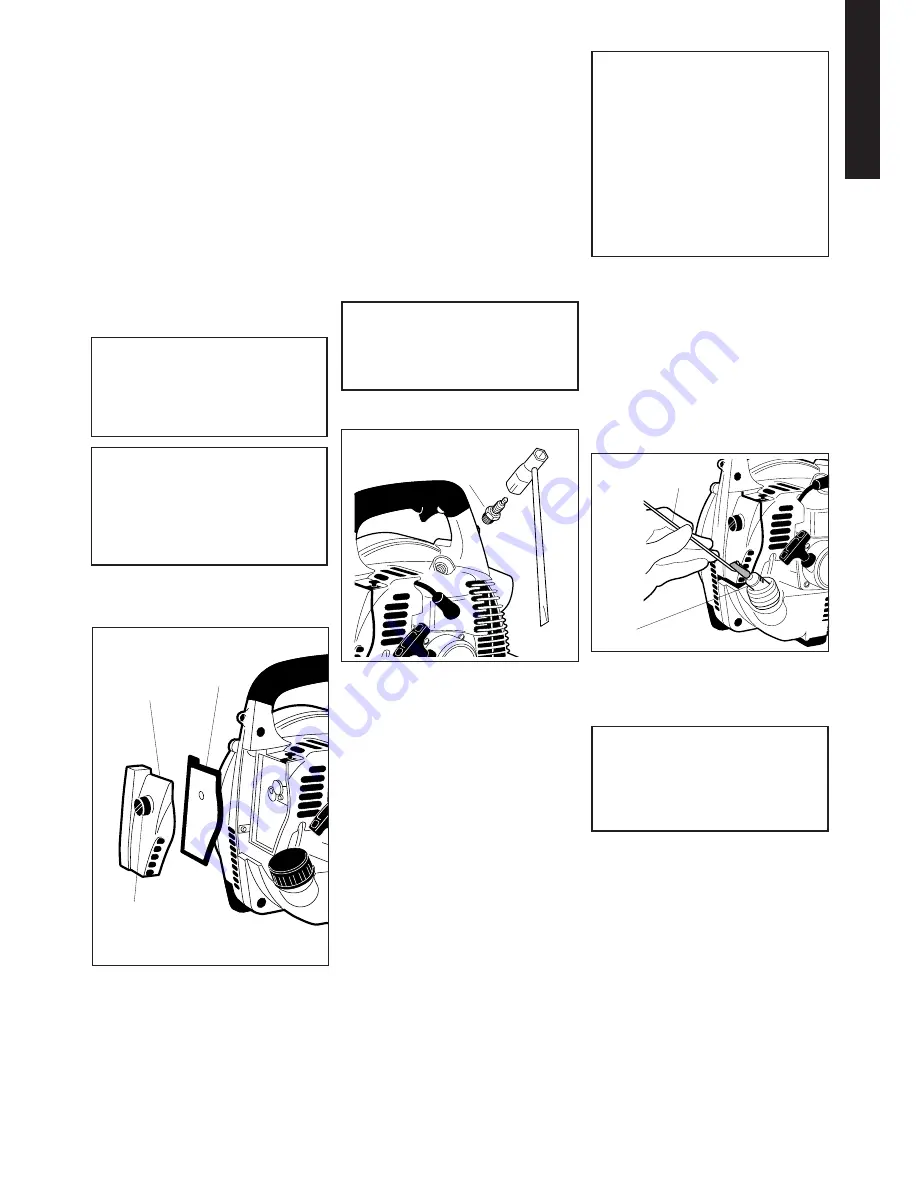
Cover
Retaining
Screw
Air Filter
Element
Air Cleaner
Cover
(more frequently in severe conditions)
CAUTION!
Never operate the blower if the air
cleaner assembly is damaged or
missing!
1. Loosen the air cleaner cover retaining
screw, and remove the cover and
filter element.
2. Inspect the element. If the element is
distorted or damaged, replace it with
a new one.
3. Wash the air filter element in soap
and water and let dry before reinstall-
ing it. Wash the air cleaner cover in
soap and water and wipe or blow dry.
4. Install the air filter element and cover,
and then tighten the cover retaining
screw.
24013
Every 10/15 Hours
1. Use the spark plug wrench to remove
the spark plug (turn counter-clock-
wise to remove).
2. Clean and adjust the spark plug gap
to 0.024” (0.6 mm). Replace any
damaged or visibly worn plug with a
Champion CJ8 or equivalent type
plug of the same heat range. For
electromagnetic compliance (EMC)
use NGK BMR6A resistor plug.
3. Install the spark plug finger-tight in
the cylinder head, then tighten it
firmly with the spark plug wrench. If
a torque wrench is available, torque
the spark plug to 148–165 inch-
pounds.
Spark Plug (turn
counterclockwise to
remove)
CAUTION!
NEVER
allow dirt or debris to enter
the cylinder bore! Before removing
the spark plug, thoroughly clean the
spark plug and cylinder head area!
Allow the engine to cool before
servicing the spark plug! Cylinder
threads can be damaged by tighten-
ing or loosening the spark plug while
the engine is hot!
Incorrect spark plug installation can
result in serious engine damage!
24014
Every 50 Hours
■
INSPECTION
Inspect the entire
blower and tubes for damage,
including loose or missing compo-
nents, and repair as necessary.
■
SPARK PLUG
Replace the spark
plug with a Champion CJ8 (or
equivalent), gapped to 0.024 inch
(0.6 mm).
■
FUEL FILTER
Use a hooked wire to
extract the fuel filter from inside the
fuel tank, and then remove and wash
the filter element in clean fuel.
Fuel
Filter
(more frequently if you note
reduced performance)
Hooked
Wire
CAUTION!
Make sure you do not pierce the
fuel line with the end of the hooked
wire. The line is delicate and can be
damaged easily.
Before reinstalling the filter, inspect
the condition of the fuel line. If
damage or deterioration are noted,
the blower should be removed
from service until it can be inspected
by a Shindaiwa-trained service
technician.
■
COOLING SYSTEM
Remove the
engine cover (as described under
“Spark Arrester”), and use a wood or
plastic scraper and a soft brush to
remove dirt and debris from the
cylinder fins and crankcase.
English
9
■
Limpie toda la suciedad y los
residuos del exterior del soplador y
del motor. Revise las aletas de
refrigeración y el limpiador de aire en
busca de obstrucciones y limpie si es
necesario.
■
Inspeccione el motor, el tanque y las
mangueras para detectar posibles
fugas de combustible y repárelas si
es necesario.
■
Inspeccione el soplador para detectar
componentes sueltos, dañados o
faltantes y repare según sea
necesario.
■
Retire cuidadosamente toda suciedad
o residuos acumulados que hubiera
en el silenciador y en el tanque de
combustible. La suciedad acumulada
en dichas zonas puede conducir al
sobrecalentamiento, incendio o
desgaste prematuro del motor.
Mantenimiento diario
1. Afloje el tornillo de retención de la
cubierta del limpiador de aire y retire
la cubierta y el elemento del filtro.
2. Inspeccione el elemento. Si está
deformado o dañado, reemplácelo
por uno nuevo.
3. Lave el elemento del filtro de aire con
agua y jabón y déjelo secar antes de
reinstalarlo. Lave la cubierta del
limpiador de aire con agua y jabón y
séquela con un paño o con aire a
presión.
4. Instale el elemento del filtro de aire y
la cubierta, y luego apriete el tornillo
de retención de la cubierta.
(más frecuentemente en condiciones
rigurosas)
Mantenimiento cada
'10 horas
¡PRECAUCIÓN!
Nunca opere el soplador si el
limpiador de aire está dañado
o falta.
24013
Cada 10 a 15 horas
1.
Utilice la llave de bujías para quitar
la bujía (gire hacia la izquierda para
hacerlo).
2.
Limpie y ajuste la separación de la
bujía a 0.024 pulg. (0.6 mm).
Reemplace la bujía si está dañada o
visiblemente gastada con una bujía
Champion CJ8 o equivalente con las
mismas especificaciones térmicas.
Para cumplir con las normnas sobre
electromagnetismo (EMC) utilice un
enchufe de resistencia NGK
BMR6A.
3.
Instale la bujía en la cabeza del
cilindro y luego apriete la misma
firmemente con la llave de bujías. Si
dispone de una llave de torsión,
configure el par de ajuste de la bujía
en 148 a 165 pulgadas-libra.
Bujía (gire hacia la
izquierda para
quitarla)
¡PRECAUCIÓN!
NUNCA
permita que la suciedad o
los residuos ingresen al diámetro
interior del cilindro. Antes de quitar
la bujía, limpie a fondo la zona del
cabezal de la bujía y el cilindro.
Antes de examinar la bujía permita
que el motor se enfríe. Las roscas
del cilindro pueden resultar
dañadas por ajustar o aflojar la
bujía con el motor caliente.
La instalación incorrecta de la bujía
puede ocasionar serios daños al
motor.
24014
Cada 50 horas
■
INSPECCIÓN
Inspeccione el soplador
y los tubos para detectar daños,
incluyendo componentes sueltos o
faltantes, y repare según sea necesario.
■
BUJÍA
Reemplace la bujía con una
Champion CJ8 (o equivalente) con una
separación de 0.024 de pulgada (0.6
mm).
Filtro de
combus-
tible
(más frecuentemente si se nota
una disminución en el rendimiento)
Gancho de
alambre
■
FILTRO DE COMBUSTIBLE
Utilice
un alambre en forma de gan-cho para
extraer el filtro de combustible del
interior del tanque de
com-bustible, y luego retire y lave
el elemento de filtro en
combustible limpio.
¡PRECAUCIÓN!
Asegúrese de no perforar la línea de
combustible con el extremo del gan-
cho de alambre. La línea es delicada
y puede ser dañada fácilmente.
Antes de reinstalar el filtro,
inspeccione el estado general de la
línea de combustible. Si nota daños o
deterioro, el soplador deberá ser
retirado de servicio hasta que pueda
ser inspeccionado por un técnico de
servicio capacitado por Shindaiwa.
■
SISTEMA DE ENFRIAMIENTO
Retire la cubierta del motor (como se
describe en “Amortiguador de
chispas”) y utilice un raspador de
madera o plástico y un cepillo suave
para retirar la suciedad y los residuos
de las aletas del cilindro y del cárter.
¡PRECAUCIÓN!
Los componentes sucios o dañados
del sistema de enfriamiento pueden
hacer que el motor se
sobrecaliente, ocasionando
posiblemente serios daños al motor.
¡PRECAUCIÓN!
La operación del soplador con
componentes sueltos, faltantes o
dañados puede hacer que el motor
opere a excesiva velocidad,
ocasionando posiblemente serios
daños al mismo.
24011
Cubra el
tornillo de
retención
Elemento
del filtro de
aire
Cubierta del
limpiador de
aire
Español
Summary of Contents for EB240S
Page 2: ...Espa ol...
Page 4: ...Espa ol...
Page 6: ...Espa ol...
Page 8: ...Espa ol...
Page 10: ...Espa ol...
Page 12: ...Espa ol...
Page 14: ...Espa ol...
Page 15: ...15 NOTES...
Page 16: ......

