background image

9

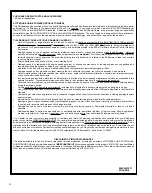
Set the throttle trigger to the “fast idle” position by performing the following:

2. 

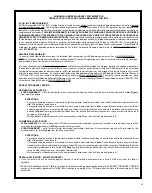
Move the ignition stop switch to the rear (towards the grip) to the “I” or ON 

1. 

position. See Figure 4.

Figure 4

Ignition 

Switch

Ignition ON

NOTE:

The blade cover is used for transportation and storage. Remove blade cover before using the unit.

(Cold engine only)

4. 

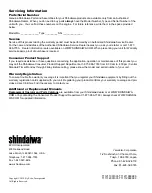
 Choke the engine by moving the choke lever 

forward

 to the 

“closed” position. See Figure 7.

Choke 

Closed

Figure 7

IMPORTANT! 

The primer system only pushes fuel through the carburetor. Repeatedly pressing the 

primer bulb will not flood the engine with fuel.

Figure 5

Throttle 

Trigger

Throttle 

Lock

Fast Idle 

Button

Prime the carburetor by repeatedly depressing the carburetor primer bulb until 

3. 

clear fuel can be seen flowing through the transparent primer bulb.

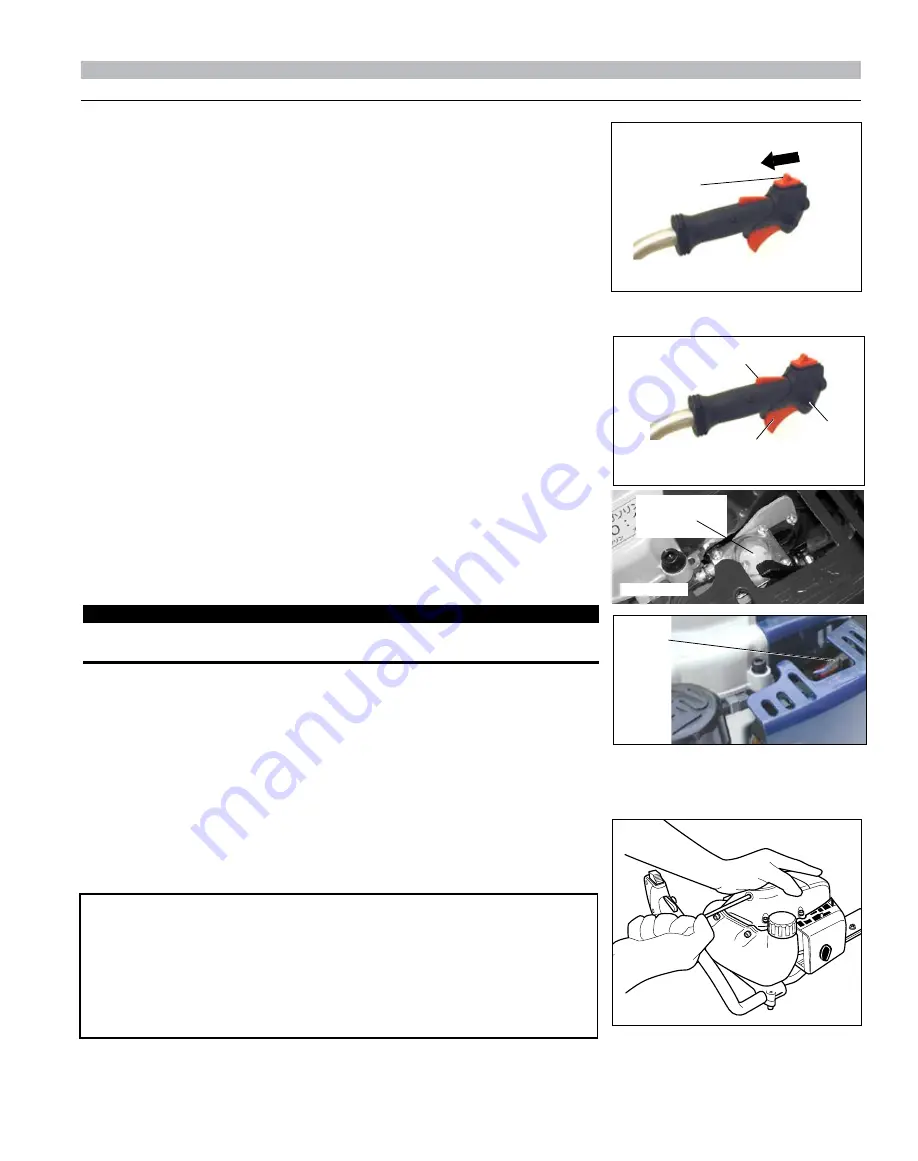
Place the unit on the ground. Grip the engine cover with your left hand and the 

1. 

starter handle with your right hand (shown).
Pull the starter handle slowly toward you until you feel the starter mechanism 

2. 

engage.
Start the trimmer by pulling the starting handle rapidly outward.

3. 

Cranking the Engine

CAUTION!

The recoil starter can be easily  

damaged by abuse!

Always engage the starter before attempting to crank the engine.


Never pull the starter cord to its full length.


Always rewind the starter cord slowly.


Depress and hold the throttle lock, then squeeze the throttle trigger.

a. 

Depress and hold the fast idle button.

b. 

Release the throttle trigger and throttle lock, then release fast idle button.

c. 

Primer Bulb  

(viewed from 

rear)

Figure 6

Summary of Contents for HT254

Page 1: ... MANUAL HT254 HEDGE TRIMMER Minimize the risk of injury to yourself and others Read this manual and familiarize yourself with the contents Always wear eye and hear ing protection when operating this unit WARNING X7502863000 04 10 ...

Page 2: ...ability without compromise to quality comfort or durability Shindaiwa high performance engines represent the leading edge of air cooled engine technology delivering excep tionally high power at remarkable low displacement and weight As an owner operator you ll soon discover for your self why Shindaiwa is simply in a class by itself IMPORTANT The information contained in this manual describes units...

Page 3: ...o not overreach Maintain your balance at all times during operation Use extreme caution when operating near fences or electric wiring Never cut metal objects or wire with the blade Never operate this unit if the safety guard has been removed or damaged Never allow children to use the unit Avoid operating near bystanders Always stop the engine and install the blade cover before moving to another wo...

Page 4: ...mes tangled Do not operate with broken or damaged equipment When cutting a branch that is under tension be alert for spring back so that you will not be struck by the moving branch If a cutter should bind fast in a cut shut off the engine immediately Push the branch or tree to ease the bind and free the cutter Always stop the engine and allow it to cool before refueling Avoid overfilling and wipe ...

Page 5: ...uble blade cutting action double edged blade Clutch Type Centrifugal clutch dry type Gear Type Spur gears Gear Lubrication Lithium based grease Standard Equipment Rear handle with integral controls anti vibe mountings front handle with guard spark plug wrench and blade cover Engine Speed 3 000 RPM Clutch Engagement Speed 4 000 RPM Wide Open Throttle Speed W O T 10 500 RPM Safety Equipment and Labe...

Page 6: ...or a complete unit n 1 Engine assembly and gearcase cutter assembly n 2 Combination spark plug 13mm wrench Carefully inspect all components for damage An Emission Control Label is located on the unit This is an EXAMPLE ONLY information on label varies by en gine FAMILY PRODUCT EMISSION DURABILITY EMISSION COMPLIANCE PERIOD The 300 hour emission compliance period is the time span selected by the ma...

Page 7: ...her engine components Fuel Requirements Gasoline Use 89 Octane R M 2 mid grade or higher gasoline known to be good quality Gasoline may contain up to 10 Ethanol grain alcohol or 15 MTBE methyl tertiary butyl ether Gasoline containing methanol wood alcohol is NOT approved Hybrid 4TM Mixture Oil Engine oil meeting ISO L EGD ISO CD 13738 and J A S O M345 FD standards must be used Shindaiwa highly rec...

Page 8: ...engine starts and could result in loss of control and possible serious injury Keep movable parts of the attachment away from objects that could become entangled or thrown Place the unit on a flat level surface 1 Clear any dirt or other debris from 2 around the fuel filler cap Remove the fuel cap and fill the tank 3 with clean fresh fuel Reinstall the fuel filler cap and 4 tighten firmly Wipe away ...

Page 9: ...tor by repeatedly depressing the carburetor primer bulb until 3 clear fuel can be seen flowing through the transparent primer bulb Place the unit on the ground Grip the engine cover with your left hand and the 1 starter handle with your right hand shown Pull the starter handle slowly toward you until you feel the starter mechanism 2 engage Start the trimmer by pulling the starting handle rapidly o...

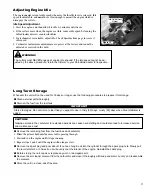
Page 10: ...pen the choke put the throttle lever in the full throttle position then clear excess fuel from the combustion chamber by 3 cranking the engine several times If the engine still fails to start or fire refer to the troubleshooting flow chart at the end of this manual 4 When the motor starts Open the choke by moving the choke lever backward 1 toward the fuel tank If the engine does not continue to ru...

Page 11: ...spect clean air filter element Check cutters and guide bar for damage and that bolts are tight Lubricate cutters Daily Maintenance Inspection Figure 12 Inspect front and rear handles for damaged or loose attachments Remove all grass clippings and dirt from the hedge trimmer 1 Remove any compacted debris from around the fuel tank and or muffler Inspect the engine cooling fins for clogging and clean...

Page 12: ...aner Cover Pre Filter 10 Hour Maintenance more frequently in dusty conditions Remove the air cleaner cover by loosening the two thumbscrews See Figure 16A 1 Remove and inspect the pre filter If the pre filter is torn or otherwise damaged 2 replace it with a new one See Figure 16B Clean the pre filter with soap and water Let dry before reinstalling 3 Inspect the air cleaner element If the 4 element...

Page 13: ...MC Remove and clean the cylinder cover and clean grass and dirt from the cylinder fins Every 50 hours of operation more often in dusty or extreme conditions Clean Debris Hooked Wire Figure 18 50 Hour Maintenance Filter Element Figure 19 CAUTION Make sure you do not pierce the fuel line with the end of the hooked wire The line is delicate and can be damaged easily Use a wire hook to extract the fue...

Page 14: ...quire no periodic adjustments Make sure all blade shoulder bolts are tight and in good condition Clean blades and apply a light coating of oil to all metal surfaces Vegetable oils may be used to protect sensitive plants from spotting Locknut Cutters Socket Head Shoulder Bolt Plate Guide Bar Figure 22 Spacer Remove the gearcase cover and use solvent and a soft brush to remove all old grease from th...

Page 15: ...ustment Remove cylinder cover rocker arm cover and set piston at TDC compression 1 Loosen adjuster locknut so that the 2 2 5 mm Allen socket head adjustment screw can turn freely Insert feeler gauge 004 0 10 mm for both intake and exhaust between valve 3 stem tip and rocker arm Turn adjustment screw clockwise tighter counter clockwise looser until 4 feeler gauge is almost snug Back off just enough...

Page 16: ...when operating the engine below 1 100 feet ASL otherwise severe engine damage may result Spark Arrester Screen Maintenance If the engine becomes sluggish and low on power check and clean the spark ar rester screen WARNING Never operate the unit with a damaged or missing muffler or spark arrester Operating with a missing or damaged spark arrester is a fire hazard and could also dam age your hearing...

Page 17: ...rior of the engine Reinstall the spark plug Before storing the unit repair or replace any worn or damaged parts Remove the air cleaner element from the carburetor and clean it thoroughly with soap and water Let dry and reassemble the element Store the unit in a clean dust free area The engine must return to idle speed whenever the throttle lever is released Idle speed is adjustable and must be set...

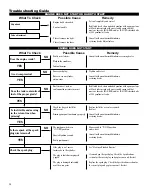
Page 18: ...ilter and or vent Priming pump not functioning properly The ignition switch is in O OFF position Shorted ignition ground Faulty ignition unit If the plug is wet excess fuel may be in the cylinder The plug is fouled or improperly gapped The plug is damaged internally or of the wrong size Consult with an authorized Shindaiwa servicing dealer Tighten and re test Consult with an authorized Shindaiwa s...

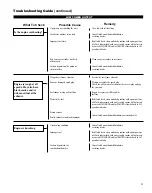
Page 19: ...ed oils at 50 1 gasoline oil ratio Clean repair or replace as necessary Consult with an authorized Shindaiwa servicing dealer Service the air cleaner element Tighten or replace the spark plug Check the Specifications section for the correct plug and gap for your unit Repair or replace fuel filter and or fuel line Refill with fresh clean unleaded gasoline with a pump octane of 89 or higher mixed wit...

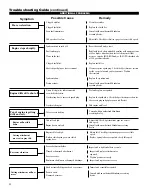
Page 20: ...red Replace the spark plug Check the Specifications section for the correct plug and gap for your unit Restart Idle engine until cool Symptom Possible Cause Remedy Engine stops abruptly Engine difficult to shut off Troubleshooting Guide continued Valve cover is leaking Consult with an authorized Shindaiwa servicing dealer Top of engine is getting dirty and oily Engine idle too high Broken clutch sp...

Page 21: ... questions concerning Shindaiwa s Warranty Statement you can contact our Consumer Product Support Department at 1 800 673 1558 or contact us through the web at WWW SHINDAIWA COM PRODUCT WARRANTY PERIOD RESIDENTIAL APPLICATION 2 YEAR WARRANTY Units for residential or non income producing use will be covered by this limited warranty for two 2 years from date of purchase EXCEPTIONS For engine powered...

Page 22: ... manual is the customer s responsibility Failures due to improper set up pre delivery service or repair service by anyone other than authorized Shindaiwa servicing dealer during the warranty period Certain parts and other items are not warranted including but not limited to lubricants starter cords and engine tune ups Use of spark plugs other than those meeting performance and durability requireme...

Page 23: ...gned built and equipped to conform with applicable EPA and C A R B emissions standards and that your equipment SORE is free from defects in material and workmanship that would cause it to fail to conform with applicable requirements for 2 years or the length of the ECHO Inc warranty whichever is longer The warranty period begins on the date the product is purchased by an end user HOW WILL A COVERE...

Page 24: ...W SHINDAIWA COM When presenting your unit for Warranty service repairs proof of purchase is required Consumer Product Support If you require assistance or have questions concerning the application operation or maintenance of this product you may call the Shindaiwa Consumer Product Support Department at 1 877 986 7783 from 8 30 am to 4 30 pm Central Standard Time Monday through Friday Before callin...

Reviews: