


3E
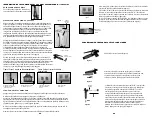
INSTALLING THE PUMP HANDLE
The pump handle can be mounted on either side of the pump shaft (A).
To install the pump handle place the handle (C) over the shaft (A)
aligning the pump handle hole and shaft hole. Push the straight side of
the cotter pin (B) through the aligned hole as shown in figure 1 thru 3.
There are holes in the pump handle to allow for either left(fig.4) or right
(fig.5) hand mounting.
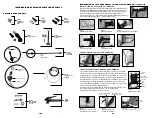
Figure 1
Cotter Pin
Figure 2
Line up holes
Figure 3
Slide pin through holes.
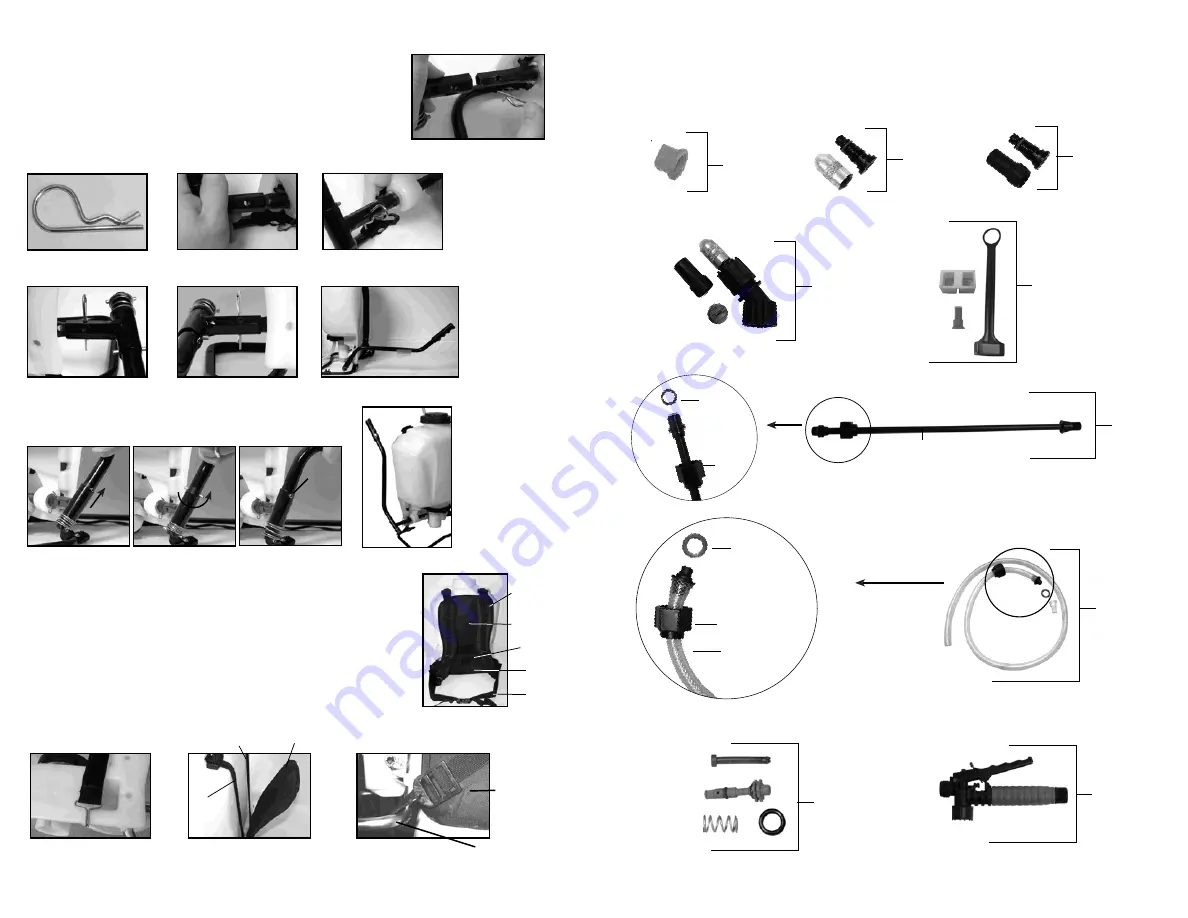
SPRAYER COMPONENTS & USE INFORMATION, Continued
INFORMATION DE COMMANDE DE PIÈCES DE RECHANGE
10F
569005
Trousse de
réparation de
robinet d’arrêt
ASSEMBLAGE DE BUSE
569012
Buse en
éventail
plat
569011
Buse poly
ajustable
569010
Buse de
laiton
ajustable
Bouchon
vissé
Joint
torique
569008
Assemblage
de tube
Tube
569006
Assemblage
d’arrêt
569009
Trousse de
remplacement
A
C
B
Pull
up
Rotate
180º
Set
into
slot
Pump Handle
Positioned For Use
(right hand shown)
Figure 5
Right Hand
Figure 4
Left Hand
STOWAWAY PUMP HANDLE
Base Tube
Lumbar
Support
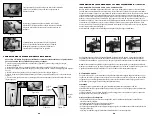
INSTALLING THE SHOULDER STRAP
The backpack strap is provided with multiple features including shoulder strap, chest
strap, waist belt, lumbar support and back pad (figure 1). The top of both the shoulder
strap and back pad strap are attached to the top of the tank and are removable. The
back pad strap attaches to the bottom of the tank (figure 2). The back pad is attached
to its strap with velcro and is removable ( figure3). The strap from the lumbar support
attaches to the base tube on the bottom of the tank (figure 4).
NOTE: If your straps become contaminated with dirt or chemicals, wash with mild
soap and water and let dry overnight. If this does not remove the contamination,
replace with new straps.
Figure 2
Back Pad strap attachment
Figure 3
Removable Back Pad
Figure 4
Strap Attachment
Back Pad
Strap
Velcro
Attachment
Removable
Back Pad
Figure 1
Strap Assembly
Shoulder
Strap
Back
Pad
Chest Strap
Lumbar
Support
Waist Belt
569007
Assemblage
du boyau
Rondelle
de boyau
Écrou de blocage
Boyau
569013
Trousse de buse


