background image

17

MAINTENANCE

To enjoy years of outstanding performance from your heater make sure 
you perform the following maintenance activities on a regular basis:

Keep exterior surfaces clean.

Use warm soapy water for cleaning. Never use flammable or 
corrosive cleaning agents.
While washing your unit, be sure to keep the area around the burner
and pilot assembly dry at all times. If the gas control is exposed to 
water in any way, do NOT try to use it. It must be replaced.

Air flow must be unobstructed. Keep controls, burner, and circulating 
air passageways clean. Signs of possible blockage include:

Gas odor with extreme yellow tipping of flame.
Heater does NOT reach the desired temperature.

Heater makes popping noises.

Heater glow is excessively uneven.

Spiders and insects can nest in burner or orifices. This dangerous
condition can damage heater and render it unsafe for use. Clean 
burner holes by using a heavy-duty pipe cleaner. Compressed air may
help clear away smaller particles.

Carbon deposits may create a fire hazard. Clean dome and engine with
warm soapy water if any carbon deposits develop.

WARNING

DO NOT touch or move heater for at least
45 minutes after use.
Allow all burner elements to cool before 
touching.

FOR YOUR SAFETY :

NOTE

In a salt-air environment (such as near an 
ocean). corrosion occurs more quickly 
than normal. Frequently check for 
corroded areas and repair them promptly.

The installation of fixed appliances shall only be carried out by competent
persons and be in accordance with the relevant Codes of Practice.

Warning:

  This appliance requires a gas hose  and natural gas pipe, check with 

                   your gas supplier and or product supplier.

AT LEAST ONCE EACH YEAR 

check the entire length of the gas 

                   hose and natural gas pipe for damage,  if there is damage, abrasion
                   or wear,  replace the gas hose or natural gas pipe.
Prior to use, check for damaged parts and inspect the gas hose from the 
appliance to the gas pipe. If there is damage, abrasion or wear, replace the
hose with part NO 4.

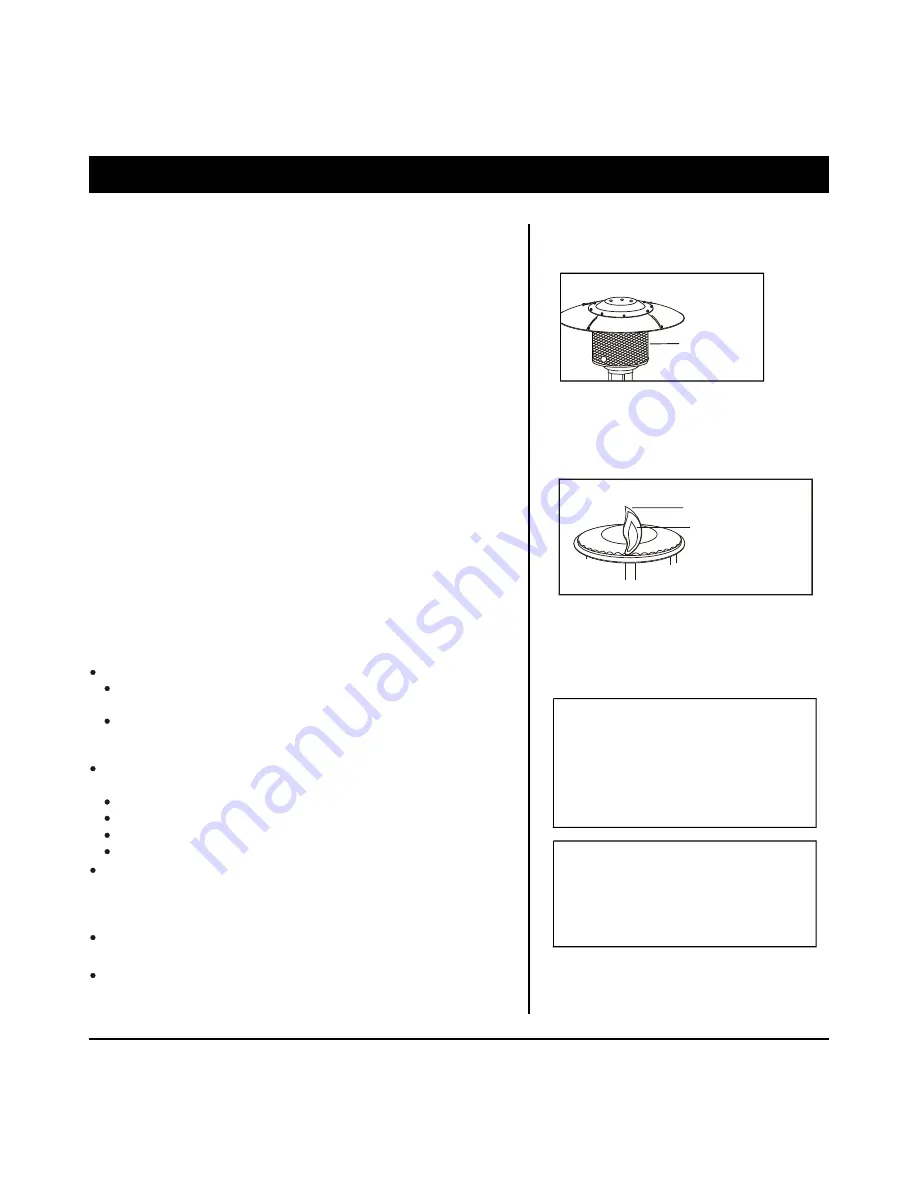
The flame pattern at the 

Emitter Screen

 should be 

Visually Checked

whenever heater is operated.

Check Your Flame:

If flames extend beyond surface of the emitter grid , or the phenomena of 
flame lift or light back, or black spot is accumulating on the emitter grid or
reflector, the heater should be

Turned OFF

 immediately.

The heater should not be operated again until the unit is serviced
and or repaired.

Normally the burner flame is blue, but little yellow flame is acceptable.

Yellow Tip

Primarily Blue Flame

Check Your Hose Assembly:

Maintenance and Cleaning:

AT LEAST ONCE EACH YEAR

 check the part of the hose inside the post.

Visually check

Emitter Screen

Summary of Contents for SRPHN02

Page 1: ...immediately call gas supplier FOR YOUR SAFETY Do not storeor use gasolineor other flammable vaporsor liquids in the vicinityof this orany other appliance WARNING For Outdoor Use Only CAUTION Retain t...

Page 2: ...service help or other assistance please call SHINERICH at 86 755 26930633 or local Shinerich dealer WARNING For outdoor use only The unit shouldbe secured ormoved indoors if winds exceed35 km h Storag...

Page 3: ...8 6mm Washers 4 8mm Washers 4 M8 Nuts 6 7 8 11 12 9 10 13 1 Mid Post 1 Lower Post 1 Upper Post 15 M6 Nuts 4 8mm Spring Washers 1 Base 4 M8 x55 Bolts 14 15 12 M6x10 Bolts 3 M6x70 doublepointed bolts 8...

Page 4: ...ion For outdoor use ONLY The installation offixed appliances shallonly be carriedout by competent personsand be inaccordance with localcodes or in theabsence of localcodes with thenational fuel gascod...

Page 5: ...LLED ONLY BY AN AUTHORISED PERSON Instruction For Battery Installing Upon first timeuse of theproduct please remove the ignition button andinstall anAA batteryas indicated Ignition button Replace Batt...

Page 6: ...the mid post clockwise to the Step 2 Step 1 Assembly for lowerpost Step 2 Attach mid postto lower post 6 6 7 9 11 10 8 5 Attach lower post to base Place the lower post on the top of base Then connect...

Page 7: ...tep 4 Attach Head Assembly to Post Load head assemblyby inserting gashose i n t o p o s t Step 4 Step 3 Attach upper postto mid post Turn the upper post clockwiseto the mid post asillustrated until ti...

Page 8: ...of this heater requires basic mechanical skills Proper assembly is the responsibility of the installer Step 6 Step 6 Attach Double PointedBolt to H e a d A s s e m b l y Attach M6x70 doublepointed bol...

Page 9: ...pcs Step 8 Attach Center Reflectorand Reflector Load center reflectorand reflector tothe top of head assemblyby M6 X 70double pointed bolts 3 pcs to the topof Head Assembly 6mm washers 3 pcs andnuts...

Page 10: ...nnections forleaks Tocheck the Connection of thegas hose natural gaspipe 1 Make leak solutionby mixing 1part liquid dish soap and3 parts water 2 Spoon several drops oruse squirt bottle of the solution...

Page 11: ...SEMBLY WARNING Step 11 TO BE INSTALLED ONLYBY A COMPETENT PERSON Step 11 Disconnect Natural Gas When Storing or Transporting 1 Turn offthe heater 2 Turn offthe valve ofnatural gas 3 Disconnect the gas...

Page 12: ...ks Be sure theaccess panel isclear of debris Be sure anycomponent removed duringassembly or servicingis replaced and fastened priorto starting Before Lighting Heater should bethoroughly inspected befo...

Page 13: ...seheat The color is more visible at night Burnerwill display tonguesof blue flame Theseflames should not beyellow or producethick black smoke indicatingan obstruction of airflow throughthe burners REL...

Page 14: ...utdoor patios decks spas pool and working areas Always make sure that adequate fresh air ventilation is provided Follow the spacing tolerances shown in Figure 1 This heater clearances shown in Figure...

Page 15: ...ews that fasten theemitter to thelower screen cone 2 Remove lower conecylinder by removingthe 4 pcsscrews which attach thelower cone cylinderto the controlcylinder 3 Remove the 4pcs screws at the bott...

Page 16: ...16 REPLACING INJECTOR 4 5 4 Use the spannerto take downthe old injector assemble the exchangedinjector and screwit by spanner The picture for pilot flame gas tube exchanged to 6 4 Aluminum pipe...

Page 17: ...R SAFETY NOTE In a salt airenvironment such asnear an ocean corrosion occursmore quickly than normal Frequentlycheck for corroded areas andrepair them promptly The installation offixed appliances shal...

Page 18: ...hail snow dust and debris If desired coverheater to protectexterior surfaces andto help prevent debris in airpassages Turn the control knob to OFF position Disconnect natural gasand move toa secure w...

Page 19: ...se connection Tighten connection Thermocouple bad Replace Thermocouple Gas leak in line Check connections Burner will not light Pressure is low Orifice blocked Remove clean and replace Control Valve n...

Reviews: