background image

User Manual

V3.3.20

AccuFab-D1s

Summary of Contents for AccuFab-D1s

Page 1: ...User Manual V3 3 20 AccuFab D1s ...

Page 2: ... expressly approved by the party responsible for compliance could void the user s authority to operate the equipment This equipment has been tested and found to comply with the limits for a Class B digital device pursuant to part 15 of the FCC Rules These limits are designed to provide reasonable protection against harmful interference in a residential installation This equipment generates uses an...

Page 3: ...nstalling operating and maintaining the product including the device software or other products provided by the Company to which the Manual is applicable The Manual does not serve as the quality guaranty for the product Every effort has been made in the preparation of the Manual to ensure accuracy of the contents The company reserves the right to interpret and modify possible errors and omissions t...

Page 4: ...3 21 Model Post Cure 7 4 21 Remove Support 7 Post Processing 19 6 1 13 Workflow 6 5 16 Choose Printing File 6 2 13 Resin Tank setting 6 4 15 Clean Resin Tank Optional 6 5 1 16 Local Printing 6 6 18 Printing Status 6 5 2 17 Flash Drive Printing 6 13 Print 6 3 Platform level Optional 14 2 2 Operation Environment 2 2 1 Site Requirements 2 2 2 Material Storage 3 2 3 Others 5 9 FabWare 5 1 Connecting to...

Page 5: ...ce Keep the material properly and keep away from the children 1 2 Ultraviolet Light During the printer and Fab cure operation Ultraviolet light with a wavelength of 405 nm will be emitted which is may bring damage to your eyes Please avoid direct contact A safety interlock is enabled to avoid printing when the cover is open Ethanol is a flammable and explosive chemical Please store in a cool and ve...

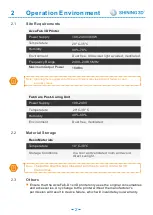
Page 6: ...y Fab Cure Post Curing Unit Temperature Humidity Environment 100 240V 20 C 30 C 40 60 Dust free Ventilated 2 2 2 Material Storage Temperature Storage Conditions 10 C 30 C In a cool and ventilated room and avoid direct sunlight Resin Materials The bottle shall be kept closed at all times to avoid contact with fire sources Note 2 3 Others Ensure that the AccuFab D1s 3D printer only uses the original ...

Page 7: ...inting environment will affect the printing accuracy and printing success rate Operation Environment 2 2 3 Others To guarantee the printing quality of the model keep the hood closed during operation or just finished operation and do not touch the model resin tank platform or other parts of the device by hand 3 ...

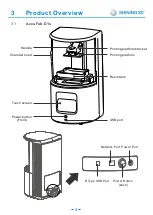
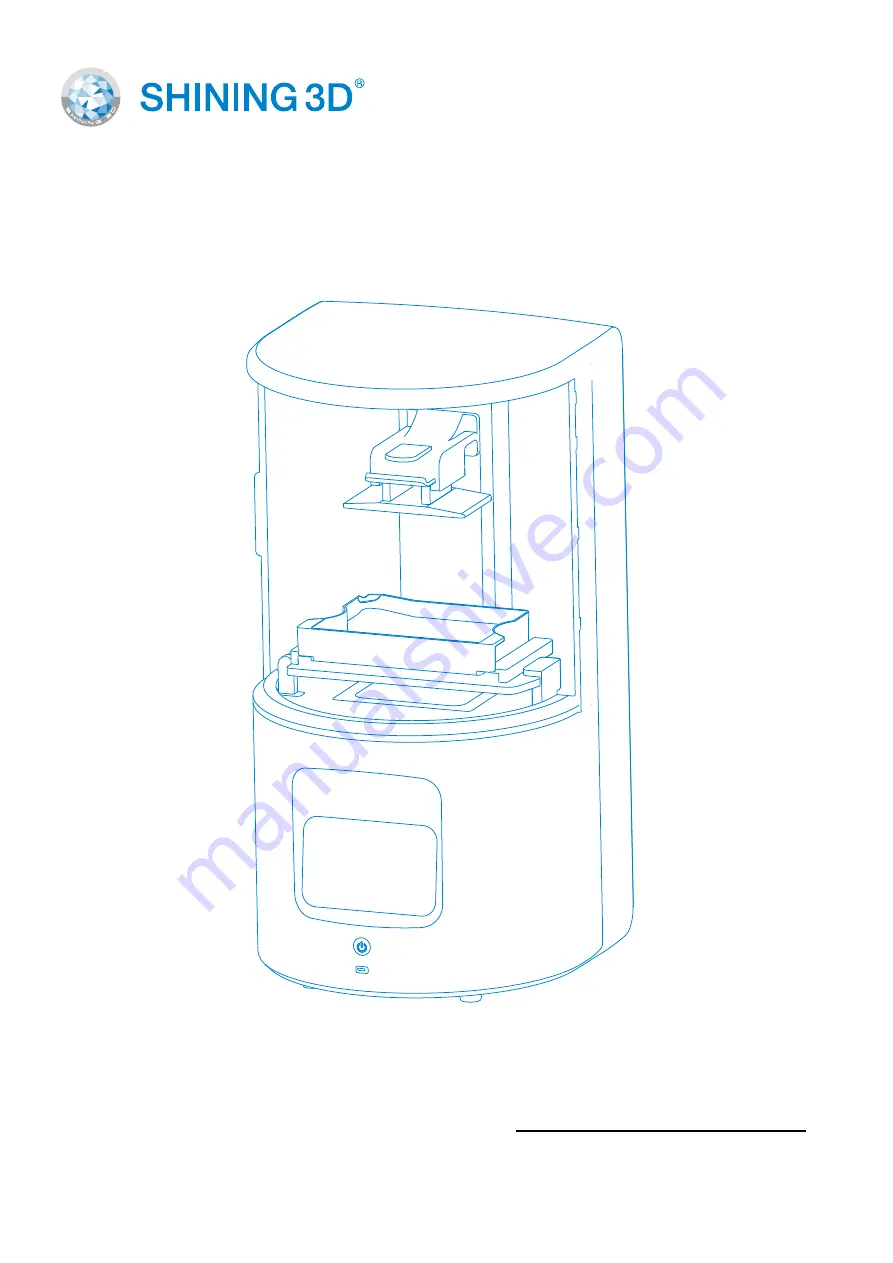
Page 8: ...ccuFab D1s Product Overview 3 Chamber hood Touch screen Power button Front USB port Printing platform bracket Printing platform Resin tank O Network Port Power Button back B Type USB Port Power Port Handle 4 ...

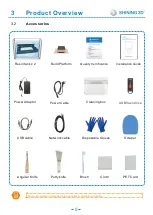
Page 9: ...ease refer to Quick Start Guide Note Cloth PET Card Putty knife Angular Knife Brush Cleaning box USB flash drive Resin tank x 2 Installation Guide Quality Certification Power Cable Disposable Gloves Scraper USB cable Network cable 5 Build Platform Power Adaptor ...

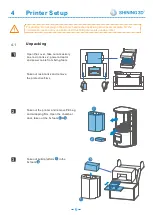
Page 10: ...s inside printer 1 2 3 Unpacking Printer Setup Open the cover take out accessory box resin tank x 2 power adaptor and power cable from fixing foam 1 2 Take out resin tanks and remove the protective films 1 3 1 2 Take out the printer and remove PE bag and wrapping film Open the chamber door take out the fix foam 3 Take out build platform in the fix foam 1 6 ...

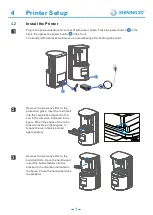
Page 11: ...printer Remove the protective film on the protection glass Inset the resin tank into the card slot and push it to the end in the direction indicated in the figure When the edges of the resin tank are inside at right angles it means the resin tank is placed appropriately Remove the protective film on the build platform Open the handle and insert the build platform into the bracket in the direction ind...

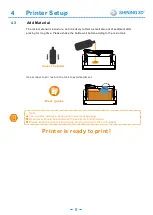
Page 12: ... adding to the resin tank You can also add resin during printing without pausing Resin level should be at between the minimum and maximum Please keep the cover closed during printing to ensure the print quality Note Shake The Bottle Printer Setup Add Material Printer is ready to print Use scraper to stir resin in the tank to avoid sediment Wear gloves 8 ...

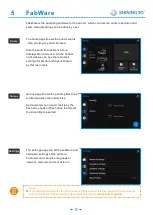
Page 13: ...inter status Idle printing or printer finished Also the build environment info is displayedfor reference On the bottom right side we can see the resin tank setting of material and layers printed by this resin tank Home The settings page are all the software and hardware settings of the printers Customer can setup the language or network manual control of axis etc Settings If you see that the printe...

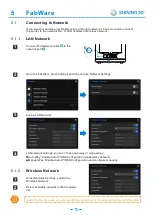
Page 14: ...ion enabled by default Manual Way Disable Auto IP DNS Configuration and configure manually 5 1 2 Wireless Network Under Network Settings enable the Wireless Network Select available network in the dropdown list 1 2 FabWare If you want to send the print file after slicing through network Then you need to connect the printer to the network first to LAN network or wireless network LAN Network Note Choose...

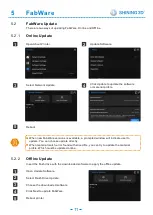
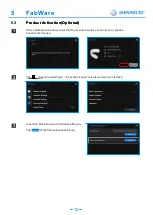
Page 15: ...ownloaded software Click Next to update FabWare Reboot printer 5 5 2 5 2 1 Online Update 1 2 3 5 2 2 Offline Update 1 2 4 Click Update to update the software or material profile 5 Reboot When new FabWare versions is available a prompted window will indicate user to update You can choose update directly When material match error found with sliced file you can try to update the material profile Which mus...

Page 16: ...Print Delete 3 If the notification window shows that the license expires or can not print please activate the license 1 Tap Advanced Settings Activate License to enter activation interface 2 Insert the Flash Drive with Activation file ac Tap Flash Drive Activation File Activate 3 ...

Page 17: ...ting You can choose the brand and material for the current print or just to choose others to set for other materials FabWare will check the setting of the resin tank and compare it with the setting of sliced file Please change the setting accordingly if an error of mismatch of setting detected AccuWare Detailed information please refer to AccuWare User Manual POST PROCESSING AccuWare IMPORT PRINT F...

Page 18: ...ed in place Try inserting PET card at four corners and between the platform and the resin tank 3 In the control panel find Settings Hardware Settings Motor Settings move to Zero Position and tap Platform will go down wait until it stops 2 1 4 Choose different step distance move the platform down until PET card cannot be inserted at all Click OK to finish 1 2 3 4 14 ...

Page 19: ...On the FabWare main interface tap resin tank area to enter the Resin Tank Information Tap Cure Resin to proceed 2 Select curing time and tap Next Change the curing time if the default time is not sufficient DO NOT use sharp tools or it may damage the film and lead to material leakage 1 3 After curing materials remove the cured material with PET card in the tool box Note 15 ...

Page 20: ...se printing file To ensure the model printing quality keep the chamber door closed when the Printer is printing or just finished printing Do not touch the model resin tank build platform or any other Printer parts Files can be sent to the printer with flash drive or through network 6 5 1 Local Printing Choose the print file stored in the printer to start printing in the queue 2 3 1 2 Select a print jo...

Page 21: ... the saved sliced file This PC Documents 3DDlpDocuments3 DlpGenerateOut Folder with corresponding Printer serial number The Printer recognizes FAT32 format only 7 Confirm printing prompts and tap Next Tap Next to start printing process After finishing printing tap to finish Ok 6 5 2 Flash Drive Printing 3 5 6 6 After finishing printing tap to finish Ok 5 Tap to start printing process Next 6 5 1 Local Pr...

Page 22: ...rrent printing Printing Status Name 1 2 3 4 5 6 Print detail Print layer Time Percentage bar Pause Cancel Tap to return to the previous step Printed layers Total layers Time elapsed Total time Printing progress Tap to pause the printing and tap again to resume Tap to cancel printing Description 1 2 3 4 5 6 18 ...

Page 23: ...er the model printing is finished lift and suspend the printing platform for 5 minutes Thus the residual resin material attached on the surface of the model drops back to the resin tank Use the PET sheet provided in accessories to scrap off the resin material on the build platform in an oblique manner Pull up the handle take out the build platform and place the platform sideways on the bench Remove ...

Page 24: ...re for the cleaning of platform Please avoid protrusion of the platform surface As it would press the resin tank film during printing process And may damage the film or even the screen 7 2 1 Clean Model 7 2 Cleaning Put the printed parts into the bath of alcohol concentration of 75 or above And clean manually for about 30 seconds You can use cleaning machine as well Dry the model with high pressure ...

Page 25: ...e can be handled without gloves Be careful to prevent scratches when using sharp tools such as utility knives Remove the build platform before replacing the resin tank to avoid resin dropping The exposure time of different printing materials are different Note 1 2 Rotate the knob to set the curing time and press it for 1s to start 3 4 DM12 OD01 DC12 SG01 GM11 TR01 Materials 5 mins per side 5 mins pe...

Page 26: ...Technical resource Support Center Aftersales service ...

Reviews: