Shining Technology CitiDISK HDV Quick Usage Guide v11.0 Shining Technology CitiDISK HDV Quick Usage Guide v11.0
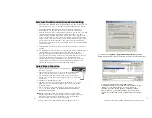
The “
Capture format
” column displays the current captured format.
For example, “QuickTime” MOV is the format selected. User is able to
change it by clicking on one of them.
There are two user-definable formats available, which are “Canopus
AVI2” and “Legacy Matrox”.
Note: Choose AVI2 for most of the Matrox editing software user. Do
not choose “Legacy Matrox” format only if it is specified by the
manufacturer.
The
“Pre-Scene Loop
” function will display how many seconds user
wants to choose. If it’s blanked out, such function is not supported by
this hardware. Up to 6 seconds is allowed for FW1256H model for DV
capturing. Such function is temporarily disabled for HDV capturing.
The “
Continue record at tape end
” is “checked” as a default setting.
Un-checking this item will force the CitiDISK HDV unit to stop
recording at tape end.
The “
Power off
” is not checked as default setting. Checking this item
will automatically turn off the unit 30 seconds after being ejected from
the computer or after being left un-connected to the camera or
computer.
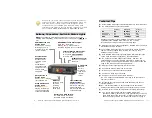
If the CitiDISK HDV is not connected to camera neither the
computer, all three lights will flash. If connecting to the camera, the
unit will synchronize itself to the camera; the whole process could
take up to 20 seconds for large capacity models. When the unit is
ready to operate, the
“GREEN”
light turns on and stays solid.
•
Auto powering off:
When the internal battery has less than 5 minutes of power capacity
remaining, this
“GREEN”
light blinks first, next to stop recording and
to shut off the unit.
•
Power off
:
Toggle the
“PWR”
button once. The
“GREEN”
light turns off.
•
Turning on the battery
:
Slide the main switch to ON position.
Without doing so the CitiDISK HDV will
not operate.
•
Turning off the battery
:
Slide the main switch to OFF position
while in storage or in transit so as not to
drain the battery when it’s not in use.
•
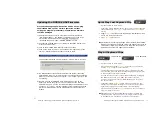
The
BLUE
charging light turned on, when the battery
is nearly empty, the charging current is the highest
and the BLUE light is the brightest. Eventually the
BLUE
light dims out and off if full. The charging time
could take up to 6 hours.
•
You can only use the external power source to either
charge the unit or to operate the unit.
P15
•
Apply the wall-mount power adapter to
the external power input socket or
connect the FireWire cable to an active
computer’s FireWire port.
Note: The internal re-chargeable battery is made of hard Lithium Polymer
material.
•
Power on
:
Toggle the
“PWR”
button once.
Charging the Internal Battery
Turning On/Off Internal Battery
Powering On/Off the CitiDISK HDV
P6
P15
P6


