39
9-3 Communicating with the connected weight
masuring sensor
Once an ID number for a weight measuring sensor has been set, connect it to the indicator
and check operation.
Connect the indicator to the weight measuring sensor.
Make a connection equivalent to that shown in the wiring diagram in Section 9-1
"Overview of the multi-drop connection."
When all the weight measuring sensors and an indicator are connected, turn on the
indicator.
The indicator displays the weighed value from the weight measuring sensor having
the matching ID number.
(If the ID number in the indicator does not match that of any of the weight measuring
sensors, then "E1-Err" blinks or is lit.)
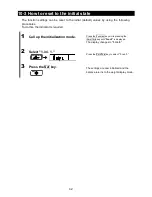
Make the indicator display an ID number.
Press the Set(ID) key.
Specify an ID number.
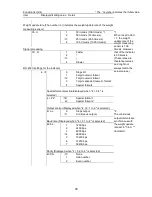
Use the Zero/Tare(+) or Function(-) key to display an ID number to be specified.
Zero/Tare(+) key: Increases the number (01
→
02
→
...
→
15
→
01)
Function(-) key: Decreases the number (15
→
14
→
...
→
01
→
15)
When a desired ID number is displayed, press the Set(ID) key.
The weighed value of the weight measuring sensor with the specified ID number is
displayed.
Switching between ID numbers
To communicate with a different weight measuring sensor, perform steps 2 and 2
above.
The value recorded in the weight measuring sensor is loaded as a function setting
value to the indicator every time ID numbers are switched.
If a function setting value was changed from the indicator, then that value is
reflected at the weight measuring sensor.
2
3
1
Summary of Contents for UD-1
Page 52: ...48 Appendix 3 Outlines Weight measuring sensor UF 620 UF 3200 ...
Page 53: ...49 Indicator ...
Page 54: ......
Page 55: ...はくし ...
Page 56: ...はくし ...


