Antenna Installation
4
CAUTION
All O-rings are made of silicone. Do not lubricate them with silicone
grease, as this will soften the O-ring. Use only a light lubricating coat of
O-Lube (provided) or petroleum jelly; too much may hamper electrical
contact and contaminate the interior of the system.
Be sure the O-ring is properly seated in its groove and not pinched
between the flange contact surfaces.
e. Remove the O-ring and coat it lightly with O-Lube (supplied with the
antenna), then reinstall it in the O-ring groove in the flange.
f. Before installing the bay radiator, make sure an inner conductor connector
is in place in the inner conductor of the baymount flange.
CAUTION
Assemble components in accordance with the installation drawing. If you
don’t, the antenna may not perform as expected.
g. Remove the matching radiator assembly from its protective plastic bag.
CAUTION
Be sure the radiator’s inner conductor fits cleanly over the baymount’s
inner conductor connector. If any of the fingers of the connector are
forced outside the radiator’s inner conductor (a "split bullet"), this will
cause arcing and damage to the antenna.
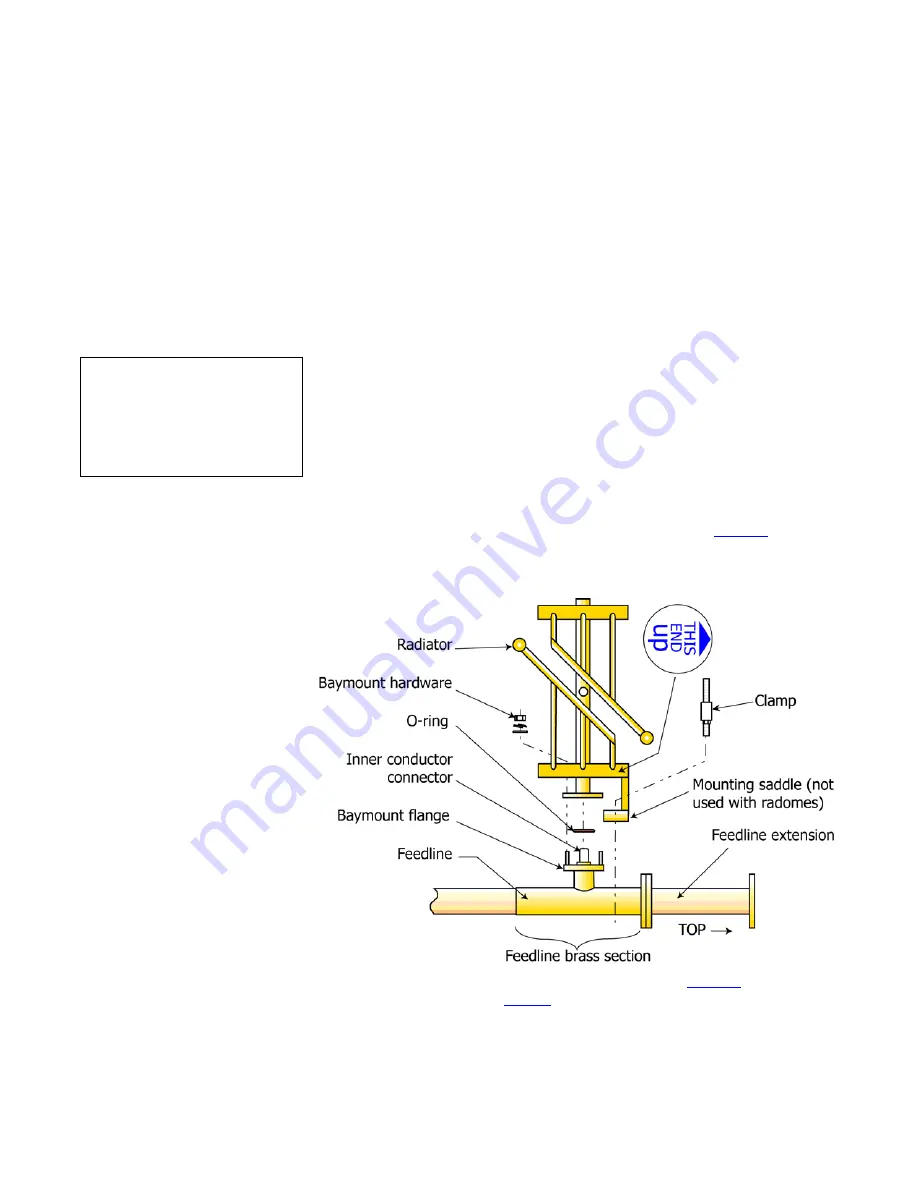
h. Align the radiator with the baymount flange as shown in
Figure 2
, with the
top pointing toward the nearby feedline flange. Carefully place the radiator
into position over the flange studs and inner conductor connector.
Figure 2. Radiator installation,
exploded view
i. First snug the flange bolts in the sequence shown in
Figure 3
, then tighten
them in accordance with
Table 1
.
Important
Be very careful not to dis-
turb or damage the feed
strap when handling the
radiator.


