17
TROUBLESHOOTING – FIXING AN AIR LEAK
STEP 1:
Drain the system ensuring the ICE is securely resting on the deck and all the air has been released from the shocks.
STEP 2:
If there is obvious damage to the fitting such as a crack or a hole, replace the fitting with a new one sourced
from a hydraulic supply shop or purchase directly from SHOCKWAVE.
STEP 3:
Ensure the compressor does not turn on by turning off either the boat power or the auxiliary power switch for
the compressor if supplied.
STEP 4:
Remove the leaking fittings, in some instances there are multiple fittings connected to generate the proper
hose routing.
STEP 7:
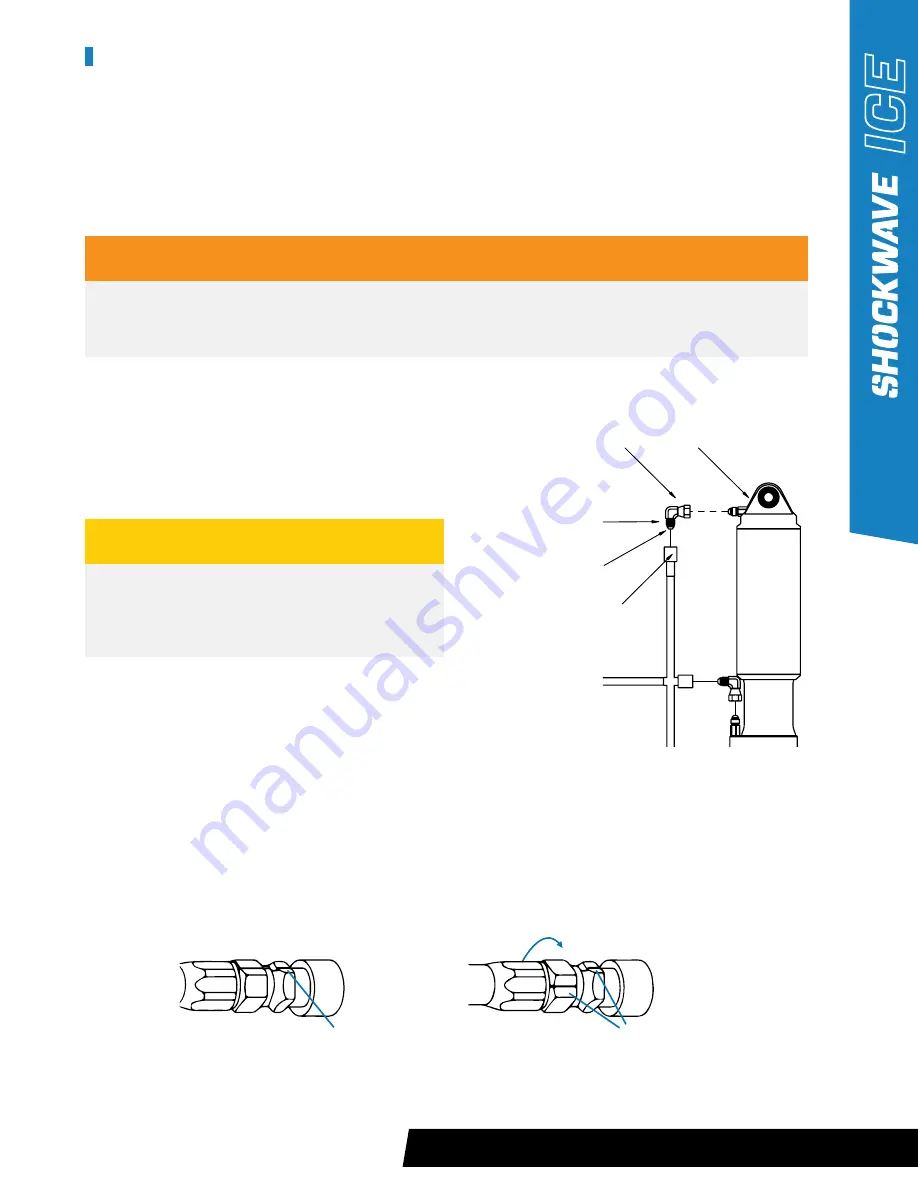
Reinstall all fittings and tighten using the method of flats.
a) Tighten the fitting until it bottoms against the seat.
b) Using a marker, draw a line lengthwise on the fitting and extend it onto the adapter
c) Using a wrench, rotate the fitting to tighten by turning the fitting the 1-1/2 to 1-3/4 hex flat rotations.
STEP 8:
If the leak continues, replace the fittings or hoses and repeat steps 6-8.
WARNING
When removing combined fittings, always hold both fittings so you only loosen the required fitting.
I.e. Removing Fitting 2 from
1
, hold Fitting
1
with a wrench and loosen fitting 2 (See drawing below).
THREADS
FITTING 2
FITTING 3
FITTING 1
SEALING FACE
MARK A LINE ON THE FITTING AND
ADAPTER BEFORE TIGHTENING.
MISALIGNMENT OF THE MARK SHOWS
AMOUNT WHICH THE FITTING WAS TIGHTENED.
TROUBLESHOOTING – FIXING AN AIR LEAK
CAUTION
Do not remove Fitting 1 unless there are clear signs
of leakage. If removed, the O-ring on this fitting
needs to be replaced.
STEP 5:
Clean the inside and outside of all fittings using a green Scotch-Brite pad or equivalent.
Ensure all contamination is removed from the sealing flanges and threads.
STEP 6:
Apply Loctite 5452 to the sealing face (taper) of the fitting and on the threads.


