-32-
W1674 Owner's Manual (Mfg. After 9/05)
O
PE
R
ATIO
NS
Free-Standing Safety Guard
Tools Needed
Qty
Wrench or Socket 14mm .......................................1
Hex Wrench 4mm ...............................................1
To install the safety guard independent of the fence
assembly, do these steps:
1.
DISCONNECT SHAPER FROM POWER!
2.
Remove the fence assembly from the table.
3.
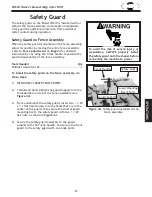
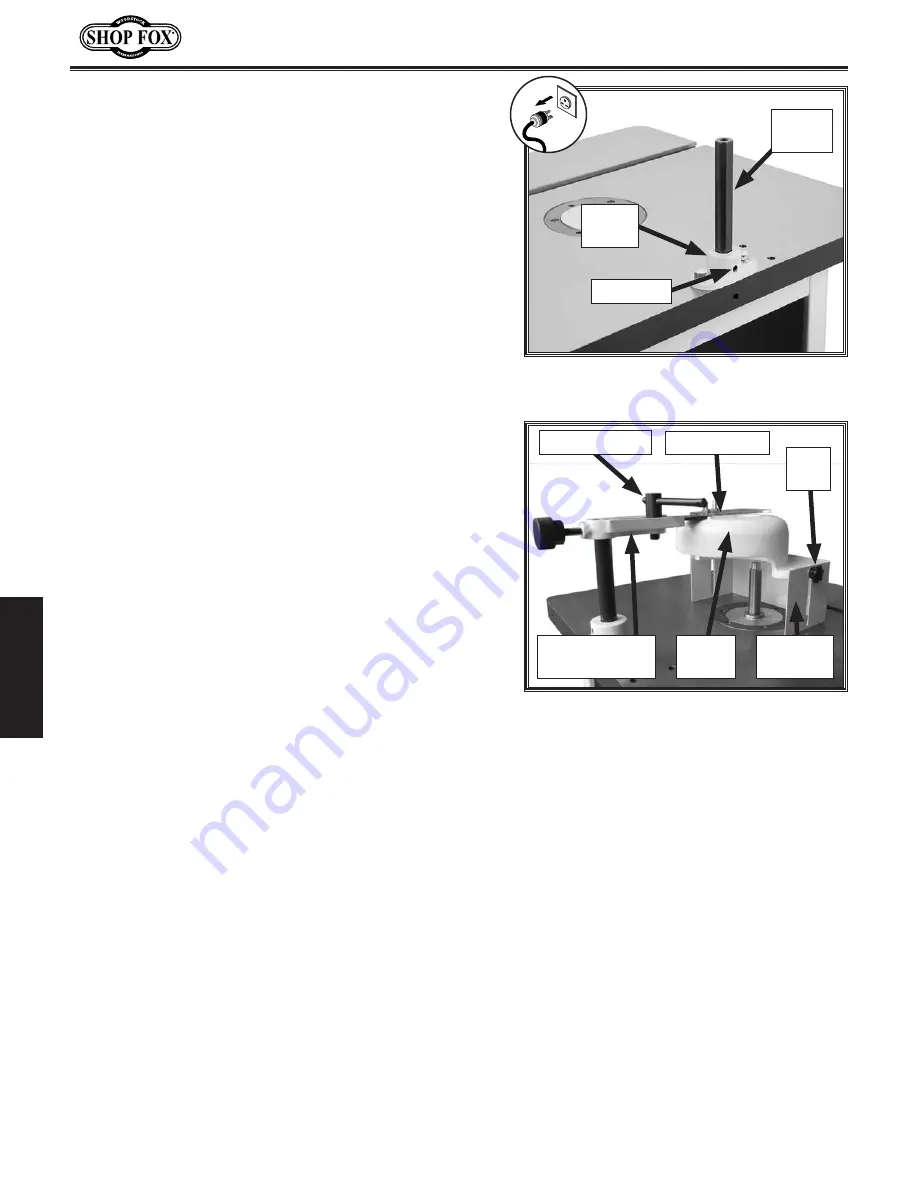
Position the safety guard shaft holder on the table
so that the set screw faces the rear, as shown in
Figure 45
, then secure it to the table with the two
provided
3
⁄
8
"-16 x
3
⁄
4
" hex bolts.
4.
Insert the safety guard shaft into the holder so that
the flat faces the rear, then tighten the set screw
against the flat to secure the shaft in place, as
shown in
Figure 45
.
5.
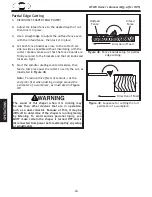
Slide the guard holding bracket onto the shaft, then
tighten the knob to hold it in place, as shown in
Figure 46
.
6.
From underneath the safety guard, insert two
1
⁄
4
"-20
x
5
⁄
8
" flat head screws into the holes in the center
of the guard, then secure the longer guard mounting
bar to the bracket with two
1
⁄
4
"-20 hex nuts.
7.
Secure the mounting bar and guard to the holding
bracket with the T-lock handle, as shown in
Figure 46
.
8. Secure the front guard to the safety guard with the
two knob bolts.
Figure
45
.
Safety guard shaft and holder
installed.
Shaft
Holder
Flat of
Shaft
Set Screw
Figure
46
.
Safety guard installed
independent of the fence assembly.
Guard Holding
Bracket
T-Lock Handle
Mounting Bar
Safety
Guard
Front
Guard
Knob
Bolt


