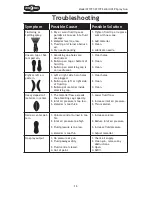
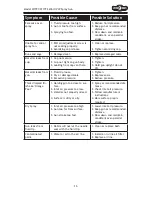

Model W1791/W1792 Mini HVLP Spray Gun
-14-
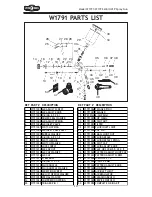
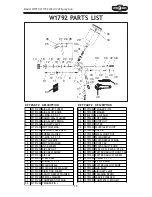
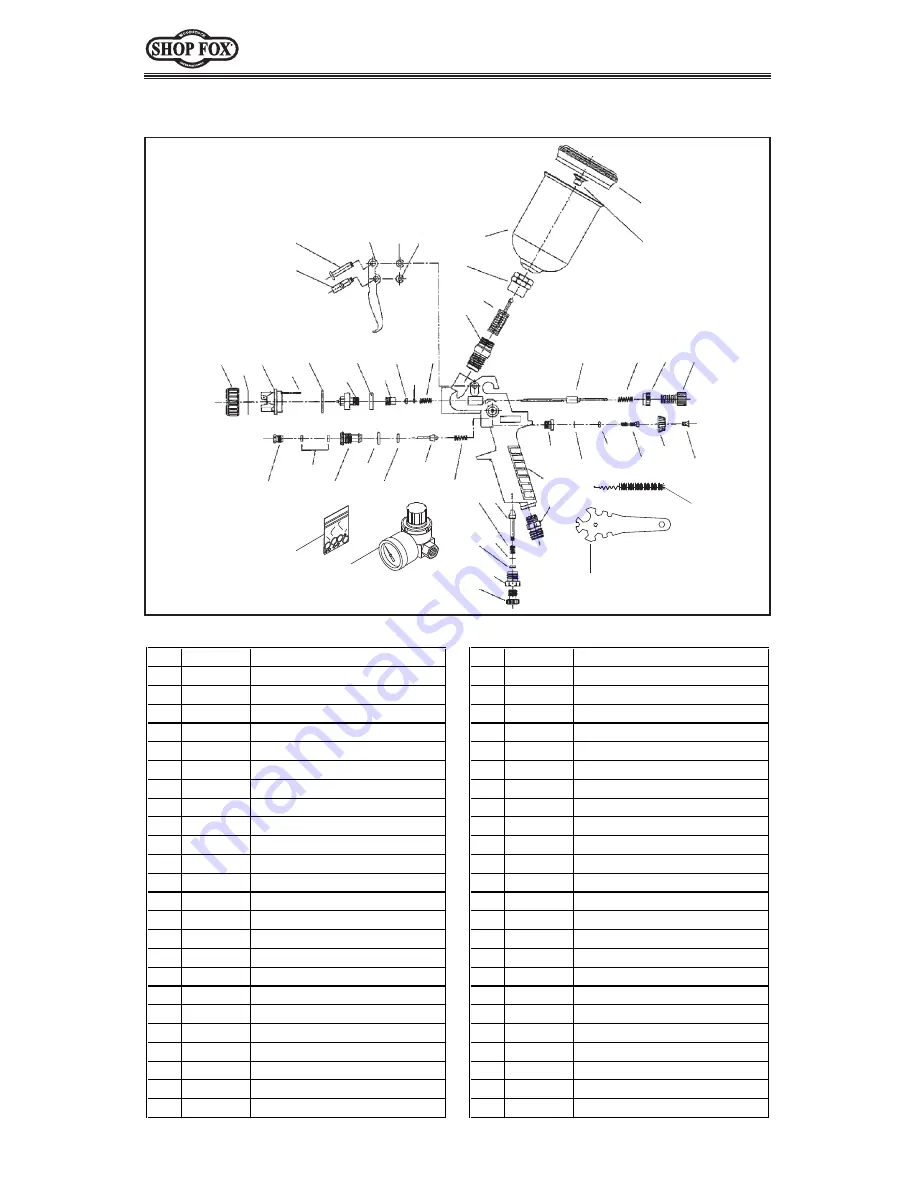
W1791 PARTS LIST
�
�
�
�
� �
�
�
�
��
��
��
��
��
��
��
��
��
��
��
��
��
��
��
��
��
�� �� ��
��
��
��
��
��
��
��
�� �� ��
��
��
��
��
��
��
��
��
��
��
��
��
REF PART
�
# DESCRIPTION
REF PART
�
# DESCRIPTION
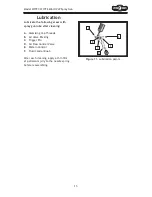
1
X1791001 AIR�ADJUST�SCREW
26
X1791026 TRIGGER�PIN�II
2
X1791002 AIR�ADJUST�KNOB
27
X1791027 TRIGGER
3
X1791003 O-RING�2.5�X�2.1
28
XPEC01M E-CLIP�3MM
4
X1791004 DOMED�SEAL�WASHER
29
X1791029 CUP�100ML
5
X1791005 AIR�ADJUST�SPRING
30
X1791030 JOINT�NUT
6
X1791006 AIR�INLET�VALVE
31
X1791031 FILTER
7
X1791007 SWITCH�SPRING
32
X1791032 FLUID�INLET�JOINT
8
X1791008 AIR�INLET�VALVE�ASS'Y
33
X1791033 CUP�LID
9
X1791009 BUBBLE�WASHER
34
X1791034 SMALL�JOINT�NUT
10
X1791010 O-RING�4.9�X�1.5
35
X1791035 FLUID�NEEDLE
11
X1791011 SWITCH�KNOB
36
X1791036 FLUID�NEEDLE�SPRING
12
X1791012 SWITCH�WASHER
37
X1791037 JOINT�CAP
13
X1791013 LOCK�SCREW
38
X1791038 FLUID�ADJUST�KNOB
14
X1791014 AIR�CAP�NUT
39
X1791039 FLAT�HD�SCR�M2.5-.45�X�8
15
X1791015 AIR�CAP�WASHER
40
X1791040 PATTERN�ADJUST�JOINT�CAP
16
X1791016 AIR�CAP
41
X1791041 PATTERN�ADJUST�SCREW
17
X1791017 STEEL�BALL�
42
X1791042 O-RING�2�X�1.5
18
X1791018 O-RING�17�X�1.5
43
X1791043 E-CLIP�2.5MM
19
X1791019 FLUID�NOZZLE
44
X1791044 PATTERN�ADJUST�KNOB
20
X1791020 FLUID�NOZZLE�WASHER
45
X1791045 GUN�BODY
21
X1791021 DIRECTION�SCREW
46
X1791046 AIR�INLET�JOINT
22
X1791022 ADJUST�NEEDLE�WASHER
47
X1791047 AIR�REGULATOR
23
X1791023 SPECIAL�WASHER
48
X1791048 CLEANING�BRUSH
24
X1791024 COMPRESSION�SPRING
49
X1791049 SERVICE�WRENCH
25
X1791025 TRIGGER�PIN�I
50
X1791050 COMPLETE�O-RING�KIT
Summary of Contents for W1791
Page 2: ... ...


