-24-
Model W1843 (For Machines Mfd. Since 3/17)
O
PE
R
ATIO
NS
To correctly tension the sanding belt, do these steps:
1. DISCONNECT MACHINE FROM POWER!
2. Make sure the sanding belt is correctly installed and
centered on the idler and drive wheels.
If sanding belt comes loose from
machine during operation, it could
cause serious personal injury from
entanglement or abrasion. ALWAYS
make sure sanding belt is properly
installed, tensioned, and tracked
before connecting machine to power.
3. Hold onto the sanding arm assembly to keep it from
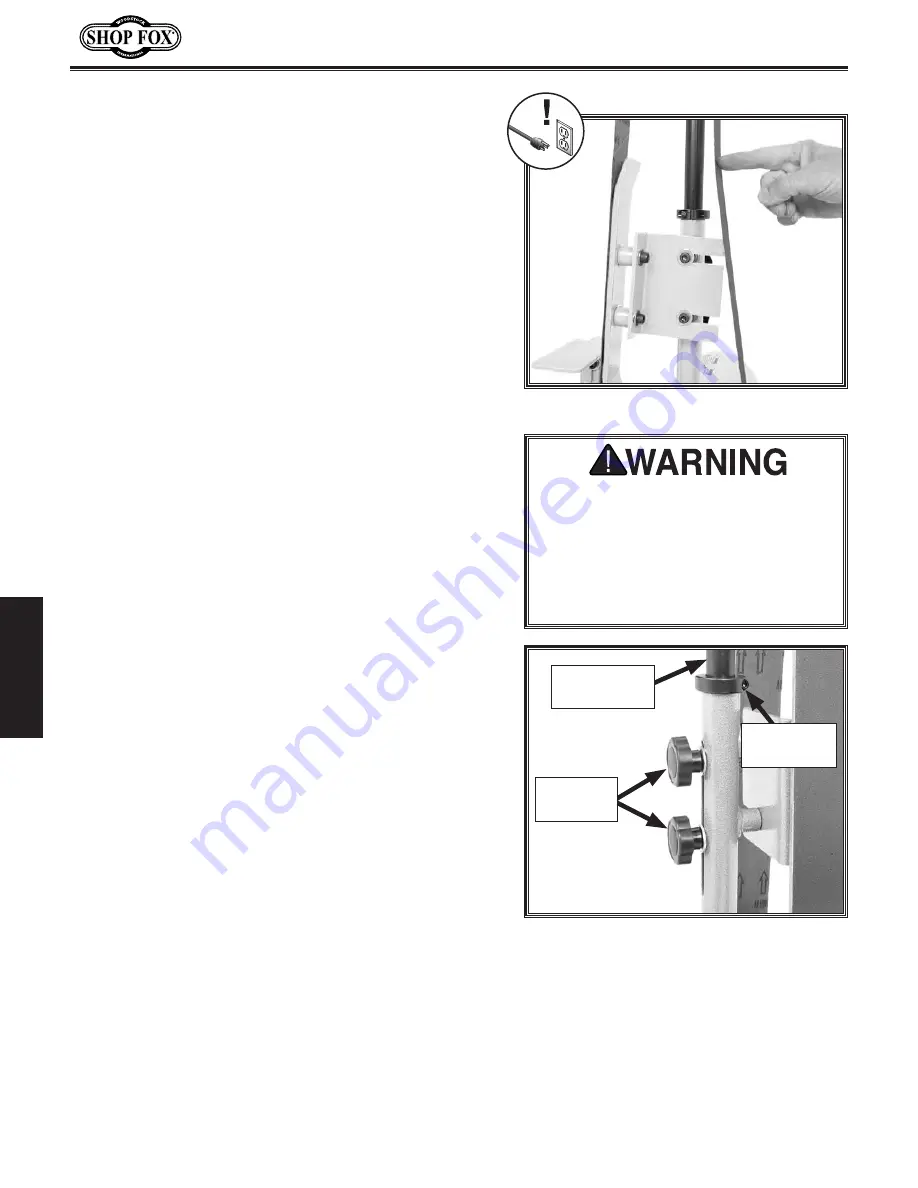
moving, then loosen the threaded knobs and the lock
collar cap screw shown in
Figure
21
.
4. Adjust the height of the sanding arm assembly
so there is the correct amount of tension on the
sanding belt, then re-tighten the threaded knobs to
hold the assembly in place.
5. Adjust the lock collar so that it is firmly seated on
the pivot arm top, then re-tighten its cap screw.
Note: The lock collar ensures the stability and
position of the sanding arm beyond the holding
power of the threaded knobs.
6. Re-check the sanding belt tension. If necessary,
repeat this procedure until the correct belt tension
is achieved.
Figure
21
. Sanding belt tension controls.
Lock Collar
Cap Screw
Threaded
Knobs
Sanding Arm
Assembly
Figure
20
. Checking sanding belt tension.
The sanding belt is properly tensioned when there is
approximately
1
⁄
2
" deflection with slight pressure applied
to the back loop of the belt, as shown in
Figure
20
.
The sanding belt tension is adjusted by raising or lowering
the sanding arm assembly.
Tool.Needed.
Qty
Hex Wrench
3
⁄
16
" ................................................1
Tensioning.Sanding.Belt


