{9}
Shor-Line | 800.444.1579 |
www.shor-line.com
;
{Raising and Lowering the Table Top}
Step 1
Using the wireless control, push the upward arrow to
move the table to the upward position.
Step 2
The down arrow will allow you to lower the table. (Fig. 3C)
{Positioning the Table Top}
Step 1
To slide table pull the spring loaded knob on the underside of the
table while sliding the table out as far as possible. (Fig. 3F)
Step 2
Once the table top is pulled out to the furthest position, pull the
lever at the end of the table to unlock (Fig. 3F) and rotate table
from Peninsula to Lateral position. (Fig. 3E)
Step 3
Once the table top is in the desired position firmly push on the
end of the table to lock it into position. Once the table top is
locked into position it will be set tight against the backboard.
(Fig. 3D)
Section 4: Operation & Functionality -
Blue-Line Rotational Lift Table with Scale
{Before Use}
• Make sure that you have mounted your Rotational Lift Table
using one of the 3 options found in Section 2.
• Plug the table into a minimum 15 amp dedicated service
outlet with ground.
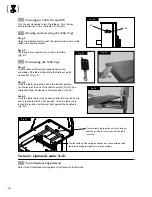
• Use the two tie downs to secure the animal to the table
during exam/surgery. (Fig. 4A)
NOTE:
Your RLT comes equipped with an outlet located on the
back of the table.
Be sure to lock table top into position before use.
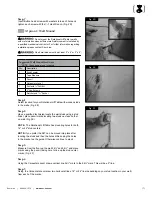
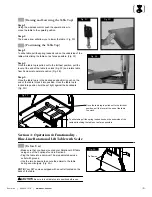
Fig. 3F
To slide table pull the spring loaded knob on the underside of the
table while sliding the table out as far as possible.
Once the table top is pulled out to the furthest
position, pull the lever at the end of the table
to unlock.
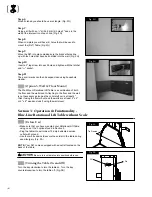
Fig. 3E
Fig. 3C
Fig. 3D
Tie Downs
Fig. 4A


