background image


9B 

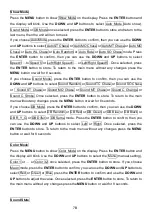
Press the 

MENU

 button to show White Balance on the display. Press the 

ENTER

 button 

and r 255 will blink, use the 

DOWN

 and

 UP

 buttons to adjust the value. Next press the 

ENTER

 button to store and g 255 will blink on the display, use the 

DOWN

 and

 UP

 buttons to 

adjust the value and press the 

ENTER

 button to store and b 255 will blink on the display, 

use 

DOWN

 and

 UP

 button to adjust the value, and press 

ENTER

 button to store. To return 

to the main menu without any changes, press the

 MENU 

button. 


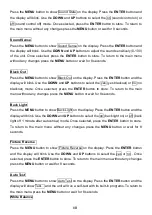
Fixture Temp. 

Press the 

MENU

 button to show Fixture Temp on the display. Press the 

ENTER

 button and 

the  display  will  show  the  temperature  of  the  unit.  To  return  to  the  main  menu  press  the


MENU

 button. 


Fixture Time 

Press the 

MENU

 button to show Fixture Time on the display. Press the 

ENTER

 button and 

the display will show the number of working hours of the unit.  To return to the main menu 

press the

 MENU

 button. 


PRO defaults 

Press the 

MENU

 button to show PRO defaults on the display. Press the 

ENTER

 button and 

the display will show Are you sure?.Press the 

ENTER

 button the fixture run built-in program 

to set the 

Channel Mode/ Black out/ Black light/ Fixture Reverse/ White Balance/ Fan 

Speed

 functions to PRO Defaults settings. To return to the main menu press the

 MENU


button.


Firmware Version 

Press the 

MENU

 button to show Firmware Version on the display. Press the

 ENTER

 button 

and the display will show the version of software inside the unit. To return to the main menu 

press the

 MENU

 button. 


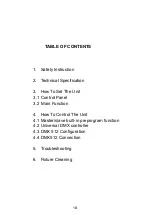
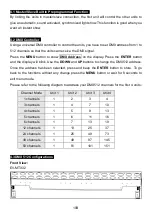
  4. How To Control The Unit   

You can operate the unit in four ways: 

1.  Master/slave built-in preprogram function 

2.  Universal DMX controller 

3.  DMX 512 Configurations 

4.  DMX 512 Connection 


Summary of Contents for DIALighting LED Bar 32-15 COB

Page 1: ...DIALighting LED Bar 32 15 COB User Guide Professional Entertainment Technology...

Page 2: ...ecification 3 How To Set The Unit 3 1 Control Panel 3 2 Main Function 4 How To Control The Unit 4 1 Master slave built in preprogram function 4 2 Universal DMX controller 4 3 DMX 512 Configuration 4 4...

Page 3: ...als close to the unit while operating as it is fire hazard Use a safety cable when fixing this unit Maximum ambient temperature is TA 40 Don t operate it where the temperature is higher than this In t...

Page 4: ...tion and slipping while operating Always ensure that the structure to which you are attaching the unit is secure and is able to support 10 times the weight of the unit 2 Technical Specification 1 3 4...

Page 5: ...t to power supply Mains output Connect to supply mains power to other units Fuse For over current protection DMX input output For DMX512 link use 3 5 pin XLR plug cable to link the unit together Safet...

Page 6: ...ns to change the show the new show will take effect immediately If you select show 1 8 or Auto Fade you can press the ENTER button to choose the speed The unit will run in the speed that has been sele...

Page 7: ...splay Press the ENTER button and the display will blink Use the DOWN and UP buttons to change the tube amount from 1 to 1000 Once selected press the ENTER button to store To return to the main menu wi...

Page 8: ...MT Chase or Sound C Change or Sound C Strobe Once selected press the ENTER button to store To return to the main menu without any changes press the MENU button or wait for 8 seconds If you choose DB...

Page 9: ...elected press the ENTER button to store To return to the main menu without any changes press the MENU button or wait for 8 seconds Back Light Press the MENU button to show Back Light on the display Pr...

Page 10: ...how Fixture Time on the display Press the ENTER button and the display will show the number of working hours of the unit To return to the main menu press the MENU button PRO defaults Press the MENU bu...

Page 11: ...display Press the ENTER button and the display will blink Use the DOWN and UP buttons to change the DMX512 address Once the address has been selected press and keep the ENTER button to store To go ba...

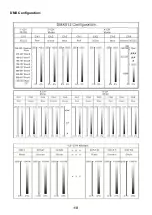
Page 12: ...11B DMX Configuration...

Page 13: ...12B...

Page 14: ...pin XLR plug and plug it in the DMX output of the last unit 3 Connect the unit together in a daisy chain with the XLR plug from the output of the unit to the input of the next unit The cable can not...

Page 15: ...n and no response to the channel check the address settings and DMX polarity 3 If you have intermittent DMX signal problems check the pins on cables and fixtures 4 Try another DMX controller 5 Check i...

Page 16: ...15B Clean the external optics at least every 20 days Clean the internal optics at least every 30 60 days...

Reviews: