background image


Galactic TXT        V1 

Highlite International B.V. – Vestastraat 2 – 6468 EX – Kerkrade – the Netherlands 

Ordercode: 51342 

MANUAL 

ENGLISH 

Summary of Contents for Galactic TXT

Page 1: ...Galactic TXT V1 Highlite International B V Vestastraat 2 6468 EX Kerkrade the Netherlands Ordercode 51342 MANUAL ENGLISH ...

Page 2: ...Multiple Galactics DMX Control 14 Fixture Linking 15 Data Cabling 15 Control Panel 16 Control Mode 16 DMX Addressing 16 Menu Overview 17 Main Menu Options 18 1 Built in Auto Shows 18 2 Sound controlled Shows 18 3 Text Mode 18 4 Time Mode 18 5 Countdown Mode 19 6 Master Slave Mode 19 7 DMX Mode 19 8 System Settings 20 Keyboard 21 1 Built in Auto Shows 21 2 Sound controlled Shows 21 3 Text Mode 22 4...

Page 3: ...2 Ordercode 51342 Galactic TXT Maintenance 32 Replacing the Fuse 32 Troubleshooting 32 No Light 32 No Response to DMX 32 Product Specifications 34 Dimensions 35 Notes 37 ...

Page 4: ...and retain packing material for inspection if any parts appear damaged from shipping or the carton itself shows signs of mishandling Save the carton and all packing materials In the event that a fixture must be returned to the factory it is important that the fixture be returned in the original factory box and packing Your shipment includes Showtec Galactic TXT IEC power cable 1 75 m Remote contro...

Page 5: ...nto the sky Never open the laser housing The high laser power levels inside of the protective housing can start fires burn skin and will cause instant eye injury Do not insert objects into air vents Do not connect this device to a dimmerpack Do not open the device and do not modify the device Do not point lasers at highly reflective surfaces such as windows mirrors and shiny metal Even laser refle...

Page 6: ...talled out of the reach of children Never leave the unit running unattended Never attempt to bypass the thermostatic switch or fuses For replacement use fuses of same type and rating only The operation of a class 4 laser show laser is only allowed if the show is controlled by a skilled and well trained operator familiar with the data included in this manual The user is responsible for correct posi...

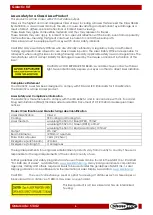
Page 7: ...ctic Laser has been designed to comply with FDA and IEC Standards for it classification The Galactic is a Class 4 laser product Laser Safety and Compliance Information The Galactic is manufactured to comply with the IEC 60825 1 and in accordance with U S Food and Drug Administration FDA Standards Listed under FDA Document 21 CFR 1040 and subsequent laser notices Product Classification and Manufact...

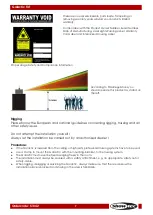
Page 8: ...es concerning rigging trussing and all other safety issues Do not attempt the installation yourself Always let the installation be carried out by an authorized dealer Procedure If the Galactic is lowered from the ceiling or high joists professional trussing systems have to be used Use a clamp to mount the Galactic with the mounting bracket to the trussing system The Galactic must never be fixed sw...

Page 9: ...ns Connect the device to the mains with the power plug Always pay attention that the right color cable is connected to the right place International EU Cable UK Cable US Cable Pin L BROWN RED YELLOW COPPER PHASE N BLUE BLACK SILVER NEUTRAL YELLOW GREEN GREEN GREEN PROTECTIVE GROUND Make sure that the device is always connected properly to the earth Improper installation can cause serious damage to...

Page 10: ...number 04 A brief description of the symptoms Claims The client has the obligation to check the delivered goods immediately upon delivery for any short comings and or visible defects or perform this check after our announcement that the goods are at their disposal Damage incurred in shipping is the responsibility of the shipper therefore the damage must be reported to the carrier upon receipt of m...

Page 11: ...80 Control Modes Auto Sound Text Time Countdown DMX Master Slave Divergence each beam 2 mrad Divergence total light 160 degrees 3 pin DMX In and 3 pin DMX Out LED Display Compact strong metal housing Sound controlled via built in microphone 20 DMX Channels Safety Features Key switch Interlock Fuse T1A 250V Dimensions 225 x 185 x 185 mm LxWxH Weight 2 kg Accessories 2 Keys Interlock remote plug rem...

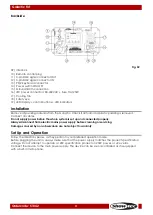
Page 12: ...moved Connect all cables Do not supply power before the whole system is set up and connected properly Always disconnect from electric mains power supply before cleaning or servicing Damages caused by non observance are not subject to warranty Set Up and Operation Follow the directions below as they pertain to your preferred operation mode Before plugging the unit in always make sure that the power...

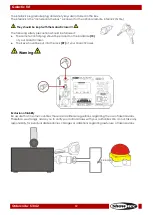
Page 13: ...lowed The remote control plug should be placed on the backside 10 of your Galactic laser The keys should be put into the lock 09 of your Galactic laser Warning Exclusion of liability Be aware that in some countries there are additional regulations regarding the use of laser devices Therefore we strongly advise you to verify your national laws with your authorities We do not take any responsibility...

Page 14: ...ord into a proper electric power supply socket 04 When the Galactic is not connected with a DMX cable it functions as a stand alone device 05 Please see page 18 for more information about the Sound controlled mode Multiple Galactics Master Slave Mode 01 Fasten the effect light onto firm trussing Leave at least 0 5 meter on all sides for air circulation 02 Always use a safety cable ordercode 70140 ...

Page 15: ...ices 05 Link the units as shown in Fig 04 Connect a DMX signal cable from the first unit s DMX out socket to the second unit s in socket Repeat this process to link the second third and fourth units 06 Supply electric power Plug electric mains power cords into each unit s IEC socket then plug the other end of the mains power cord into proper electric power supply sockets starting with the first un...

Page 16: ... digital DMX signal Maximum recommended DMX data link distance 100 meters Maximum recommended number of fixtures on a DMX data link 30 fixtures Data Cabling To link fixtures together you must obtain data cables You can purchase DAP Audio certified DMX cables directly from a dealer distributor or construct your own cable If you choose to create your own cable please use data grade cables that can c...

Page 17: ...dress of the second Galactic should be 1 20 21 021 the DMX address of the third Galactic should be 21 20 41 041 etc Please make sure that you do not have any overlapping channels in order to control each Galactic correctly If two or more Galactics are addressed similarly they will work similarly Controlling After having addressed all Galactic fixtures you may now start operating these via your lig...

Page 18: ...17 Ordercode 51342 Galactic TXT Menu Overview ...

Page 19: ...d controlled shows 03 The device will now run the automatic built in sound controlled show 3 Text Mode In this menu you can choose the text which is going to be displayed 01 While in the main menu press the UP and DOWN buttons until the display shows and press the ENTER button The display will show 02 Press the UP and DOWN buttons to toggle between Each number corresponds with a single user made t...

Page 20: ...n again 05 Press the UP and DOWN buttons to choose the text which will be displayed once the countdown time has run up The adjustment range is between Each number corresponds with the user made texts 06 Press the ENTER button to link the countdown to the desired text 07 Press the UP and DOWN buttons to start the countdown 08 If you want to pause the countdown press the UP and DOWN buttons again 09...

Page 21: ...5 Press the UP and DOWN buttons to choose one of the 4 possibilities Normal View Horizontal Vertical Flip Horizontal Flip Vertical Flip 06 While the display shows press the ENTER button to proceed to the remote control settings 07 Press the UP and DOWN buttons to choose between If set to ON the fixture will recognize the included remote control If set to OFF the remote control will be ignored by t...

Page 22: ... DOWN cursors until the display shows 03 Press the ENTER key to proceed 04 Press the UP and DOWN cursors to choose from two built in auto shows 05 The device will now run the automatic built in show 2 Sound controlled Shows 01 Press the key to proceed to the main menu 02 Press the UP and DOWN cursors until the display shows and press the ENTER key 03 Press the UP and DOWN cursors to choose from tw...

Page 23: ...ssing the UP and DOWN cursors will adjust the speed of action unless stated otherwise Key Action Flow settings Flow OFF Flow ON Color settings Manual adjustment Press the UP and DOWN cursors to manually choose one of the available colors Red Green Blue Yellow Purple Cyan White Color switch Press the UP and DOWN cursors to adjust the switch speed Color flow Press the UP and DOWN cursors to adjust t...

Page 24: ...er of the displayed characters Play time settings Press the numeric keys 0 9 to set the duration of a single text playback For example 0008 8 seconds Delete Press the key to delete the whole text along with its all characteristics Backspace Press the key to remove one character Home Press the key to set the cursor in front of the initial character End Press the key to set the cursor behind the fin...

Page 25: ...the steps 1 10 4 Time Mode 01 Press the key to proceed to the main menu 02 While in the main menu press the UP and DOWN cursors until the display shows 03 Press the ENTER key to confirm The display will show 04 Press the ENTER key again The display will show Press the ENTER key to enter time display mode Press UP and DOWN cursors to choose one of the two options Day and Time Only Time 05 While the...

Page 26: ...text which will be displayed once the countdown time has run up The adjustment range is between Each number corresponds with the user made texts 07 Press the ENTER key to confirm 08 Press the SPACE key to start the countdown 09 If you want to pause the countdown press the SPACE key again 10 Similarly press the SPACE key to resume the countdown 6 Master Slave Mode In this menu you can set the fixtu...

Page 27: ... show display mirror options 06 Press the UP and DOWN cursors to choose one of the 4 possibilities Normal View Horizontal Vertical Flip Horizontal Flip Vertical Flip 07 While the display shows press the RIGHT cursor to proceed to the remote control settings 08 Press the UP and DOWN cursors to choose between If set to ON the fixture will recognize the included remote control If set to OFF the remot...

Page 28: ...he show Adjustment Adjust the parameters 1 Built in Auto Shows 01 Press the button to activate Built in Auto Shows mode 02 Press the button repeatedly to toggle between the two shows 03 Press the button to pause the show If no other button is pressed afterwards the show will resume after 5 seconds 2 Sound controlled Shows 01 Press the button to activate Sound controlled mode 02 Press the button re...

Page 29: ...etween the parameters keep pressing the button 4 Countdown Mode 01 Press the button to activate Countdown mode 02 Press and hold down the button for 3 seconds to enter the countdown setup 03 Press the numeric buttons to set the starting point of the countdown For example 0008 8 seconds 04 Press the button to confirm 05 Press the button to start pause the countdown 5 Text Mode 01 Press the button t...

Page 30: ...ry patterns Channel 4 Color 0 7 Default colors 8 15 Blue 16 23 Green 24 31 Cyan 32 39 Red 40 47 Purple 48 55 Yellow 56 63 White 64 111 Color switch from slow to fast 112 159 Color switch from slow to fast 160 207 Color flow from slow to fast 208 255 Strobe from slow to fast Channel 5 Gradual pattern drawing 0 Off 1 127 Manual pattern drawing 128 255 Automatic pattern drawing from slow to fast Chan...

Page 31: ...d from fast to slow Channel 14 Horizontal movement 0 127 Manual adjustment 128 191 From left to right movement 192 255 From right to left movement Channel 15 Horizontal movement speed 0 255 Horizontal speed from fast to slow Channel 16 Vertical movement 0 127 Manual adjustment 128 191 Up to down movement 192 255 Down to up movement Channel 17 Vertical movement speed 0 255 Vertical speed from fast ...

Page 32: ...31 Ordercode 51342 Galactic TXT Patterns ...

Page 33: ...ver If this happens follow the directions below 01 Unplug the unit from electric power source 02 Insert a screwdriver into the slot in the fuse cover Gently pry up the fuse cover The fuse will come out 03 Remove the used fuse If brown or unclear it is burned out 04 Insert the replacement fuse into the holder where the old fuse was Reinsert the fuse cover Be sure to use a fuse of the same type and ...

Page 34: ... cables Data link not terminated with 120 Ohm termination plug Insert termination plug in output jack of the last fixture on the link Incorrect addressing of the fixtures Check address setting One of the fixtures is defective and disturbs data transmission on the link Bypass one fixture at a time until normal operation is regained unplug both connectors and connect them directly together Have the ...

Page 35: ...reen 70mW 450nm Blue Cooling Cooling fans and TE Cooling Beam diameter 20mm at aperture Pulse Data All Pulses 4Hz 0 25 sec Divergence each beam 2 mrad Divergence total light 160 degrees Safety Features Key switch Interlock DMX control Via standard DMX controller Control Modes Auto Sound Text Time Countdown DMX Master Slave Housing Black Metal Flame retardant plastic Connections Dedicated IEC Power...

Page 36: ...35 Ordercode 51342 Galactic TXT Dimensions ...

Page 37: ...36 Ordercode 51342 Galactic TXT ...

Page 38: ...37 Ordercode 51342 Galactic TXT Notes ...

Page 39: ...38 Ordercode 51342 Galactic TXT ...

Page 40: ... 2015 Showtec ...

Reviews: